What and how to make an applique from leaves
What we need:
- 1. Natural material: leaves of various sizes, shapes and colors (they can be dried in advance), twigs, flowers, herbs, seeds.
- 2. Colored paper, felt, glue, scissors, paints, pencils, cardboard.
- 3. Varnish can also be useful to fix the finished work and give it shine.
How to work with leaves:
To start working on crafts from leaves, they must first be dried. This can be done between the leaves of books, or using an iron. Store the leaves between the pages of books or newspapers.
Options for paper applications
Autumn-themed crafts have always been popular and have not lost their relevance to this day. It is during this period of the year that the miraculous transformation of green trees into yellow, orange or red occurs.
All this gives applique lovers the opportunity to find the most beautiful leaves and use them in their crafts. In addition to them, during work you will need a minimum amount of simple and accessible materials for everyone. Their low cost means that even children from families with little financial resources can practice appliques.
Vegetation objects
Most children begin their education in creativity while in kindergarten. There, professional educators keep them busy with various activities that help the proper development of fine motor skills and mental activity. One of these activities is autumn-themed appliqué.
In the preparatory group, children study various plants, flowers and trees, which become their first objects for creating crafts.
Most often, educators use tree appliqué as a lesson. In order to get started, you need to prepare the following materials and tools:
several sheets of colored paper;- multi-colored cardboard;
- glue;
- brush;
- a simple pencil;
- scissors.
Instead of colored paper, you can use pre-collected natural materials, such as tree leaves. They will help revive the future picture and make it more attractive.
The process of making a children's applique is simple and consists of the following steps:
- First of all, take a sheet of thick cardboard and cut out a base of the required size from it. Its color can be chosen arbitrarily or based on the requirements of the future craft.
- A picture of a tree trunk is drawn on a piece of brown paper.
- Then, using sharp scissors, the workpiece is cut out and set aside.
- At the next stage, yellow, red and orange paper is taken. The required number of leaves is drawn on it. You can also use pre-prepared templates to apply contours. This will not only help speed up the process, but will also greatly simplify it. It is best to use oak, birch or maple leaves.
- Multi-colored leaves are cut out and folded separately from the tree trunk. You can immediately arrange the blanks by color so that you don’t waste time searching for them during the creative process.
- As soon as all the details of the application are prepared, the process of gluing them to the cardboard base begins. First of all, take the barrel and lubricate its back side with glue.
- After this, the largest part of the craft is attached to the center of the base.
- Next comes the turn of the cut leaves. They are glued to the cardboard one by one and form the crown of the tree. Its appearance depends only on the author’s imagination and personal preferences. To ensure that the attached elements do not lose their shape after the glue dries, it is necessary to apply it not to the entire surface, but only to the edges.
- The finished tree is set aside for a few minutes to dry completely.
- If there is enough space left on the base, then you can attach several more smaller trees in the same way.
- The craft is decorated with various additional elements. It could be grass, flowers, clouds, the sun or any other attribute of a children's applique.
Types of applications made from natural materials
- Overlay applique. A simple look that does not require additional work with leaves - they are glued to a sheet of paper or cardboard, creating the intended plot. These can be animals, trees, mushrooms. You can add some details.
- Mosaic or modular application. This technique involves gluing leaves that are identical or similar in shape. This way you can make a bird's tail or fish scales.
- Symmetrical applique. In this case, it is necessary to select similar leaves to create mirror images. This way you can make an image in water, a butterfly, a dragonfly.
- Ribbon applique. A type of symmetrical applique, but in this case you can make several similar images.
- Silhouette applique. The leaves are trimmed to create the desired pattern or shape.
Children become interested in applications and crafts even at the stage of collecting material. Kids like to collect leaves on the paths while walking, look for cones and chestnuts. Therefore, it will not be difficult to persuade your child to use all this to create a beautiful applique.
Simple autumn applications for kids
It is always more difficult to work with the youngest children and you need to find an approach to them. They cannot be forced to sit on one job for a long time. Therefore, the craft should be as simple as possible. How to make an interesting autumn-themed craft in just a few minutes to inspire your child to continue.
It seems that nothing simpler than this application can be found.
Take one beautiful yellow leaf. Turn the wide part down. Glue it onto cardboard. You can finish drawing the arms and legs, and insert the drawn umbrella into your hand.
A leaf like this with eyes will look funny. They can be made from plasticine or cardboard, or maybe you can find small buttons and glue them on. Don't forget to make it cheerful by drawing a smile.
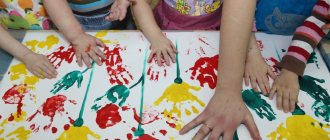
Autumn from palms: applique
We will need:
- Colored paper
- Scissors
- Glue
- Sheet of cardboard
1. We need brown paper to create a tree trunk.
2. Trace children's palms on colored paper, making several multi-colored blanks.
3. Glue the tree trunk and leaves onto the cardboard
Options for appliqué on the theme of autumn made from palms:
Application for the younger group: autumn tree
Another applique option for the little ones is a tree.
It’s easy to make: collect thin branches of approximately the same size and glue them in a bunch on cardboard. We lay the leaves above like a crown. You will get an autumn tree from leaves.
You can make a torn applique from colored paper.
Using cereals you can make a beautiful autumn tree.
Paint the millet with different colors. Draw the trunk and branches. Using PVA, glue the cereal to create a tree crown.
Making the application “Autumn Kaleidoscope”
So, we will be interested in a multi-colored applique that would best symbolize a beautiful autumn tree. Pupils from the middle group can be offered a voluminous applique - with your help they will cope with this task perfectly. Such work will contribute to the development of fine motor skills, strengthening skills in working with scissors, and cultivating beauty and neatness.
To make the application we will need:
- sheets of blue cardboard;
- tree templates (ready-made colored or white for tracing);
- colored paper;
- pencil, glue, scissors, ruler.
Application for the younger group on the theme of autumn
Applications made from natural materials in kindergarten are not very complicated. For them you can use not only leaves, but seeds, acorns, twigs. Colored paper and cardboard are also used.
Autumn flower applique
Beautiful colorful leaves that fall to the ground from trees can be transformed into an autumn flower. You can create such a flower using glue and a sheet of cardboard.
If one flower is not enough, then you can make a vase with flowers from autumn leaves.
Beautiful umbrellas will be made from pieces of colored paper. This type of applique is called cut-off.
Application “Autumn tree” made of autumn leaves
To work you will need:
- autumn leaves,
- cardboard with a silhouette of a tree,
- glue.
It is advisable to use bright colors of cardboard, so the tree will be more noticeable.
For work, you need to choose beautiful and undamaged dry leaves. They are cut into strips. To continue the task of appliquing autumn leaves, you need to prepare glue and a brush. The branches of the tree are coated with a brush. Dry leaves are placed on these branches. All that remains is to let the work dry.
Autumn applications: preparatory group
Applications made from natural materials in kindergarten occupy a large part of the children's development program. Autumn gifts of nature open up many possibilities for activities with children. Therefore, autumn fairs are a place where you can show off your talents.
You can invite the children to come up with a real composition of leaves.
If you combine drawing and applique, you can make such a cute hedgehog from seeds.
Using flower petals and grass sprigs, you can make beautiful applications
In 3-4 grade
Simply gluing pieces of paper onto paper will no longer captivate ten-year-old children. The tasks need to be more challenging and creative.
The most popular options:
- modular appliques - complex silhouettes from parts;
- mosaic of geometric shapes;
- ornamental panels with a selection of colors;
- 3D applique craft made from leaves folded into a cone.
Combined techniques can be proposed in one work. Joint creativity will also arouse interest - a proposal to implement one idea together or three. This activity will also teach children to negotiate and work in a team. Gluing corners for a voluminous appliqué will promote perseverance and develop fine motor skills.
Dress for a doll
Children can make a dress for a girl even in kindergarten, so in elementary school the task needs to be complicated. It is necessary to convince children in advance that the dress must have an original cut, details, and accessories. Children can already come up with and depict the silhouette of the Queen of Autumn on their own.
Another complication of the topic is three-dimensional work. Old Barbie will probably be found in any family with girls.
Procedure for working on a three-dimensional model:
- Sketch, selection of material.
- Making a base from fabric or paper napkin.
- Gluing the leaves to the base.
Accessories can be chosen from natural or doll-like ones. For a formal outfit, sparkles, beads, and beads are useful. In addition to the dress, you can come up with a spectacular umbrella, fan, and hat. The doll itself will not suffer from such work.
Beauty Autumn
Children in grades 2-3 can also draw a face on their own. It is proposed to use the leaves to create a hairstyle and accessories. Despite its apparent simplicity, the work requires a creative approach, selection of colors and shapes. It is worth discussing in advance how students see this person - a fairy fairy in a light dress, a girl wrapped in a collar, or a queen in a ball gown.
Other photo ideas
The teacher planning the lesson needs to take into account that the leaves brought by the children may be of the same type - collected in the yard next to the school. To have a larger assortment of shades, you will have to take care of unusual colors and textures personally, starting the collection in the summer. To prevent crafts made from natural materials from losing their shape, finished works can be sprayed with hairspray.
Leaf applications: senior group
Leaves are the most accessible material for embodying your talent in creating bright and colorful paintings and applications on the theme of autumn. By choosing leaves of the correct shape, you will get a variety of animals and insects.
Applique: fox made of colored paper
It is very convenient to make applications with children using ready-made templates. To do this, just print the blank and cut it out.
Another version of the fox template made from colored paper made of geometric shapes.
The fox cubs may turn out completely different, but adding them with a drawing will result in interesting works:
Unusual three-dimensional applique made of colored paper
Applique Autumn tree: middle group
The change in nature in autumn is noticeable to everyone and even children see the difference when the trees turn yellow.
We will need:
- Sheet of cardboard
- Colored paper
- Glue
- Scissors
Create a tree trunk and branches from brown construction paper.
Glue the tree onto a background sheet of cardboard, having previously made a tree crown
Glue leaves of different colors onto the branches of the tree.
Autumn mushroom: applique
You can always find mushrooms under a tree in the fall, so learning how to make mushroom appliques is also useful.
Mushroom cutting templates for appliques
If classic appliqués are already boring and you want some variety, then you can combine drawing and gluing natural materials. Such works are quite suitable as applications made from natural materials for elementary school.
Children can already give a gift to their mother by drawing her portrait and adding leaves and other natural materials to the picture.
Application options
Many people believe that such a craft can be made exclusively from colored paper, but there are other methods. You can stick it on cotton wool, cotton pads or any other elements. In this case, the result will be completely different. Therefore, we recommend experimenting, introducing your child to creativity and developing his original approach to creating things.
Flat paper applique
The standard way to create an autumn forest. To do this you need:
- Take a piece of paper of any color that seems most suitable - white, blue, green.
- Glue a strip of paper along the bottom to imitate the ground. More often they choose brown or green. Just choose this color that is contrasting with the background.
- Make several trees of different colors. It can be yellow, orange, dark green, brown, mustard. Here the child must draw the outline of the future tree on the back of the sheet, and then carefully cut it out.
- Don’t forget to cut additional trunks for each tree.
- Carefully, lubricating the back side of each blank, stick them onto the prepared sheet so that the trunks stand on the ground.
- Then suggest using a black or dark brown felt-tip pen to draw branches directly on top of the colored paper.
The technique is easy and accessible, even for small children. It is used in kindergartens.
Volumetric techniques
By working not only on a given theme, but also on texture, you can achieve a certain effect when creating an appliqué. There are several techniques for creating volumetric applications. Let's try to analyze the main and most effective of them.
Working with cotton wool
This method involves molding pieces of cotton wool into the required volumes. Fixing them to the main sheet. And then carefully painting the entire surface to create a specific color scheme for the entire composition.
This is done as follows in class:
- A piece of cotton comes off.
- It is necessary to prepare a small container of water to make it easier to mold the cotton wool.
- By dipping your fingers in water, give the cotton a certain look and shape.
- Lubricating or dipping one part of the cotton wool into glue, then fix it on the paper in the right place, while creating a tree crown.
- Take a brush with a fairly voluminous and thick bristle, dilute the paint of the appropriate color quite thinly, and with precise movements paint the cotton wool in the desired color. It is not necessary to achieve a continuous tone creation. It will be enough to apply it pointwise.
- Cut out trunks from paper and glue them under the cotton wool.
Application with cotton pads
It is necessary to invite the child to take cotton pads and color them in the desired color. Take into account and prompt the child that the final application will look most impressive if the cotton pads are painted with several shades of the same color at once.
Cut out a trunk from colored paper and glue it to the main sheet. Now start gluing cotton pads around the trunk and on top of it, forming the crown of the tree. Keep in mind that if they are placed one on top of the other, with a slight overlap, you can achieve greater volume of the composition and its effectiveness.
Make several of these trees, preferably painting cotton pads in different colors.
Composition of rolled strips of paper
In this case, a colored sheet of paper needs to be cut into thin strips of short length and glued into rings. Cut out the trunk and glue it to the base.
Drop a drop of glue onto the rings, preferably in the place where there is a seam on the paper. And fix it around the trunk in this way so that a crown is formed.
Please note that the rings can be glued both vertically and horizontally. This will result in completely different wood looks. Therefore, you can combine several methods on one application to get more texture.
Using methods for creating an autumn forest appliqué, you can arrange a real master class for your child, both at home and in classes in the garden or at school. Although, there are other ways that the teacher must also take into account when drawing up notes for the relevant classes.
Autumn applications made from natural materials
With the help of activities with natural materials, you can also strengthen children’s understanding of changing weather conditions, explain to them what the seasons are and what happens with their changes.
The late autumn applique will help reveal to the child a new stage of nature that precedes winter weather. After all, in late autumn we observe a cooling, the leaves become less and less and the last leaves are blown away by the wind from the branches of the trees.
Application: autumn has come
An application on this topic will reveal to the child the concept of how summer changes to autumn, what happens in nature during this period. After all, there are still many leaves on the trees, some green, but also red, orange and burgundy.
Take unnecessary puzzle pieces, paint them with different colors, whatever color you want the leaves on the tree to be. The tree trunk can be drawn, or it can be glued from paper.
Application “Autumn tree” made of colored paper
To prepare such a fun applique, you need the following materials:
- colored paper
- cardboard
- glue
- disposable cardboard plate
First you need to take colored paper and tear it into small pieces. If you perform a cutting appliqué on an autumn tree, this significantly improves fine motor skills. Next, a disposable cardboard plate is greased with glue. Colored paper should be glued randomly onto it. This will be the crown of the tree.
Now you need to cut a rectangular piece of colored paper. This will create a tree trunk.
To make the work more beautiful, you can draw dark stripes on the tree trunk with a marker. After this, the finished parts are glued onto cardboard. This kind of work turns out to be voluminous and quite interesting.
Sources
- https://metodbv.ru/applikatsiya-derevo-iz-tsvetnoj-bumagi/
- https://gidrukodeliya.ru/applikaciya-osenniy-les
- https://academy-of-curiosity.ru/tvorchestvo/podelka-zimnij-les/
- https://podelunchik.ru/applikacziya-osennij-les
- https://masterimrukami.ru/applikatsii-osennee-derevo/
[collapse]
Volumetric applique on the theme of Autumn
Autumn is accompanied by rains and an attribute that can be found in any apartment is an umbrella. It’s quite simple to depict an umbrella and create a voluminous applique on an autumn theme.
Take a white sheet of paper. Starting from the corner, draw any pattern. You need to cut the corner in a semicircle. We fold the cut out part of the sheet like an accordion.
Glue this part onto a piece of paper
You can draw raindrops on a piece of paper.
You can also use a ready-made template to make an umbrella.
We cut out the template, having previously printed it, and make patterns on it.
Just like in the previous version, we fold the umbrella blank like an accordion
You can make such funny umbrellas
Draw or print out an image of a girl and glue an umbrella to her hand.
MAGAZINE Preschooler.RF
Tsapko Anna Vladimirovna. Teacher at GBOU d/s No. 2723, Moscow. Goal: developing skills in making appliqué from crumpled paper, cardboard parts, and decorative stickers. Objectives: Educational: master new non-traditional appliqué techniques; summarize children’s knowledge on the topic “Trees”; Educational: to cultivate respect and respect for nature; Developmental: correction of general and fine motor skills. Equipment: · artificial spruce trees; · reproductions of paintings by I.I. Shishkin “Oaks”, “Morning in a pine forest”, “Oak grove”, “Pines illuminated by the sun”; · napkins in different shades of green, yellow, orange; · a set of decorative stickers; · poster “Tree”; · “crowns” oak, birch, maple. Preliminary work: · examination of reproductions of paintings by I.I. Shishkin “Oaks”, “Morning in a pine forest”, “Oak grove”, “Pines illuminated by the sun”; · Conversations on the topic “Forest”, “Trees”; · learning the song “We walked in the forest” Lesson progress: Children are divided into 3 groups and sit at 3 tables. The teacher, standing near a stylized forest (artificial spruce trees), addresses the children: I entered the forest on a green day. The green oak swayed in it. Green leaves, Green grass, Green frogs Sing: “Kva-kva, kva-kva, kva-kva!” Green moss lay on a stump. The green beetle was buzzing above him. The sun opens its eyes, the silent forest comes to life, we open the forest door, we talk to the forest. What is a forest? Children's answers. Right! A forest is a place where many plants grow and is home to many animals and birds. What plants live in the forest? Children's answers. What is a tree? How does it grow? Who can name all the parts of a tree correctly? Children's answers. (Summarization of answers by the teacher). Let's get up and imagine that we are in the forest and take a walk and stretch our legs. Children go out to the “clearing” and sing the song “We were walking in the forest” to the soundtrack. We were walking in the forest, we were looking for mushrooms. We walked around the birch trees and found a boletus. Ai Lyuli Ai Lyuli The boletus was found. We walked into the forest, we looked for mushrooms. We walked around all the aspen trees and found boletus. Ay lyuli ah lyuli The boletus was found. We were walking in the forest, we were looking for mushrooms. Everyone came up to the Christmas tree and found a large white mushroom. Ai Lyuli Ai Lyuli A large white mushroom was found. Educator: We took a walk, breathed the forest air, and now we’ll sit on the chairs and relax. Guys, what time of year is it now? What kind of trees are there? What kind of Christmas trees? (children's answers) Correct! The Christmas trees are always green, and the trees change the color of their foliage depending on the time of year. We'll play with you now. Children go to the “Glade” Game-Physical Education Minute The wind blows in my face (waving their arms) The tree swayed (sway) The wind gets quieter and quieter (they squat) The tree gets higher and higher (they stand up and stretch up) The game is played 3 times, each time the teacher takes out a “crown” and puts it on the child with the words: The cold wind in autumn blows, howls, rustles, and plucking leaves from the maple tree, it gilds the entire Earth. (“crown with yellow leaves”) The wind shakes the tree and turns it into a birch tree. ("crown" with green leaves) The wind shakes the tree and turns our oak tree into a winter shroud, a cap of snow onto our oak tree. (“crown” with white foliage) The teacher places a crown on each table and asks each group of children to determine the season of the year by the color of the foliage. Shows the children a blank for the future application, which depicts a tree trunk, and offers to correct the missing details and choose the color of the foliage. The teacher gives the children yellow, white and green napkins, and the children make “balls” from them. Now guys, decorate the tree with leaves. A pre-prepared image of a tree without leaves is placed on each table and the children take turns gluing crumpled paper onto the crown. Well done! So we have an autumn, winter and spring tree growing in our magical forest... Guys, in fairy tales we don’t always see ordinary trees. Listen to the poem by K.I. Chukovsky’s “Miracle Tree” (added and changed by the teacher): Just like at our gate, the Miracle Tree grows. Miracle, miracle, miracle, wonderful miracle! Not leaves on it, Not flowers on it, But stockings and shoes, Like apples! Hares sit on it and wiggle their ears, and laughing frogs chatter and scream. And cars, and cakes, Fishes, squirrels, flowers... What a tree, a wonderful tree! In front of the teacher there is an easel with a picture of a tree, while reading a poem, he pastes cardboard pictures of the characters in question. This is the “Miracle Tree” I grew up in. Let’s make “Miracle Trees” too. Everyone will have their own tree with its own wonderful fruits. To make your work beautiful, you need to warm up. Physical education minute. He went into the forest himself. (steps in place) I climbed the birch tree myself. (hands moving) He grabbed the branch himself. (grasping movements) I scratched my knees myself. (pat knees) I fell from the birch tree myself. (squat down) Tears began to fall.He wiped away his own tears. (rub eyes)
Nobody saw anything. (spread your arms and cover your face with them)
Well done! Now let's get to work!
The teacher distributes blanks for the appliqué; children take out stickers one by one from the “magic bag” and, under guidance, complete the task.
Well done guys, all the applications are beautiful and interesting! Now tell us one by one what wonderful fruits have grown on your trees.
Children describe their work.
The teacher sums up the lesson and thanks the children for their work. All works are displayed at the exhibition.
| Next > |
Leaves applique: autumn
It is not necessary to use only whole leaves for appliqués. There is a separate direction in creativity - broken applique. You can use not only leaves, but also colored paper. Its principle is that the silhouette of the figure is created from torn material.
To make the application, we will need:
- Sheet of cardboard
- Leaves
- Glue
- Dye
Dried leaves must be crumbled.
Draw a tree trunk and branches on cardboard.
Once the paint is dry, apply glue to the trunk and branches where you want the leaves to be.
Sprinkle pieces of leaves onto the glue.
Press down the leaves a little to secure.
Shake off excess leaves from the appliqué.
The same tree can be made using colored paper.
It is not so easy to cope with such an application. The main thing here is to choose the right leaves
Application “Autumn tree” made from pumpkin seeds
In order to create this work, you will need:
- sheet of cardboard
- paints
- glue
- pumpkin seeds
- tree stencil
The first step is to create the autumn leaves. This application involves the use of pumpkin seeds, which are previously painted in different colors. It is advisable to use yellow, orange and red colors.
Coloring can be done with both paints and felt-tip pens. On a sheet of paper you need to draw a barrel with paint or use a stencil. Then the work will be more accurate. Now all that remains is to glue the leaves to the tree.
The work is ready.
Applique Autumn bouquet
This craft is quite suitable as a gift for a teacher or mother from a schoolchild. After all, such a bouquet of leaves will last much longer than a fresh bouquet of real flowers.
Pre-dry leaves from different trees. Prepare glue, scissors and a sheet of cardboard.
Form a vase from the leaves by gluing them onto cardboard. And then help your child create a beautiful bouquet of leaves. To make it bright and neat, use light leaves for the craft, without holes or stains.
A vase for an autumn bouquet of leaves can be made from colored paper, or you can create a bouquet not only from leaves and do without a vase.
Autumn paintings, panels: applications
Using the appliqué technique, you can create beautiful and original paintings from a variety of natural materials.
Collect various leaves, twigs and flowers, dry them as a herbarium and start creating real panels and paintings.
The following are perfect for such a picture: moss, straw, spikelets, seeds, small flowers
Painting “Autumn Girl”
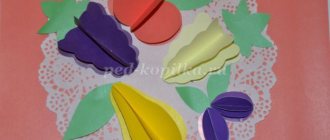
Volumetric applications of vegetables and fruits in the preparatory group
Every child will be interested in making a variety of fruits and vegetables out of paper, which they eat from an early age. They can be made as appliqués on paper or in volume.
How to make an apple out of paper
We will need a sheet of red double-sided paper. Fold it in half and cut it. We also fold the halves in half and draw the silhouette of half an apple with a pencil.
Glue the apple halves onto a piece of paper and create a core, stalk and leaf.
Fruit applique: senior group
Making strawberries out of paper
Cut out tails from green paper.
Fold two pieces of red paper in half and cut out a heart.
Glue one part to the base of the sheet, and glue the second along the fold line.
Glue a green tail cut from a template on top and draw dots with a black felt-tip pen.
Volumetric cherries made of paper: applique
From red paper you need to cut 4 circles (diameter 5-6 cm).
Fold the circles in half and cut out the green strip.
Take a green sheet 12*6 cm and cut out the leaves by folding the paper in half
Glue a strip folded in half onto a sheet of cardboard. Glue leaves on top and a cherry on each branch.