Lesson in non-traditional technology. Drawing with stamps. "Bizarre patterns."
Lesson in non-traditional technology.
Drawing with stamps.
"Bizarre patterns."
Target:
Acquaintance with a new material -
stamps
;
Tasks:
*teach children to draw with gouache using a stamp, using available material
* clarify and consolidate knowledge of color and shape, be able to navigate on a sheet of paper;
*create interest and a positive attitude towards drawing.
Materials:
Gouache, brushes, sheets of A4 paper (according to the number of children), stamp, napkins; samples of thread and stamp designs.
Preliminary work.
Poem “I am a simple-looking thread
…»
Reading the fairy tale “School of Unusual Artists”
.
Progress of the lesson.
IN
: Today guests came to our group, these are teachers from other groups of our kindergarten, let's say hello to them and give them our smiles! Guys, you put all the toys in their place, what is this box, who brought it? Maybe they brought us a package? What do you think could be there? (children offer options). Let's open it and take a look.
The teacher opens the box.
Yes, here is a postcard, there is some girl on it. Maybe she sent us a package and riddles? Let's read and guess everything together.
Puzzles
To sew and embroider, you need to take it in your hands.
I have multi-colored coils, a friend has them.
We embroidered cards, we needed them.
(Threads)
I'll get them quickly
I will build a house for the animals, There will be a chair and a table in the house, To make it more comfortable. I’ll build a garage with a bridge for the car... What am I playing with, tell me, friends? (Building cubes)
The teacher takes out stamps.
IN
: And what is it? Some unusual cubes with strings
Guys, remember we read the fairy tale “The School of Unusual Artists”?
There, the girl Tanya was introduced to various objects that could be used to draw - these were unusual artists - flowers, leaves, all sorts of fruits and vegetables, a huge red blot and a Thread. And we drew such wonderful patterns with the help of a thread!
The teacher shows samples.
IN:
Perhaps it was Tanya who sent us these objects so that we could draw with them?
Let's take these unusual cubes and go to the land of Drawing.
Let's stand up, turn around and say the magic words:
“Doo-doo-doo, I’m going to the table.
Ah-ah-ah, I’ll draw
!
Ru-ru-ru, I take a brush,
Squee-pinch-pike, I’ll dip it in paint” and we find ourselves in the land of DRAWING
.
We go to the tables, sit down, put the cube on a plate.
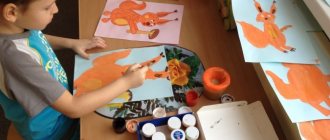
Let me be the first to try to draw using a cube.
Choose the color of paint you want to paint with and also place it on the plate. Take a brush from the cup, dip the brush in paint and paint one side of the cube, carefully place the cube with the painted side on the sheet, press and, without moving, lift it up. This way you can leave prints on the entire sheet, only at the top and bottom of the sheet, on the right and left and in the center (middle) of the sheet.
Lesson 1. CubesGoals. Teach children to paint with stamps using wooden figures; navigate on a sheet of paper; clarify and consolidate knowledge of colors and shapes; develop interest and a positive attitude towards drawing.
Materials. Paints - gouache or watercolor; a large sheet of paper for a collective drawing, sheets of A4 paper (according to the number of children); wooden figures - cubes (with a smooth surface, not treated with varnish or paint); polyethylene covers; water in cans; rags, napkins; multi-colored cubes from a building set.
Technique. Drawing with a stamp.
Progress of the lesson
Prepare the paints and pour them into the lids. Before starting work, show the kids the colorful cubes. Tell them that today they will paint cubes.
Educator. Look what I brought you today. That's right, these are cubes. Let's not just draw, but print them. See how this can be done quickly and easily.
Show how to pick up a stamp cube, dip one side of it in paint, apply it to the paper and press down, then carefully lift it - a bright imprint will remain on the paper.
When changing paint, use a sponge to wash off the previous paint from the cube and wipe it dry with a cloth.
Invite the children to take turns printing the blocks on a large piece of paper. Monitor the consistency and quality of actions, if necessary, help and correct errors. At first, you should use one ink and print squares of the same color (so that you do not have to wash the cube before changing the ink). You can use several cubes - each for a specific paint.
Give the children paper and encourage them to print the blocks themselves. Help place the prints evenly over the entire surface of the sheet of paper.
Subsequently, teach children to apply paint to the surface using a brush. In this case, you can use several colors - each cube turns out to be different colors.
Lesson 2. Balls
Goals. Teach children to paint with a stamp using cut vegetables; navigate on a sheet of paper; clarify and consolidate knowledge of colors and shapes; develop interest and a positive attitude towards drawing.
Materials. Paints - gouache or watercolor; a large sheet of paper for a collective drawing, sheets of A4 paper (according to the number of children); carrots cut crosswise; polyethylene covers; water in cans; rags, napkins.
Technique. Drawing with a stamp.
Progress of the lesson
Before class, prepare the paints and pour them into the lids. Tell the children that during the lesson they will draw colorful balls.
Educator. Let's not just draw colorful balls, but print them. Now I will show how this can be done quickly and easily.
In front of the kids, cut a washed carrot of medium length and thickness in half, then show how to pick up half a carrot, dip the cut side into the paint, apply it to the paper, then carefully lift it - a bright imprint will remain on the paper. When changing color, wash off the previous paint from the cut surface of the carrot and wipe dry with a cloth. Accompany each step of the action with an explanation.
Have the children take turns printing circles on a large piece of paper. Monitor the consistency and quality of actions, if necessary, help and correct errors. At first, you should use one paint and paint circles of the same color (so that you do not have to wash the carrots before each change of paint). Or use several carrot halves, each for a different color.
Then give the children paper and encourage them to draw the balls themselves.
Subsequently, you can teach children to apply paint to the cut surface of carrots using a brush. In this case, use several colors - each ball will turn out to be different colors.
Lesson 3. Stars
Goals. Continue teaching children to draw using a stamp; navigate on a sheet of paper; clarify and consolidate knowledge of colors and shapes; develop interest and a positive attitude towards drawing.
Materials. Paints - gouache or watercolor; a large sheet of paper for a collective drawing, sheets of A4 paper (according to the number of children); several pieces of carrots cut across with an asterisk cut out on the cut; polyethylene covers; water in cans; rags, napkins.
Technique. Drawing with a stamp.
Progress of the lesson
Before starting the lesson, prepare the paints and pour them into the lids.
In front of the kids, cut washed carrots of medium length and thickness in half, then cut out a star on the cut (prepare several of the same shapes in advance). Show how to print figures using this stamp.
Invite the children to take turns printing stars on a large sheet of paper and come up with a plot for the drawing on their own - it could be flowers in a clearing, stars in the sky, or multi-colored holiday fireworks. You can use different paints.
Then give the children paper and invite them to print the stars themselves, coming up with a name for their drawing.
Lesson 4. Towers
Goals. Continue teaching children to paint with stamps using wooden cubes; maintain rhythm when using two colors; navigate on a sheet of paper, place the prints in a certain way relative to each other; clarify and consolidate knowledge of colors and shapes; develop interest and a positive attitude towards drawing.
Materials. Paints - gouache or watercolor; sheets of drawing paper in A4 format (according to the number of children); wooden figures - cubes (with a smooth surface, without varnish or paint); polyethylene covers; water in jars; rags, napkins; multi-colored cubes from a building set. Technique. Drawing with a stamp.
Progress of the lesson
Before class, prepare the paints and pour them into the lids.
Show the kids the cubes and ask them to build tall towers out of them, alternating two colors. When the towers are ready, compare them in height. Tell the children that today they will draw towers of blocks using paints on paper.
Show the children how to stack the prints on top of each other (in this activity, the paper is placed vertically). To make it easier for them, you can use one color at first, then alternate colors next time. You should also draw a line at the bottom of the sheet to indicate the surface on which to place the cubes.
Give the children paper and encourage them to print the towers themselves. If necessary, help position the prints one above the other.
From what is
If you can’t buy or order children’s stamps in the required quantity or want to get something special, you can make them yourself. The most suitable materials: eraser, foam rubber, thick cardboard, vegetables, etc. Here are options on how to do this.
- Prepare the details of the old construction set. Cut out squares from thick paper, or preferably thin plastic, equal in size to the base of the parts. Glue them together. From polystyrene foam - a food tray-container will do - cut out the necessary figures. Here you can use regular paper stencils. The only thing left is to glue the figures to the construction set cube using double tape. Homemade stamps are ready. Similarly, they can be made from a bottle cap (it will replace a designer part) or a cap from drinking yogurt and foam rubber.
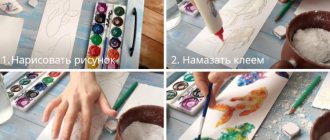
- Make the necessary inscriptions (numbers, letters, whole words) or drawings on a piece of cardboard and coat with glue. Place a thick thread pre-selected in size and soaked in glue on top. Let dry. The original stamp is ready.
- It is very easy to make any raised print on an eraser, foam plastic, or even a potato. First you will need to draw the desired pattern on the surface - you will need to first cut the potato in half - then process it with a sharp knife. Then everything is as usual - dip the seal in paint and transfer the print to paper.
In general, anything can be used: buttons and a roller for cleaning clothes, real leaves and garden flowers, vegetables and children's toys, even the baby's hands and fingers. For example, from the cut stalk of Chinese cabbage you will get a beautiful rose, from the bottom of a plastic bottle - an elegant flower, and under a rolling pin with specially glued prints a whole composition will be born. Parents just need to show their imagination, listen to their children and, most importantly, not be afraid that they will get dirty.
Ways to organize children's activities
The fact that children love to draw is no secret. But for 3-4 year old children this doesn’t always work out successfully. Alternatively, you can use children's stamps. The ones bought in the store look like the real thing, which in itself arouses the interest of children. But the resulting drawings turn out to be characters from cartoons and fairy tales, parts of a single picture, for example a landscape, realities of our world that little ones are just getting acquainted with (vegetables, animals), funny emoticons, etc. A set of stamps can be selected or ordered individually for each child, depending on his age and interests.
Another thing is children's stamps made with their own hands. After all, if you initially involve children in this process, the seals will turn out exactly the way they want them to be.
What are the benefits of using such stencils?
First of all, this is a very exciting activity for kids, which will help organize their leisure time for quite a long time. With children's stamps, children will learn about the realities of the world, develop imagination and creative thinking, and learn communication. It is also important that seals contribute to the development of fine motor skills, coordination of movements, and teach them to plan their activities.
Master class “Drawing with stamps with children of early and primary preschool age”
Elena Dyachenko
Master class “Drawing with stamps with children of early and primary preschool age”
All-round creative development is useful and necessary for all children. But not all children like to draw , but the technique of drawing with stamps is liked by all children and even adults without exception.
By drawing in this way, children are not afraid of making mistakes, since everything can be easily corrected, and something new can easily be invented from a mistake, and the child gains self-confidence and overcomes the “fear of a blank sheet of paper”
and begins to feel like a little artist.
He develops an INTEREST, and at the same time a DESIRE to draw .
After all, you can print with anything. This is what real creativity will be.
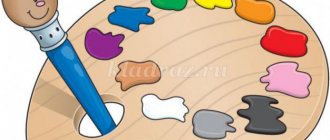
Teach your baby to make prints. To do this, soak a piece of foam rubber with diluted gouache to create something like a stamp pad. Now we dip our mold into the paint, press it onto the paper and carefully remove it. The color print is ready. You can apply paint to the stamp using a brush , or dip it in thick paint.
It doesn’t matter that your baby won’t get accurate impressions right away. Here, as in any business, a certain dexterity and dexterity are needed.
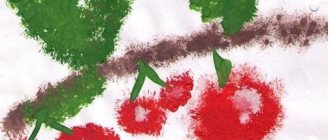
In order for printing figures to acquire some meaning, invite your child to decorate a paper plate, a vase cut out of cardboard, or a painted doll’s . You can draw rowan berries and scarlet strawberries with foam rubber, beads on the girl’s neck and a bright rooster’s tail. The main thing is that the creative process is enjoyable and evokes an emotional response in the young artist.
Materials for homemade stamps surround us at every step, and the number of design options is almost endless, but first, it’s worth trying to implement several common and well-proven ideas.
In the process of drawing with kids, you can use the following types of stamps :
1. The very first typing tool is the baby’s own fingers and palms .
The child draws on paper with his palm , or the edge of his palm , or his fist. It is dipped in paint and imprinted on paper as necessary for the design it represents. Don’t rush to draw it with your hands , you can simply show him an example - on your piece of paper, the child quickly grasps the principle of drawing himself. Then the paint is wiped off the palms with a cloth.
Making fingerprints is no less fun than handprints; such an activity will require more concentration and develop fine motor skills even better.
2. Vegetable stamps.
Carrot stamps
Make two or three stamps : a circle, an oval, and for the petals - a circular sector (to do this, you need to cut off only two sides of the triangle, and leave one rounded).
Potato stamps
Cut the potato in half, apply a design on the side of the cut and carefully remove the excess along the edge.
You can cut out anything, or rather, what your skill allows you to do - from a house to a beautiful flower
Cabbage stamps
You can twist a cabbage leaf, make an even cut - the imprint will be an unusual rose. An interesting print is obtained from a cut of Chinese cabbage.
Halves of onions, apples, pears and other vegetables and fruits make excellent stamps .
3. Drawing with foam rubber
The child puts down a piece of foam rubber (or a foam rubber tampon)
into thick paint and makes an imprint on paper.
You can use a stencil. Pieces of foam rubber are good for tinting paper, creating a background for a future drawing, drawing animals , birds, conveying the texture of fur and plumage.
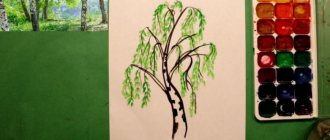
4. " Drawing with Leaves "
Find beautifully shaped tree leaves on the street.
Dip one side of the leaf into the diluted paint.
Carefully apply it with the painted side to the landscape sheet, lightly pressing it against the paper with a napkin, and smooth it out with your hand.
Remove the leaves and look at the prints together.
Lego construction sets are good bases for signets.
stamps in themselves ).
6. Plasticine stamps It is very convenient for them to press designs on pieces of plastic trays in which vegetables and fruits are sold.
7. Excellent signets can be made from ordinary rubber bands for money if you stick them on a base, bending them in the shape of a square, triangle, circle, star, snake, etc.
8. Jars and bottles with different configurations and diameters of the neck and bottom are ready-made stamps . For example, the bottoms of plastic bottles give wonderful impressions of a flower or the sun.
9. A cocktail straw split at the end will help to embody the same images in a slightly different form - the deeper the cuts, the longer the imprints of the ray petals.
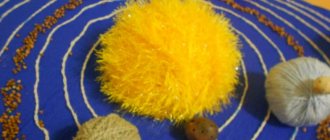
10. To draw the background, you will need stamps made from thick threads wound on a base, as well as balls of rope, pieces of an old ribbed sweater and rope.
11. To make the pattern repeat, you can make roller seals using a roll of tape or a rolling pin for the base.
12. It’s very convenient to make stamps from foam plastic and food trays. 13. You can roll up paper, chocolates or boxes - you will get stamps for flowers .
14. Cotton swabs - ready-made stamp . You can also use cotton wool and crumpled paper.
You will need a separate stick for each color. Using this technique, lilac or mimosa flowers are produced beautifully. Draw branch lines with a felt-tip pen . And make clusters of flowers with chopsticks. But this is already aerobatics! Drawing simpler things - flowers and berries (the stems can be drawn with a felt-tip pen ) will bring no less pleasure to the child.
.
Or you can cut out a dress (scarf, tablecloth, mittens)
and decorate it with an ornament of dots.
Drawing with stamps helps a child develop:
• Fine motor skills and tactile perception;
• Spatial orientation on a sheet of paper, eye and visual perception;
• Attention and perseverance;
• Fine skills and abilities, observation, aesthetic perception, emotional responsiveness;
• In addition, in the process of this activity, the preschooler develops control and self-control skills.
Drawing for a child is a joyful, inspired work that he should not be forced to do, but it is very important to stimulate and support the child, gradually opening up new possibilities for visual activity.
Drawing with stamps attracts with its simplicity and accessibility, revealing the possibility of using well-known objects as artistic materials. This is especially clearly visible when working with children before the fine art period, when they have not yet developed the technical skills of working with paints and brushes...
And the main thing is that drawing with stamps plays an important role in the overall mental development of a child. After all, what is intrinsically valuable is not the final product - a drawing, but the development of personality: the formation of self-confidence in one’s abilities, self-identification in creative work, purposefulness of activity.
Not only for play, but also for business
There are also functional children's stamps that will really help in life, but for adults. For example, parents, sending their children to kindergarten, school, or camp, often embroider their first and last names on their clothes - a kind of identification mark. You can get rid of this need for many years if you order a stamp with the child’s data. With its help, I put a mark on the back of the clothes - and the child will always be able to identify his pajamas or blouse.
A children's stamp will also help a teacher or primary school teacher. After all, they usually evaluate the work of their students with the help of drawings or funny faces. And with such an assistant it will be much easier and faster.
Non-traditional drawing with “stamps” (printing) in kindergarten
Marina Fursova
Non-traditional drawing with “stamps” (printing) in kindergarten
Printing ( stamping )
- a technique for producing images on paper using
stamps previously immersed in jars of paint. Stamps are made from pieces of foam rubber, polystyrene foam, chopped fresh vegetables and other similar materials. They also use ready-made factory stamps with images of animals, cartoon characters and alphanumeric symbols.
painting technique goes well with stamping . Using a thin brush or using graphic techniques, children draw the outline of an object or living creature on a sheet of paper. Then, if the dot technique of drawing with stamps , you can invite the child to depict fruits on an apple or pear tree, colorful leaves in the crown of a tree in the fall, spots on the skin of a leopard, etc.
Through an unconventional method of drawing with stamps, you can study certain geometric shapes with children if you make prints of the appropriate shape on paper, combining them with each other.
In this way you can get a house, some kind of animal, and even show kids how to draw a person .
"Violets". Unconventional drawing with a foam rubber poker. Photo report on children's creativity Good evening, dear colleagues! We had a project-themed week “Friendship with indoor plants” in our group. How much new and... Master class “Flowers for Mom”. Drawing in an unconventional way - with stamps from cardboard tubes. The good and bright holiday of Mother's Day is approaching. Both adults and children prepare gifts. Our children also try to please their loved ones. Do-it-yourself non-traditional physical education equipment in kindergarten Instilling healthy lifestyle skills, creating motivation for sports, exercises and gymnastics is one of the priorities.
Source
LiveInternetLiveInternet
Friday, February 12, 2016 01:26 + in the quote book nata_tursha
all posts by the author Comprehensive creative development is useful and necessary for all children. But not all children like to draw, but the technique of drawing with stamps is liked by all children and even adults without exception.
By drawing in this way, children are not afraid of making mistakes, since everything can be easily corrected, and something new can easily be invented from a mistake, and the child gains self-confidence, overcomes the “fear of a blank sheet of paper” and begins to feel like a little artist. He develops an INTEREST, and at the same time a DESIRE to draw.
After all, you can print with anything. This is what real creativity will be.
Teach your baby to make prints. To do this, soak a piece of foam rubber with diluted gouache to create something like a stamp pad. Now we dip our mold into the paint, press it onto the paper and carefully remove it. The color print is ready. You can apply paint to the stamp using a brush, or dip it in thick paint.
It doesn’t matter that your baby won’t get accurate impressions right away. Here, as in any business, a certain dexterity and dexterity are needed.
In order for printing figures to acquire some meaning, invite your child to decorate a paper plate, a vase cut out of cardboard, or a painted doll’s dress with an ornament. You can draw rowan berries and scarlet strawberries with foam rubber, beads on the girl’s neck and a bright rooster’s tail. The main thing is that the creative process is enjoyable and evokes an emotional response in the young artist.
Materials for homemade stamps surround us at every step, and the number of design options is almost endless, but first, it’s worth trying to implement several common and well-proven ideas.
In the process of drawing with kids, you can use the following types of stamps:
1. The very first typing tool is the baby’s own fingers and palms.
The child draws on paper with his palm, or the edge of his palm, or his fist. It is dipped in paint and imprinted on paper as necessary for the design it represents. Don’t rush to draw it with your hands, you can just show him an example - on your piece of paper, the child quickly grasps the principle of drawing himself. Then the paint is wiped off the palms with a cloth.
Making fingerprints is no less fun than handprints; such an activity will require more concentration and develop fine motor skills even better.
2. Vegetable stamps.
Carrot stamps
Make two or three stamps: a circle, an oval, and for the petals - a circular sector (to do this, you need to trim only two sides of the triangle, and leave one rounded).
Potato stamps
Cut the potato in half, apply a design on the side of the cut and carefully remove the excess along the edge.
You can cut out anything, or rather, what your skill allows you to do - from a house to a beautiful flower
Cabbage stamps
You can twist a cabbage leaf, make an even cut - the imprint will be an unusual rose. An interesting print is obtained from a cut of Chinese cabbage.
Halves of onions, apples, pears and other vegetables and fruits make excellent stamps.
3. Drawing with foam rubber
The child dips a piece of foam rubber (or a foam rubber swab) into thick paint and makes an impression on the paper. You can use a stencil. Pieces of foam rubber are good for tinting paper, creating a background for a future drawing, drawing animals, birds, conveying the texture of fur and plumage.
4. “Drawing with leaves”
Find beautifully shaped tree leaves on the street.
Dip one side of the leaf into the diluted paint.
Carefully apply it with the painted side to the landscape sheet, lightly pressing it against the paper with a napkin, and smooth it out with your hand.
Remove the leaves and look at the prints together.
5. Good bases for stamps are plastic bottle caps, corks, erasers, small boards, matchboxes, cubes and pieces of Lego-type construction sets (however, the latter are already good stamps in themselves).
6. Plasticine stamps are made by squeezing a pattern into it using any sharp object such as the refill of a ballpoint pen. It is very convenient for them to press designs on pieces of plastic trays in which vegetables and fruits are sold.
7. Excellent signets can be made from ordinary rubber bands for money if you stick them on a base, bending them in the shape of a square, triangle, circle, star, snake, etc.
8. Jars and bottles with different configurations and diameters of the neck and bottom are ready-made stamps. For example, the bottoms of plastic bottles give wonderful impressions of a flower or the sun.
9. A cocktail straw split at the end will help to embody the same images in a slightly different form - the deeper the cuts, the longer the imprints of the ray petals.
10. To draw the background, you will need stamps made from thick threads wound on a base, as well as balls of rope, pieces of an old ribbed sweater and rope.
11. To make the pattern repeat, you can make roller seals using a roll of tape or a rolling pin for the base.
12. It’s very convenient to make stamps from foam plastic and food trays. 13. You can twist paper or candy or boxes to create stamps for flowers.
14. Cotton swabs - ready-made stamp. You can also use cotton wool and crumpled paper.
You will need a separate stick for each color. Using this technique, lilac or mimosa flowers are produced beautifully. Draw branch lines with a felt-tip pen. And make clusters of flowers with chopsticks. But this is already aerobatics! Drawing simpler things - flowers and berries (the stems can be drawn with a felt-tip pen) will bring no less pleasure to your child. Or you can cut out a dress (scarf, tablecloth, mittens) from paper and decorate it with an ornament of dots.
Drawing with stamps helps a child develop:
• Fine motor skills and tactile perception;
• Spatial orientation on a sheet of paper, eye and visual perception;
• Attention and perseverance;
• Fine skills and abilities, observation, aesthetic perception, emotional responsiveness;
• In addition, in the process of this activity, the preschooler develops control and self-control skills.
Drawing for a child is a joyful, inspired work that he should not be forced to do, but it is very important to stimulate and support the child, gradually opening up new possibilities for visual activity.
Drawing with stamps attracts with its simplicity and accessibility, revealing the possibility of using well-known objects as artistic materials. This is especially clearly visible when working with children before the fine art period, when they have not yet developed the technical skills of working with paints and brushes...
And the main thing is that drawing with stamps plays an important role in the overall mental development of a child. After all, what is intrinsically valuable is not the final product - a drawing, but the development of personality: the formation of self-confidence in one’s abilities, self-identification in creative work, purposefulness of activity.
Source
| Categories: | Trowel/Drawing |
Tags:
drawing for children, non-traditional drawing techniques, stamps
Cited 2 times
Like share
0
Like
- I liked the post
- Quoted
- 0
Saved
- Add to quote book
- 0
Save to links
Liked
0