Summary of GCD for drawing “Bear” in the middle group
Advanced training course for 340 rubles!
Emotional burnout of teachers. Prevention and ways to overcome
Municipal state preschool educational institution "Kindergarten No. 25"
educational activities in the middle group.
Theme of the week
: “Who is preparing for winter?”
Developed and conducted by teacher Mezentseva O.I.
Goals:
Continue to learn to master drawing examples (round and oval shapes), paint over them in a circular motion, carefully, without going beyond the contour.
Be able to convey the characteristic features of an animal (bear), observing proportions.
Fix the shape, color, size.
Foster independence and accuracy in work.
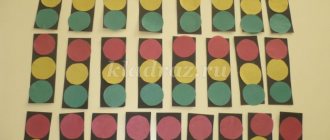
Blue cardboard (according to the number of children), paints, brushes, cups of water; templates; example of a teacher; video letter from a bear.
Preliminary work: a surprise moment at the beginning of the week a toy / gnome
/. The gnome is rearranged throughout the group during the week, unnoticed by the children, and the teacher draws the attention of the children to this.
Preliminary work:
viewing the album “Winter in the Forest”, conversation “How animals prepare for winter”, reading the poem “Why does a bear sleep in winter?” V. Orlova.
Drawing in the middle group of domestic and wild animals: lesson notes
| Author's full name | Title of the abstract |
| Chikunova L.G. | "Cat" Educational objectives: learn to draw a cat, conveying its characteristic features. Developmental tasks: develop eye, color perception, sense of proportions. Educational tasks: cultivate interest and caring attitude towards animals. Integration of educational areas: “Artistic creativity”, “Cognition”, “Communication”, “Socialization”, “Health”. Demo material: toy cat. Handout: sheets of white paper according to the number of children, gouache, sippy cups, brushes, coasters for them. Progress of the lesson: The lesson begins with a surprise moment - someone is crying. It turns out that this is a cat. She is sad because her grandmother lives far away. The cat wants to send her her portrait, but doesn’t know how to draw (motivation). The children happily agree to help the animal. Conversation on the topic: what does a cat have, what parts of the body, what is on the face. What color can this animal be, what size? What do cats like to do? A didactic game “Who is bigger?” is played: cats are compared in size to a fox, dog, hamster, bear, mouse, etc. The teacher demonstrates a step-by-step image of a cat. A sample and step-by-step drawing diagram are left on the board. Finger gymnastics “Cats” is being carried out: One, two, three, four, clap their hands. Cats lived in our house. hands up “showing the roof” The cats were playing with a ball, arms extended “showing the ball” The cats were lapping up milk. bring your palms in the form of a “bucket” to your lips. The cats sharpened their claws, “sharpened” them on their knees. They caught little gray mice. hands extended fingers clench and unclench. Physical education lesson: children imitate the movements of a cat.
Independent productive activity of children. Exhibition of works. The kitty promises to give them to her grandmother so that she won’t miss it so much. |
| Tonkikh L.P. | "Little Bear" The lesson begins with a mini-conversation about animals. A surprise moment: someone is moving in the snowdrift. To find out who it is, children must solve a riddle.
A toy bear appears - it turns out that he lost his mother and wandered into a forest clearing with the children. You need to help the animal - draw its portrait and hang it on trees throughout the forest. Mom will see him and find him (motivation). Conversation on the topic: what color is the bear’s fur coat, what is the shape of its head, paws, body, how many paws does the bear have. The teacher shows the technique of drawing and coloring a bear. A physical education session is being held
Independent activity of preschoolers with musical accompaniment. |
| Lukanina Yu. G. | "Hedgehog" (on a contour basis) The lesson begins with a conversation about winter. The teacher leads the children to the fact that in winter it is cold for wild animals in the forest. The children are shown a presentation “Wild Animals”, which is accompanied by a short story from the teacher about each animal. Preschoolers are offered the didactic game “Find the mother her cubs” Physical education
Didactic game “Who eats what?” Didactic game “Where, whose house?” A conversation about hedgehogs: where they live, what they eat, why they need needles. A surprise moment - a bunny appears with a package and a letter from the forest. A hedgehog wrote a letter: his hole is gloomy, he wants to make it elegant - hang his portrait above the crib (motivation). And for this he gives gifts to the children. The teacher shows how to draw a hedgehog. After finger gymnastics, the guys get to work. |
| Tazhekenova S.A. | "Kid" The lesson begins with reading the poem “Little Goat”
Conversation based on content: who is the hero of the poem, where the mother called her son, what the kid answered her. Preschoolers look at a picture of a kid and discuss the shape of its body and fur. Demonstration of drawing techniques (the animal is depicted with white paint, the silhouette is drawn in parts, starting from the head). The teacher invites the children to also draw flowers on the lawn (optional). A physical education session on a flower theme is held:
Independent activity of children. Exhibition of works. |
Summary of a lesson in the middle group on drawing animals in unconventional ways
Svetlana Danilova
Summary of a lesson in the middle group on drawing animals in unconventional ways
Municipal budgetary preschool educational institution general developmental kindergarten No. 37 “Fairy Tale”
Tuapse municipality Tuapse district
Summary of direct educational activities for children of the middle group in the educational field “Artistic Creativity”
(
drawing in non-traditional ways ) on the topic
“Guys visiting the bear cubs”
Performer: Danilova S. A.
Tasks. Teach children to draw animals using the poking method . Strengthen the ability to paint with a brush in different ways . Develop the ability to independently choose the color scheme for an image; Ability to properly use a brush and napkin. Cultivate a desire to help. Develop an imaginative interest in the visual arts.
Preliminary work. Looking at illustrations of animals . Reading the fairy tale “The Three Bears”
.
Material. a landscape sheet with drawn outline of a bear in different poses; 2 brushes (hard and thin, equipment for painting . Two samples: on one, an outline of a bear; on the other, a bear drawn using the poking method . Bear mask, toy bears.
Specifics of drawing animals in the middle group of preschool educational institutions
Children in the middle group are able to depict objects, approximately conveying their shape, size and color. At this age, preschoolers can already create a simple composition from several objects, so you can offer them plot-based drawings of animals (for example, “Kids are grazing in the meadow” or “Hedgehogs are walking through the forest”).
Children 4–5 years old are quite good at selecting colors, judging the color of the animal in the picture.
The process of learning to draw animals can be divided into two areas: cognitive activity (children understand the structural features and colors of living creatures) and improving direct visual skills. To depict any animal, a preschooler must be good at drawing round and oval, triangular and rectangular shapes (after all, they are what make up the object’s body). The teacher must also improve children's compositional skills - harmoniously arranging objects on a sheet of paper.
Note that it is easier for children 4–5 years old to imitate toy animals: as a rule, they have a large head, thick legs, and a relatively short body. Therefore, the correct proportions in such a drawing will not be very important. Before starting to draw, the teacher should let the kids touch the toy and play with it.
When teaching preschoolers to draw animals, the teacher should emphasize that their structure has a lot in common. In addition, it is highly desirable that a drawing lesson be preceded by modeling on a similar topic.
As for the sample, in the middle group it is very important. Before independent children's activities, the teacher demonstrates to the children all the stages of drawing. The sample remains on the board until the end of the lesson so that children can focus on it as they work.
Materials used and base
Animals are depicted on a sheet of A4 paper. Since they are most often depicted with paints (gouache or watercolor), the teacher first tints the base to match the natural background. It could be blue on the top (sky) and green on the bottom (grass). If it is assumed that the animal will be drawn in a home environment, for example, a cat, then the paper can be tinted in any pastel shades.
Using gouache allows you to make your work bright and rich. This is especially true, for example, when drawing a giraffe or a white kid on a green background.
A middle school student paints with gouache
Watercolor images are more delicate.
If the drawing involves the presence of small details (grass, mushrooms, berries, etc.), you can offer preschoolers colored pencils.
Pencil drawing
In some cases, it is appropriate to use felt-tip pens. For example, by drawing with “loops” you can convey the peculiarity of the skin of kids.
Drawing with loops using felt-tip pens
Techniques and techniques to use when drawing animals
When teaching children 4–5 years old to draw animals, it is necessary to practice the skill of correct painting with a brush. The outline of the animal’s body and small details (muzzle, paws, tail) are carefully drawn with the tip of the brush. The body is painted over more intensively, with all the pile.
Hatching with a pencil should be in one direction: from top to bottom or from left to right.
In addition, children must master the skill of stopping movement in a timely manner and adjusting its scope depending on the size of the surface to be painted.
Children must learn to hold a brush and a pencil differently. For example, when painting large figures, the pencil can be tilted more towards the paper - the strokes will be wider. When drawing small elements, it is more convenient to hold the tool almost vertically. The same techniques apply to using a brush. All this contributes to the ease and freedom of movement of the brush.
Note that having mastered the method of depicting one animal, it will be much easier for a child to depict any other. However, this does not at all force the child to solve the same type of images.
Additional types of visual activities used, the relevance of an individual approach
A drawing in the animalistic genre in the middle group can be diversified by including applicative details. For example, when depicting kids grazing in a green meadow, you can make grass out of a strip of colored paper with cuts: only the bottom part is glued, and the cut top remains free - a volume effect is created. Using applique, you can also decorate the cat with a bow on its neck or make apples that the hedgehog will carry on its back (small details are drawn).
At the top of the composition you can place a sun made using the plasticine technique.
As for plasticine, you can invite kids to sculpt the eyes and nose of an animal out of it. If this is a cat, then you can make it a beautiful mustache from thin plasticine flagella. And the drawn hedgehog will look more impressive if you add a few sculpted spines to it.
Note that all these techniques can also be used within the framework of an individual approach, since in the middle group the abilities of children are already beginning to be visible. Someone can do it faster, and such a child will be interested in adding additional originality to his composition.
Plan - summary of the drawing lesson “Drawing wild animals”. Sketch
Lesson topic: “Drawing wild animals”, sketch
Target:
Learn to draw images of animals, make sketches that capture the characteristic pose of the animal.
Tasks :
Subject:
Acquaintance with the works of animal artists, the concepts of “animalist”, “animalistic genre”
Metasubject:
Learn to extract the necessary information that expands your understanding of drawing techniques;
find a solution to a creative problem.
Personal:
Cultivating interest in the subject, a sensitive and caring attitude towards animals.
Equipment:
projector
Materials:
albums, pencils, erasers
Visual range:
drawings of animals, birds and insects, methodological tables (sequence of drawing, color design of the work).
DURING THE CLASSES
1. Organizational moment.
- Hello!
We look at the table. Today we need a sketchbook for class. Don't forget about a pencil and eraser.
There are so many beautiful and interesting things in our world. Explored and unidentified. Hundreds of thousands of animals, insects, birds, and fish, known and unknown to humans, live on our planet.
And today we continue to get acquainted with .... (animal world).
But not just animals, but a certain group. These are wild animals and birds.
But first, let’s remember what happened in the last lesson (who was the first to depict animals, animal artists, who are they).
- Today in class we will not only learn how to draw wild animals and birds, but also convey in the drawing the features of their character.
2. Work on the topic of the lesson.
— There are many wild animals and birds in the world. If we list them all, we will not have enough of this activity. They are all beautiful and interesting in their own way. Is it difficult to choose which animal or bird to depict?
I have a small task for you, look at the animals that I show and explain the pattern.
- What groups can they be divided into? — Wild animals, pets and insects. — We will find pets among our guests. - Horse, pig, cow. - Let's name the insects. — A wasp, a butterfly and a mosquito. (The teacher hangs them separately)
— Among insects, butterflies are especially beautiful. They are called fresh flowers. Children love to catch them because of their beauty. This cannot be done, because butterflies are very delicate; from our touch they are injured and die. We need to remember this and not offend butterflies.
- Now let’s name wild animals and birds. — Fox, wolf and crow. (The teacher hangs them up separately) - Guys, do you remember the topic of our lesson. Who will remind you? — We draw wild animals and birds. - Right. So, there are extra groups here, this is....? Who will name them? — The extra groups are insects and domestic animals. - Right. We leave drawings of wild animals on the board and remove unnecessary ones. (The teacher removes drawings of insects and domestic animals)
-We have two tables. So let us divide into two groups, and each of us will draw our own animal.
— Our first table draws a fox, the second table draws a crow. (The teacher pins the corresponding drawings on the board in front of the group, which animal they will draw.)
— Every animal or bird is different in some way from the others. Let's describe them using adjectives. Who among us knows more about their animal or bird?
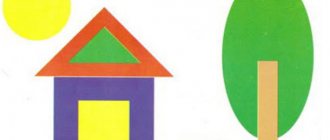
- Let's look at them carefully. If we generalize the entire shape of the beast, we can roughly see a geometric figure. Using this figure we will draw the animal.
So, the fox is an oval and a circle. The crow is also an oval and a circle.
But before we get started, let’s remember about preparing the album sheet for drawing. Who will remind you? Please.
— Before we start drawing, look at the drawing. If the height of the drawing is greater than the length, then we place the landscape sheet vertically; if the width of the picture is greater than the length, then we place the landscape sheet horizontally. And then we find the middle of the sheet and mark it.
— We all open the albums and prepare them for work. (The guys prepare the album sheets for drawing.)
- Now let's rest a little. They stood up quietly.
A minute of rest
They sat down, stood up, sat down, stood up. Like crows we flew, We ran like wolves, Like a fox we sat down quietly,
And they looked at the leaves.
— Today in class we are learning to draw a sketch of a fox and a crow. We will need the ability to draw these animals in the next lesson when depicting a wolf and an eagle.
3. Independent work of students.
— Each group draws its own animal. At home you will try to draw other wild animals in the same way, so listen to all my explanations carefully.
In the middle of the album sheet we place an oval and, without pressing the pencil, draw an oval with light lines. This will be the torso. Those who draw a fox and a crow place and trace a circle on the right side. This is the head. Then everyone draws lines according to the diagram for drawing their animals.
After completing the drawing, remove the extra lines. If there are no questions, let's get to work. Table 1
4. Shutdown.
5. Lesson summary.
At the end of the lesson, a child from each group shows their drawings. Works are assessed both by the teacher and the students themselves.
Well done boys! You all did a great job today. Do you think geometric shapes helped you when drawing animals and birds? Do you remember who the animal artists are?