Every day the autumn season is getting closer. She paints the trees in bright colors and dresses them in golden costumes, pours rain on everyone and blows them with wind. Every month nature sheds its clothes and prepares for a long winter sleep. All these stories undoubtedly inspire all the artists who pick up their brushes, trying to convey the full range of emotions of this season.
So for an hour we will turn into painters and plunge into the world of artistic art. This article will tell you how to draw autumn easily and beautifully for kindergarten and school, both with a pencil and paints, you will no longer have any questions about how to help your child with his homework.
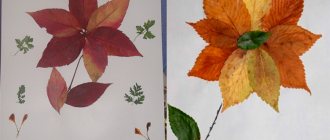
You can also make all kinds of pumpkin crafts for kindergarten or elementary school.
Easy and simple autumn drawings for kindergarten
Many parents wonder how to help their child depict the seasons. They start looking for examples and ideas on the Internet. And we have collected everything you need in a convenient format especially for you! Step-by-step photos with detailed instructions for drawing on the theme of autumn will orient you and your child with food.
Before starting work, clean the work area and lay out the necessary materials, teach your little one to hold the tool in his hands and make even strokes. After such a brief excursion, begin to transfer the lesson step by step onto your canvas. A little patience and perseverance and you will get a real masterpiece!
Step-by-step instructions for drawing autumn for a child:
- We outline an even square, and on top of it we mark an isosceles triangle in the right area. We continue it to the left, forming a roof.
- We lower the vertical edge, outlining the cube. On one wall we draw a rectangular door with a handle, and on the other plane a window.
- We use an arcuate line to show the hill on which the building stands. In both parts of the canvas we express trees, with branches spread out in different directions. Keep in mind that the closer to the ground, the thicker the plant trunk becomes.
- We fill the roof of the house with scarlet color without going overboard. We paint the foundation of the house and the neighboring tree with a yellow tint, outlining the rounded shape of the crown.
- Color the opposite tree and clearing with bright orange chalk. With a few chaotic strokes we will show the falling leaves. We will decorate the door in the same color scheme.
- We focus on the red foliage that develops in the wind. Cover the path with small multi-colored specks in the appropriate palette.
- Let us write a characteristic phenomenon for this time of year: bird migration. Our smaller brothers fly away to warmer climes in a whole wedge, which is what we will depict in the corner of the composition. We sketch the birds themselves in the form of black checkmarks.
This illustration is extremely simple and quick, we drew it in literally 10 minutes. The mischievous, active fidget will definitely not get tired of creativity and will even want more!
You can also draw cute autumn mushrooms with pencils.
Summary of a lesson in fine arts in the senior group “Autumn Trees”
MBDOU No. 54 “Swallow”
Summary of a lesson in fine arts in the senior group “Autumn Trees”
Conducted by: Gulina N.M.
2014 Program content: -educational objectives: continue to introduce children to brushes and paints, teach them how to hold a brush and use paint carefully. Practice drawing a tree, trunk, thin branches. Strengthen technical skills. Lead children to figurative transmission of phenomena. Foster independence and creativity. -developmental tasks: develop fine motor skills of the fingers, memory, imagination, logical thinking; -educational objectives: to cultivate an emotionally positive attitude towards drawing, the ability to work independently. Treats natural objects with care and attention. Integration of educational areas: “Artistic creativity”, “Music”, “Communication”, “Cognition”. Preliminary work: 1. Observations of changes in nature; 2. Conversation on the topic: “Autumn”; 3. Looking at pictures of nature in autumn; 4. Reading poems about the autumn forest; 5. Preparing the background on album sheets for the lesson. Material for the lesson: illustrations from the “Seasons” series, for each child a landscape sheet, tinted green and blue; watercolor paints, two brushes, a napkin, a sheet of paper for selecting the desired color, Q: What kind of paint did the sorceress take? I painted the leaves and removed them from the branches. She hid the midges to sleep until spring. What kind of sorceress, you say? (children's answers) Educator: Guys, look at the fallen leaves from different trees in my hands. I decided to collect an autumn bouquet. Let's carefully look at the leaves of which trees are in my bouquet. Listen and guess the riddles. (The teacher asks riddles and shows a piece of paper and puts a herbarium of dried tree leaves on the board) Teacher: I will tell you riddles, and you listen carefully. She turned green in the spring, tanned in the summer, Autumn came to the garden, she lit the red torch. (Rowan) Everything is at peace, the wind has stopped and the trees are all silent. No, not yet - these Leaves rustle quietly. (Aspen) From the trees in early summer Suddenly snowflakes flutter, But this does not make us happy - It makes us sneeze. (Polar) She lowered her curls into the river and became sad about something, but what she is sad about doesn’t tell anyone. (Willow) Not caring about the weather, she walks around in a white sundress, and on one of the warm days May gives her earrings. (Birch) It’s not even a mystery, We’ll name it right away, If only someone says - There are acorns on it! (Oak) What kind of girl is this: Not a seamstress, not a craftswoman, She doesn’t sew anything herself, But she wears needles all year round? (Christmas tree) Like a white snow globe, In the spring it bloomed, exuding a delicate scent. And when the time came, At once she became all black with berries. (Bird cherry) Educator: Well done, guys, you solved all the riddles. Educator: Autumn painted all the foliage in different beautiful colors. Guys, do you want to draw trees with the same beautiful, golden, elegant foliage? But first, let’s stretch our fingers for work Finger gymnastics “One, two, three, four, five - We will collect leaves. (Clench and unclench their fists). Birch leaves, rowan leaves, poplar leaves, aspen leaves, oak leaves we will collect, (bend fingers). We'll bring an autumn bouquet to mom. (Clench and unclench their fists). Demonstration by the teacher with an explanation: - Look how I will draw a tree. First, let's draw a tree trunk. We draw the trunk from the top of the head, using the tip of the brush, because the top is thin; and downwards the trunk thickens, we go down and gradually press on the brush. Next we will draw the branches. Large branches extend from the tree trunk, they all look up. And from large branches there are many small branches. We will paint them with the tip of a brush; the more small branches there are, the more spreading and beautiful the tree will be. Showing the finished tree. — Pull the sheets of paper towards you. On the sheets you already have a blue background. Now we are all artists! Grab a brush and get to work. Practical part. The teacher turns on calm lyrical music. Children start drawing. Reminds me of techniques for depicting trees. Monitors the use of various techniques for painting with a brush (with the whole brush, with the end) Educator: -Well done guys, what beautiful trees you have turned out to be, but is something missing? Children: - Listyev. Tell me, please, what colors should I use to paint autumn leaves? Children: -Yellow, red, orange. Q: And while our trees are drying out, let’s do a little physical exercise: Autumn has come, look how beautiful it is, the leaves are rustling and flying everywhere, flying, flying, let’s collect leaves, we’ll sit on a stump, we’ll smile sweetly at the sun, we’ll hold hands together, we’ll run along the path, lifting our legs higher, we spin, fly, we all squat together, that’s it, it’s time to get up, we need to walk again! (Children sit at the tables) Q: So, our trees have dried up, we can start drawing leaves. Watch how I will draw leaves. I pick up yellow paint and apply it. The leaves may be on the branches, or maybe the wind has already blown them away and they have fallen to the ground. Now I rinse the brush well, pick up red paint and apply it, I get red leaves. Guys, get to work. The teacher turns on calm lyrical music. Children start drawing. During the work, the teacher encourages children to use different colors to depict colorful autumn foliage. Summing up: Q: Look what beautiful autumn trees we have turned out to be. Did you like what we did today? What time of year were we talking about? Did you like being an artist (children's answers) Q: I liked your autumn paintings. Well done.
Drawing with pencils for children from 3 years old
The next work will be no worse than the previous one, but we will do it with the help of colored pencils. A set in a box will definitely be found in every home or in the nearest stationery store. They are easy to use and are recommended for inexperienced toddlers to start their creative activities with. Let's depict a stunning autumn forest on canvas.
Be sure to take your child to this park; he will probably be happy to swim in the fallen leaves. In the meantime, let’s take a walk in his painted version, believe me, it’s even better, because we’ll make it!
We draw an autumn forest in stages:
- A wave extending beyond the boundaries of the canvas denotes mounds. We duplicate it a little lower, expressing the foreground.
- We place three triangular trunks at the same distance. Try to express them as similar to each other as possible.
- We put caps of crowns on the elements, somewhat reminiscent of fluffy clouds.
- We shade the characters from left to right in orange, red, yellow tones. Let the fidget do this completely independently.
- We fill the first wave with a reddish pigment, and decorate the part in the foreground with a bright yellow pencil.
- Fill the trunks with brown and shade the background with blue pigment. We make quick diagonal movements, bypassing the drawn composition.
- Using a contrasting color scheme, we highlight the foliage with dots and the blades of grass with stripes. Let's mark a couple of black birds in the corner with ticks.
The autumn landscape is ready, it is perfect for a competition or a thematic exhibition. And what’s more, it will take away all the awards and sympathy from the audience.
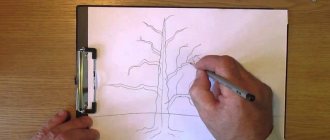
Another lesson on how to simply draw an autumn tree:
Examples of drawings on the theme of autumn for a child to draw for school
All manuals recommend that young artists sketch pictures at first. This will allow you to sharpen your hand and develop a creative eye. By repeating an endless number of works, you will soon be able to create them yourself! Your hands will create magic and your brain will generate great ideas. In the following selection you will find options for children's images using different techniques. Go for it!
- Three autumn trees against the background of a river: a colorful version of the picture
- A lonely tree on a yellow background is suitable even for the smallest children:
- Trees in yellow and red on a green hill:
- Cute hedgehog with apples: drawing for kindergarten
- Bench in the autumn park:
- Another idea for a drawing on the theme of autumn for the junior or middle group of a kindergarten: this option can be depicted by simply dipping your fingers in different colors, the children will simply be delighted!
- Girl in the autumn forest
- Forest mushrooms:
- Autumn road:
- An interesting idea for drawing a sparrow in yellow tones:
You can also draw a bullfinch; older children will definitely love this idea.
- Squirrel on a stump:
Autumn can also be painted with acrylic, here is a video master class on this topic:
Summary of a drawing lesson for older children. Autumn
Summary of the drawing lesson “Golden Autumn” in the senior group.
Compiled by: Educator Tatyana Valerievna Strokova Program objectives: 1. To cultivate interest in autumn natural phenomena, emotional responsiveness to the beauty of autumn. 2. Develop a sense of composition and color perception. 3. Continue to teach children to reflect autumn impressions in drawings, draw various shapes of trees, large, small, tall, slender, continue to depict leaves. 4. Fix the working techniques with a brush (with the end of the brush with all the bristles). 5. Correctly place the plot on paper. 6.Develop children's aesthetic perception and love of nature. Materials and equipment: watercolor paper A 4 format, watercolor paints, brushes No. 1, No. 4, napkin, sippy cup. Preliminary work of the teacher: reading poetry, a story about autumn, selecting illustrations for the lesson, paintings about autumn, conversation, observation on a walk, writing notes, preparing material for the lesson.
Progress of the lesson:
Today we have an unusual activity; we are going with you on an unusual journey to an art gallery where we will look at the works of Russian artists on the theme “Golden Autumn”. Display of paintings by Russian artists on the theme “Golden Autumn”
Educator: Guys! Please tell me what time of year is depicted in the paintings? Children: Autumn Teacher: That's right, autumn. Educator : Guys! What is autumn like? Children: Cold, rainy, gloomy, golden, sunny. Educator: Who knows why autumn is called golden? Golden leaves, golden trees. Children: because in the fall all the leaves on the trees and bushes turn yellow and therefore everything seems golden. Yellow and orange leaves lie everywhere on the ground - like a golden carpet. Educator: guys, when it rains, there are drops on the leaves and when they shine, the leaves seem golden. - Guys, do you know what the autumn phenomenon is called when leaves fall from the trees? Children: - This is leaf fall. Educator: - That's right. Why do trees shed their leaves in the fall? (it becomes cold, in winter it will be difficult for the branches to hold leaves and snow, in winter the tree sleeps and rests). No one tells a tree when to shed its leaves. But then autumn is approaching - and the leaves on the trees change their green color to yellow or red and fall off. This happens because water freezes and stops flowing into the twigs and leaves. The tree falls asleep for the winter. Leaves fall from all trees in autumn. The wind carries them through the streets and parks. The next year, new leaves appear on the trees. Listen to the poem called "Falling Leaves." The conversation is barely audible among the fallen leaves: - We are from maples... - We are from apple trees... - We are from elms... - We are from cherries... - From aspen... - From bird cherry... - From oak... - From birch... Leaves are falling everywhere: Frost is on the doorstep! Y. Kapotov Educator: - In autumn, the leaves on the trees become not only yellow, but also red, orange, brown and even purple. The color of the leaves depends on what the weather is like: the sunnier the autumn days, the brighter the color. Many artists love to paint autumn nature precisely because of this variety of colors. Today I want to bring to your attention reproductions by Russian artists. The very name of the paintings indicates what time of year the artists depicted on it. Looking at these pictures and observing nature on a walk, you and I can be convinced that autumn itself comes up with outfits for trees, bushes, and all of nature, as if organizing a competition to see who has the brightest and most beautiful leaves. I want to admire them every day. What a shame. Autumn uses a long thin brush to repaint the leaves. Red, yellow, gold - How beautiful you are, colored leaf!.. And the wind puffed up your thick cheeks, puffed up, puffed up. And I blew, blew, blew on the colorful trees! Red, yellow, gold... The entire colored sheet flew around!.. I. Mikhailova Educator: Now let’s take our brushes in our hands and let’s practice. We draw the tree trunk from top to bottom, the tree thickens towards the bottom. We draw it until the end of the grass so that the tree does not hang in the air, we draw the branches on the tree with the end of the brush, they reach towards the sun. Educator: what kind of paint do we take to paint a tree? Children: brown. Educator: when we paint the leaves, apply the entire bristle of the brush. Educator: What kind of paint do we take to paint leaves? Children: green, yellow, orange, red. Educator: let's get to work. During the lesson, the teacher pays attention to those children who are not doing well. Encourages. Helps.
1 . Draw the sky. Use brush number 4. We apply blue paint in large strokes from left to right, without changing the direction of the stroke. 2. The second color is yellow. We remind children the direction of the stroke is from left to right.
3. At the next stage of our work, we need to add two more colors: orange and brown. We remind children not to change the direction of the stroke from left to right. We wait a few minutes for the paint to dry.
4. At the next stage of work, draw the trees with brush number 1.
5. Draw leaves of different colors, yellow, green, orange, red. (Leaf fall).
The teacher collects all the works and arranges a vernissage of children's works. You guys see what wonderful pictures you turned out, you were real artists. Educator : What did you and I draw? Children : Golden autumn. Educator: Do you like your work? Children: yes. Let's give ourselves a clap. Well done!
We recommend watching:
Drawing on the theme Autumn for kindergarten Monotopia in elementary school on the theme: Autumn Drawing with heated wax crayons on the theme: Autumn Batik in kindergarten. Master Class
Similar articles:
Drawing lesson for primary schoolchildren on the theme Autumn
Drawing lesson for schoolchildren on the topic “Autumn”
How to draw a picture on the theme “Golden Autumn” with a pencil
During the autumn period, we are amazed and notice the transformation of trees. They, covered with gold, smoothly sway back and forth, and small leaves fall from them, spinning in a dance. A light blow of wind completely changes the course of events and bends fragile blades of grass and plants under it.
From such impressions, your soul becomes light and good, peace covers your head. Have you already presented such a story? Then we suggest transferring your feelings to the canvas and throwing out all your imagination and feelings. Our step-by-step master class on drawing a golden, magical autumn will help and guide your talent in the right direction!
Let's start the creative process:
- We draw a sloping horizon line. We build a log cabin on its top. To show the logs, draw two columns of circles. Then we outline the cats with shutters and mark the rows of pieces of wood along the entire perimeter, connecting the elements.
- We outline the pointed roof with a window and also detail it with logs. Next, draw a diagonal axis and draw a striped tile.
- We finish drawing the left side of the house, and next to it we draw a tree with a voluminous crown. In the left area we will work on the fence for this purpose we make checkered strokes.
- From the building there is a winding path that leads directly to a large tree in the foreground. Its crown is slightly tilted to the left, from the breeze, and young grass grows at the foot.
- We sketch the background with mountains and plowed fields with haystacks. We outline rows of bushes and cumulus clouds in the sky with flying cranes.
- We will paint all the greenery using an interesting technique. We only partially fill the elements with each color, and then change the color. So we will have a variety of transitions and gradients, don’t be afraid to experiment!
- We decorate the house in brownish tones. And the spacious meadows still remain green, as September has just come into its own. We decorate the field with haystacks in a red tone, because wheat grows on it. We paint the skies in a blue palette.
The painting is ready, it’s perfect for homework, so feel free to take it to class. You are guaranteed to get an A!
Autumn pictures for school with paints: a step-by-step master class on painting with gouache
If you successfully completed the previous illustration, then working with paints will definitely not scare you. This material is thicker and more saturated, allowing you to achieve bright and natural transitions. You don't need a large package of gouache, because we only use autumn colors.
Brew some warm tea, turn on some nice music and create masterpieces with us on the theme of the golden season. Your efforts will be rewarded at school according to your merits; you will definitely be one hundred percent prepared for the fine arts lesson!
Now we will figure out how to paint an autumn tree branch step by step:
- Fill the entire canvas with bright yellow pigment. We put an orange tone on the brush and outline a circle in the center, making strokes in a rounded shape.
- We fill all the edges and corners with a scarlet palette, slowly mixing it into the already drawn tints. We leave the most intense accent in the middle, so we get a huge sun.
- We draw a bending branch; it should not be a completely straight segment. It has thin knots and uneven branches. This is the natural beauty of nature!
- Using single strokes of orange and scarlet gouache, we mark the remaining leaves on the branches.
- We mark each element with black spots, make sure that they are slightly blurred. So, we will highlight the depth and volume of individual zones.
- We also work on the sky and clouds from above in the same range. We make soft dipping movements to get similar colorful clouds.
The canvas simply screams and bursts with color, it looks extremely impressive and will amaze all spectators and observers on the spot!
Autumn leaves: drawing for children of grades 1-3 with paints
Let's sketch the main attribute and association with October, September and November - autumn leaves! They smoothly fall and swirl in the air, the children collect bouquets from them and make herbariums for lessons on the world around them. We will depict them on canvas easily and simply, in just a few minutes.
Call your fidget, put on an apron and get creative, our step-by-step master class will help you in this difficult task!
You'll need it today:
- Gouache
- Thick paper
- Background brush, synthetic No. 1 and No. 2, bristles No. 8
Step-by-step instructions for painting autumn leaves with paints:
- We cover the spot in the background with a yellow tone, and also draw out the lower horizontal surface. This will be the water in which the branches are reflected. Add a few cross-shaped ocher strokes.
- We collect red material and shade the area on the right side. We decorate the left corner of the canvas with green color, and also draw it to the opposite edge.
- Using a thin brush we draw a brown twig and the outline of the leaf and its veins. We shade the left area from the edge with red-burgundy, the center should be lighter.
- We schematically express the remaining silhouettes of the leaves using dirty shades. We form several layers, a whole armful of plants.
- We add a few Dark Green spots to add depth to the illustration, and also work on the highlights with white on the water and other elements.
A painting can perfectly decorate the interior of your apartment, just hang it on the wall and it will create a cozy, warm autumn mood for you.
Examples of leaf drawings for sketching and inspiration
The following selection is perfect for those who have run out of thoughts, ideas and imagination on the theme of autumn. It is not necessary to repeat the pictures from the photo exactly; perhaps they will push you to realize your plans. Choose the image you like, there are also step-by-step diagrams among them.
- Maple leaf in bright colors
- Sketch of a pink leaf in a notebook: a simple idea for sketching for beginners
- Another idea for drawing a maple leaf step by step
- Step-by-step instructions for drawing an autumn leaf:
- Black and white leaves flying in the wind: a drawing for the little ones
- An armful of autumn leaves in hand
- Fallen leaf in a puddle
- Beautiful, bright yellow maple leaves in a vase
- Bouquet of colorful autumn leaves
- 6 types of autumn leaves of different colors and shapes
- Birch leaf with a simple pencil: an idea for advanced
- Oak leaf: a simple drawing idea for a child
- Another maple leaf drawing idea
For you, we have also selected a selection of video lessons on drawing autumn leaves. I'm sure you'll find something to your liking:
Watercolor option:
Another bright idea for painting with paints:
Drawing on the theme of autumn in pencil
Drawing with a pencil is very simple. Can be used:
- drawing technique (look at the original and repeat every stroke exactly),
- or simply retake the image and transfer it to your own sheet of paper (this is when a blank sheet of paper is superimposed on the picture and drawn with a pencil along the contours and individual details of the image),
- a pencil allows you to convey shadow and light, volume and texture of an object (due to shading).
Well, if something doesn’t work out, you can easily fix it with an eraser.
Pencil drawings can be monochrome or color. How can a simple pencil convey the gold of autumn leaf fall, the crimson of sunset and the aroma of fallen leaves? Easily! If you use pictures typical of autumn, your memory will “complete the picture” itself. For example, a heap of leaves depicted on paper that lies under a tree will remind you how great it is to toss these leaves, how they quietly fall and spin, and how they rustle under your feet when you walk on them.
See examples of drawings for sketching in the gallery:
For reference! A pencil drawing is a work done by:
- with a simple pencil;
- a set of colored pencils;
- one of the colored pencils.
The children themselves can choose how it is convenient for them to draw autumn, and what colors will convey what they see.
Master class on how to draw autumn with a pencil.
Author
1. First, draw a sketch with a simple pencil. For example, an alley in a park, on the sides of which trees appear one after another. A person can walk along the alley under an umbrella.
2. Draw the contours with a felt-tip pen. We erase the pencil.
3. Color with colored pencils, shading or pastels. First we paint the crowns yellow.
4. Then shade one side with light brown.
5. Here and there we apply green spots on the bushes and on the ground. All that remains is to color the silhouette of the girl.
How to draw an autumn landscape step by step: an easy but beautiful gouache drawing
Making the next wonderful picture will be very easy. You don’t necessarily have to have a diploma from a higher art school or attend specialized courses.
The language of our lesson is simple and will be understandable to everyone. He will describe to you all the nuances of working with materials, setting light and shade, and processing volume and perspective.
Don’t be intimidated by complex phrases, but rather get down to business quickly:
- The sketch is done with an HB pencil, it should be a light sketch, do not press too hard on the tool. Draw a horizontal line just below the center, which divides the sheet into two parts. Next, we outline the mass of trees in the distance. Then we sketch a meadow with birch trees and note the clouds in the sky.
- If your gouache has dried out, fill the bottles with water and place them in this position overnight.
The next day, drain the liquid and you will be left with fresh, wet material at the bottom. We paint the sky with a pale blue tint, with abrupt strokes, as well as its reflection in the river. The further from the center the darker the tone becomes, add blue paint to the mixture.
- We write out the long shot, the lighting will be on the left side. First, we cover the silhouettes with yellowish pigments, then we work on the halftones with a red palette. Water, like a mirror, reflects everything, so we depict a vertical smeared reflection on it.
- We outline cumulus clouds in empty spaces with whitewash, and decorate them with a pinkish-lilac color. So, we will clearly show the shadow and volume. Now we move to the foreground, make the first layer of yellow crown, mixing in a little light green.
- We use a greenish tone to express the nearby lawn and several accents on the forest background. For additional texture, add dark contrasting shadows in some places. To do this, mix ocher with blue paint and mix the desired range.
- Use whitewash and a thin brush to highlight the ripples on the river. We paint strokes of different lengths in chaotic places. We draw the ornament on the birch trunks in black. Using a purple tint we go over the background, showing the shadow.
- We place accent spots in the crowns and in the reflection on the water surface. Draw blades of grass on the field. Finally, we release a flock of migratory birds in the corner of the image.
We leave our autograph at the bottom of the masterpiece so that everyone understands who worked hard and created an incredible landscape.
How to draw an autumn landscape for children
What is landscape? In fact, the landscape is not just the nature outside the window. Have you seen how artists are looking for exactly that piece of nature that they will paint on canvas? They should like the view, the angle, and the lighting. Sometimes the character of nature is reflected in the most inconspicuous picture. And this suggests that the artist saw beauty and was able to convey it in all details, color and light.
How can children master this science? Very simple. You need to show your child a couple of pictures of a beautiful autumn landscape and tell him what makes this picture special. For example:
- In one picture there is a tree strewn with golden foliage. Although the artist painted the leaves as a “cloud,” he highlighted several individual leaves as an accent and drew every detail on them.
- On the other there is a river, which is visible from a high hill, already covered with yellow-brown-green foliage. And it is the shine of the river, and the way heavy autumn clouds are reflected in it, that makes the landscape special.
- And on the third everything is simple: trees, bushes, grass. And only how low the sun is and how it sparkles like sunbeams in the tree branches decorates the landscape.
Kids quickly grasp such details. A little training and they will succeed!
Master class on how to draw autumn trees and sky.
Author
I offer a simple option for children. You will need:
- Brushes
- Paints
- Wet wipes
- Plastic bag
1. We make the background with watercolors. Using a large brush, apply transparent yellow, blue, a little red, apply randomly.
2. Take a damp cloth and smear the paint stains, while the cloth absorbs excess water.
3. On a separate sheet of paper, apply random spots of gouache paint. We make them with the touch of a large brush.
4. Apply clean water to the bottom of the sheet. We turn it over and apply our blank of paint stains to the wet part of the sheet, smoothing it with our hands. And we remove the leaf.
5. If you shoot by the top edge in the middle, you will get a static forest, and if you shoot by the uppermost corner, you will get the effect of wind in the forest.
6. It remains to draw the tree trunks. We do this in two shades of brown to make the picture more voluminous.
7. Let's draw rain. Take a wide brush and remove excess water from it. We put white gouache on the tip and apply strokes with diagonal light movements.
8. Using a thin brush and dark gouache we depict a key of birds that fly away to the south.
9. We put a simple plastic bag on our hand and apply gouache on the bag in spots. Let's crumple the bag a little in our hand.
Now we apply this package in different places of our trees with sharp jerky movements. This is how we get leaves. The forest becomes more alive.