The essence of the ebru technique as an unconventional way of drawing
Ebru is an ancient art technique that involves painting on water with liquid paints. The essence of this method is that water and paints have different densities, due to which the latter do not spread or dissolve, but leave an expressive pattern on the surface in the form of a thin film. After creating a design on water, it is carefully transferred to paper or fabric (the material is simply applied to the liquid).
The water is made more dense by the addition of special substances. Initially, it was a plant extract that was extracted from the thorns of the geven plant and infused for more than a week. Today, art stores sell special ready-made bases for mortar. During the work process, it is difficult to predict how the paint will spread, so each composition turns out to be original and unique.
Each composition turns out to be unique, since it is impossible to predict exactly how the paint will spread.
A brief excursion into history
The history of the Ebru dates back to the distant past. It is not known for certain in which country this unusual technique originated. According to some sources, this is India, according to others - Turkestan. Most art critics and historians believe that this method of drawing was invented in Turkey, since the oldest image drawn on water is located there.
Ebru is also very popular in modern Turkey: exhibitions of paintings made in this technique and master classes for tourists are held there.
Ebru drawing is still popular in Turkey, where master classes for tourists and exhibitions are held
Through the Great Silk Road, ebru entered Europe, where it was given the name “Turkish paper” (another option is “marble paper”). This elegant technique was used to decorate books and valuable documents. For example, important notes (certificates, decrees) were made on colorful patterned paper; it was very difficult to forge such a document.
The peak of ebru's popularity in Europe was observed in the 18th and 19th centuries.
As for the etymology of the name, there is also no complete clarity here. It is assumed that it goes back to the Persian “ob” (water) and “ru” (on). In Turkish, “obru” is transformed into “ebru,” which means “on the water.”
Video: history and philosophy of Ebru art
Types of ebru
In modern painting, different types of water painting techniques are used. The most popular are the following:
- Akkase Ebru. Several layers of paint are applied successively to one sheet of paper as it dries.
- Gel-Git (or waves). Paint is simply splashed onto the water, then lines parallel to each other are drawn along it with an awl or other sharp object.
- Battal ebru. The paint is also splashed onto the surface of the water. Then the resulting pattern is transferred to paper without any changes. Thus, little depends on the artist’s level of skill: it is simply one of the components of creativity, along with water and paper.
- Lightened ebru. The paint is highly diluted with water. As a result, the image turns out to be very light, as if applied with light strokes. Such pictures are used mainly as a background.
- Ebru Nejmeddin (named after the inventor). Concentric circles of different sizes are drawn on the base, which are then transformed into patterns or images. This is a very good way to depict flower buds.
- Ebru shawl. Paint splashes across the surface of the liquid. Then the awl is used to move left and right or up and down. After this, circular movements are made according to the same pattern. The result is a so-called “ebb and flow” pattern.
The concentric circles of the circles can easily be turned into flower buds, as well as leaves and other images
What is Ebru: technical features, review, characteristics
What is Ebru?
Drawing Ebru involves using liquid instead of the usual paper. This is not ordinary tap water, and watercolor paints will not work. Hevea extract is added to the liquid. It allows you to thicken it so that the drops do not mix with each other and do not settle at the bottom.
As for paints, they are created on the basis of ox bile and special minerals. There are no clear boundaries for drawing, the patterns are arbitrary and do not need an outlined border.
Liquid paint is perfectly distributed on the surface, and special tools allow you to create beautiful patterns. After completing the drawing, the image can be printed on paper. Professionals can use surfaces made of other materials for these purposes.
Conducting a drawing lesson using the ebru technique in kindergarten
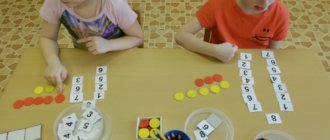
Drawing classes are organized in a preschool educational institution with the entire group of pupils at a certain time. When studying the ebru technique, children can work in pairs or mini-groups.
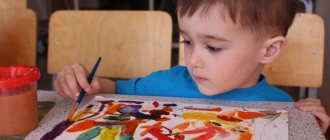
Drawing using the ebru technique allows every child to feel like a creator creating an extraordinary masterpiece.
Possible lesson topics
The following topics will be suitable for drawing classes using the ebru technique:
- Space landscape: the theme may sound like “Earth in the porthole”, “On an alien planet”.
- Winter landscape: “Winter's Tale”, “Winter Fantasies” (the motifs of blizzards and snowflakes are used, and the composition itself is done in blue tones).
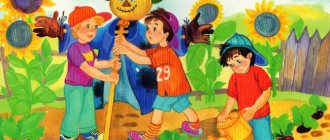
- Floral motifs: “Flower meadow”, “Summer meadow”, “Beautiful flower”.
- Marine motifs: “The Underwater Kingdom”, “The Fairytale World of the Golden Fish”.
- Fantasy motifs: “Fantasy World”, “My Dreams”, “Fairy Tale World”.
- Creation of patterns: “Fabric for mother’s dress”, “Scarf for mother”.
- Colorful objects of nature that provide an opportunity for color experiments: “Turtle”, “Butterfly”, “Peacock”.
Using the ebru technique you can draw any objects, for example, even a fantasy car
Video: drawing a turtle using the ebru technique
Organization of a motivating start to the lesson
Since the Ebru technique is directly related to water, motivation (regardless of the topic of the lesson) can come from this area. For example, the Golden Fish comes to visit preschoolers and invites them to her sea possessions. Alternatively, it could be the Merman, the Sea King, the Little Mermaid, or the Dolphin.
Some sea creature, for example, a dolphin, may come to visit the children to introduce them to the wonderful properties of water
If the topic of the lesson is cosmic landscapes, then you can start your educational activity with a virtual journey through the vastness of the universe. Musical accompaniment, for example, compositions by the group “Space,” will come in very handy here. In such a lesson, you can also use a fairy-tale character, for example, Luntik or an alien.
When drawing on a floral or fantasy theme (a fairy-tale landscape, a magical meadow, etc.), it is especially important to create a suitable atmosphere. Again, musical compositions, relaxing moments, and fictional magical characters will come to the rescue. For example, you can tell a story about a fairy who always did good deeds. One day, while traveling around the world, she met very sad and gloomy people and, of course, wanted to help them. It turned out that in their country there are no colored paints at all - only black and white. And the sorceress wanted to show these people how beautiful and colorful the world can be. The task of preschoolers is to help the fairy do this.
Another motivation option is for the teacher to tell the children that the wizard gave her unusual paints. You can draw on water with them - isn’t that a miracle? Of course, the guys will become interested and want to create themselves. You can start the lesson with an offer to go on a trip by sea to the unfamiliar country of Turkey, where the children can learn about a new technique for drawing on water.
In order to captivate preschoolers with the topic of the lesson, you can use physical education minutes. You just need to choose them correctly in accordance with the theme: winter landscapes, underwater world, space, etc.
Table: examples of thematic physical education minutes (compiled based on open access materials)
| Name | Poem text | Children's actions |
| "Winter window" | Look out the window: | A square “window” is drawn in the air |
| White carpet, | Wavy movements of the hands | |
| The swing skidded | Rotate with hands | |
| Spruce trees sleep under the snow. | Squat with eyes closed | |
| There is a yellow moon in the sky, | Pull up on toes | |
| She's the only one who doesn't sleep. | Circular movements of the head | |
| "Sea World" | In a stormy sea, a blue sea, Dolphins swim quickly. | Smooth movements of the hand |
| The wave does not scare them - it splashes nearby. | Rubbing their palms | |
| A whale swims past and says to the dolphins: | Walking single file | |
| - You dolphins, don’t make noise, catch a quick fish: One, two, three, four, five - | Walking while clapping your hands | |
| The fish need to swim away. | Hands locked in and out | |
| The fish swam and splashed in the cool sea water. | Hand movements | |
| They submerge and then float up, | Squats | |
| They will bury themselves in the sand. | Lie down on the mat | |
| "Cosmodrome" | Everything is ready to fly, | Stretch your arms forward, then up |
| Rockets are waiting for all the guys. | Connect your fingers above your head to represent a rocket | |
| Little time to take off | Marching in place | |
| The astronauts stood in a row. | Stand up with a jump - legs apart, hands on the waist | |
| Bowed to the right, to the left, | Side bends | |
| Let's bow to the ground. | Forward bends | |
| The rocket took off. | Jumping on two legs | |
| Our cosmodrome is empty. | Squat down, then rise up |
To motivate preschoolers to study, you can show them a number of finished works using the ebru technique
Table: fragments of notes from lessons on drawing using the ebru technique
| Author and title of the lesson | Progress of the lesson |
| Pashchenko A. lesson in non-traditional drawing techniques “Drawing on Ebru water” for middle and older children | A conversation about spring and its distinctive features. The teacher reads a poem, and the children perform the appropriate movements:
Spring is the time to get creative. And the teacher invites the children to turn into photographers - develop and fix the picture on paper. A conversation about the brightness and beauty of nature. The teacher invites the children to photograph their vivid fantasies. This could be the seabed, a flower meadow, a flower bed, the sky, etc. <…> Repetition of safety rules when working with paints and sharp objects. The teacher demonstrates techniques for drawing on water using the ebru technique. He draws an apple tree, accompanying his actions with reading a poem:
Before lifting a sheet of paper from the water, the teacher creates intrigue - pronounces magic words (in any version). <...> Independent activity - preschoolers draw their fantasies to the appropriate musical accompaniment (mysterious quiet music). Summing up the lesson. Children tell what they liked most and what profession they mastered. |
| Quote from: https://www.maam.ru/detskijsad/zanjatie-v-netradicionoi-tehnike-risovanija-risovanie-na-vode-yebru-dlja-detei-srednego-i-starshego-vozrasta.html | |
| Gryaznova E. V. lesson “Journey to the underwater world” using the non-traditional drawing technique “Ebru” in the middle group | The lesson begins with a riddle about water:
Looking at the globe: most of it is blue. An argument about why the water is blue, because in fact it is transparent (it reflects the blue sky). Conversation on the topic: what is water for? Game task: children glue droplets to places in the group where water lives: toilets, washbasins, indoor plants, toys that need to be washed every day. The teacher explains where the water gets to the group from (showing illustrations). A conversation about the need to conserve water and not pollute water bodies. <…> Experimental activity: the children are invited to drink water and determine its properties. They find out that water has no color, taste, smell, or shape. Riddle about the Goldfish:
The appearance of a game character - a toy Gold Fish, who invites the children to her underwater kingdom. To get there, you need to play. Physical education is carried out with fabric imitating the sea:
Sea animals and shells are hidden under the fabric. Children should use facial expressions and gestures to show how scared they are. The teacher suggests holding sea shells to your ear to listen to the sound of the sea. Relaxation music plays. The teacher reports that they have entered the kingdom of the Golden Fish. A video about the underwater world is shown. <…> The Golden Fish wants to give children a miracle that can be created with the help of water. Children can create their own magical underwater world, populating it with unusual marine inhabitants. The teacher explains to preschoolers the principle of drawing using the ebru technique, drawing attention to the brush in the shape of a fan to create a background. The color scheme of the underwater world is specified: blue or dark blue bottom, green and purple algae, yellow and red corals. And sea creatures can come in a variety of colors. Independent activity of preschoolers. In gratitude to the Golden Fish, the guys sing a song to her. |
| Quote from: https://educontest.net/component/content/article/43786 | |
| Shishvaleeva Z. A. lesson “Earth in the porthole...” in the senior group | The class takes place on April 12 - Cosmonautics Day. A conversation about space, viewing slides with images of Yuri Gagarin, dogs Belka and Strelka, a spaceship, a rocket, a spacesuit. <…> The teacher offers to play as astronauts. Physical education is held, children sit on chairs.
The teacher invites preschoolers on a space journey. The sound of rockets sounds. A globe is demonstrated - this is how our planet looks from space. <…> Children read a poem in chorus about the planets of the solar system (corresponding slides are shown during the reading process):
Considering the color palette of the Earth. Blue color is water (liquid or ice, occupies 75% of the planet’s surface), green is forests, thanks to which you can breathe, yellow is mountains and hills. The teacher tells the children that they will draw their planet using the non-traditional ebru technique. It came from Turkey, where it was passed down from generation to generation. <…> The teacher explains the methods of work and demonstrates the necessary materials. Preparing the water: starch and a little office glue are added to it, the solution must be mixed thoroughly. Any bubbles that appear can be removed by placing a newspaper against the surface of the liquid. Preparation of paints: they need to be diluted with water until liquid. You will also need brushes, sticks, napkins and a palette. Explanation of the technique itself. Paint is applied to water using the tip of a stick or brush. The background is drawn. You can depict flowers, landscapes, fantasy images, just a beautiful background, etc. After transferring the drawing to paper, you can add details to it using a brush. Independent productive activity of preschoolers. Examination of finished works, summing up the lesson. |
| Quote from: https://nsportal.ru/detskiy-sad/risovanie/2016/04/17/konspekt-zanyatiya-risovanie-v-tehnike-ebru-zemlya-v-illyuminatore |
Video: drawing lesson using the ebru technique at a preschool educational institution
The history of Ebru
The method of creating paintings on water canvas appeared a long time ago, in the countries of the East. So in the 12th century in Japan they loved this type of creativity. Back then, images were created on thin rice paper, and the art was called “floating ink” because of the technology used.
Although historians have not been able to determine exactly where art originated. The technique is often referred to as Turkish creativity. In this country, masters can not only create abstract patterns on water, but also paint landscapes, birds and fish.
The name Ebru is translated from Persian as “air clouds”; it is precisely similar patterns that are often obtained when drawing.
The method of creating paintings on water canvas appeared a long time ago, in the countries of the East.
Examples of children's works using the ebru technique with comments
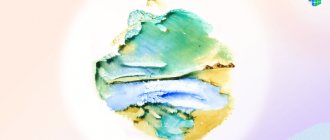
Children's works using the ebru technique always turn out bright and unique. This is the best way for guys to get flowers. The basis of the image is a circle, which is then given a certain shape: elongated (“Cosmic Flowers”) or, conversely, rounded petals (“Blue Flowers”, “Flowers Blooming”). In such compositions, the background is of great importance. So, in the drawing “Flowers on Mars” the flowers themselves are quite simple, but the work looks interesting due to the bright red base with white streaks, reminiscent of the surface of a distant planet. Compositions made in pastel colors (“Winter Flower”) also look elegant.
In the work “Dandelion in the Sun,” the expressive flower echoes the sun in color (yellow-orange), shape and size. The clouds also turned out beautiful. In the drawing “Sandstorm in the Desert”, the yellow-orange stains look like sand that is swirling from the wind, and at the same time like the tail of a fairy-tale Firebird. The plot composition “A ship sails on the sea” is interesting: the sun peeks beautifully from the horizon, the green-hued water with multi-colored highlights contrasts with the blue of the sky.
What is so attractive about Ebru?
Ebru are unreal paintings. Do you remember how ordinary puddles with colored gasoline stains were sometimes enchanted? Ebru from this series. The drawing appears as if by itself. It may not meet the artist's expectations, but it certainly won't disappoint.
For a child with a developed imagination, a set of ebru will be the best gift - it will help him create new amazing “worlds”.
Also using watercolor painting:
- calm the nervous system;
- develop creatively;
- take a break from everyday routine
But these are already points for parents.
How to make ebru paints with your own hands
It is possible to make paints for Ebru yourself, but you will also need a homemade base. This is how acrylic paints are used, which are made liquid, ordinary water is added to them, and glycerin or starch is used to thicken the water film.
For children's work, you can use gouache, also diluted with water. The base will be full-fat milk, with a couple of drops of dishwashing liquid added.
Acrylic paints or gouache are suitable, they are made liquid and ordinary water is added to them.
Ebru: master class for beginners
If you want to try painting on water at home, it's easy to do. Firstly, ready-made kits for ebru are sold (by the way, this is a good gift option, you can buy it here), and secondly, you can assemble such a kit yourself.
Necessary materials:
• a tray the size of an A4 paper sheet;
• ready-made thickener for the base or homemade.
• Ebru paints or oil paints and oil thinner for them;
• Brushes. It is better to use with hard bristles, as larger drops form on them.
• container for washing brushes; • napkins; • primed paper for transferring the design. You can use any matte paper, but it will lose its shape when it dries;
• Combs, awl. Instead of an awl, you can use a thin stick.
Any flat surface is suitable as a workplace. To avoid paint getting on it, you can cover it with film or paper.
The process of drawing on water
Having prepared the necessary materials, you need to understand how to draw in order to get a unique pattern and transfer it to a base made of fabric, paper or wood.
Having prepared the necessary materials, you need to understand how to draw in order to get a unique pattern.
Creating a background
Any picture requires a background; first the selected tone is sprayed onto the base, the first drops may sink, but after that the layer will be fixed. You can use up to three shades for the background; using more is not advisable. It is not worth making a thick layer; transferring it will be difficult.
Afterwards, you can apply other shades and draw with them using a comb or awl.
You can use up to three shades for the background; using more is not advisable.
Creating the main drawing
You need to draw patterns from large elements; complex details are drawn at the end. The first color is introduced in a small amount through an awl or a brush onto the surface, a round or oval spot will remain, another color is added on top, then they are stretched at the discretion of the master to obtain ornamental patterns.
Each time you dial a new shade, you need to clean the device for work.
You need to draw patterns from large elements; complex details are drawn at the end.
Transferring an image to paper
It is not difficult to transfer the design to the material; the paper web is applied to the image for a short period, then left to dry. The dried base can be leveled under a press if necessary.
It is not difficult to transfer the design to the material; the paper web is applied to the image for a short period, then left to dry.