Drawing using the poke method with preschool children
One of the most important means of understanding the world and developing aesthetic perception is drawing.
Learning to draw in preschool age involves solving two interrelated problems: - It is necessary to awaken in children emotional responsiveness to the world around them, to the events of our lives; - To develop their visual skills and abilities.
By drawing, the child develops certain abilities: visual assessment of shape, orientation in space, sense of color. Special skills and abilities are also developed: eye-hand coordination, hand control. In addition, drawing classes bring joy to children and create a positive attitude. Therefore, developing methodological support for classes with children is an important and responsible task.
Many methodological techniques underlying the development of drawing skills are not without drawbacks. For example:
-A difficult task for preschool children will be the technique of depicting objects with thin lines, because... Due to their age, they have not developed graphic skills and abilities.
-The technique of coloring a picture using strokes or the filling method is also not aimed at preschool age. With this coloring, images of objects turn out to be monochromatic, flat, and when using watercolor paints, they are also transparent.
Such techniques make it difficult to adequately execute and perceive the drawing. I want to introduce you to the experience of learning to draw using the poke method.
Advantages of the poke method:
The proposed method: - allows you to develop special skills that prepare the child’s hand for writing; — makes it possible to experience the multi-colored image of objects, which is undoubtedly important for the most complete perception of the surrounding world; - forms an emotionally positive attitude towards the drawing process itself; - promotes more effective development of imagination and perception, and therefore cognitive abilities - drawings created using the poking method are aesthetically pleasing and understandable both to the child himself and to those around him.
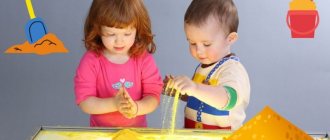
When painting using the poke method, gouache is used, it should be thick, the brush should be hard, and most importantly dry.
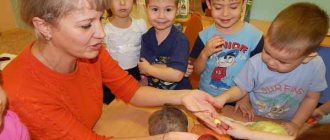
The poke drawing technique for younger preschoolers is as follows: the teacher draws the outline of an object on the children’s sheet in advance with a simple pencil. Children first examine and trace with their finger the outline of a given object (an image of an animal, a bird), naming its parts out loud (head, ears, tail). Having started to draw, they should make pokes with a brush along the contour line from left to right, without leaving a gap between the pokes; then the surface inside the contour is painted with random pokes. Children draw the remaining necessary details of the drawing (eyes, nose, mustache, paws, etc.) with the end of a thin brush.
Children of senior preschool age should independently draw the contours of objects with a simple pencil or directly with a brush, using geometric shapes in different combinations. The painting technique is the same. In the process of painting with pokes, the drawn objects acquire a shape and volume close to real ones.
Methodological recommendations for drawing using the poking method.
1. Classes are held 1-2 times a month. 2. Gouache for classes should be thick. It is best to lay it out little by little in small sockets. 3. Paper can be used in any color and size. 4. There must be at least two brushes (one hard). 5. You also need a jar of water, a stand for brushes, a cloth napkin, and a simple pencil.
Before class, you can do a short exercise - warm-up with a brush:
Let's take the brush like this: Is it difficult? No, it's nothing. (The hand rests on the elbow, hold the brush with three fingers, above the metal part). Up - down, right - left (Perform movements with your hand). Proudly, like a queen, the brush poked and clicked with its heel. And then he walks in circles, like guys in a round dance. Are you tired? Let's rest and start knocking again. We draw: once, once... Everything will work out for us! (Put the brush vertically. Make a few pokes without paint).
As practice has shown, children like to draw this way and easily learn this method. As already noted, drawing with pokes stimulates the development of small muscles of the hand, so it is subsequently easier for children to master other methods of drawing.
Children's works using the proposed technique turn out to be interesting, expressive, colorful and delight both the little artists themselves and their parents.
Bibliography:
K.K. Utrobina, G.F. Utrobin. “Fun drawing using the poking method with children 3-7 years old”
Author: Mekhonoshina Anastasia Grigorievna, teacher, MBDOU No. 385 “Fairy Tale”, Ekaterinburg, Russia
The article is published in the author's edition
Unconventional drawing of individual objects and objects (examples of work with comments)
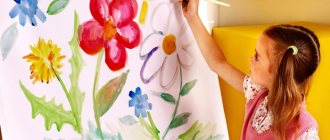
Some topics are especially conducive to unconventional drawing methods. For example, a tree can be depicted in an original way using a print of leaves, completing the missing parts (composition “Autumn Trees”). Another interesting method is cabbage leaf imprinting (“Winter Tree”). Using your palm, you can depict a snow-covered crown (“Snow-Covered Tree”). The leaves and fruits of the tree are often depicted with fingers or cotton swabs (“Apple Tree”).
Leaf imprints and drawing Drawing with palms and fingers Imprinting with cabbage leaves Drawing with cotton swabs
An object that kids love, like balloons, can be depicted with foam rubber or using rubber balls themselves (they are inflated and the tip is dipped in paint - a very realistic image is obtained).
Drawing with a balloon
Drawing with a balloon
Falling autumn leaves can similarly be depicted using real leaves. To do this, it is better to select small-sized specimens (“Multi-colored leaves”). Another way is to draw with cotton swabs, fingers, or poking. Leaves can also be printed with potatoes, after first drawing the corresponding silhouette on the vegetable.
Printing with leaves
Poking drawing
The structure of the rowan branch is conducive to drawing it with cotton swabs, fingers or a poke (photo).
Poking drawing
Birds in the middle group are also often depicted in unconventional ways. For example, using your palms you can draw a graceful flying or swimming swan.
Drawing with palms
Drawing with palms
Using unconventional drawing methods, it is good to depict vegetables and fruits.
Drawing with a pipette
Printing with half an apple and drawing with cotton swabs
Preview:
Municipal budgetary preschool educational institution, child development center - kindergarten No. 41 "Solnyshko" in the city of Smolensk
in the middle group
Educator: Stepanova E.V.
SOFTWARE TASKS: continue to teach drawing using the poking method; strengthen children's ability to draw small details; cultivate responsiveness and a desire to help.
MATERIALS: sheets of blue or dark blue paper with drawn outlines of a bunny, a stick - a foam rubber bull, white gouache, felt-tip pens of different colors, ink and a stick, a sample of a bunny drawn using the poking method, a toy hare.
METHOD OF ORGANIZATION: by subgroups.
- Guys, I come to work today, turn on the light, and an hour later a guest is sitting on the carpet. But the guest is unusual. This is neither a boy nor a girl, nor an aunt, nor an uncle. Do you want to know who it is? /Yes/. And for him to show up, we need to guess a riddle about him:
I look like a rabbit, same ears, same tail. We both love carrots, We both jump deftly. He's such a coward, but my name is /Bunny/
- That's right, guys, it's a bunny./Showing a toy bunny/.
Hello guys! 3hello, girl - What is your name? /Polya/. Good morning boy. What’s your name? /Maxim/. The hare greets all the children, finds out their name, and suddenly starts crying;
- Why are you crying, bunny?
- These guys know their names. And I don't have a name. Mom just called me son.
- Well, don’t be upset, bunny, our guys are smart and we will now help you find your name. Whichever one you like the most, that’s what you’ll choose./The children give the bunny a name and justify their answer as to why he called it that: Jumpy—jumps deftly; Stepashka is the hero of a children's TV show; The fluff is fluffy, soft; Snowball is white, like snow, etc. Educator:
- Guys, can I also give the bunny a name? /yes/. I would call him Cornflower. Look how blue the bunny's eyes are, like cornflower flowers.
The hare chooses the name he likes most:
- Can I be Snowball, as Marina called me, I really liked this name.
- Well, okay, bunny, now you also have a name - Snowball and don’t cry anymore. Guys, look how white and fluffy Snowball is. What else?/Warm, soft, clean/.
- Indeed, it looks like a snowball, but only the snow outside is cold, and our snowball is warm. Guys, we didn’t find out the most important thing, why he came to visit us. Snowball, please tell me why you left your forest and came to visit us?
- Oh, guys, I came to you not just to visit, but for help. My kitten friends told me that you can draw well. And I would like to give my friends the bunnies gifts for the New Year - draw their portraits, but I myself don’t know how to draw. So I came to you for help. Please help me draw portraits of my friends.
“But I would like the portraits of my friends to be as white and fluffy as me.”
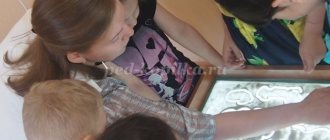
- Don’t worry, Snowball, our children will draw portraits of your friends as you want. Sit here and now you will see everything, what good artists our guys are. And we, guys, let's look at Snowball and tell us what parts of his body he has /Head, torso, paws, tail, on his head - ears, eyes, nose, mustache, mouth, tongue/. And so that the portraits turn out the way Snowball wants , we will: draw them not with brushes, not pencils, not felt-tip pens, but with magic wands - pokes, with which we have already drawn kittens and they turned out fluffy in the drawing. We will also draw bunnies. Here I have drawn a portrait of one bunny. But it is drawn on a blue background. Why do you think? That's right, because the little white bunny won't be visible on a white background. Now let's remember how to draw with sticks and pokes correctly. I have already drawn the outline of one bunny and now I will paint it over, and you watch carefully. I take the magic wand vertically with three fingers, just like a pencil, and dip the tip into the paint. But I use a little white paint so that when we paint, it doesn’t spread in all directions. If we suddenly dip the poke very hard and get a lot of paint, then we remove the excess paint on the edge of the jar. And then, holding the sheet of paper with your left hand so that it does not move: in all directions, with your right hand, with quick movements, we begin to paint over the bunny at the beginning along the contour, and then in the middle. / I accompany all my explanations with a demonstration /.
- This is how white and fluffy the bunny turned out to be. But you see that I didn’t paint over the bunny’s nose, eyes, or mouth. We will do this with colored felt-tip pens, and draw in the claws and whiskers with ink, but I only got one bunny, and Snowball needs portraits of all his friends, and there are a lot of them. And so let's get to work and start drawing. First, everyone will take a poke and, without paint, show me how he will paint his bunny, first along the contour, and then in the middle.
After this, I invite the children to dip their magic wands in paint and start drawing. After the children paint the bunnies, I suggest they leave them to dry for a while and give them physical education.
The teacher is a “mother-bunny”, the children are “hares”. I pronounce the text, the children perform the movements named in it:
They jumped merrily: jump-jump-jump!
And then they clapped: clap-clap-clap!
And then they stomped: thump, thump, thump!
They sat down, looked, and began to play with their ears: me-me-me.
They shook their heads: oh-oh-oh!
And then everyone galloped merrily into the house: hop-hop-hop!
After the physical education session, children use felt-tip pens and ink to complete the bunny’s eyes, nose, mouth, and mustache.
At the end of the lesson, Snowball examines the children's work, thanks them for their help and gives each child a paper bunny.
Source