Teaching drawing to a 4-5 year old child
Drawing lessons for children 4-5 years old are aimed at teaching artistic and creative activities. All materials that are selected in advance by the teacher must be available to preschool children. They must understand the essence of the topic in order to correctly depict a certain subject on paper.
How to teach drawing to a preschooler aged 4 to 5 years
Many people often wonder how to teach a child to draw at 5 years old. The family plays an important role in this process. Before taking your child to kindergarten, you need to create a favorable atmosphere at home, for example, invite your child to play with markers and pencils. It is advisable to depict several patterns together.
Important! If simple drawing lessons for a 4-year-old child are interesting, then you can start doing complex details, for example, correctly making lines, contours, strokes.
The benefits of drawing for child development
The benefits of drawing for children are scientifically proven:
- artistic activities develop fine motor skills, which stimulates areas of the brain responsible for thinking, speech, visual and motor memory, and coordination. During drawing, both hemispheres of the brain are involved, interhemispheric connections actively arise;
- the child develops spatial intelligence, as well as imagination;
- through drawing, the child expresses himself, projects his psychological state on paper;
- Painting for children is considered a calming activity. It is especially useful to draw for children prone to whims, depression, and neuroses;
- systematic painting lessons teach the child to structure time, develop perseverance, and form discipline;
- Through painting, children learn to creatively comprehend the world around them and understand that each person has his own perception of reality, sees objects or phenomena in his own way.
What benefits does artistic activity bring to a preschooler?
The benefits of creativity for child development
Drawing lessons are a mandatory element of comprehensive development for children 6-7-8 years old.
In particular, they provide:
- Stimulation of fine motor skills, which makes it easier for preschoolers to prepare their hands for writing.
- Development of the right hemisphere, and with it imagination, creativity, creative thinking.
- Conscious perception of real objects, deep knowledge of their properties.
- Education of aesthetic feelings.
- Mastering relaxation techniques, since creativity in any form is considered a powerful meditative tool.
- It works like art therapy: creativity allows, through a concrete or abstract plot, not only to express a personal opinion, but to throw out emotions, reduce fears and anxiety.
- A useful pastime that can later turn into a stable hobby.
- Improving communication and cooperation skills when working in a group.
Image techniques
The method of studying for five years is, first of all, an auxiliary means that does not determine all the specifics of activity in the classroom, and has only a narrow educational significance. For example, if reading a poem (story) at the beginning of a lesson was intended only to arouse interest in the task and attract the attention of children, then in this case the reading served as a technique to help the teacher in solving a narrow task - organizing the beginning of the lesson.
Important! Teaching by example occurs using a specific model and other visual aids. Before completing the task, the teacher must have a conversation with the children. The child learns to look at individual objects and then record his point of view using pencils, paper and other devices.
Fine motor skills of the hands in children 3, 4 and 5 years old - developmental features
What techniques are used in practice
Workspace organization
Drawing for children aged 4-5 years should take place in a pleasant environment. In order for a preschooler to feel as comfortable as possible at home, he needs to be allocated a special space. The children's room should be well lit, since the rays of light should fall from the opposite side from the hand with which the baby is drawing.
How is work space distributed?
Where should you start teaching your child to draw?
Drawing with children aged four is not only a process in which drawings are created using felt-tip pens, pencils or other devices. A beginning artist must gradually become familiar and get used to other techniques. Family support will have a beneficial effect on the baby. We need to support him in every possible way, directing him in the right direction. For example, you can suggest several interesting topics.
Note! Children love to draw their favorite cartoon characters or animals. Therefore, parents should take care of all the details and buy their baby all the accessories to create a new masterpiece. These include: gouache, colored paper, watercolor, colored crayons, felt-tip pens.
How does the drawing process proceed?
Techniques for developing drawing skills
Drawing technique has a fairly broad concept. To create lines and shading, certain materials are used. Among them are paper, canvas, pencil, charcoal, oil paint, gouache, etc. The concept of technique usually corresponds to the direct result of the artist's work. The young creator must be able to use the artistic possibilities of this material
Note! When working with children, the teacher pays attention to the correctness of the outline, as well as the shape of the object. Training occurs in stages. It is not recommended to overload your child with difficult lessons. Children are offered tasks on the topic: “Autumn”, “Favorite animal”, “Winter”, “Cat”, “Summer”, “Spring has come”, “Apple tree in the garden”.
Drawing with children “21 ways to draw using non-traditional techniques”
Elena Nikitina
Drawing with children “21 ways to draw using non-traditional techniques”
Drawing is one of the most favorite activities of children. Drawing in unusual ways evokes even more positive emotions in children. Using non-traditional drawing techniques, abilities develop . The child develops an interest in drawing , and as a result, a desire to create.
Today I will tell you and show you how to draw without using a brush.
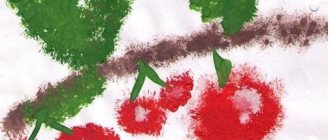
1. Drawing with cotton swabs . We put paint on a stick and decorate the image on a sheet of paper with dots. (Christmas tree, snow, teapot, sundress, rowan branch)
.
2. Drawing with palms . Pour the paint into a flat container. Dip your palm and press it to a sheet of paper. (Flowers, fish, Santa Claus, swan, carrots)
.
3. Drawing with cotton pads . draw with cotton pads by folding them in half, quarter or whole. (Moon, snowdrifts, various flowers)
.
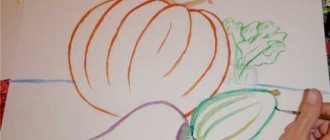
4. Drawing with prints . A simple drawing method : paint is applied to the surface to be printed and a print is placed on a sheet of paper. (Use: flowers, shells, fruits, vegetables)
.
5. Blotography. A spot or blot of watercolor paint is made on a sheet of paper. Take a tube and blow air onto the blot.
6. Drawing with a fork . We put paint on a fork from a flat plate and make an imprint with the flat surface of the fork. You can draw grass , a fence, flowers, a hedgehog.
7. Drawing with thread . It is best to draw with wool thread . We dip the thread in paint and apply it to a sheet of paper and create a pattern by imprinting with the movement of the thread. The wool thread creates a fancy pattern that is suitable for depicting clouds, clouds, sheep, or an unusual flower.
8. Drawing with a sponge or piece of foam rubber. We clamp a piece of foam rubber with a clothespin, dip it in paint and apply prints that create the texture of the object. They are used to paint animal fur, fluffy bunches of flowers, clouds, and tree crowns.
9. Spray painting . You will need a toothbrush and comb. Take a little paint on the brush and spray it with a comb. Move the brush over the comb over a sheet of paper. You can apply paints of different colors, it will turn out very beautiful.
10. Drawing with stamps . The stamp is easy to make from plasticine. We apply plasticine to a block, cube, etc. Using any sharp object, we depict some object or abstract pattern on it. The stamp is ready. We make a pillow from a sponge. Pour paint onto the sponge. We apply the stamp to the sponge with paint. Now you can make prints. A stamp can be made from the bottom of a plastic bottle, you get beautiful flowers.
11. Drawing with imprints of cups and necks of different diameters. Pour the paint into a flat plate. Dip the glass in paint and apply the design to a sheet of paper.
12. Drawing with a comb . We will need a comb with fine teeth. Apply multi-colored paint (next to each other)
on a sheet of paper in the shape of a drop.
Then we run a comb over all the drops of paint, connecting and smearing them. It turns out to be an amazing rainbow. You can also draw different patterns by adding drops and moving the comb in different directions.
13. Drawing with wax crayons . Using colored wax pencils or wax crayons, apply the design to a sheet of paper. Then we cover it with one or several layers of watercolor. The result is an unusual and bright pattern. (You can draw stars , flowers)
.
14. Scratching (waxography)
. We paint the surface of the entire sheet of paper with wax crayons, then cover the sheet with black gouache. When everything is dry, scratch the paint and create a drawing with lines. You can scratch with a pointed stick, skewer, or toothpick.
15. Drawing with gauze . Apply a layer of gauze to a wet sheet of paper, straightening it. The gauze should remain motionless on the paper. Paint on top of the gauze with a brush and paint. Let the drawing dry. We remove the gauze - a pattern remains on the paper in the form of an imprint of the texture of the gauze fabric. (Landscape, sky, tree, grass)
16. Drawing using plastic film. Let's draw a picture. Before the paint has dried, quickly apply the film to the drawing in the right place and carefully, using rotating movements, create wrinkles of the film on the paper. The wrinkles collect paint. Allow to dry and carefully remove the tape.
17. Monotype. Drawing symmetrical objects. To do this, fold a sheet of paper in half and draw an object on one half. While the paint is still wet, fold the sheet in two again. You will get a print on the other half. After this, the image can be completed or decorated .
18. Painting with bubble wrap. Using this wonderful material you can very simply draw falling snow . We apply white or pale blue paint to the film and apply it to a sheet of paper with a pattern. Using this technique you can create an extraordinary background for winter appliqué.
19. Painting with salt . Apply a design to a sheet of colored cardboard using PVA glue. We draw a picture on the theme of winter. Sprinkle salt on top. When everything is dry, shake off the excess salt.
20. Drawing with semolina . For drawing in this technique, colored paper or cardboard is used. PVA glue is applied to the outline of the design. Semolina is poured on top and a sheet of paper is placed tightly on top. Then remove the paper and shake off the excess semolina. In this way the next part is created.
21. Drawing with a candle . On a thick sheet of paper or cardboard, children draw with a candle according to plan. The sheet is painted over with watercolor paint. Wax images will appear through the watercolor. (Christmas tree, snowflakes, animals)
.
You can also use the following non-traditional drawing : drawing with a feather , drawing with a finger , drawing on a stencil with a stamp, drawing with the poke method , drawing with soap bubbles , drawing with crumpled paper , drawing with leaves .
How to teach a child to draw step by step, what theme to choose at this age
In order for your baby to learn to hold a pencil, you need to provide him with help. Parents or a teacher should take a pen and pencil in their hand, and then draw straight and wavy lines together. Initially, it is best to make a few simple shapes. As soon as the preschooler learns to perform simple large forms, you can make the tasks more complex.
How to teach your child to draw step by step
As for learning to work with paints, it consists of several stages. Step by step example:
- prepare soft bristle brushes, a sippy cup, watercolor paints and a palette;
- teach your child to hold and use a brush;
- At the first stage, the baby must move a dry brush over the paper, determine the degree of pressure and the correctness of the movements.
How to teach a child to draw with pencils
Adviсe:
- The pencil should be held with three fingers.
- When the teacher begins to teach the child to draw a line from top to bottom, the hand with a pencil goes to the side of the line, and when a line is created from left to right, the hand goes to the bottom of the line. You need to move your hand this way in order to see how the drawing is created. Then you can get a straight line.
- The line must be drawn immediately, without stopping, without removing the pencil from the paper, otherwise it may turn out uneven. You should not draw the same line several times.
- Rectangular and square-shaped objects need to be drawn, stopping at the corners so that you can think about how to draw next.
- Round objects need to be drawn in one motion, without stopping.
- You need to paint over the drawing with a pencil by continuously moving your hand back and forth.
- When painting a drawing, strokes should be applied in one direction: from top to bottom, from left to right, or obliquely.
- When painting a drawing, you must not go beyond the outline of the drawn object.
- You need to paint over the drawing without gaps.
- When painting a drawing, you need to press the pencil evenly: harder if you want it brighter, and less if you want it lighter.
How to learn letters correctly with a child 3-5 years old
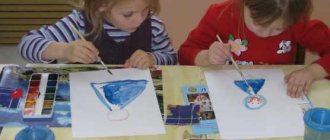
Teaching a child to paint with paints
Drawing with paints for children from 4-5 years old is a great pleasure. To draw an interesting picture, you need to take into account the advice of professionals. Step-by-step master class:
- To hold the brush correctly, you need to grab it with three fingers.
- When making lines on paper, the brush should be drawn with the side of the pile, respectively, the hand with the brush should move in front of the line.
- When making wide lines, you need to rely on the entire bristle of the brush. It is recommended to hold the stick at an angle to the paper.
- You need to create a thin line so that the brush is pointing upward. The item must touch the paper.
- When making drawings with a brush, the lines need to be placed side by side, drawn in one direction and only in one direction, each time starting from the top or left (and not back and forth, as with a pencil).
- Each line when drawing and when painting needs to be drawn only once.
- You need to draw lines immediately, without stopping.
Drawing with pencils with children 6-7-8 years old
Drawing techniques
Pencil drawing styles:
- An outline drawing is an image of the appearance of an object or character.
- Adding volume - drawing details, working with light and shadows.
- Hatching : involves making short straight sections. The length, density, and direction of the stroke depend on the author’s idea.
- Shading, or rubbing , of the main lines in whole or in part. The boundaries become less noticeable, the entire image softens. The technique is used to convey the realism of the picture.
Ideas and themes for drawing
List (approximate) of ideas and topics:
- Pet (kitten or dog): 2 large ovals - body and head, 4 smaller ones - paws. Long ears and a tail are added. The muzzle contains a mouth, eyes and nose, and a mustache. A dog may also have a bone, a cat may have a bowl of milk. The animal is painted over by shading or shading.
- Kindergarten (school): ask them to draw their friends, choosing a special color of pencils and shading for each.
- Bright abstraction : secure several pencils together with an elastic band and draw patterns in this way.
- Drawing on tinted paper : paint the paper with watercolors in the chosen color, draw on top with colored crayons or pencils.
Children willingly draw birds and animals (tit in pastels on tinted paper).
Thus, you can depict a field with dandelions on a dark green or blue sheet. To make a flower, you need to draw a circle and a lot of short strokes from it; complement it with a long stem and elongated leaves.
Master class 1
Colored pencil image of “Northern Lights” - materials:
- Colored or pastel pencils.
- Plain white (or pastel) paper.
- Paper napkins.
Northern Lights with colored pencils
Work steps:
- Place the sheet vertically.
- The lower part, about 4-5 cm, is the ground. It is painted over in any form in black or dark green.
- The northern lights appear as sinuous lines that go from one edge of the sheet to the other. The segments are about 1 cm wide, they are hatched with straight lines. For shine, 4 or more shades are used; colors can mix and overlap one another.
- With similar elements the entire space is painted over to the dark bottom.
- Finally, you need to paint the trees and bushes in black (dark green). For Christmas trees, first draw a vertical axis - the trunk; straight or slightly rounded lines extend from it to the right and left. The bushes look like dashes extending from one area in different directions.
Master class 2
Creative work “Cat with a ball”, drawing with pastel pencils.
To create this drawing you will need pastel pencils.
Preparation of tools:
- Pastel pencils.
- Pastel paper.
- Napkins.
- Nag.
The working process:
- The paper is arranged in a vertical format. The work is done in pastels, as it allows for better shading, but it is acceptable to use soft colored pencils.
- The cat's body is an oval, occupying about 2/3 of the sheet. You can immediately draw it with yellow pastels without a simple pencil sketch. Paws extend from the body - 2 more elongated ovals.
- The head is a circle, located on the body, approximately in the center of the sheet. On the head there are triangular ears, they depict 2 smaller triangles as the inner part of the ears.
- At the bottom of the sheet there is a pink ball of round thread.
Cat with a ball of pastel pencils
- First of all, the background is painted over. Light blue, blue and a little black around the edges of the paper are used. Shading can be done with napkins or fingers.
- The cat's body, paws, muzzle and upper part of the ears are painted completely yellow. In the central part of the head, as well as on the legs and body, you can add a little dark yellow to create volume. The contours are outlined in white.
- Muzzle: the nose is drawn pink with a white spot in the middle; for the eyes and mouth, curved lines should be drawn in black. The cat also has light eyebrows and long straight whiskers. The inner areas of the ears are painted with pink and white pastels. The boundaries of colors are blurred.
- The ball is painted pink in combination with purple, individual threads are drawn in pink and white. Also, the threads lie in semicircles around the cat and encircle its body and paws.
Should I send my child to a drawing class?
Today, many parents send their children to specialized clubs. Here the children feel good, as they not only learn artistic activities, but also communicate with their peers. Before you take your child to classes, you need to make sure that he is really interested in this type of art.
Should a child attend a club?
Note! Do not forget that preferences in preschool age are unstable, so today the little one wants to study at an art school, but tomorrow he doesn’t.
Step-by-step drawing for children from 6 years old
- How to draw a dragon with a pencil.
- How to draw a pear with paints.
- Step by step drawing of animals.
When children learn to draw or improve their skills, adults should adhere to the following rules:
- Try not to skimp on materials by purchasing everything your artist needs for creativity: albums, sheets, brushes, paints, pencils of different hardnesses. The quality of materials and tools must also be good - there is nothing worse than drawing with pencils that scratch the paper or felt-tip pens that dry out early in the creative process. Show your child brushes of different thicknesses and softness, as each of them is able to transfer the image to the sheet in a completely different way.
- Create a comfortable corner for your child , to which he will have unhindered access at any time and where he can sit down for creativity. For children 7 years old, drawing is already a fairly serious activity that may require solitude and concentration. Explain to them how to store paints, care for brushes, tell them about what and where they can paint.
- Never, under any circumstances, criticize the work of a young artist . You can discuss certain flaws without speaking negatively about the drawing as a whole.
- Don’t try to correct anything in your child’s work yourself ; it’s better to give him advice that he can use if he wants.
Every parent can develop the drawing talent of a 6-7 year old child!
Recommendations from psychologists and teachers
During drawing classes, teachers do not recommend overloading children, otherwise, instead of enjoying a rich and interesting life, the child will suffer from fatigue and frayed nerves. If perseverance is not one of his virtues, then there is no need to force him to study, since he must come to this on his own.
By drawing, the baby develops certain abilities: visual assessment of shape, the ability to navigate in space, and feel colors. In addition, drawing classes bring joy to children and create a positive attitude. To complete easy tasks, you can use online programs.