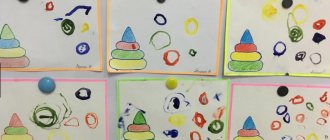
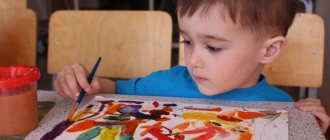
We started drawing at about 1 year old. At first Antoshka did it with finger paints in the bathroom. A couple of months later, my husband made an easel, and my son became acquainted with brushes and gouache.
Basically, the child draws whatever he wants with the materials he wants or that I provide. Free drawing should be practiced as often as possible. But don't stop there.
In this article I will share drawing ideas with children aged 1 – 3 years old, I will talk about various techniques for drawing with paints, pencils and other materials, even shaving foam.
You can also download coloring pages for little ones and templates for finger painting.
I won’t talk at length about the benefits of drawing with children. I think you already know very well that it develops the child’s imagination, creativity, improves hand coordination and fine motor skills of the fingers.
How to draw with a child 1-3 years old
In the article about applications, I talked about the book by E.A. Yanushko . This author also has a book called Drawing with Young Children (Labyrinth). This is an excellent teaching tool for parents and teachers, and it also comes with a CD with demonstration materials.
The book presents a methodology for conducting drawing classes with children 1 – 3 years old . I take many ideas from her.
Before you start drawing with your child, here are some simple tips from me:
- Show your child various drawing techniques (pokes, strokes, stamping, etc.) gradually, starting with the simplest ones.
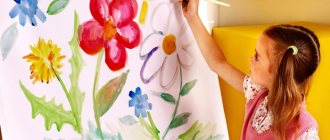
- I highly recommend buying or making your own easel for painting. It is relevant as soon as the child learns to walk.
- Draw as often as possible.
- Use a variety of drawing materials.
- Try to immediately teach your child to hold a brush and pencil correctly. But if the child stubbornly refuses to do this, do not insist.
- Give your child maximum freedom. Let the child draw what he wants and how he wants. Never demand that he draw the way you want. Below I will talk about various drawing techniques with children, but if the child refuses to do something, do not insist.
Don't correct your child! Let him draw purple skies and red grass. So what if cows don't fly and there are no fences on the rainbow? Your child's mind is still free from cliches. He is a true creator.
Text of the book “Drawing with children 4-5 years old. Class notes"
Daria Nikolaevna Koldina Drawing with children 4–5 years old. Class notes
From the author
Visual activity (drawing, modeling and applique) is one of the most important means of understanding the world and developing aesthetic perception, associated with the independent practical and creative activity of the child.
Teaching visual arts in preschool age involves solving two main tasks:
• awaken in children positive emotional responsiveness to the world around them, to their native nature, to life events;
• to develop children's visual skills and abilities.
In the process of visual activity, preschoolers improve their powers of observation, aesthetic perception and emotions, artistic taste, and creative abilities.
It is also advisable to introduce preschoolers to non-traditional drawing techniques, which can also become means of expression. Therefore, in this book we provide notes on exciting lessons in painting with gouache and watercolor paints, colored pencils and wax crayons in traditional and non-traditional ways.
The classes are organized according to the thematic principle: one topic unites all classes (on the surrounding world, on speech development, on modeling, on appliqué, on drawing) during the week.
Drawing classes for children 4–5 years old are held once a week; Lesson duration 15–20 minutes. The manual contains 36 notes of complex lessons designed for the academic year (from September to May).
Read the lesson notes carefully in advance and, if something doesn’t suit you, make changes. Prepare the necessary material and equipment. Preliminary work before class is also important (reading a work of art, becoming familiar with surrounding phenomena, looking at drawings and paintings). It is advisable to conduct a drawing lesson after the children have already sculpted and completed an application on this topic.
Drawing classes are structured according to the following approximate plan:
• creating interest and emotional mood (surprise moments, poems, riddles, songs, nursery rhymes, familiarity with works of fine art, reminders of what was seen earlier, a fairy-tale character in need of help, dramatization games, exercises for the development of memory, attention and thinking; active a game);
• the process of work begins with examining and feeling the depicted object, advice from the teacher and suggestions from children on how to complete the work, in some cases showing depiction techniques on a separate sheet. Next, the children begin to create works. The teacher can show the children a successfully started drawing and guide the actions of the children who need support and help. When finalizing a drawing with additional elements, you need to draw children’s attention to expressive means (correctly selected colors and interesting details);
• examination of the received work (children's drawings are given only a positive assessment). Children should be happy with the result obtained and learn to evaluate their own work and the work of other children, notice new and interesting solutions, and see similarities with nature.
Children 4–5 years old consciously approach the drawing process and strive to achieve the desired result. Their drawings usually depict single objects. Children draw an object in parts - first the largest parts, then smaller ones and some characteristic details. The guys gradually begin to combine several objects in one drawing, creating a plot composition; learn to choose appropriate colors. They develop strong skills in proper use of a pencil and brush.
For drawing classes you will need: drawing paper and watercolor paper, gouache paints, watercolor paints, pencils, colored pencils, felt-tip pens, wax crayons, soft and hard brushes, cotton swabs, glasses of water, wide bowls for diluting gouache, palettes, oilcloth linings, rags.
Let us list some properties of visual materials.
Gouache
gives a durable opaque layer; as it dries, you can layer one layer on top of another. Gouache paints are slightly diluted with water to pick up the paint on the brush bristles. To obtain a new color, you need to mix the primary colors, and to obtain lighter tones, white is added to the paints. Gouache can be painted on white and colored paper.
Watercolor -
delicate, light, transparent colors. Watercolor paints, like gouache paints, can be mixed to create a new color. A lighter tone is obtained by diluting the paint with water. To paint with watercolors, children should be given special, rough watercolor paper.
Colour pencils
have thick rods containing fatty particles. Their oily, shiny marks adhere firmly to any paper. When drawing, you need to press evenly on the pencil, put strokes in one direction, without gaps or dark spots. Do not use colored pencils for coloring large surfaces. It is advisable to draw with them on half of the album sheet.
Markers
filled with special ink. They give a bright, rich color. It is easier for children to draw with felt-tip pens than with pencils because felt-tip pens easily leave a mark on paper, but when drawing with felt-tip pens, you cannot get shades of color. It is advisable to draw with felt-tip pens on drawing paper.
Wax crayons
They have rich, bright colors and can be used to paint over a surface much faster than with colored pencils. By changing the pressure, you can get different tones of the same color. Wax crayons are suitable for drawing on paper, cardboard, glass and metal.
Expected skills and abilities of a child by age five:
• shows interest in drawing with different materials and methods;
• knows how to depict simple objects.
• has an idea of the shape of objects (round, oval, square, rectangular, triangular), size, location of their parts;
• knows how to create a simple plot composition from repeating and different objects;
• creates a plot composition from objects, adding various objects to them (sun, rain, snow);
• places the plot on the entire sheet of paper;
• knows how to mix paints of primary colors to obtain orange, purple, green, brown colors and knows how to choose the right colors to depict objects;
• knows how to obtain shades of colors (pink, blue, light green) by mixing gouache with white;
• uses a variety of colors in drawing;
• obtains the brightest or lightest shades by adjusting the pressure on the pencil;
• correctly holds a brush, pencil, felt-tip pen, colored greasy chalk;
• picks up paint only onto the bristles of the brush; to pick up paint of a different color, rinse the brush well in a jar of water, remove excess water with a cloth or on the edge of the jar;
• knows how to draw wide lines with the whole brush, and use the tip of the brush to put dots and draw thin lines;
• continuously paints within the outline with colored pencils, applying strokes in one direction;
• paints over the drawing, drawing lines in one direction; rhythmically applies strokes without going beyond the contour;
• correctly conveys the location of parts when drawing complex objects and correlates them by size;
• familiar with non-traditional drawing techniques (fingers, palm, poking with a hard, semi-dry brush, drawing with wax crayons and watercolors), can make imprints of leaves, create an image on a wet sheet, make an imprint with crumpled paper;
• keeps his workplace in order;
• creates a composition based on Dymkovo patterns;
• creates a composition based on Filimonov patterns;
• familiar with Gorodets products, elements and color combinations of Gorodets painting.
Annual thematic planning of drawing classes
Class notes
Topic of the week: “Parts of the body and face”
Lesson 1. There are such boys (Drawing with a simple pencil)
Program content.
Teach children to draw a happy and sad face with a simple pencil. Learn to analyze and understand the content of a poem. Cultivate a friendly attitude towards others. Learn to express and describe your feelings.
Material.
Landscape sheets, simple pencils (for each child).
Progress of the lesson
Read excerpts from A. Barto’s poem “There are such boys” to the children:
We look at the boy - He’s kind of unsociable! He frowns and sulks, as if he drank vinegar. We thought and thought, We thought and came up with: We will be, like Vovochka, Gloomy, gloomy. We went out into the street - They also began to frown. He looked at our faces, He was about to get angry, Suddenly he burst out laughing. He doesn't want to, but he laughs louder than a bell.
Ask the children:
– What was the boy like at the beginning of the poem? (Gloomy, angry, sad.)
– What did he become at the end of the poem? (Cheerful, kind, laughing.)
Invite the children to portray first a sad boy, and then a cheerful one. To do this, you need to draw a circle on the left half of the sheet - a face, eyebrows in the form of downward arches and a mouth, with the corners of the lips downward. On the right side of the sheet you need to draw a circle - a face, straight eyebrows and a smiling mouth with the corners of the lips raised up.
At the end of the lesson, ask the children when they feel sad and when they feel happy.
Theme of the week: “Vegetables”
Lesson 2. Cucumber and tomato (Drawing with colored pencils)
Program content.
Teach children to draw round and oval objects from life and paint them with colored pencils, without going beyond the outline and applying strokes in one direction. Learn to draw objects large, placing them on the entire sheet. Develop sensory sensations. Learn to distinguish and name vegetables.
Material.
Dummy vegetables (cucumbers and tomatoes), bag. Halves of album sheets, colored pencils.
Progress of the lesson
Together with the children, name, examine and feel the vegetables (models), and then put them in the bag. Next, the children will take turns looking for a vegetable in the bag, naming it, and only then taking it out.
Invite the children to carefully look at the cucumber and tomato again. Determine their shape (oval and circle) and color (green and red). Next, children draw these vegetables on a sheet of paper and color them in with colored pencils. Remind the children that strokes should be placed in one direction, without gaps, and try not to go beyond the outline of the object; It is also important to ensure that the vegetables are large and spread over the entire sheet.
At the end of the lesson, ask the children what other vegetables can be drawn.
Theme of the week: “fruit”
Lesson 3. Apple and pear (Brush painting. Gouache)
Program content.
Teach children to draw round and oval objects from life with a simple pencil and paint with gouache using a brush; draw objects large, placing them on the entire sheet; Remove excess water from the brush with a cloth. Strengthen the ability to distinguish between fruits and vegetables.
Material.
Models of vegetables and fruits (or object pictures). Half landscape sheets, pencils, gouache, brushes, glasses of water, rags (for each child).
Progress of the lesson
Offer to play in the store. Children, in turn, need to approach the table where fruits and vegetables are laid out and “buy” what the adult asks: “Masha, buy a red vegetable.” Masha needs to look at the table, name a red vegetable (tomato or carrot, etc.) and take it. Then the adult asks: “Dima, buy a yellow fruit.” Dima needs to name what he chose (banana or pear, etc.) and take this fruit.
Then invite the children to draw an apple and a pear with a simple pencil, and then paint over them with gouache. After dipping the brush into the water, you need to blot it with a cloth to remove excess water. And excess paint from the brush needs to be removed on the edge of the jar with gouache. It is also important to ensure that the fruits are large and spread over the entire sheet.
At the end of the lesson, ask what other fruits you can draw.
Theme of the week: “Berries”
Lesson 4. Cherry branch (Drawing with colored pencils)
Program content.
Teach children to draw and color a branch with berries with colored pencils; place the drawing on the entire sheet. Learn to understand and analyze the content of the poem.
Material.
Half landscape sheets, colored pencils (for each child).
Progress of the lesson
Start the lesson by reading G. Boyko’s poem “Cherry”:
In early spring this year I planted my own cherry tree. Now look: Overtaking me, My cherry has grown over the summer.
Ask the children:
– At what time of year did the girl plant the tree? (In early spring.)
– What was the cherry tree like at first? (Small.)
– Did the cherry tree grow quickly? (Yes – I grew up over the summer.)
Offer to draw the berries that are ripe on this tree. Show on a separate sheet of paper how to first draw two branches connected at the top and diverging downwards in different directions, and at the end of each branch draw circles - berries. On the side of the branch, draw an oval sheet of dots. Children draw a cherry according to this pattern and color it in with colored pencils.
Theme of the week: “In the forest”
Lesson 5. Mushroom (Brush painting. Gouache)
Program content.
Teach children to draw from life objects consisting of an oval and a semi-oval; create a simple plot composition. Strengthen the ability to remove excess water on the brush with a cloth. Continue learning to imitate movements in accordance with the text of the poem.
Material.
Dummy mushroom. Halves of album sheets, simple pencils, gouache, brushes, jars of water, rags (for each child).
Progress of the lesson
Invite the children to go for a walk in the forest. Stand one after another and quietly “walk through the forest.” Ask the children: “What can we see in the autumn forest?” (Trees, bushes, berries, mushrooms.)
Offer to recite a poem and pretend to pick mushrooms. You need to slowly walk through the forest, bend down and put mushrooms in an imaginary basket:
The children walked and walked and walked and found a white mushroom. One - fungus, Two - fungus, Put it in the box.
Ask the children what a box is. (Basket.)
Invite each child to draw one mushroom. Examine a dummy mushroom with your children and determine that it has a stem and a cap.
First, children draw an oval leg with a simple pencil, a semi-oval cap on top and paint over it with gouache. Remind the children that after dipping the brush into the water, they need to blot it with a cloth to remove excess water; Excess paint from the brush must be removed on the edge of the jar with gouache.
Tell the children what they can add to the drawing: draw a sun, grass in which a mushroom grows.
Theme of the week: “City Birds”
Lesson 6. Dymkovo birds (Brush painting. Gouache. Team work)
Program content.
Cultivate interest in the art of Dymkovo masters. Teach children to highlight and draw with the tip of a brush the elements of Dymkovo painting (rings, dots, sticks, wavy lines). Continue to learn how to remove excess water on the brush with a cloth. Develop creativity and imagination.
Material.
Clay Dymkovo toys and illustrations with their images (young ladies, horses, geese, chickens, roosters, ducks); samples of elements of Dymkovo painting. Silhouettes of clay bird toys cut out of paper, a sheet of colored paper, gouache, brushes, jars of water, rags (for each child).
Progress of the lesson
Tell the children that in the village of Dymkovo near Moscow, people came up with the idea of making funny toys out of clay and painting them with bright colors.
Show the children examples of elegant Dymkovo young ladies, dashing horses, ducks, chickens and roosters. Tell us how these toys were sculpted from clay, and then the crafts were painted with crimson, yellow, orange, blue, and brown paints.
Ask the children what patterns the craftsmen drew on clay toys (rings, dots, intersecting lines, wavy lines).
Give children painted samples and cut-out paper silhouettes of geese, chickens and roosters. Show how to draw fine lines with a brush tip.
Invite children to become Dymkovo craftsmen and make the birds elegant, decorating them with rings, dots and lines.
At the end of the lesson, create a composition of the poultry yard on a sheet of colored paper.
Topic of the week: “Migratory and resident birds”
Lesson 7. Owl (Drawing with colored pencils)
Program content.
Teach children to draw a bird using an oval and a circle. Introduce the distinctive features of an owl. Develop imagination.
Material.
Subject picture with the image of an owl; half album sheets, simple and colored pencils (for each child).
Progress of the lesson
Read the nursery rhyme to the children:
It’s dark in the forest, everyone has been sleeping for a long time. One owl does not sleep, sits on a branch, looks in all directions, and how it will fly!
Look at the picture of an owl with your children. Tell us that an owl is a big bird with huge eyes. At night she hunts mice and sleeps during the day.
Invite the children to draw an owl. To do this, you need to draw a circle (head) with a simple pencil, and draw an oval at the bottom, narrowed downwards. On the head draw large eyes, a beak, and ears. At the bottom of the oval are the paws and the branch on which the owl is sitting. When the owl is ready, you need to paint it over with an orange, yellow or brown pencil.
Theme of the week: “Autumn”
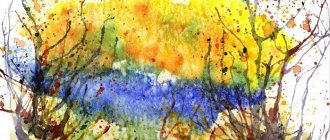
Lesson 8. Autumn leaves (Leaf prints. Gouache)
Program content.
Teach children to make prints with leaves. Learn to mix red and yellow gouache to get orange. Learn to distinguish and name trees, recognize leaves.
Material.
A landscape sheet, fallen leaves from different trees (maple, birch, rowan, poplar, oak), gouache, a wide brush, a jar of water, a sheet of paper or oilcloth (place under the leaves to be painted).
Progress of the lesson
Ask the children to bring some fallen leaves for this activity ahead of time. Read the poem by I. Evensen to the children:
Leaves are falling, falling, leaves are falling in our forest. Red and yellow leaves curl and fly in the wind.
In class, look at the autumn leaves with your children and determine which tree each leaf comes from.
Then each child takes one leaf, places it with the smooth side on the oilcloth and paints the underside of the leaf with gouache of the same color. To make an orange leaf print, teach children to mix red and yellow paints. While the gouache has not dried, the painted side of the leaf is applied to a clean sheet of paper and pressed tightly so that it is printed in its entirety. The leaf cannot be moved.
This way the child can make several prints of different leaves. At the end of the lesson, ask the children how many leaves each of them drew.
Theme of the week: “Dishes”
Lesson 9. Cup (Drawing with cotton swabs. Gouache)
Program content.
Teach children to draw a large piece of utensils from life with a simple pencil, placing it on the entire sheet. Learn to choose the appropriate colors yourself, trace the outline drawn in pencil with dots using a cotton swab with gouache; decorate the product with dots drawn with a cotton swab. Practice forming the plural of nouns.
Material.
Cup, plate, pan (you can take toy dishes), ball. Landscape sheets, simple pencils, cotton swabs, gouache, jars of water (for each child).
Progress of the lesson
Show the children a saucepan, a plate and a cup and ask how these objects can be called in one word. (Dishes.)
Invite the guys to play. Children stand in a circle, you throw the ball to one child and name one piece of utensils, the child throws the ball back and names many of these items. (Cup – cups.)
Then you throw the ball to another child, etc.
Invite the children to look at the cup again. Show how to draw on a piece of paper with a simple pencil a cup in the form of a rectangle, slightly tapering downward, and the handle of the cup. Then each child takes a cotton swab by one end, moistens the other end in water and puts gouache of the desired color on it. Trace the pencil outline with dots. You can make imprints on the cup in the form of dots on the tips of a cotton swab. You can use different paints, but carefully rinse the tip of the cotton swab.
Theme of the week: “Food”
Lesson 10. Candy (Drawing with colored pencils)
Program content.
Continue teaching children to draw round and oval objects. Develop creativity and imagination. Learn to understand and analyze the content of the poem.
Material.
Half of the album sheets, simple and colored pencils (for each child).
Progress of the lesson
Read to the children an excerpt from S. Mikhalkov’s poem “Sweet Tooth”:
There is no greater joy in childhood, seeing these sweets, sitting closer to them and eating everything you see. Pounce and eat!
Ask the children what sweets they would like to eat. (Candy, cakes, ice cream, etc.)
Invite the children to draw sweet, tasty round and oval-shaped candies; decorate their candy wrappers so that you immediately want to eat these candies.
How to draw with your child
The more different art materials you use, the better.
You need to start with the easiest to learn (for example, finger paints), eventually reaching regular pencils.
We draw on:
- plain paper
- old wallpaper,
- easel,
- magnetic board,
- plaster figures for coloring,
- wood, plywood,
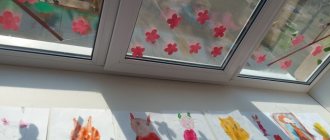
- fabrics,
- tiles in the bathroom and in the bath itself.
For drawing with children 1 – 3 years old, you can use the following materials :
- Finger paint;
- gouache, watercolor (and, accordingly, brushes of different sizes);
- felt-tip pens (water-based and regular);
- crayons (wax and regular);
- wax pencils;
- dry pastel;
- pencils (preferably soft ones);
- gel and ballpoint pens;
- foam rubber, sponges;
- cotton swabs and cotton wool;
- stamps;
- semolina;
- shaving foam.
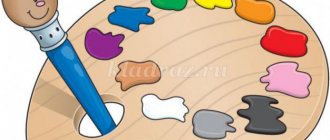
You will also need a glass for water (preferably a sippy cup) and a palette for mixing paints.
Drawing techniques with paints and pencils
All drawing techniques involve the use of different materials depending on the age and capabilities of the child. We give paints, crayons, felt-tip pens to very young children, and pencils, etc. to older children.
I list all the techniques in order of increasing complexity .
Free drawing
My son calls this kind of drawing “scribbles”.
We introduce the child to drawing materials and give him the opportunity to experiment. At the same time, there is no need to give any tasks to draw something specific.
Practice free drawing as often as possible at any age of the child. It perfectly develops imagination.
Painting a sheet
We give the child paints, crayons, etc. and we suggest drawing:
- grass for the cow,
- water for fish,
- sand, snow.
The child needs to paint over the sheet, and not draw individual blades of grass, etc. Even a one-year-old can cope with this task.
paint rollers here - plain or shaped.
Shading an element
We draw a base (small images of animals and various objects) and ask the child to hide them by painting them over:
- hide the mouse, bunny, fish, bug;
- hide the moon and stars, the sun, the car.
With very young children it is interesting to do this with a sponge; with children over 2 years old it is useful to paint over elements with pencils.
Drawing points
Pre-draw the basis for the drawing - a bird that the child will feed, a bush on which berries will grow, etc.
Invite your child to draw: grains, berries, snow, raindrops, a bagel with poppy seeds, freckles, polka dots on a dress.
Drawing lines
- Direct: rays of the sun, stems of flowers, tops of carrots, fence, cage, path, rails, paws of bugs, needles of a cactus, teeth of a comb.
- Wavy: boat waves, worms, octopus legs, car tracks, hair.
- Broken: slides, a fence, icicles, a road with turns, thorns for a hedgehog.
Draw circles, ovals
Balls, apples, candies, Christmas tree decorations, beads, balloons, rowan berries, berries, bubbles, eggs, cones.
Drawing Spirals
Invite your child to draw: a snail's house, smoke, a bee's flight, curls, sheep's rings, threads.
Finishing the drawing
Antoshka really likes to play this game: I say that one boy drew different figures, but did not finish them, and I suggest that my son finish them. He does this with great pleasure. This is how we finish drawing:
- geometric figures;
- I draw a road (a broken line) and Antoshka repairs it,
- any simple and understandable drawings.
Drawing simple stories
This is the most difficult stage in mastering drawing. Here the child combines different drawing techniques according to the instructions of an adult.
Take turns asking your child to draw different elements that will eventually turn into something specific. But give your child as much freedom as possible.
The purpose of such drawing is to show the child how the finished image appears step by step.
Dotted coloring pages
The elements of each outline are given in a simple form - the child just needs to trace the lines depicting certain geometric shapes along the contour. An older child will be able to color the characters or try to complete the element on their own, continuing to draw it after this sample.
Game tasks will help coordinate the movements of children's hands and teach them how to properly hold a pencil and regulate the pressure when drawing.
The child is asked to trace the outline of the drawing using dots and dotted lines, and after the drawing takes on a holistic appearance, color it at his own discretion.
Sponge painting
The child can hold the sponge with his hands or with a regular clothespin.
Simple sponge painting:
- waves, sand, snowy landscape, grass, paths - by smearing;
- snow, leaves - poked;
- we hide bugs, fish, etc. - by painting.
Sponge stamps . Draw the shape you want on the sponge - a triangle, a tree, or even letters. Cut it out. Invite your child to dip a sponge in gouache and make an imprint on paper.
Drawing with semolina
I talked about drawing with semolina in articles about games with semolina, as well as about applications for children 1 – 3 years old. There are two ways to draw with semolina:
1 way . You need to pour a little semolina onto a surface with sides: a tray, a baking sheet, a lid from under a large shoe box. And then the child draws simple images with a finger or a brush - waves, paths, circles, etc., makes fingerprints or various objects.
Method 2 . Print out a coloring book for the little ones. Invite your child to apply glue to the image and sprinkle it with semolina. It will be more like coloring with semolina. But you can simply give your child a brush with glue and let him randomly apply it to the sheet, and then pour in semolina, shake it and see what pattern he gets.
I paint semolina with gouache. Instead of semolina, you can use sand for children's creativity.
From simple to complex
After mastering the simplest drawing skills, it is appropriate to move further in this direction. Take, for example, the subject of the image is the cat Maruska, who lives in the neighboring yard and often basks in the sun next to the playground while the children are out for a walk. The kids probably had a good look at it a long time ago. And to reduce problems with drawing, you can offer young artists a master class, which provides detailed step-by-step instructions. Although drawing together will bring great benefits. For 4-year-old children, it is very important to observe from the outside how adults themselves do what they ask the kids to do.
Coloring pages for kids
On the Internet, I have repeatedly come across the opinion that children should not be given coloring books before school. Allegedly, they interfere with the child’s creative development. Some parents are simply afraid to give coloring books to their children, while others have a real phobia.
I don't see anything wrong with coloring books . But rather only benefit if used in moderation. And give the main priority to free drawing, which I mentioned above.
Offer your kids simple coloring books that use 1-2 colors. From 1.5 years old, you can try coloring books that involve the use of several colors. But all the same, the elements in them must be large. And you need to paint them, of course.
But it’s better to color small images with pencils or felt-tip pens, because the child simply won’t have the patience for large ones.
At 1–2 years old, children are also interested in water coloring books (Labyrinth, My-shop).
There are ready-made regular coloring books on sale (Labyrinth, My-shop).
You can also DOWNLOAD COLORING PAGES for kids in one file.
What do children draw?
Most often, drawing for 4-year-old children is connected with what surrounds them, what they know well, are familiar with and are interested in. In addition, the skills and capabilities of the children should be taken into account. Indeed, in case of failure, many children deeply experience their imperfection, their inability to do something well. Therefore, drawing for 4-year-old children is best to focus on what is around them: nature, pets or favorite toys. There are many ways to depict a chosen subject in a painting.
Drawing stamps
All children draw with stamps with great pleasure. You can make them yourself. For example, from sponges for washing dishes, vegetables. You can use improvised objects and toys as stamps.
Or you can buy ready-made stamps or even entire drawing sets (Labyrinth, My-shop).
I really hope you found this article helpful. Draw with your child and then he will also love this activity. Which drawing method does your child like best?
Similar articles:
- Applications for children 1 - 3 years old
- Games with semolina
- Games with cereals, pasta and beans
Print simple tracings for children 3-4 years old
Outlining will help a 3-4 year old child prepare his hand for drawing, and later for writing. The presented tasks will help your child train his fingers! The child will not be bored doing them. The lessons are selected according to age, interesting pictures will attract attention. The presented outlines will appeal to both boys and girls.