For children from one to three years old
Crafts that develop fine motor skills will play an important role in thinking, the ability to analyze and reason. When it comes to babies who have only recently begun to walk independently, it is important to consider that their perseverance is minimal.
And the ability to correctly hold and manipulate a pencil or scissors in your hands or sculpt figures from plasticine is so rare in everyday life that it is equated to something especially admirable. That is why kids make crafts under the close supervision of an adult.
The goal of an adult when doing joint needlework is to guide, give an idea and provide the necessary tools and materials. During the work, an adult must not only show what and how to do, but also discuss all the actions performed. At the same time, clearly stating all the names and names of the processes.
You can forget about thorough correctness, evenness and beauty when working with one-year-olds. The main thing is that this form of communication brings positive emotions to both, and there is a desire to continue.
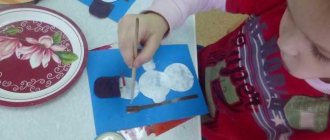
On the Internet you can find many photos of educational crafts, the sight of which will inspire you to create them. In this case, a wide variety of materials are used, ranging from leaves, twigs, paper and to specialized paraphernalia.
Cutting pictures
These are the very first puzzles that you can make for your baby. They are good because they do not require much time, but they bring great benefits.
First puzzles. Cardboard puzzles are very useful toys that develop a child’s intelligence in several directions at once. By putting together a puzzle, a child learns to think logically, trains imagination and spatial perception. Equally important are perseverance, patience, the ability to concentrate, and the ability to finish what you start. If your baby is still too small and cannot assemble store-bought puzzles, make homemade ones for him. It couldn't be easier to do this. Take some cards and cut them in half. It’s good if the plot of the picture is close and interesting to the baby. First, give the baby two parts of one postcard and offer to connect them together to make a whole picture. When your child can easily complete the task, mix the halves of two or more postcards. The task will immediately become more complicated, because first the baby will have to find two parts of one postcard, and only then connect them. For the clever little ones, increase the number of cards and cut them into six or more pieces. When the baby learns to handle fragments of the correct, identical shape, cut the picture into pieces of different shapes and sizes.
Circles-squares. Cut out large geometric shapes from colored cardboard: circle, square, rhombus, triangle, rectangle. Cut them in half. Invite your one-and-a-half-year-old baby to put together a figurine in two parts, and at the same time remember what it is called. Older kids will be able to independently select the necessary fragments and make figures from them. You can make several shapes of different colors. Then the baby will need to first select all the fragments of the same color, and then put them together into the desired shape. This simple game will solve several didactic problems at once: it will introduce you to color and shape, and train spatial thinking and fine motor skills. You can also talk to the baby about the whole and the parts by dividing the cardboard “cake” between the doll and her “guests.”
Whose tail? For this game you will need pictures of birds, fish, animals from old books, magazines, postcards. Cut out the figures, stick them on cardboard and carefully cut off the animals' tails. That's it, the game is ready. Lay out the tailless animals and their “accessories” in front of the baby and tell a fairy tale about how the animals got tired of their tails and decided to swap with each other. They changed and changed, all the tails got mixed up, and now they can’t find whose tail is whose. Of course, the kid will agree to help them and find the loss. You can get creative and play differently - pick up new tails for the animals. And at the same time, talk about why tails are needed in general.
Collect the bunny. For this game, draw silhouettes of bunnies (dragons, cars, etc.) on sheets of cardboard in six colors, cut them out and cut them into 4-6 pieces. Make a cube with sides of different colors and six small cardboard cards of the same colors. Let the child choose what color bunny he will collect. As a reminder, he receives a card of the same color. Let's start the game. We throw the dice one by one. If “our” color comes up, we take a piece of “our” hare. If not, we skip the move. The player who puts together the picture of his color the fastest wins. When your child can easily cope with the game, invite him to collect two or even three pictures at the same time.
Windows. Select several large, colorful pictures from magazines, preferably with large details. Using a large stencil, draw several circles or squares in different places of the picture and cut them out. Paste the picture with holes onto a sheet of white paper. The baby puzzle is ready. Invite the baby to find where the pieces “fell out” from. The younger the child, the larger the figures should be and the smaller their number. If your baby likes to put the fragments in their places, make a whole series of similar puzzles for him, increasing the number of cut out fragments and decreasing their size. Fortunately, the production of such games takes only a few minutes.
For children from three years old
Most children start kindergarten at three years old.
At this age, they are already more independent, since they can do a lot themselves: draw specific objects, cut out elements with straight sides. Fine motor skills are already quite well developed. In this regard, they are able to cope with more complex crafts. Difficulties may arise in the first stages, but each time it will turn out better. Movements will become more harmonious and confident.
Educational crafts for kindergarten can be made from various materials: paper and cardboard, plasticine, glitter and small beads, feathers, pine cones and acorns. Working with small elements will help in the future with practical issues, such as tying shoelaces, fastening buttons on a blouse, and so on.
Master class “Multifunctional aids for kindergarten”
Municipal educational institution "School kindergarten-s. Katravozh named after Hero of the Soviet Union A.M. Zverev"
CONSPECT “Multifunctional aids for kindergarten”
Teacher speech therapist
Serashova Alena Petrovna
2018
Subject:
"Multifunctional aids for kindergarten."
Target:
Enrichment of teachers’ practical experience in making manuals with their own hands.”
Tasks:
— introduce the process of making manuals.
- provide knowledge about various methods of using benefits taking into account the Federal State Educational Standard.
- expand knowledge about the variety of games with these aids, the meaning and ways of manipulating them.
Expected results of the master class.
— mastery by teachers of preschool educational institutions of methods of producing manuals.
- mastering new ways and methods of using benefits, expanding knowledge about how to manipulate them.
Equipment:
manuals “Clock with one hand”, “Clock with two hands”, “Dry pool”, “Magic box”.
Progress of the master class:
The issue of organizing the subject-developmental environment of preschool educational institutions is particularly relevant today. This is due to the introduction of the new Federal State Educational Standard (FSES) in preschool education. As you know, the main form of work with preschoolers and the leading activity for them is play. That is why we are experiencing increased interest in updating the subject-development environment of preschool educational institutions. You can make the manuals yourself. What is the advantage of handmade manuals? As a rule, they are mobile and multifunctional!
Mobility
— this is the ability of the manual to quickly change, to change the conditions of the game.
Multifunctionality
-Performance of several different functions by the aid.
What can we do with our own hands?
Manual “Large clock with one hand”
The manual is made from a sheet of plywood, an even circle is cut out. An arrow made of thick cardboard is attached to the middle of the circle so that it rotates freely in different directions. Pictures are attached to the clock using paper clips and, if necessary, change depending on the game.
This manual helps solve many problems: develop the ability to classify, find unnecessary things, enrich vocabulary, develop speech, develop logical thinking, develop attention, memory, automate sounds, conduct speech therapy examinations, etc. Let's take a closer look at the games with this guide:
- “Time of year” - pictures are placed on the clock - signs of the season, depending on the season, among them are pictures - signs of some other season. The child is given the task - Find the extra pictures. He moves the arrow to the extra picture(s) and removes it (them), while explaining why it (they) is extra.
- “Geometric shapes” - on the clock there are pictures with objects of some geometric shape (for example, round ones: a ball, an orange, a wheel, etc.) and among them there are several extra ones that are not round in shape (a roof, a cube), the child finds the extra pictures and explains why they are extra.
- “Pets”, “Wild animals”, “Fruits”, “Vegetables”, “Transport”, “Berries”, “Trees”, “Flowers”, “Dymkovo painting”, “Gzhel”, etc.. By type In the game “Geometric Shapes”, several extra pictures are placed on the clock, the child draws the arrow and explains why the pictures are extra.
- “Name it in one word” (classification). The child rotates the hand and names all the pictures on the clock, and then names them in one word: “Animals”, “Transport”, “Berries”, “Fruits”, “Vegetables”, etc.
- “Time of day” - the child rotates the hand and uses the pictures on the clock to explain what time of day it is, what happens at this time of day.
- “Tell according to plan” - pictures are placed in order on the clock (story plan, like a “Mnemotable”) according to which the child, rotating the arrow, tells the story.
- “Memorizing a poem” - a schematically depicted poem (supporting pictures) is located on the clock; when memorizing and telling the poem, the arrow rotates, and the child recites the poem step by step.
- “Automation of sounds in words” - name the words by sound, the arrow rotates and the words are called (can be used for speech therapy examination of sound pronunciation).
- “Find the shortest (longest) word - the arrow points to the desired picture.
- “Find a word with a given sound” - the arrow points to the desired picture.
Manual “Clock with two hands”
The manual is made in the likeness of a large clock, only here two hands are attached in the center. This manual is used to develop phonemic awareness. The child rotates two arrows and points them to two pictures according to the assignment. Games used:
- Differentiation games: find two similar words (crack-lac)
- Find the two longest words
- Find the two shortest words
- Find two words for the given sound
- Find two words where there is no sound.
Manual "Dry pool"
To make a manual, you need a box; any seeds cannot fit in it: beans, peas, wheat, etc. The pool serves for relaxation and at the same time, educational tasks are solved, fine motor skills are developed. Various objects are hidden in this pool, depending on the game. Games you can use:
- “Find Pets Only”, “Wild”, “Vegetables Only”, “Fruits Only”, etc.
- “Hide only domestic animals”, “Only wild”, etc.
- “Find toys with a given sound”
- “Choose pebbles from grain”, “Choose beans from grain” (beans) - any games for sorting objects.
Manual "Magic Box"
The manual is made from a candy box. Through windows are cut out in the molds. According to the size of the box, blank pictures are prepared on different topics (pets, wild animals, berries, vegetables, fruits, etc.) The pictures must match the windows and be visible through them. Games:
- “Name the pictures” - two players play. The player throws a light, small ball, whichever window the ball lands in, he names that picture, and so on until all the pictures are named.
- “Name the Pictures” is a game used to automate sounds in words. The child throws the dice into the windows, the number of dots on the dice, the number of times he names the picture that the dice lands on.
- “Name it in one word” - the child names all the pictures, putting a chip in each box, and then names the pictures in one word.
For children from 6 years old
For older children who skillfully handle scissors and other tools, we can offer educational crafts made from felt. This type of work is especially interesting.
In the process, skills in working with scissors are consolidated, interaction with a needle, thread and additional materials develops. It also trains fine motor skills at a higher level, improves artistic taste and improves patience and perseverance.
MAGAZINE Preschooler.RF
Multifunctional didactic aids for the comprehensive development of preschool children.Compiled by: Ekaterina Petrovna Gusakova, teacher at MKDOU No. 4 in the city of Efremova, Tula region.
I believe that in the modern world, hand-made manuals continue to be indispensable in the work of teachers with preschool children. This is a modern, effective game-based learning technology and an excellent assistant in work.
The toy, created with your own hands from high-quality and safe materials, trains tactile and visual perception, develops hand motor skills, speech, allows you to master the skills of role-playing games and expand your ideas about the world around you.
The results of my pedagogical creativity in this direction were the creation of multifunctional teaching aids for the comprehensive development of preschool children
The most interesting and favorite toys are those made by hand.
To sew my first teaching aid, I emptied my grandmother’s chest and found funny buttons, ribbons, and scraps of fabric of different sizes and colors.
Multifunctional teaching aids allow you to:
- form ideas about animals (structure, appearance);
- practice practical skills in fastening and unfastening clothes (buttons, snaps, Velcro, hooks, magnetic fasteners);
- consolidate knowledge about color; about geometric figures;
- form ideas about quantity (many - few, one - many, pair);
- teach counting, construction, spatial orientation;
- form ideas about size;
- develop speech and speech breathing, expand and enrich vocabulary
- develop attention, memory, imagination.
I use such manuals in individual and subgroup work from an early age, gradually complicating the plot with removable elements and adding various fasteners.
With the help of these manuals, children reinforce the names of shades of primary colors, geometric shapes, and in the future they will be able to study ordinal counting, writing letters and numbers.
The value of these benefits lies in the fact that they can be used in educational activities and in children’s independent activities.
Tactile and aromatic bags Playing field Wonderful bag
Felt toy Tablet fairy tale.
tactile and aroma bags
This manual consists of bags with various fillings:
- cereals (rice, buckwheat, peas)
- small items (paper clips, coins, buttons, etc.)
- aromatic fillings (tea, coffee, orange, lemon peels.)
The contents of the bags can be changed periodically by adding different fillers.
This wonderful bag promotes the emotional development of babies, forms an idea of the shape and size of objects, and improves finger motor skills. Removable parts are attached to the base using hooks, Velcro , and buttons.
Playing field
Develops logic and strategic thinking.
For theatrical activities, which are very important in the development of children, I made a “tablet” . It allows me to solve many pedagogical problems related to the expressiveness of a child’s speech and artistic and aesthetic development. The “Tablet” is an inexhaustible source of developing feelings, experiences and emotional discoveries, a way to become familiar with spiritual wealth.
It is designed so that children not only listen to fairy tales, but also see their heroes. When telling a fairy tale, we place the characters on the “tablet” in the order in which they appear, in accordance with the plot. Reinforce the concept of wild animals. The maze is an excellent exercise for developing fine motor skills and hand-eye coordination. Didactic game “Whose tail?”
Educational board game: “Funny rubber bands”
During the game, logical thinking, observation, attention, memory are developed, fine motor skills and reaction speed are improved, and it helps to consolidate knowledge of colors and counting skills.
A felt book is an educational tool with interesting elements that allows you to solve child development problems. All elements on the game pages are secured with Velcro, buttons, hooks, etc.
The knowledge gained during play helps children in everyday life.
This is the educational book I made for children. Bright pictures and interesting tasks await children on the pages of this book. Each page is a tablet, which is an independent multifunctional manual.
A gaming “tablet” is the basis for games with sets of flat felt figures. It alone will replace a dozen educational games.
The educational “tablet” made of felt is designed for both younger preschool and older children.
It develops:
- coherent speech
- spatial imagination
- logical thinking
- fine motor skills.
- mathematical and creative abilities
Replenishes children's vocabulary.
You need to guide the button through the maze. The “Balloons” tablet develops visual
orientation to the color of objects by comparison
This task will require attention from the child,
concentration and manual dexterity.
Tablet “Christmas tree”
You can play different games on the Christmas tree:
hang toys on hooks; thread the garland through the rings (lace).
- Geoboard develops a child’s cognitive abilities: spatial and associative thinking, attention, memory.
Promotes psychosensorimotor development (stretching, putting rubber bands on buttons - useful sensory “charging” for little fingers!). The geoboard offers many options for independent use, which means it develops the imagination and creative potential of children.
-take off the gifts and see what has changed.
Happy Counting tablets develop the ability to correlate numbers and quantities of objects.
You can do a lot with your own hands, if you just want to! When you see joy in the eyes of children, you receive such a charge of positive emotions that you simply cannot stop the flight of creativity and you continue to delight your preschoolers with more and more surprises.
| Next > |
Tips for successful work
Before you begin your chosen work, you should listen to the following tips:
- Prepare all required materials in advance.
- Scissors for children should first of all be safe, so they are suitable only with rounded ends.
- Consider protecting your work surface. It is better to cover it with oilcloth, and put special plastic boards for modeling.
- When painting with paints, you should make sure that the water is not very cloudy. After completing the drawing, it is good to cover the paints to prevent them from drying out, and wash your hands well.
- When sculpting, if there is no goal to dry the material, you need to wrap it in a suitable material: clay - in a piece of damp cloth, plasticine - in plain paper.
- Markers should be stored with their caps tightly closed.
- It is good to sharpen pencils with a sharpener.
Examples
Below are several options for educational crafts for children of different ages. They can be performed both at home and in a kindergarten group.
Shark made of clothespins and paper
Necessary materials:
- pin;
- colored paper;
- glue gun;
- toothpick;
- felt-tip pen.
Progress:
- Cut out two parts from blue paper: the upper part of the shark and the lower part. Draw an eye on the top.
- Cut out a small fish from orange paper. One that fits in a shark's mouth.
- Cut a small stick from a toothpick and glue an orange fish to its top. And glue the free part of the stick to the edge of the inside of the lower part of the shark.
- Take a clothespin and glue blue parts to its ends to make a shark. It turns out that when the clothespin is opened, the shark will begin to open its mouth, and the fish will try to escape. But when closed, it will again be eaten by predatory fish.
DIY educational toys: Development of fine motor skills.
I offer a selection on the topic “Toys for the development of fine motor skills.” Toys that you can make with your own hands. All the photographs below are our creations with my daughter.
Let's start with toys and aids that do not require special skills:
1. “Box of cereals” - took a shoe box, small shovels, rakes, a shaving brush, containers with cereals (we have semolina, millet, rice), cut out geometric shapes from cardboard and attached “handles” to them - lids from plastic bottles. You can sprinkle it, draw on cereals, bury small toys, learn to “write” letters and numbers with your finger, etc.
2. Continuing the theme of using shoe boxes - “Box with lids” . We kept our first cars in such a box for a long time. The child practices screwing and unscrewing the caps; you can also include learning colors (screw them according to color). We made it like this: a shoe box, self-adhesive film (we made an applique), cut necks from plastic bottles (screwed into the lid from the inside), caps from plastic bottles for screwing on.
3. “Feeding piggy banks” - from plastic bottles and jars you can make piggy banks that children will be happy to “feed”. We have a pig (I covered it with felt, but we could have covered it with self-adhesive tape), and the very first ones were animals made from jars of finger paints (here, in addition to fine motor skills, we went through who eats what).
4. Games with clothespins (and for older children, with paper clips) - these are easy to make from paper or cardboard.
5. “Plasticine pictures” , or rather blanks for reusable drawing with plasticine - simply printed out the pictures and laminated them in the online printing salon. Now you can “draw” with plasticine (white peas for fly agarics, black peas for ladybugs, apples on an apple tree, a fence in front of the house, etc.)
6. “Home sandbox.” A home sandbox has a lot of advantages: you can play with it all year round, you don’t have to worry about your child’s health (outdoor sandboxes are very popular with cats, and at home the sand from the quarry is calcined), sand helps adults relax too, and I personally really like sand therapy (read in the Internet).
7. Finger puppets. You can sew them, or you can make them out of paper.
You will need sewing skills to make the following toys:
8. “Tugs and tugs” - there can be a lot of options for their execution, we made one for our car seat. I sewed different textured, multi-colored scraps, ribbons, and laces with beads. And I sewed an owl toy for my little niece.
9. Iskalochki - toys made of fabric with a transparent window, filled with beads/rice and small parts. Children go through the treasure hunt and look for the treasures hidden in it. There are many options on the Internet, here is our turtle.
10. Toys with fasteners. There are various designs: matryoshka dolls, educational cubes, books, rugs. Personally, I like the rug option the most, because it is very practical - it’s convenient to take it with you to nature, to the country house, to the beach.
I hope this collection is useful to someone.
Cave
You will need:
- thick cardboard from a box;
- large sheet of paper;
- glue gun
Step-by-step instruction:
- Cut out three elements from cardboard: a free-form base and two curved arcs of different sizes.
- Place the arcs perpendicular to the base and secure with hot glue.
- Crumple the paper and cover the resulting structure with it, leaving an entrance on one side.
- The voluminous, spectacular craft is ready. You can place animal figures inside, placing them on a pile of straw or on pebbles.
Mouse from a sleeve
Required tools and materials:
- sleeve;
- cardboard;
- colored paper;
- paints;
- glue;
- scissors.
Progress:
- Paint the bushing gray and let dry. This will be the body of the little mouse.
- Cut out ears and paws from gray cardboard.
- Make cuts in the sleeve to fix the cardboard elements in them.
- Cut an oval out of pink paper and glue it to the base. This will be the tummy.
- All that remains is to draw the eyes with eyelashes, a nose and two teeth.
Educational crafts for kids can be good helpers in studying many topics. For example, when studying shapes, you can make a chest of drawers from matchboxes and label each one with a certain meaning: circle, triangle, square. Then cut out these shapes from colored cardboard. This way the child will learn not only to cut out the simplest shapes, but also to sort them correctly.
Do-it-yourself teaching aids
ELENA KOSENOK
Do-it-yourself teaching aids
I would like to present to your attention teaching aids made by myself.
Didactic game
"GREEDY"
Algorithm for making a manual: to make a manual you need 4 sheets of multi-colored cardboard; cut out white squares - “windows”, stick them on cardboard, print out small words - mine, mine, mine, mine, cut and paste at the top, you get a “multi-story building”. Then make paper envelopes for cards with images on lexical topics (pictures can be found on the Internet or printed). All the manual needs to be laminated and the game is ready.
Goal: Formation of skills to coordinate pronouns with nouns.
Age: The game is intended for children from 4 to 7 years old, no more than 4 people can play it.
What is included in the set: 4 cards - houses, small cards, instructions for the game.
Instructions; The adult invites the children to take one card each - a house. The teacher takes small cards and shows them to the children, naming the object: “What is this?” - “Coat”, “Whose coat?”, the child must answer: “My coat”, etc. The game ends when the children put all the small cards on the house map.
Game options:
Option I:
Invite your child to name objects about which you can say “this is mine” (my pencil, my ball, my teddy bear, my house, my kitten, etc.); “this is mine” (my doll, my group, my bag, my car, etc.); “this is mine” my dress, my tree, my coat, my mirror, etc.); “this is mine” my pants, my shorts, my glasses, my watch, etc.).
Option II
Select the pictures and invite the child to arrange them into houses: mine, mine, mine, mine. When unfolding, let the child say, for example: my doll, my dress, etc.
Developmental lotto
"PREPOSITIONS"
Algorithm for making a manual: to make a manual, download maps and diagram cards from the Internet, print them, laminate them and play with the children.
Objectives: to teach children to understand the spatial meaning of prepositions;
form an idea of a preposition as a separate word;
learn to make sentences based on pictures.
Age: The game is intended for children from 4 to 7 years old, no more than 6 people can play it.
What is included in the set: 6 cards, small cards with a preposition diagram, instructions for the game.
Instructions: The game is played according to the “lotto” type: the adult shows the diagram of the preposition, the children make up sentences based on their pictures. A child who has correctly composed a sentence and named a preposition closes one cell on his card with a preposition diagram. The first one to cover all the plot pictures wins.
Didactic game
"GARAGES AND CARS"
Algorithm for making a manual: to make a manual you need 5 sheets of colored cardboard, draw the silhouette of a “garage” on the cardboard, cut them out. Cut out rectangles from white paper and stick them on the “garages”. Then laminate it. Glue a plastic pocket onto the roof of the “garage” with strips of self-adhesive paper. Cut cars out of colored cardboard according to the template, print and cut out the numbers, stick them on the cars, and laminate them. The guide is ready.
Purpose of the game: to consolidate children's ideas about the composition of the numbers of the first ten.
Age: The game is intended for children from 4 to 7 years old, no more than 5 people can play it.
What is included in the set: cards - garages with numbers, cars with numbers, instructions for the game.
Instructions: An adult invites the children to take one card each - a garage. The teacher takes the car cards and shows them to the children, naming the object: “What is this?” - “Car”, “What number is on the car?”, the child must answer: “Two, this is my car, because on my garage the number is 2”, etc.
Game options:
Option I: The number on the roof indicates the number of cars in the garage. The child must select and place cars with the same number.
Option II: An adult invites children to make a number from two smaller numbers. The child finds these numbers and places the number cars in the garage.
Didactic game
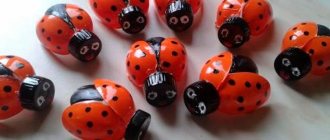
"LADYBUGS"
Algorithm for making the manual: to make the manual you need cardboard in green shades, cut out leaves from it according to the template, print and stick the numbers, and laminate it. Then download pictures on the Internet depicting ladybugs with different numbers of dots on their backs, print them, cut them out, and laminate them. You can play.
Goals: strengthen counting skills within 10; development of the ability to compare the number of objects.
What is included in the set: leaves with numbers, ladybugs with dots, instructions for the game.
Instructions: Place a ladybug on each leaf, which has the same number of dots on its back as there are on the leaf.
Game options:
Option I: Each ladybug must find its own leaf (both the ladybug and the leaf must have the same number);
Option II: Arrange the ladybugs and leaves in forward and reverse order (from one to nine and from nine to one).
The game is a puzzle
"TANGRAM"
Algorithm for making a manual: making a puzzle is very simple. You need a 10x10 cm square. Cut it out of colored double-sided cardboard. Then cut the same square into 7 parts. These should be: 2 large, 1 medium and 2 small triangles, a square and a parallelogram. Then make pockets from white paper according to the number of children, place squares cut into seven parts into them. Download and print diagrams - samples. The game is ready.
Purpose of the game: development of logical, spatial and constructive thinking, intelligence.
Age: The game is intended for children from 4 to 7 years old.
What's included in the set: pockets with seven parts, diagrams.
Instructions: An adult invites children to compose images using samples and according to their own ideas.
Game options:
Option I: To begin with, you can create images from two or three elements. For example, make a square or a trapezoid from triangles. The child can be asked to count all the parts, compare them by size, and find triangles among them.
Option II: A little later, you can move on to exercises on folding figures according to a given pattern. In these tasks you need to use all 7 puzzle elements.
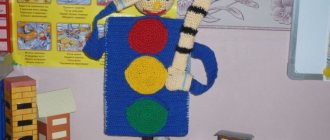
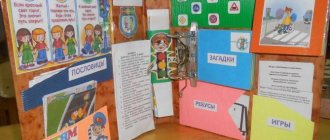
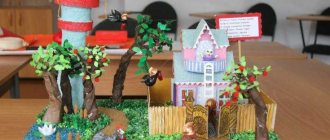
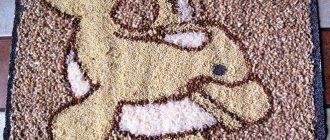
Photos of educational crafts
0