Winter house
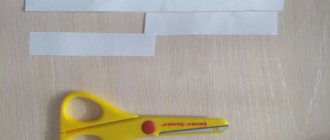
The white sheet is torn into small pieces - this will be snow. This activity is great for developing fingers. Ready-made house templates are printed and cut out. The house is pasted onto the main background, the roof is decorated with cotton wool. Nearby, snowdrifts are created with cotton material.
And at the final stage it is decorated with a previously prepared paper snowball.
Products made from cotton wool
Cotton wool discs have a good texture for making winter applique pictures. And thanks to the light shade, you can create a snow woman and snowdrifts from them. Circles are very popular in preschool institutions.
Corrugated paper
Winter applique senior group can include corrugated paper. Ready-made winter-themed templates are pasted over with pieces of multi-colored paper. Embossed paper should be cut with scissors rather than torn. The material is glued using PVA glue.
Green paper is perfect for creating Christmas trees. The material is finely chopped and glued to a light base. After drying, triangular shapes are cut out of the sheet. The parts are glued onto cool-colored cardboard to form a tree.
Snow and snowdrifts are painted on with white paint. Using a hole punch and light paper, create falling snow.
Application for younger groups
Melted snowmen can easily be made with small children. The younger group cuts out on their own, because the work does not require accuracy. Next, the figures are glued onto colored paper.
A simple mitten applique is also good for the preparatory group. A mitten figurine is cut out of thick cardboard in advance, and a snowflake is cut out of a snow-white sheet. The two parts are secured to each other and the work is ready.
Hedgehog made from autumn leaves
It is difficult for preschoolers of the younger group to sit still for a long time, so they have to use technically simple but exciting activities. One of these crafts is a funny hedgehog. This animal, associated with autumn and mushroom season, is easy to make from fallen leaves. First, you and your children need to collect leaves from the yard; they must be clean and fresh. They must be dried under a press so that the ornamental material turns out smooth and neat.
To create an application, prepare:
- dried leaves;
- landscape or thick colored paper;
- office glue;
- black or dark brown half bead;
- toy eye.
Instructions for creating an application:
- Prepare natural material, select leaves suitable for making the animal. One leaf should have a pointed tip - this will be the face of the hedgehog. A linden or birch leaf will do. For a back with thorns, maple specimens are optimal, but you can choose others at your discretion. Handle dried material carefully, as it is fragile.
- Glue a sharp piece of paper – a muzzle – onto a horizontal piece of paper, slightly moving it to the side from the center of the composition.
- On the back side of the tip of the nose, glue maple leaves to the muzzle. The number of copies can be any, depending on the size of the application. The main thing is that the leaves should be directed with their carved ends up and to the sides; they should not cover the hedgehog’s nose, but can overlap each other.
- Glue a black bead onto the tip of the muzzle to create a nose. Also glue on a toy eye. If you can't find it, cut out an eye from colored paper.
Craft "winter"
A technique for depicting a winter landscape using small balls and a glass will be very entertaining for a child. To work, you will need several balls and a cylinder-shaped object, such as a cup.
A colored sheet is placed in the container, and the balls are dipped in white paint. Painted figures are poured into a glass and covered with a lid. Shake well and you will get a colored sheet with white streaks.
Note!
How to decorate a Christmas tree for the New Year 2022 with your own hands: TOP-200 photos of the best ideas, choice of color, toys and style
- How to make a New Year's toy - beautiful and interesting ideas for New Year's toys. DIY instructions for beginners + 100 photos
- How to make snowflakes: TOP-160 photos of the best ways to create snowflakes from different materials. Simple work plans for children
By analogy, you can experiment with colors. Parts for appliqués are cut from finished sheets.
How to make a hedgehog?
Autumn hedgehogs are a very popular idea for creativity. Its needles can be depicted with leaves, seeds, plasticine, well, you will soon see for yourself.
Here is an application for little ones. With button decoration.
Or seeds and cereals.
Character from the cartoon "Tilimilitryamdia".
This template will come in handy.
The hedgehog bears rowan on its needles.
Parts in the shape of children's hands also form a composition.
Or from long strips that are glued together in the shape of a drop.
The circles we already know will also come in handy.
Just draw this cute animal using watercolor.
It is possible to cut out a handsome man from a postcard and decorate his needles with natural materials.
Also a fabric hedgehog.
Look at the finished results of children's creativity, taken from the school competition exhibition.
You may find these diagrams and drawings of hedgehogs useful in your creativity.
They can be painted, filled with plasticine or cut along the contour.
Snow collecting machine
Boys will appreciate the snow blower. To make this craft you will need colored paper, a cardboard sleeve, cotton wool and bubble wrap. To create a background, the air film is painted with white paint. The material is tightly fixed on the blue sheet.
When the paint is dry, the car applique is placed on the background. The transport bucket can be made from a cut bushing. Cotton wool is used to imitate snow.
Hat with mittens
An applique is created from winter accessories. To make the details more realistic, they are decorated with pom-poms made from cotton wool. You can decorate the mittens with felt, bugles or beads.
Polar bear
Foam board, which is easy to work with, can be used to create applications. The parts are cut out using the template and glued together. The tail is glued to the product and you can make a pendant from the bear by fixing a light braid on the product.
Volumetric applique of autumn forest
This method requires some skills and is accessible to children of primary school age.
Take white birch paper and draw black marks. For a voluminous central trunk, cut a strip of 9x17 centimeters and screw it into a tube onto a marker, gluing the edge so that the tube retains its shape.
Attach strips of 10x4 centimeters in the same way, using a pencil, to get thinner tubes. Roll the paper along the long edge, so you will get a thick tube 17 centimeters long and several thin ones 10 centimeters long.
Glue them in the form of a central trunk with branches on the sides. Using a template or a hole punch, cut out leaves from paper in autumn shades and attach them evenly along the branches.
For originality, you can add autumn fruits, such as apples.
Forest and trees
Branches are glued onto a colored sheet. You can create an imitation of snow using cotton wool or fur. And with the help of cut rain or silver beads it is easy to depict snowflakes. On the finished sheet you can draw trees, placing a tubercle with cotton wool between them, and you will get a den.
Note!
- How to make a snowman with your own hands: reviews of the best ways to create a snowman. Simple work schemes and step-by-step master class for children (130 photos)
- Crafts for the New Year 2022: TOP 110 photos and step-by-step instructions for creating New Year's crafts from scrap materials
- Snowman made of cotton wool - TOP-170 photos of original ideas. Simple schemes for creating a snowman with your own hands + step-by-step instructions for children
Snowman
To form a snowman, you will need to cut out the base from a white sheet. Cotton balls are glued to the prepared material. A cap, eyes and a nose are attached to the snowman. Handles and pom-poms can be added if desired.
Bullfinch
Draw the details of the birds on a separate sheet, cut them out and assemble them into the overall picture. For the background, blue paper is selected or a regular sheet is painted blue. Snow is formed using glue and cotton wool.
A bird branch is cut out of brown paper and glued to the main background. There is a bullfinch on a branch. Rowan is created from red balls of paper.
Volumetric ideas made from natural materials and tree leaves
Let's quickly run through this section and see how we can use nature's gifts.
Cereals, dried legumes and even pasta are suitable here.
To do this you need to draw a large picture. Apply PVA glue inside it, onto which you apply tightly to each other to fix the cereal.
Scales from pine cones will help you make a basket, and a hedgehog made from postcards will make the idea brighter.
Migratory birds have already created their wedges in the sky. So we will depict them from peas, buckwheat and seeds.
In autumn there is not enough warmth and sunshine, let’s make it ourselves.
The whole panel is made from pine cones and withered grass. Also use dried flowers.
The cones lend themselves well to coloring and are very similar to flower buds.
Another material for creativity can be pumpkin seeds.
They are applied to the drawing, fixed with PVA glue.
The seeds are also well painted with gouache. Only after this let them dry, otherwise the child will get all dirty.
Wheat harvests are also possible only in the fall. And they can also be depicted as seeds.
Pistachio shells will add texture and volume to the basket.
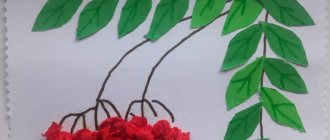
Next, let's look at rowan bunches. It is also well fixed with PVA glue. Just keep in mind that if you use fresh berries, they will begin to dry out after a couple of weeks. The berries will become smaller in volume and shrink.
You can lay out the fruits in a chaotic order or, conversely, tightly next to each other in even rows.
Or use bunches as accent elements.
But let’s look at rowan differently! Let's take it just for prints.
Don't have natural berries on hand? No problem, roll it out of napkins in red or bright orange shades. And stick it into the voids of this drawing. You can simply paint over the leaves and twigs.
Below are ideas for umbrellas we already know. But now their decorations are not paper, but real ones made of leaves, berries and dried flowers.
Next, I offer options for panels, for example, in the form of a woman.
Or a bouquet in a vase.
Below we will talk about what can be made from fallen tree leaves.
Lizard, lion and ballerinas - this is not the whole list of ideas. But they definitely deserve attention.
For ballerinas, take these diagrams.
And here is a selection of eagle owls. Just repeat the arrangement of the leaves as in the photo and you will succeed.
It is also easy to make applications from leaves in the form of fish.
The jackdaw is created from two maple leaves of different sizes.
Since we've moved on to birds, this bird will definitely win the work competition.
What else is there in autumn? Rain.
Even the leaves get wet from it.
The mushroom theme stands alone. Therefore, we make sure to make such gifts of the forest.
We looked at how we can use the material that nature provides. Below I will tell you what can be made from scrap materials.
Deer
Disposable plates are very good as an applique on the winter theme. You can easily make a Christmas reindeer out of them. The plate is painted brown. Horns are created using handprints.
Cardboard rectangles are suitable for paws. All parts are cut out and attached to each other. Eyes made of beads or paper are glued onto the muzzle.
Ideas for crafts from scrap materials (plasticine, plastic)
Here I mean fabric, plasticine, disposable tableware and other accessories that can be found in almost every home.
Therefore, here is a master class on creating such a plasticine application.
First, draw the shape of a leaf. Then tear off a piece of plasticine and smear it inside the drawing with the pad of your finger. Next, cut out the blank along the lines and glue it onto the base.
Advice! For creativity from plasticine, take soft types.
The following photo depicts the crown of trees in the form of spirals. First, a long and thin sausage is rolled, which is twisted into a spiral.
A plastic disposable plate can become the basis for a mushroom.
Or warm the bird.
You can cut out animal details from a piece of fabric and paste them onto a piece of paper.
Another option is made of plasticine.
There will be a lot more interesting things to come.
Winter ball
The glass ball is a popular souvenir. Using a minimal set of decorative paper, cotton wool and glue, you can create a paper version. Inside the winter ball, using colored paper, it is easy to arrange fairy-tale scenes: houses, Christmas trees, a palace or a snowy landscape.
Note!
New Year's decorations for windows 2022: 150 photos of beautiful templates for do-it-yourself window decorations for the New Year
Making an autumn forest, trees and nature
But the most important advantage of autumn is the colorful trees. They just brighten up this slushy time. Therefore, we cannot do without images of forests and nature.
Let's start first with single trees.
Master class on making this curly tree.
You need strips 15*1 cm long. They need to be fanned out on the base. And having fastened one end to the trunk, begin to twist the strip so that it looks like a wave. We also fix the second end.
Glue pieces of colored paper onto them.
There is still a forest in front of you. Absolutely any texture and color of blanks will do.
Below is an applique postcard.
Try to depict the forest and nature with leaf prints. To do this, you need to apply gouache to one side of it. Press the painted side onto the paper, transferring the pattern of veins.
The same technique can be used for the “Autumn Outside the Window” master class.
Autumn will swirl you in these applications. And gouache will depict the wind.
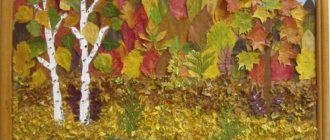
Leaves glued in rows on top of each other are very similar to a forest of birches and fir trees.
Look at the variety for creativity.
Birch trees also look beautiful with their own yellow birch leaves.
The trunk can be drawn or glued from cardboard.
Next, the work “Wind”. It's also not difficult to repeat.
Also create an abundance tree with your own hands!
Use candied fruits, nuts, dried fruits, seeds.
The crown of the pumpkin seed tree is very iridescent and bright. The kids will love it.
Did you like the ideas? Below are diagrams and templates that you can use as a basis.
Winter landscape
A simple and beautiful winter applique made from paper will appeal to middle school children. To make this you will need cotton pads and swabs. For the background it is better to choose blue cardboard. Holographic paper can convey the feeling of frost with iridescent snowflakes.
The contours of the tree are applied to a cotton pad and cut out. Nearby you can place a similar tree glued to a cotton swab. By cutting the disks in half, beautiful snowdrifts are formed, they are glued at the base of the picture.
It is easy to obtain a young moon from the edge of the disk. All parts are fixed using PVA glue. You can create stars and snowflakes from small rolled balls.
A gift for your beloved dad: a tank made of colored paper with your own hands
Despite the fact that such a tank can be easily made from paper, it looks attractive.
It is best made from a double-sided sheet of colored paper. You will also need glue, scissors, pencil, ruler, gouache.
We cut out two strips that will be caterpillars measuring 2*20 cm.
Glue the strips together in a circle.
For the base of the tank you need a 7*12 cm rectangle.
Step back 5 mm and another 2.5 cm from the edges and draw a line. Fold along these lines.
We make the same part, but 6*8 cm in size for the tank turret. Here we retreat from the edges by 5 mm and 2 cm.
For the barrel, measure a piece 4*8 cm and bend it twice along the length. Make small cuts to attach the muzzle.
Assemble the tank base and the turret with its muzzle together.
You can decorate the tank with a red star
Night in winter
A wide variety of materials are used for winter nights. Therefore, this application is suitable for schoolchildren. For better results, just watch the video and repeat the finished master class. The result will be a nice decoration for your apartment.
At the initial stage, you should decide what will be depicted in the picture. On a winter night there is always a birch tree with a house and a fence, and everything is covered with snow. The desired idea should be sketched on cardboard.
The next step is to prepare a mass of papier-mâché. To do this, napkins are manually crushed and filled with hot water and finally beaten with a blender. Excess moisture is removed by normal squeezing.
PVA glue is added to the finished material until a plastic consistency is formed. The mass is thoroughly mixed and oil is added.
Using plasticine, snowdrifts, logs and branches are formed. The entire drawing is processed with the finished mass. The top of the product is coated with PVA glue. The work must dry well.
The final stage will be painting with gouache. Blue or black would be perfect for it. For snow, you should choose white, and light blue should be used as a shadow. Draw black stripes on white birch. For the house and fence you should choose the desired shade of brown.
Autumn applique for students in grades 1, 2, 3, 4 made of paper with templates
Well, now let's move on to more complex crafts. I’ll say right away that I took some from social networks, that’s why there’s a link there. If you're interested, type it into a search engine and look there. But here I have selected ones that are more suitable for schoolchildren.
For example, this application. It is quite complex and requires accuracy. However, a 4th grade student can definitely handle it.
Advice! Use double-sided paper.
I won’t describe the steps, everything can be seen in the picture. This template was used. Please note that the stem of the leaf is not cut off, but falls on the fold. This is fundamentally important.
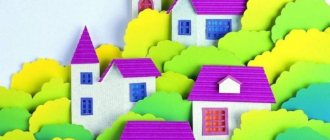
Next is the master class “Autumn City” .
So, for houses you need to cut 7 roofs: 4 trapezoids and 3 triangles. Our houses will be in the form of rectangles of different sizes.
Place rectangles on the base and distribute them so that they do not completely cover each other. In other words, create a composition. After this, they can be fixed to the cardboard with glue. Then we put them on the upper sides of the roof and also fix them.
The leaves will be circles, which we will make with a hole punch from different shades. We also cut out tree crowns; they can be uneven in shape. And we finish the craft.
Use pieces of colored paper from which you made leaves with a hole punch. You can put together such a tree. Waste-free production is achieved.
The next craft is with a mouse.
Use this template.
Here's an idea for a fall harvest basket. Instead of paper, cotton pads, felt and foamiran are suitable for depicting fruits.
Here is a diagram for the blanks.
Do you want to laugh? Then it's time to sculpt such a positive acorn.
You need to take two sheets of paper: a brown shade and a yellow or orange one. We cut out two blanks. From a brown shade, a square with sides 6*6 cm. From yellow we make a rectangle 6*5 cm.
Fold the square in half and insert the short side of the rectangle into it. Glue them together.
Next, you need to give the bottom of the rectangle the shape of an acorn or bowl by cutting off the ends. We bend the edges of the brown workpiece on the wrong side.
We complete the remaining details with a felt-tip pen.
These are the beauties they turn out to be.
Next up are some cool umbrellas. This important element of autumn is reflected in applications.
Below is a step-by-step master class.
To make cones, it is convenient to first draw a circle with a compass. Cut it out. And then cut into 3-4 equal parts.
Leaflet templates can be used those presented in the lower sections of the article.
Based on this idea, such masterpieces are created.
And here is a voluminous idea with a maple leaf and umbrellas.
Advice! When you glue the umbrellas, go beyond the base.
This is the diagram that will come in handy for you.
Next in front of you is a cute dog with a romantic soul.
This is what the details look like.
Another voluminous idea in the form of a pumpkin. You've definitely done something like this before. There is absolutely nothing complicated here.
Cut out these parts. Place it on colored paper and trace it. You cut out the blanks or fix them on the base, as in the photo.
Advice! For pumpkin, choose several shades of orange, then it will turn out brighter.
Here is a version of an autumn umbrella with a squirrel.
It can be painted and covered with plasticine. Fill the white voids with cereals, berries or napkins.
You will also like the mushroom basket.
By the way, the mushroom itself can be anything: from saffron milk cap to fly agaric.
A dress for the beauty of autumn will not leave any girl indifferent.
Here's a diagram for the details. The skirt can be made from toilet paper or a napkin. Just fold it like an accordion and secure the top part of the workpiece together. You can see it in the photo.
Warm tea is sorely missed in autumn. Typically, these are herbal drinks with lemon, cinnamon and ginger. This is what inspires.
Take the diagram.
By the way, the mug can be made in a single color!
Open palms inspire confidence. We will also put autumn leaves on them.
Here is the palm template. You need two of them. One side is not cut off, but gets folded.
This is what it should look like on paper. The diagram of the maple leaf will be below.
The squirrel was amused. The work is painstaking, but very nice. I give it for inspiration.
Of course, the most important thing is that the squirrel turns out to be friendly and cheerful.
And then we add any design.
A voluminous basket with fly agaric mushrooms made of paper. They can also be repeated from felt or foamiran.
The leaves are folded like an accordion. Here's a sketch.
You can also take paper helpers. For example, bushings. Flatten them to make an oval. Dip the edge in paint and make imprints in the form of leaves.
Or use it completely in an application. The inside can be painted or filled with napkin balls.
Like here. Plasticine balls are also suitable for filling.
A little more children's creativity. Autumn spoils us with rain and clouds. This is what is shown below.
But nature itself is simply beautiful. Especially when the sun comes out. Therefore, we personify her in the form of a beautiful girl with an ornament of flowers, leaves and harvest.
To make the task easier for the child, part of the application can be drawn. And make some details voluminous.
The composition of the lower craft is interesting. The master made it against the background of a circle. And along the edge he let out branches and moss.
Older guys can repeat this beautiful idea.
Or this one.
Well, at the end of this section, I’ll show you some cool hedgehogs.
Take a sheet of paper. Fold it in half. In the upper part of the half we draw the face of a hedgehog.
Cut out the nose along the contour.
And we fold the rest of the sheet like an accordion.
Glue both ends together.
Decorate them as desired.
Snowfall
For winter style applique you will need: blue cardboard, sheets of brown, orange and red, white sheet, scissors and glue.
You should cut out the parts for the craft. A rectangle for a house made of red paper. Small orange squares for the window, and brown trunks for the trees. Snow is created from a white sheet torn into small pieces.
Markings are made on the background for the location of the finished patterns. The parts are glued to the finished strokes, and excess glue is removed with a clean cloth. Prepared paper snow is also fixed with glue.
You can use pencil glue for a cleaner job; it dries quickly and won’t leave streaks. The application is ready, all that remains is to place it in the frame.
Cardboard craft for February 23rd in kindergarten
The simplest material from which bright crafts are made is colored cardboard. In kindergarten, with the help of teachers, children will develop thanks to the prepared materials. If kids don’t yet know how to use scissors, you can give them cut-out blanks.
With the approach of a holiday like February 23, adults and children begin to prepare gifts for their defenders. In kindergarten, kids make simple crafts for February 23rd from cardboard, paper, and plasticine. They can do many of the options on their own, but they still often require adult help.
We often give cups as souvenirs. But the children don’t have the money or the opportunity to buy, so they can make their dad a gift for February 23rd from cardboard.
Materials:
- White cardboard
- Colored paper
- Pencil
- Ruler
- Scissors
- Label from tea bag
- Glue
- Curly scissors
- Pen without ink
From a sheet of thick cardboard, cut out a rectangle measuring 15*21 cm and a piece in the shape of a mug handle.
On a rectangular piece, step back 3 cm from the edge and use a non-writing pen to draw the lines along which we will bend the pieces.
We cut out details from red and green cardboard: strips 21*2 cm and circles
We decorate the base of the mug with these details
Glue the handle onto the 15*10cm piece
Glue both parts of the mug together
We will stick the tea label with tape
Crafts for February 23: making crafts in the younger group
At an early age, children are just beginning to learn shapes, colors and details. Therefore, it is important to teach them to work with small colored parts. Even if a child doesn’t like to glue things at home, then in kindergarten, together with the whole team, he will be interested in being creative. Prepare the parts in advance and let your child look at them before assembling.
A tie with stars can be given to dad on February 23rd instead of a card.
You can offer a similar application to very young children, also by preparing the details in advance.
Using colored pencils you can make an original frame
Making a colorful card and asking mom to sign it would be a great gift for dad on February 23rd.
Tank made from a sponge for washing dishes: a fun craft for the middle group
Making a craft for dad with your own hands for February 23rd is very touching. From simple materials you can create a huge army and arrange a real war game with your dad or grandfather.
Materials:
- 2 sponges for washing dishes
- Beverage pipe
- Paper star
- Coin
- Scissors
- Marker
- Hot glue
- Ruler
Remove the hard layer from one sponge.
From this hard layer you need to draw 6 identical circles using a coin.
They will play the role of wheels, which we will glue to the body with hot glue.
We need the second sponge to make two parts measuring 4*4 and 1*1 cm. Cut a piece of straw 6-7 cm. From these parts we make a tower with a barrel. Decorate the sides with red stars.
Let's glue two tank parts together
February 23 in kindergarten: what can be done in the older group
In the older group, children want to do more things with their own hands. Crafts for fathers and grandfathers for February 23 are of great importance for any child. You can create real compositions or make one figure, but beautifully and neatly.
Tanks, planes, helicopters and missiles are the main heroes of the holiday of men and defenders of the homeland.
The plane can be made from cardboard and a matchbox, or you can use a clothespin and popsicle sticks.
If your dad or grandpa has something to do with ships, or simply loves the sea, then make an applique from a disposable plate.
Simple or voluminous cards can be a worthy gift for dad on February 23rd from a child.
Forest trees
For work you need sheets of blue, green, yellow and brown paper. The parts are initially cut out from newspaper, then from colored material. For the background, blue paper is used, ideally velvet.
Dashes mark the points for the location of the cuttings. Each tree is carefully fixed one by one to the base using glue. Excess glue is removed with a napkin. For snow you will need white paper
You can decorate trees with multi-colored confetti. To ensure accurate work, you should wait until each tree dries individually. With this approach, the glue will not smear across the background.
Crafts for February 23 in elementary school with templates
In elementary school from 1st grade to 4th grade, children really love the technology lesson. Previously, this subject was simply called labor. It really is a lot of work to make something with your own hands. And there is a special responsibility when a gift is created. For convenience, the crafts presented here are prepared with templates that you can prepare in advance for the lesson.
Shall we make a cap out of cardboard?
For the craft we will need:
- Colored cardboard
- Glue
- Scissors
Cut out parts from colored cardboard. At first I cut out blue stripes exactly without teeth, like on a visor, so I had to additionally make more tooth strips from white paper to connect the parts. You can immediately cut with them on the first two parts.
The size was based on the head of my nine-year-old daughter. But as it turned out later, our dad showed off perfectly in this cap too. Relative to the A4 sheet, the length of each strip (the side of the cap) was 29.7 centimeters. This also includes allowances for gluing.
So, glue the cardboard to make a circle. Try it on again to see if the cap is too big if it is for a child. If you are making it for dad, then glue it to a minimum at the joints.
As I said above, I didn’t immediately cut it with teeth. I had to supplement it with paper, otherwise there would be nothing to attach the top part to.
We coat all the folds with glue and firmly attach the band to the cut out bottom.
It's the visor's turn. It's easier with this. Here you can immediately glue it to the band.
We bend each clove and wait for the glue to set.
Hurray, hurray, hurray! Our next gift for February 23rd has been completed.
The schemes for the forage are as follows. The band, i.e. the side part. The option with teeth is more convenient
Donyshko. If the cardboard format is A 4, set the compass across the entire width of the sheet, and then add a little from the long edges, making a small oval.
The visor itself. Don't forget about the fastening teeth. Just draw them yourself
And the stars. You can hold a thin sheet of white paper to the computer screen and convert it to the format you need.
The cap can also be made flat on a postcard, supplemented with leaves using the quilling technique.
We made a cap. But there is also a cap that can be made for both the child and the father. Folding it out of paper is as easy as shelling pears.
With these sheet sizes, you can determine the headdress for both a child and an adult.
Following the diagram, fold a sheet of paper.
