On the topic: methodological developments, presentations and notes
Entertainment scenario for children of primary preschool age 1.5. – 2 years together with parents. Artistic and aesthetic development - music “Mommy-beloved, my sunshine!”
Continue to develop the ability to close a line into a ring. paint repeating the outlines of the drawn figure.
Drawing lesson summary Topic: “My favorite sun.”
Children raised to work from an early age are distinguished by independence, organization, activity, neatness, and the ability to take care of themselves. To successfully solve problems in labor education of preschools.
A very interesting summary of a drawing lesson for middle school children! We learn to draw the sun with its rays. We supplement the drawing, if desired, with our additional images. We answer the question.
Summary of drawing lessons in the middle group on the theme “My Sunshine.”
Source
Preview:
Red sun! (Senior group)
Materials, tools, equipment.
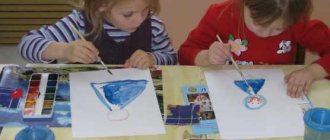
Gouache paints, brushes of 2-3 sizes, sheets of white and tinted paper of different sizes, jars of water, palettes.
The teacher reads to the children a story about a boy who wanted to become an artist.
The tale of the Rainbow and the Boy who wanted to become an artist.
Once upon a time there was a boy who really wanted to become an artist. One day he looked out the window and saw a rainbow.
- What do you think the boy saw in the red kingdom? What does the word red mean? How about beautiful? What and who are they talking about?
— In the red kingdom, the boy found a red, beautiful, beautiful rose and hurried on his way back.
— What red flowers do you know? Let's play the game "What is red?" (Who can name more words?) What do you think is the character (or mood) of the color red? In what mood are you looking at or tasting something red?
The boy who wanted to become an artist returned home and immediately drew a beautiful, beautiful portrait of the sun.
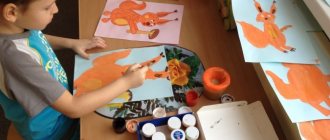
The teacher asks the children to draw a kind sun - cheerful, joyful, smiling - and very beautiful in color - red, orange, pink, yellow, crimson...
- Let's draw a “red sun” - bright, big, warm, kind, beautiful. With rays - wavy lines or curls. Our suns will look at us tenderly and smile cheerfully.
The teacher reminds the children how to get the color orange in order to paint “an orange sky, an orange sun, an orange sea, an orange mother”... (mix paints on a palette or board, adding a little red to the yellow).
Children choose the color and format of the background, create a complex color on the palette (orange, pink) and begin to draw. Each child creates a sun in accordance with the plan, independently choosing materials, artistic tools, the format of the base and the scale of the image. If desired, children can unite in micro groups to create an image that is large in size and technically complex.
During the lesson, the teacher tells or sings a song by G.R. Lagzdyn:
Like a bright orange
The sun came out of the aspen trees,
Called by everyone everywhere!
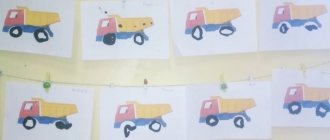
At the end of the lesson there is an exhibition of portraits of the cheerful sun peeking out from the clouds. All the suns are placed at an exhibition of children's creativity for parents. After 2-3 days, children can take their work home to give it to their parents or frame it to decorate their home.
With rays
"Dymkovo painting"
summary of a lesson on decorative drawing in the middle group The sun with rays is considered a classic drawing, with which children begin to teach basic skills in fine art.
The simplest algorithms for creating such a picture look like this:
| Sun drawing option for children | Recommended Workflow Algorithm |
| 1. Draw an even circle in the middle of the sheet of paper you are using. 2. Depart from the main outline 2-4 cm, depending on the format of the sheet of paper used. At the indicated distance, draw a zigzag line, the bends of which should be different, but periodically repeating (rays). 3. Color the distance between the outline of the main figure and the rays yellow. 4. At the top of the inner surface of the circle, draw 2 small semicircles, placing them at the same level (eyebrows). 5. Under the eyebrows, retreating 2-3 cm, draw 2 identical circles. 6. Inside each of the circles, draw 1 more circle, smaller in size. 7. Paint over the inner part of the smaller circle, leaving a small area white - the highlight (eyes). 8. Under the eyes, between them, draw a small oval, placing it vertically (nose). 9. Under the nose, draw a semicircle curved downwards (mouth). 10. If desired, detail the picture by adding freckles, hands or hair to the sun. | |
| 1. In the middle of the working plane, draw a circle of medium size (the main outline), the inside of which must be painted in yellow. 2. Inside the circle, draw 2 large ovals or circles (eyes). Divide the inner part of the eyes into 2 parts using a slightly curved horizontal line. The upper part should be painted dark, leaving one small area (highlight) unpainted. 3. Draw several smoothly curved lines (eyelashes) from the boundaries of the drawn eyes. 4. Draw a horizontal line under the eyes. 5. Draw a triangle down from the horizontal straight line, slightly rounding its corner (mouth). Detail the image by drawing teeth and tongue (optional). 6. From the main contour, along its entire length, draw several triangles with slightly rounded corners, placing them at the same distance from each other (rays). 7. Fill the inner part of the triangles with curves arranged in a chaotic order. 8. Color the picture using yellow, red and orange. |
Drawing the sun with paints
Creating a drawing with paints will help not only create a spectacular picture, but also teach your child about water or liquid.
The composition can be drawn using different techniques. For children 3-4 years old, it is easier and better to use a coloring page of the sun with clouds, a smile, rays and other elements, coloring which develops the child’s imagination, fine motor skills and creativity. For drawing you will need materials:
- album sheet;
- thick and thin brushes, or cotton swabs, depends on the drawing technique;
- gouache or watercolor;
- a glass of water;
- simple pencil.
We make a blank as a disk of the sun, draw a circle with a simple pencil, add rays and a smile. For variety, you can add clouds to the drawing using continuous arcs of different sizes, outlining an oval, the final arc that converges with the beginning of the first. If the child allows, all this can be done with the child’s hand to visually reinforce the skill.
Let's move on to forming a colorful drawing; if the baby is not yet familiar with coating with paints, then first it is better to show with a dry brush or cotton swab how to draw the sun.
Depending on the age of the child, a brush is used with older children, and a cotton swab is more convenient to paint with babies. We tear off the yellow paint and dip a brush or cotton swab in water; excess water must be removed on the edge of the glass. We dip our tool in the paint and draw the disk of the sun. From the circle we draw the sun's rays with yellow paint and fill the sun inside with yellow. The sun must be left to dry.
In the meantime, let's move on to creating clouds; this will require light blue or blue paint. We rinse the brush to remove yellow color in water, remove excess water and dip the brush in blue paint. We draw an arc - the beginning of the cloud, from the end point of the semicircle we add another arc, and another. To complete the image of the cloud, you need to draw a reverse arc from the last semicircle to the first and paint the cloud with blue strokes, when finished, leave it to dry. For variety, you can draw several clouds.
The sun has dried up, we return to finish the drawing. We rinse the brush and move on to red or pink paint, which helps to draw a smile on the sun. Using black paint we make eyes - dots. You can, of course, draw the sun without a smile and eyes, then the picture will be more realistic.
For cleanliness while drawing, you need to take wet wipes, which will not allow you to stain your clothes, furniture with paint left on your fingers and simply ruin the drawing itself. We set our masterpiece aside to dry.