A little theory
How to make a sun craft?
- First, you should understand what basic elements it consists of.
- The main component of the sun, undoubtedly, is the circle.
- During the work process, rays made of any suitable material are attached to it, on which, in turn, their length and shape depend.
- The resulting sun can be flat or three-dimensional, suspended on a string or attached to a stick - it all depends on the chosen option for making the craft.
- Drawn eyes, a nose, freckles and a playful smile, as well as long, expressive eyelashes or bangs with braids can give him expressiveness.
The complexity of manufacturing the parts added to the craft and their attachment to it, first of all, depends on the age of its creator and his capabilities.
This means that the younger the child working on the creation of the sun is, the simpler and clearer the process of making it should be.
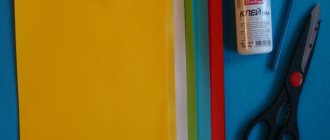
To begin with, you can try to make one of the simplest crafts - a paper sun.
It will require:
- Yellow paper;
- Scissors;
- Glue.
When starting work, mark two circles of equal diameter on paper and cut them out. One of the circles will act as the basis for attaching the rays.
They can be made:
- From colored strips, by bending each of them in half (without pressing hard at the bend) - this way they will turn out to be more voluminous.
- By winding multi-colored strips of paper onto a pencil or knitting needle.
- From wavy strips cut from paper of different colors.
- From strips of paper decorated with fabric, braid, beads, rhinestones or beads. Folding cut paper like an accordion, etc.
On the second circle, draw eyes, a mouth, a nose and glue it onto the circle - the base, on top of the glued rays. The craft is ready.
Sun with rays made of accordion-folded paper.
A child of 4-5 years of age can easily cope with such a craft - the sun he makes will be an excellent gift for March 8th or a birthday for a mother, grandmother or sister. To work you will need:
- Colored paper in two bright colors (yellow, pink, orange, red are suitable);
- Sheets of cardboard of different colors;
- Glue;
- Scissors;
- Marker.
Progress:
- The rays of the future sun are collected from colored paper by folding its sheets like an accordion and cutting their edges at a forty-five degree angle.
- The resulting parts are glued together, alternating colors, resulting in a multi-colored circle.
- Make 2 circles of different colors from cardboard and glue them together. At the same time, one of them should be slightly larger than the other.
- On the resulting blank, draw eyes, a nose and a smile and glue the resulting face into the center of the circle of the previously assembled multi-colored circle.
- Additionally, you can also glue a skewer to the craft so that the finished sun can be installed, for example, in a flower pot.
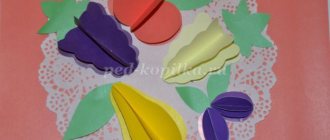
Templates for cut appliqué
It will be very convenient if you prepare beautiful templates in advance for working with scrappy techniques. You can get the template from anywhere:
- cut from a magazine;
- use old coloring books;
- draw with your own hands.
Children can also create these patterns on their own. After all, drawing the outline of a cat or butterfly does not require much skill, just like tearing off pieces of colored paper.
At the first stage, when the baby is just getting acquainted with this technique, you can offer him a ready-made template - for example, from an old coloring book. As they gain experience, children themselves will want to try to draw their own version of the outline drawing. These can be animals, landscapes, clouds, flowers and bouquets, kittens or puppies. The outline drawing should not be too detailed or complex. The main thing is that it serves as a good basis for further gluing with torn elements.
Sun made of corrugated paper or organza
Making this craft requires perseverance and attention from the child. The craft is suitable for pre-kindergarten and primary school students.
To work you will need:
- Yellow cardboard;
- White corrugated paper (or organza);
- Glue;
- Scissors;
- Threads;
- Marker;
- Compass.
Progress:
- Using a compass, mark two circles of the same diameter on cardboard and cut them out.
- Rectangles measuring approximately 3 x 8 centimeters are cut out of corrugated paper (or organza), which are subsequently collected from one edge with an accordion, and fixed using a thread - these will be rays.
- The finished beam blanks are placed on one of the cardboard circles, after which they are glued, carefully flattening the assembled part.
- The second circle is glued on top. After the glue has dried, you can draw eyes, a nose and a smile on the sun.
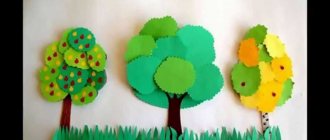
Example of a craft “Autumn Tree”
Let's look at a sample of a broken autumn tree applique. This is a simple and very beautiful option for children in the middle or senior kindergarten group.
For work you will need materials:
- glue stick;
- set of colored paper: yellow, orange, brown, green, blue;
- cardboard base (you can use white paper);
- additional decorations in autumn style: golden beads, small stones;
- a cloth for wiping off glue.
Work algorithm:
- Invite your child to apply the drawing to the base. Let it be a large tree with a lush crown. You can draw the sun and clouds in the sky, and bushes and paths on the ground.
- Next, select the main shade for the wood - yellow, orange, brown. The paper is torn into pieces and evenly pasted inside the contours of the tree. Dark colors are used for the trunk, light colors for the crown.
- They cover the sky with blue pieces, leaving space for clouds.
- The sun is decorated in yellow. Thin rays can be drawn with a pencil or felt-tip pen.
- The finishing touches are glued on – pebbles on the ground, beads on the tree as fruit.
The picture is ready, it can be framed. You can also wipe off any excess glue on the image before the glue dries completely.