Crafts from scrap materials
You can make a traffic light from scrap materials.
From packages
You will need bags (cellophane or garbage bags), scissors, a plastic cover, tape, and thread.
Progress:
- The bags are placed in a stack, the bottom and handles are cut off to get even rectangles.
- Rings are cut out of 2 plastic lids or cardboard.
- 2 rings are folded together and wrapped with cellophane strips.
- Cut the cellophane along the outer contour.
- Spread the rings and tie the pompom with thread.
- Align the length of the pompom pile.
- Connect 3 pom-poms of different colors together on a thread.
This traffic light can be hung or attached to the wall. Using this principle, you can make a traffic control mechanism from threads and wrapping paper.
Sewn traffic light
An interesting option is a traffic light made from fabric. It can serve as an educational toy if the colors are made removable by attaching them with Velcro.
The outline of a traffic light is cut out of black fabric and sewn together with padding polyester or interlining. It is more convenient to make signal colors from felt.
Sweet "red-yellow-green"
After eating a delicious traffic light, every child will remember the rules for crossing the street. It’s not difficult to prepare such delicacies: you can bake cookies or take ready-made ones.
The main secret is in the decoration.
Cookies, waffles or sweet buns should be poured on top with chocolate and, before it hardens, place three candies of the desired colors (red, yellow, green) on top. These could be caramels, candied fruits or M&Ms. That's all!
Paper miracles
If you approach the task creatively, you can create a lot from paper, and you don’t need designer or expensive paper - what’s in every home will come in handy.
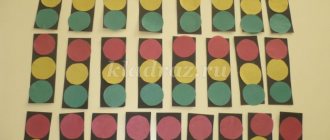
Application
On the rectangular one we draw circles, keeping the same interval between them. Circles can be drawn with a compass or using a template, tracing the selected object (cup, saucer, jar). Then you can act on one of the options.
Option 1.
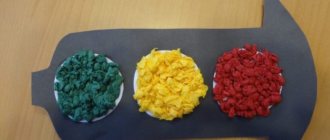
Take 3 sheets of colored paper - red, yellow and green - and tear them into small pieces. Each circle is filled with paper pieces.
Option 2.
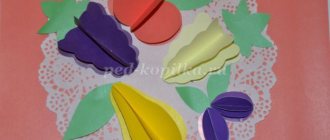
You can cut out 3 colors of hearts of different sizes. Fold the hearts in half and glue them onto one half. It turns out beautifully if the hearts are laid out in a symmetrical order, forming a flower.
Option 3.
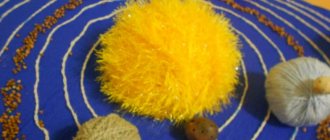
You can fill in the signal circles at a traffic light by cutting colored paper into small squares, then screw each square onto a pen rod and glue the end part onto the circle. You'll get a fluffy traffic light!
Important!
For such applications, you can use not only paper, but also everything you have at hand - eggshells, yarn, fur, felt. The main thing is that there are 3 colors - red, yellow, green. This craft will help your child forever remember that a traffic light is our best friend!
Origami
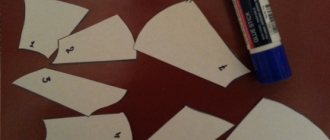
The traffic light is made using the kusudama method. You will need paper of 3 colors and a stand.
Cut into squares measuring 5x5 cm. The modules are assembled according to the diagram, then 3 modules are added together. 1 ball will require 24 blanks. A ball is assembled from the modules; it must be attached to a leg.
For the little ones
The materials for such a traffic light will be the simplest, depending on what you plan to make the traffic light from. It could be simple paper, yellow, red and green leaves of trees from the park, pieces of colored fabrics. Tools can also be thread and a needle, glue, cardboard, leather, etc.
We will be making paper appliqué for children in junior kindergarten groups, therefore, we will need the following items:
- a piece of cardboard;
- colored paper - green, yellow, red and black;
- glue.
For kids, it’s better to prepare in advance a template for the shape of the traffic light itself and the circles for its lights, so that it won’t be difficult for the children in the process of making the craft and the result will be exactly the option we had in mind.
The technique for performing such a craft is as simple as it sounds. You can simply stick the colored circles in the desired sequence onto the prepared cardboard. You can complicate the task slightly and cover a cardboard rectangle with black paper and attach circles on top of it to make the craft more realistic.