Appliquéing a person is a very exciting and creative job. Its advantage is the variety of techniques used and varying complexity. Such work is suitable for very young children, preschoolers and elementary school students. Using the application, you can study geometric shapes, colors, parts of a person’s face, and his emotions.
Application of geometric shapes
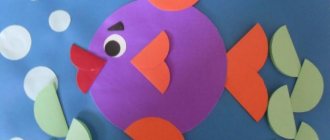
The simplest version of a person’s appliqué is made from geometric shapes. This technique helps develop a child's imagination. The main elements used are square, triangle, circle, and rectangles.
For the application you will need:
- patterns of triangles, circles,
- cardboard;
- glue.
The complexity of the work depends on the number of parts and elements used. The simplest option is to invite the child to arrange the figures so that they form a body, head, arms and legs. A rectangle (boy figure) or a triangle (girl figure) is used as a body. Instead of a head there is a circle. The arms and legs are made from thin rectangles.
They complicate the work with various details - pigtails, a hat, highlighting the hands and feet. Small details indicate the eyes, mouth, nose.
Face: studying the senses and emotions
Appliquing a person's face from paper is not just an interesting creativity, but also an opportunity for a child to develop in different areas. To get acquainted with the senses and emotions, children are asked to do a simple job - stick eyes, mouth, nose, ears on a template.
Classes can be divided into 2 types depending on age:
- familiarization with the location of organs;
- game of emotions.
Getting to know the location of the senses
Familiarity with the location and purpose of the senses is necessary for children aged 2-3 years. During this period, work is performed with the help of an adult.
For the application you will need:
- face template;
- templates of mouth, eyes, nose, ears;
- glue.
To begin with, the child is shown a template of a face and told that the sense organs are located on it. They show the organs one by one, explain their purpose and location, and let you look at them. The child applies glue to the template and sticks it to the face. The actions are repeated with each sense organ.
Getting to Know Emotions
The application of a person's emotional face will be of interest to children aged 4-5 years. To work, you will need to prepare in advance templates of the eyes and mouth, expressing various emotions - anger, joy, sadness. Also, for the applique you will need a person's face made of paper. It may have a nose drawn on it in advance.
- Work begins with one emotion. It is described in detail. They tell how this feeling is expressed through the eyes and mouth.
- They invite the child to choose from a general set of templates that are suitable in meaning and place them on his face. If it turned out correctly, move on to the next emotion.
- If a child has made a mistake, then it must be discussed and helped to correct it.
Playing with emotions is interesting not only in the form of applique, but also with magnetic templates or Velcro parts.
MAGAZINE Preschooler.RF
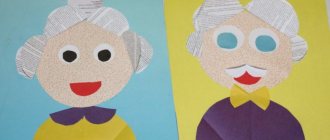
Objectives: Educational: Continue acquaintance with the types and genres of fine art. Developmental: 1) Arouse interest in the search for visual and expressive means that allow you to reveal the image more accurately, fully and individually (features of appearance, character and mood of a particular person). 2) Learn to compose a portrait from separate parts (an oval - a face, strips or lumps of crumpled paper - a hairstyle). 3) Strengthen the skill of cutting out an oval from paper folded in half. 4) Develop color perception (select a color tone for the background in accordance with hair color). 5) Continue to develop the ability to evaluate your own work and the work of a friend.Educational: 1) Foster creative activity and independence, using various methods of working with paper in appliqué work. 2) Make the child want to help. 3) Develop aesthetic perception. Preliminary work: 1) Introduction to portraiture as a genre of painting. 2) Examination of reproductions of paintings by famous portrait painters. 3) Looking at photographs. 4) Drawing portraits with sticks on the ground while walking, with felt-tip pens and pencils in independent artistic activities. 5) Experimenting with different ways of working with paper in appliqué work. 6) Looking at your reflection in the mirror. 7) Drawing up verbal portraits (of yourself and the doll). Methodological techniques: reading a poem, conversation, demonstration and explanation, productive activity, theatricalization (parish of Kapitoshka). Materials: a rectangle of white paper for the oval of the face, colored paper for hairstyles and other parts of the face, a set of colored cardboard for the background of the portrait, glue, glue brushes, oilcloths, cloth napkins, samples of portraits (works of older children) for display, slides, multifunctional toy A capitoshka with a set of different shapes of lips, eyebrows and mouths, an incomplete portrait, a strip of paper with different shapes of noses, mirrors, carpet. Contents: - Guys, do you know the name of our group? - Turtles. — Yes, the name of the group hangs on our door, and everyone who comes to us will know about it (slide). — But in addition to the name, there should be a business card hanging in the locker room. What it is? — This is a corner where a photograph of all the children attending this group is pasted. For example, like in the neighboring group “Sun” (slide). — I went to the photographer, but he is busy and cannot come to photograph you. What should we do? — You can draw yourself, make an applique, or bring a finished photograph from home. - Thank you for telling me how to get out of this situation. This means that each of you will have to take your own portrait. Let me remind you what it is. If you see that someone is looking at us from a painting - a pilot or a ballerina, or Kolka is your neighbor - the painting is definitely called a portrait. - Please note that the portrait should be such that anyone looking at it can recognize who is depicted in it. — I made the corner where your works will be placed. Here he is. What does it look like? - For a turtle. — Everything you need to do the work is on your tables. The background for the portrait will be colored cardboard. First, let’s clarify which background to choose correctly? You have light and dark colored cardboard on your tables. If you are fair-haired, what color cardboard do you choose? - Dark. - If dark-haired - light-haired. - Why are we doing this? — To make the hair more visible, the work turned out to be brighter. — I brought you several samples of portraits made by children of the senior group. The details of their faces are drawn, but you are children of the preparatory group and therefore you will make them out of paper. — Make an oval face from a rectangle. Fold it in half, hold it by the fold line and round the corners. “I’ll tell you guys that to quickly glue the oval to the background, glue should not be spread on the entire oval, but only on the edge, and stick it on the cardboard so that there is room on top for the hairstyle.” - Let's move on to the hair. A) Straight hair can be made from strips of paper. B) By cutting out wavy lines, we will get wavy hair or braids, they can be made by tearing strips from a large sheet of colored paper. C) You can make hair using a mosaic method - this is when small pieces of paper are torn off and glued on. D) You can get curly hair by crumpling pieces of paper. D) If the hair is curly, it can be made from serpentine, obtained by pulling a straight strip pressed to the edge of the scissors. — This is how we made an autumn birch tree (slide). (During the explanation I show examples from the samples).
- When the hair is ready, you can start shaping the hairstyle. It could be ponytails, braids or something else. Everyone knows their hairstyle. -What do we all have on our faces? - Two eyes, two eyebrows, nose, mouth. — Eyes are cut out circles that lie on your tables. Everyone glues a circle exactly the same color as your eyes. — For eyebrows, paper is black and brown. Eyebrows can be of different shapes: triangular, rectangular or arched (shown from the set for Kapitoshka). — We make the mouth out of what color paper? - Red. — It can also be different (show from the set for Kapitoshka). - From all these details you can get different facial expressions: sad, smiling, surprised, scared. I don’t know what yours will be like. — The nose can be like this (showing a tape with samples of noses of different shapes). — We make ears from semi-ovals or semicircles. — You can draw on some things with felt-tip pens. Like what? - Eyelashes, freckles, earrings. - Does everyone understand how to do what? — You can go to the mirror to look at yourself and get to work. “I would like to remind you of the proverb: “If you hurry, you make people laugh.” This means that before you start doing something, you need to think about how and what you will do. (Children complete the task. We hang the finished work on a business card - a turtle, remove the workspaces). - Oh, what beautiful and different portraits you turned out! What is a kindergarten? This is a home for all the guys. This is joy, this is laughter, This is a hundred friends for everyone.
If we become alike, how can we recognize each other?
You're not like others, that's why you're good for mom!
The only thing dearer to her is Andryushka’s freckled freckles, Tanya’s protruding ears and snub nose.
All shapes and colors of your hair and eyes. Dear children, very different, the best and most beautiful!
- Well done boys! Thank you for helping us design our group’s business card.
Children's work for the lesson “My Portrait”
| Next > |
Man in motion
The appliqué of a person in motion helps develop a child’s creative abilities and imaginative perception. The difficulty of this task is that rectangles and squares of different sizes are used for the work.
For the application you will need:
- blanks of squares and rectangles made of paper;
- cardboard;
- glue.
The work consists of several stages:
- The child is asked to choose cardboard - the base on which he will stick the figure.
- The adult pronounces the pose that will be depicted in the form of an appliqué. He explains how the arms and legs are positioned in this pose, and what features there are. For example: a person runs, bends over, jumps.
- The child takes the prepared templates and lays them out in the desired position on the cardboard. If you have completed the figure correctly, then glue the rectangles with glue.
- If mistakes are made in a pose, the adult tells you how to correct it.
The application of a person in motion will be useful for children of primary school age and art students.
Studying anatomy
Older children will be interested in studying human anatomy using the applique as an example. This game will not only develop fine motor skills and perseverance, but will also introduce children to the structure of internal organs.
Depending on age and level of training, the number of organs may vary. To play you will need:
- template (contours of the human body);
- organs (brain, stomach, lungs, liver, heart, intestines and others);
- diagram with the location of organs on the template and their names;
- glue.
The essence of the game is to introduce the child to internal organs.
- Each organ is taken in turn. Its name is clearly pronounced and shown on the diagram where it should be located. For older children, the purpose of this organ is explained.
- The child takes the organ shown and glues it onto the person’s stencil for appliqué.
- The actions are repeated with each organ.
If this is not the first time an acquaintance with the internal structure of a person occurs, then the child can be asked to independently glue the organs onto the template.
Anatomy Fundamentals: Human Internal Structure
It is best to study the internal structure of the body and become familiar with the anatomy of the human body after mastering a portrait. A blank will help to master the basics of anatomy, which will be useful for older children (from 5 to 6 years old), and parents can make such a craft together with their child:
- you will definitely need a schematic drawing of the typical arrangement of internal organs; it can be taken as a basis, printed or copied from an anatomical atlas;
- On a felt base, you can pre-sew or glue a piece of Velcro, creating small tips that will guide the child in the process of fixing human organs.
- craftsmanship from tactile and wear-resistant materials, it is better to use soft felt or thick cardboard, which convey the shape well and can be processed by hand;
Having made a set for the game, with multi-colored internal organs and the human body, it can be used in constant activities. The set includes the brain and lungs, heart and kidneys, liver and stomach; for older children, the craft can be integrated with the intestines and gall bladder, spleen.
Using the appliqué technique with children, it is easy to create a human face with different emotions and study geometric shapes. Regular classes will prepare your child for drawing lessons, where he will be able to depict any human figure using the concept of proportions, poses and movements of different parts of the body.
Movable little man
Patterns of human body parts can make applique more interesting for children. With their help, it is possible to achieve a realistic, bright picture or give it dynamics. Surely older children will enjoy the dynamic applique.
To work you will need:
- templates of body parts (arms, legs, torso, head);
- screws and nuts from a metal constructor;
- cardboard;
- glue;
- scissors.
The work is carried out in several stages:
- Templates printed on paper are cut out and glued onto thick cardboard. This makes them stronger. Then the parts are cut out of cardboard.
- Place your hands on the body and use sharp scissors to make a through hole. A screw is inserted into it and a nut is tightened. I repeat the operation with my legs.
- The head is attached to the body in a similar way.
The little man gains mobility and is ready to play. To complicate the work, you can create additional connections at the elbows and knees.
Applications are a fascinating creativity that develops imaginative thinking, perseverance, and fine motor skills. Working with paper is suitable for children of all ages. Having mastered the skills of appliqué on paper, you can move on to more interesting and complex activities - for example, creating a reusable game with felt Velcro.
Human head
Work on this topic is suitable for middle and senior groups.
Such an applique is created not only from paper. Threads, buttons, plasticine and everything the soul desires are connected here. Step-by-step instruction:
- Draw an oval with ears on the sides. This will be the head.
- We cut the workpiece along the contour.
- On separate colored sheets of paper we draw eyes and a mouth. There should be different colors for the paper parts of the face. For example, draw lips on red paper, and make eyes on white: first draw an oval, then the iris and pupils.
- We cut off parts of the face and glue them into place, after which we finish drawing the nose.
- We take several thick twisted threads and attach them with glue to the head. If it's a girl, she gets ponytails if she wants. Plasticine is used for young children.
