winter tree
Summary of a lesson on drawing a snow-covered tree with children of the senior group.
Target
: learn to create expressive images of winter patterns on the window, and a tree in the snow outside the window.
Training tasks:
introduce graphic options for depicting a tree; consolidate the skills of its depiction using an artistic brush; improve the ability to achieve the required shade by mixing paints, make underpainting with rhythmic, smooth strokes in one direction, use additional devices of your choice (felt-tip pen caps, cotton swabs, rolled sheets of paper, stamps).
Developmental tasks:
develop a sense of color, shape, rhythm; attention, thinking, imagination, creativity; emotional response to the beauty of winter nature.
Educational tasks:
cultivate accuracy when drawing; encourage independence in decision making; the ability to rejoice in the successes of comrades.
Equipment:
projector, screen, computer, 2 easels.
Demo material:
slides depicting frosty patterns on glass, graphic versions of a tree.
Handout
: for each child, gouache in ten colors, sheets of A3 paper, palette, caps from felt-tip pens, rags, cotton swabs, sheets of white A6 paper, brushes No. 12 and No. 5.
Progress of the lesson
(The music of A. Vivaldi “Winter” sounds. The teacher throws up a handful of fluffy snow and catches snowflakes, the children gather around him.)
Educator:
Guess the riddle: The star spun in the air a little,
sat down and melted on my palm. What is this? (Children guess.)
The winter master Frost painted his picture. He wandered between houses, gardens, forests, parks and decorated them. What do you think he decorated with?
Children:
Icicles, snowdrifts, snow, ice, frost, frost, snowflakes.
Educator:
Frost has reached our kindergarten.
What did he manage to decorate? Let's go to the window and admire it. (The teacher turns off the lights in the group and approaches the window with the children.)
Children:
I decorated the windows and the fence. I covered the paths, trees, our mountain ash under the window, bushes.
Educator:
Look at the gorgeous pattern on the windows. Is it the same? What does it look like? Let's consider.
Children:
The pattern is completely different. It looks like curls. The same touches are there. Look, I looked at the sleigh!
Educator:
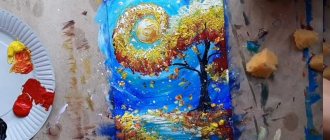
Moroz composed it himself, was not afraid to make mistakes, and wanted to please everyone. The snow-white pattern on the glass is beautiful against the dark sky, the silhouette of our mountain ash is clearly visible, the shape of the branches is clearly outlined.
Today we will try ourselves in the role of the same wizards. Let's depict the view from our window in only two colors. One color will be white, but you will choose the cool shade of the second “winter” color yourself. How can I do that? Let's go to the easels. The guys who have already created beautiful “winter” shades will help us. ( Two children tell and demonstrate how they mixed paints and achieved an interesting result. The teacher and other preschoolers watch.)
Children:
I mixed blue and white paint. It turned out light blue. And I got a beautiful color by mixing blue and a little red, and I also added white. And I took blue paint and added more water to create clouds.
Educator:
Master Frost composed his pattern and wrote so amazingly, and drew so wonderfully, look.
(The teacher demonstrates drawing a curl and a snowflake with a brush in the air and a damp brush on a board, and jerky lines on an easel. He shows techniques for drawing on paper with a felt-tip pen cap, a dry brush, paper rolled into a cylinder, a cotton swab.)
Let's take an imaginary magic brush in our hands and Let's repeat everything that Frost did.
(Children repeat all movements in the air after the teacher).
Educator:
Sit on the carpet.
Now you will see Frost's mastery on the windows of other houses. (The teacher turns off the light and shows a slide show of frosty patterns on the glass).
Now we will try ourselves in the role of Frost’s assistants and create our own original pattern.
Go to the tables. ( Children take their seats.
)
Educator:
Patterns on glass become poems.
Patterns on glass are winter fantasies.
The patterns on the glass live in the window frame,
They will tell us the story of winter. (I. Gilchenko)
Remember how the pattern is located on the glass. You can leave part of the sheet white and apply color to the rest. Or apply color to the entire sheet. (The teacher tints part of the sheet, leaving one corner white. Shows a previously prepared sheet, where several corners are white. Tints the entire sheet with light strokes. Then removes the samples.).
Take a wide brush and try to do the underpainting yourself.
(The music “Winter” by A. Vivaldi plays. Children complete the task.
) Now your underpaintings need to dry.
And today Frost has a performance,
We are invited with you by command
It's fun to walk like snowflakes fly,
Dance in the snow and draw patterns! (Tychkina S.M.)
(The music of G. Sviridov “Blizzard” sounds. Children stand up, raise and lower their hands, shake them, walk in place, spin around themselves, depicting the flight and dance of snowflakes, and draw in the air.)
Educator:
And now the most interesting part of our work.
Take your seats. ( Children sit down
). Now we will look at how to depict a tree.
(The teacher shows slides with different options for depicting a tree, including graphic ones, with a damp brush on the board, paint on a sheet.)
Your work has dried out, try to depict a tree outside the window. Our rowan will be a real decoration of the picture! We will paint it with a wide brush, and the branches with the tip of a thin brush. Rowan can be fabulous or real. You and I drew a curl, a snowflake, a stroke in the air. Let's transfer them to paper, and then you can decorate the drawing with small details.
(The music of G. Sviridov “Blizzard” sounds. Children depict a tree and a pattern, decorate the work with small details. The teacher helps the “wizards” in finding means of expression. The teacher offers the children who finished the work earlier than others to compose a winter story.)
Educator:
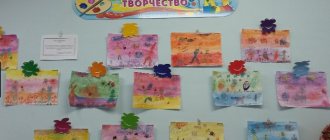
Let's look at the drawings you made.
(Children look at each other’s drawings, talk about their work, share their impressions.)
Svetlana Tychkina, teacher
GBOU School No. 1905, D/o No. 1, Moscow
Complicating the techniques of depicting trees in different age groups
Slide 1. Consultation for educators “Complicating the techniques of depicting trees in different age groups”
Slide 2.
The child shows an active interest in drawing already in the 2nd year of life.
At this age, toddlers
enthusiastically scribble various squiggles and scribbles on paper, and this is encouraged, because in the process of drawing squiggles, the child recognizes a pencil, felt-tip pen, brush and paints and gets used to them.
Slide 3.
These skills consist of very simple things that are the basis of drawing: the ability to draw vertical and horizontal straight lines with a pencil, felt-tip pen and gouache.
A child’s highest mastery in mastering basic drawing skills lies in the fact that he learns to draw closed lines: a circle, an oval, an abstract figure using the same tools - a pencil, a felt-tip pen, and then a brush with paints. The ability to draw vertical and horizontal lines, the ability to draw a circle and an oval allow children to draw whatever they want: animals, birds, trees, cars
, etc. Everything they like in life, they will be able to
depict
using closed and straight lines . And this is not a joke, but the basis of painting.
Slide 4.
Analysis of software tasks in
different age groups
.
We can highlight the following general tasks of teaching preschoolers to depict trees of different types:
breeds in object drawing:
— To form in children a generalized idea of a tree and how to depict it
.
— Introduce children to the characteristic features of trees of different species
.
— To form children’s ideas about the changing appearance of different trees
breeds at different times of the year.
— To promote mastery of various ways of depicting trees
.
— Learn to use different drawing techniques
.
— Learn to use different visual arts
materials for drawing
trees
.
For every age group
For preschoolers, setting tasks when teaching object drawing has its own specifics.
Slide 5.
The learning objectives in the first junior
group
are set taking into account the fact that with a child of the second year of life, special training in
image
, since he strives to reproduce the actions of the teacher, accompanied by explanations, but he has little experience, lacks knowledge and skills, and has insufficiently developed hand movements . Therefore, the main tasks are primarily related to the general educational impact on children (on the slide):
- arouse interest in the process of drawing as an activity that produces results, a desire to try one’s strengths;
- introduce drawing materials (pencils, paints)
and
methods for using them
.
Here, for example, is how to draw a tree
, mastering the basic principles of painting.
A tree grows on the ground
Therefore, the child must mark the place from which the
tree
with a straight horizontal line.
He must then use a pencil to mark the trunk of the tree
by drawing a straight vertical line perpendicular to the line marking the ground.
A tree has a crown
, therefore, the child must indicate the boundaries of this crown by tracing the top of the trunk
(or the tip of the straight vertical line that he just drew)
with a closed circle or oval line. It will turn out something like this.
Slide 6.
Drawing trees . 2nd junior group .
We draw on tinted paper, on the entire sheet or strip, with black paint and a wide brush.
Explanation:
Slide 7.
We indicate where
the tree grows - I draw an even
, straight line from left to right with black paint. Then I draw a straight, beautiful trunk - I draw a vertical line from top to bottom, start painting with the tip of the brush, and then with the whole brush.
Slide 8.
Now I'm drawing branches.
The tree
has a crown - I draw 2 small branches up.
The spruce branches grow downward, and the tree branches grow upward towards the sun
.
Raise your hands up, this is how we will draw twigs on a tree
, the brush will show where the twig grows - it grows from the trunk upward (I draw a line, now I draw a twig on the other side - it grows, grows.
Slide 9. Middle group
We draw on tinted paper, on the entire sheet or strip, with brown paint. We give 2 brushes: wide for the trunk, medium thickness for the branches.
Slide 10.
I take a wide brush and use brown paint to mark where
the tree
, draw an even, straight line from left to right.
The tree
has a straight, beautiful, even trunk - I draw a vertical line from top to bottom, start painting with the tip of the brush, and then with the whole brush.
I take a medium-thick brush, with which I will paint brown branches. With the tip of the brush I paint 2 small branches on the tops of the heads, which look up at the sun. tree has thick branches
, and they all grow upward - towards the sun, I paint them with the whole brush on one side and the other of the trunk. And on thick branches there are thin ones, they also reach out to the sun, I paint them with the tip of a brush on one and the other side of the branch.
Encourage children to watch their friend’s work and exchange opinions.
In the middle group you can draw a tree at different times of the year
: covered with snow in winter, in spring, summer, autumn - with leaves, we draw them by dipping them.
Slide 11. Senior group
Let's draw varieties of trees
.
Pay special attention to the fact that if children in the older group
, even after repeated observations, draw poorly, then transfer this work to the preparatory
group
, since this material is very difficult for children.
Slide 12.
Birch
We draw on two-stripe tinted paper with white and black paint. We give 2 brushes: wide and medium thickness.
Explanation:
The birch has a beautiful trunk - I paint the trunk with a wide brush of white paint, just like we painted the trunk of other trees
. The birch tree has black specks on its trunk, we will paint them later when the white paint has dried. Birch is called curly birch. Its branches are beautiful, elastic, and bent down. I take a medium brush and use black paint to paint thick branches from the trunk on one side and the other, starting from the top. And from the thick branches come thin ones, like garlands, descending down. The birch trunk has dried up, now let’s decorate it with black dots. Remember, when we looked at it, we noted that the trunk was very black at the bottom and there were fewer dots at the top.
The word of the teacher and the speech of the children themselves play a great role in conducting classes on drawing trees. The teacher's explanation must be thought out so that the child can think. When explaining, the teacher can use literary artistic images. This makes emotional memory work, which contributes to the creation of bright, expressive drawings. For example, while admiring a slender birch tree in a clearing, you can remind the children of a familiar song and stand around the birch tree and sing the song. They will start drawing a birch tree with special pleasure.
We draw a birch tree at different times of the year
: snowy in winter and green in spring
(we draw a raw outline of the crown and dotted leaves)
.
Slide 13. Preparatory group
We continue to draw varieties of trees
. Oak
We draw on tinted paper in two stripes, gouache, palette. We give 3 brushes: wide for the trunk, medium thickness and hard.
Slide 14.
Explanation:
The oak tree is called a giant, its trunk is very thick, I will paint it with a wide brush with brown paint like this - I will draw a central line and “build it up”
trunk on one side and on the other.
The trunk is thick, the oak is mighty, it stands firmly on the ground - the roots are visible. Using a medium brush, I paint the branches with brown paint. The branches have bent from time to time, they are old and thick. The oak does not have a crown like other trees
.
At the top the branches are curved and thick curved branches extend from the trunk. Small curved branches come off from the thick branches; I paint them with the tip of a brush. The greenery of the oak is transparent, carved, I will paint it with a hard glue brush “poke”
.
In this group
You can show a way to draw a crown without branches - with an outline.
Slide 15.
Also at this
age
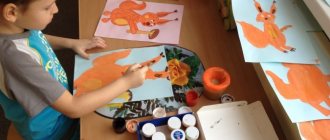
, children enjoy drawing various fairy-tale
trees
.
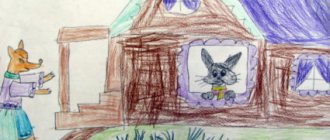
For example, drawing “Autumn tree ”
.
The teacher has a drawing depicting a tree with autumn foliage
, the lower end of which ends approximately in the middle of a wide strip of land; Children have sheets of paper painted 1/3 with green paint.
The teacher shows the children a drawing of a tree
and offers to listen to the description, warning that there will be mistakes in the story.
Anyone who notices a mistake should say “no
.
“A summer tree
.
(No)
.
Which one? Why? Its trunk is thicker than its branches. The branches are longer at the top than at the bottom. (No)
.
Which branches are at the top and which ones are at the bottom? Thin branches extend from the branches. They are very long (no)
.
What are they like? The leaves on the tree are yellow
, orange, red."
Praise the children for knowing the structure of a tree
.
Suggest a diagram for drawing trees
.
Show children techniques for drawing tree crowns
.
Slide 16.
— Do you know by what signs you can distinguish one
tree from another (by trunk, leaves, branches)
.
-How can you recognize a tree
?
(by silhouette)
. Show silhouettes of birch, spruce, maple. Offer to draw the crown with crumpled paper or a poke. Accordingly, observing the shape of the crown.
Slide 17.
When
depicting trees,
you can use various
techniques
, for example: Arrange a walk in the park:
Consider the trunk, roots, branches, twigs, leaves, fruits, etc.
• Pay attention to the unusual shape of the trunks (curved, hollow, inclined)
• Play the game “I am a tree ”
- bring to the group
spruce or pine sprig for consideration;
- take a second walk into the forest to compare different deciduous trees
;
— Look at reproductions of paintings depicting trees
;
— Organize the lesson as a trip to different continents
where unusual
trees (palm trees, cypresses)
.
In teaching older children
you can use a partial display -
an image
of a detail or an individual element that preschoolers do not yet know how to
depict
.
For example, children 4-5 years old draw a tree
in the form of a triangle with a wide base.
This mistake is caused by the teacher’s explanation: “The tree trunk is narrow at the top and wide at the bottom
.
Therefore, along with verbal instructions, show an image of a tree trunk
.
One of the effective techniques
visual learning is the teacher's drawing. But the educational drawing should not be simplified to a diagram. The image must remain alive, corresponding to reality.
Slide 18
. For example, when showing how to draw a Christmas tree, the teacher must proceed from the requirements of the program - convey the main features: a vertical trunk, branches going to the sides, green color.
But these signs characterize other trees
.
To preserve the image of the Christmas tree, the teacher will draw the trunk with a line expanding towards the bottom, the branches (shorter at the top, longer at the bottom)
slightly inclined. It is important that the visual image does not diverge from the image of the real object, in this case it is a Christmas tree.
Slide 19.
If we want each child to fully demonstrate his or her individuality in art classes, create an atmosphere of joy, pleasure, goodwill and respect for the work, imagination, and creativity of each child.
Analysis of software drawing tasks according to age group
In the first junior group, drawing tasks are:
- arouse interest in the drawing process as a type of activity that produces results;
- familiarize children with drawing materials and how to use them;
- teach to understand an adult’s drawing as an image of an object;
- teach how to draw straight, rounded lines and closed shapes.
Drawing tasks in the second junior group:
- teach to depict a variety of simple objects, convey their main features - shape, color;
- develop a sense of color - learn to distinguish and name primary colors;
- develop compositional skills - placing the image in the middle of the album sheet;
- improve technical skills.
Drawing tasks in the middle group:
- teach how to depict round and rectangular objects, convey their structure, main parts and details;
- teach to use color as an artistic means of expression;
- develop compositional skills in arranging an object in the center of the sheet;
- improve the technical skills of painting a picture with pencils and paints.
Are you an expert in this subject area?
We offer to become the author of the Directory Working conditions Drawing tasks in the senior group:
- teach how to correctly convey the shape of an object, its characteristics, relative size and position of parts;
- teach how to convey simple movements in a drawing;
- develop and improve the sense of color;
- develop technical skills in working with pencil and paints;
- teach how to draw with crayons, charcoal, sanguine, and watercolors.
Objectives of object drawing in the preparatory group:
- teach to depict the structure, size, proportions, characteristic features of objects from nature and from imagination;
- teach the transfer of a wealth of forms and colors, the creation of expressive images;
- develop compositional skills;
- develop a sense of color;
- develop technical skills - the ability to mix paints to get different colors and shades;
- apply pencil strokes or brush strokes to the shape of an object.