Notes on drawing “Balloons” for children of the middle group
Svetlana Panchekhina
Notes on drawing “Balloons” for children of the middle group
Topic: "Colored balls "
Program content: continue to introduce children to the techniques of depicting round and oval objects; develop hand motor skills; cultivate the desire to achieve good results.
Materials: teddy bear toy, round and oval balloons
Ioo: cognitive development; speech development.
1. Organizational moment. Educator: Guys, listen to who I’m telling you about!
The furry beast loves honey.
If he doesn't understand something,
Can roar wildly
Because he is (Bear)
“Today I invited the little bear to come visit us, but he still doesn’t come.” I wonder where he is? (a roar is heard, a bear cub appears)
. Oh, little bear, what happened?
Little Bear: I was stomping along the forest path.
I carried the balls in my hand.
He stumbled and fell - WHAM!
And my one balloon disappeared (roars)
Educator: Guys, what happened to the ball? Where did he go? (burst)
.
Oh, what a pity! How can we calm the bear cub down and cheer him up? I think I've come up with an idea, let's draw new balls for the bear! (Let's)
. Little bear, don’t be sad, the guys and I will draw new balls and not just one, but many, because we have a lot of kids.
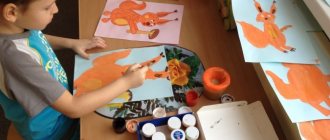
2. Looking at a balloon . The teacher invites the children to look at the remaining balloons . Guys, what shape is the ball? (round, oval)
.
The teacher invites the children to outline this shape in the air with a movement of their hand .
3. Demonstration of drawing . The teacher shows the technique of drawing an oval with pencils , accompanying the words with the direction of movement: “Round, long, round again and long again.”
, and then invites one of the guys to show at the board how to
draw an oval-shaped balloon .
4. Independent work of children , the teacher helps individually, as needed. After finishing the work, the teacher invites the children to attach the finished drawings to the magnetic board and turns to the bear cub: “Look, little bear, what wonderful balls the guys have drawn for you .” The little bear thanks the children for the balloons and leaves.
5. Finger gymnastics at the teacher’s choice.
6. Summary: What did you do today? What did you draw ? What shape are balloons ? What color were the balloons ? For whom were the balloons drawn ?
Summary of direct educational activities in the educational field of communication in the middle group. 1. Developed in accordance with the project “Oh, these fairy tales.” 2. Topic: “Let’s call a fairy tale.” 3. Goal: To consolidate children’s knowledge about Russian folklore.
Long-term plan for design and application in the middle group for the first half of the year PERSPECTIVE PLAN FOR DESIGN AND APPLICATION SEPTEMBER. 1 (design): Topic: “Practical experimentation with paper.
Source
Balloons in the sky
In this master class you are asked to draw a landscape with hot air balloons flying against a blue sky. Using the example of balls in the sky, a child can be introduced in a simple and understandable way to the principle of perspective: the closer an object is to the viewer, the larger it is; the further away from the viewer, the smaller it is.
An example of a balloon drawing for children.
To complete this drawing you will need:
- paper;
- a simple pencil;
- eraser;
- black felt-tip pen;
- colored pencils or wax crayons.
The drawing is performed in stages:
- First, mentally or with light lines with a simple pencil, divide the sheet in half with horizontal and vertical lines. Then these lines will need to be erased. In the meantime, they are needed to determine the center of the composition.
- The balls are placed relative to this center. The balloon in the upper right is closest to the viewer, and therefore the largest. In the upper left part there are two other balls moving away from the viewer. The smallest one is furthest from the viewer.
- Draw the balls. Draw vertical stripes on them, running from the top of the ball to the basket. There can be 5 or 6 of them. These are the cables connecting the basket and the ball. Then add horizontal stripes on the ball. Finish drawing the basket.
- Hills and trees are marked at the bottom of the sheet. Since the balls are flying across the sky, this should be emphasized with a light cloud.
- Erase all unnecessary lines with an eraser. Now carefully outline the drawing with a black thin felt-tip pen.
- The last stage is coloring.
Use colored wax crayons or colored pencils for this. Or paints, of your choice.
Summary of drawing lesson “Multi-colored balls”
Kots Svetlana
Summary of drawing lesson “Multi-colored balls”
Priority educational field: Artistic and aesthetic
• continue to introduce children to the techniques of depicting round and oval objects;
• develop hand motor skills;
• cultivate the desire to achieve good results
Subject-spatial development environment: a toy - a bear cub, a person in a bear costume, round and oval balloons
Planned results: They recognize a bear by its characteristic features, describe a balloon, recognize a circle and an oval, write a story about the work done.
Course of the lesson corresponding to the Federal State Educational Standard
| Lesson stages | Content | Auxiliary material |
| Organizing time | Guys, today a new toy will come to visit us. But first, solve the riddle. If you answer correctly, you will find out what kind of toy it is. What clues in the riddle helped you solve it? How can you play with a toy airplane? Today we will learn a lot about airplanes and learn how to draw them. And after class you can play with him. In ancient times, people looked at birds and dreamed of flying like them. But a lot of time passed before this happened. First, people learned to rise into the air on... (Show picture). Do you know what this is? People learned to take to the air in a hot air balloon. The ball was filled with smoke from the fire, a gas that is lighter than the surrounding air. But the ball flies where the wind blows. And the man wanted to choose where to fly. Time passed and finally an airplane was invented, which was controlled by a pilot. (Show picture). It flies where the pilot directs it. But in order to get off the ground and into the air, the plane must first fly at high speed along the ground. This requires a lot of space and a specially built road - a runway. And sometimes you need to fly to a place where there is not a lot of space and such a runway. That's when people had to come up with a helicopter. (Show picture). The helicopter is also controlled by a pilot. But to take off and land, a helicopter does not need a lot of space or a runway. The pilot turns on the engine, these blades begin to rotate (shown in the picture), and the helicopter takes off straight from the spot. Guys, what does the plane have? (wings, landing gear, fuselage, cockpit) Let's draw a plane that flies through the clouds. Show the children a finished sample of the drawing. | Riddle: Not a bee, but buzzing, Not a bird, but flying, Not building nests, Carrying people and cargo. (Airplane). |
| Practical part | Invite the children to use wax crayons. First you need to draw the body, and then finish drawing the wings, windows, and cockpit. Color the plane with crayons in a solid color. Use watercolors and a lot of water to paint the sea around. While the watercolor is drying, play outdoor games. Guys, a cloud appeared on the way of the planes. Let's draw it using gouache. Give the children white or blue gouache. Show how to paint oval clouds using a semi-dry hard brush using the poking method. | Outdoor game: Let's fly, fly, (Stand your legs apart.) Spin your arms forward. (Rotate your arms in front of your chest.) Arms to the sides - take flight. Send the plane, (Spread your arms horizontally to the sides.) Right wing forward, (Turn your body to the right with your right arm moving forward.) Left wing forward. (Turn the body to the left with the left arm moving forward.) One, two, three, four - Our plane has flown. A wonderful pilot sent the plane on its way. (Running freely with your arms out to the sides.) |
| Conclusion | After creating a drawing, children are invited to play a game. At the end of the game, ask the children what new did you learn today and what did you learn during the lesson, what did you like most? Praise each child. Be sure to sign all the drawings and arrange a mini-exhibition for parents. | Outdoor game “Airplanes” Children run freely with airplanes in their hands. The teacher gives the commands: “Planes, land,” “Planes, take off,” “Planes, gain altitude,” “Planes, descend.” |
Modeling lesson in the younger group of kindergarten
Note! Depending on the skill level of the students, you can complicate or simplify the drawing.
Summary of GCD for drawing in the middle group “Multi-colored balls”
Zakharova Anna
Summary of GCD for drawing in the middle group “Multi-colored balls”
Age group : middle (4-5 years)
.
Topic: " Colorful balls "
Leading educational field: “Artistic creativity”
Goal: To develop children's creative potential using non-traditional visual arts techniques.
Educational: continue to introduce non-traditional drawing ( drawing with cotton swabs print -drawing technique )
, continue to develop in children the ability to carefully fill the outline of an object with color.
Strengthen ideas about the shape of an object (round, oval)
.
Enrich children's ideas about colors (green, blue.)
.
Developmental: develop imagination and color perception.
Educational: Arouse interest in drawing , cultivate friendliness by appreciating the work of other children.
Types of activities: gaming, motor, communicative, visual.
Forms of organization: group , individual.
Forms of implementation of children's activities: conversation, play, looking at illustrations, drawing .
Vocabulary: round, oval, green, blue.
Equipment: White A4 paper with an outline of balls , gouache, water jars, napkin, balls , sponge.
Preliminary work: reading and watching the fairy tale Winnie the Pooh, D/I “Pick it according to the shape”
, D/I
“Colored Rainbow”
, examination of illustrations.
Step by step process of drawing an airplane
- At the first stage, draw the outline of the airplane. Its outline is similar to a fish.
Drawing an airplane step by step
Important! Explain to children that they do not need to draw thick lines with a pencil. If necessary, inaccuracies can be removed with an eraser.
- The wings are being drawn. This is an important element. The wing, which is located behind the body, needs to be drawn partially. The wings are shaped like triangles with rounded corners;
- Draw small wings on the back of the tail. Draw a rectangular front window on the front of the hull, and round portholes throughout the hull.
Drawing an airplane flying through the clouds can take a lot of time, as it requires drawing a large number of details, smooth geometric shapes and lines. Nevertheless, most boys will be delighted with this activity. Girls will also love the beautiful airplane drawn with their own hands. And the teacher’s correct approach to organizing the lesson will help to depict an airplane easily and quickly.
Lesson 1. Modeling “Apples and berries” (“Peaches and apricots”)
Program content.
Strengthen children's ability to sculpt round objects of different sizes. Learn to convey impressions of the environment in sculpting. Cultivate a positive attitude towards the results of your activities, a friendly attitude towards the drawings created by peers.
Methodology of conducting the lesson.
Talk with children about fruits and berries. Examine fruits and berries, ask about their shape, compare by size. Invite the children to remember and show with their hands in the air how to sculpt round objects. Ask which lumps of clay need to be separated from the general piece to make large and small round fruits and berries.
At the end of the lesson, consider with the children what they made, talk about the sculpted images, pay attention to the best works: the shape is well conveyed, the difference in size (without naming the children’s names).
Materials.
Fruits and berries to look at. Clay, plasticine, board (oilcloth) for modeling, stack (for each child).
Connections with other activities and activities.
Observations on walks and excursions; a conversation about fruits and berries that have ripened in gardens and vegetable gardens; looking at pictures and illustrations in books; conducting didactic games; reading poems and riddles on the topic.
Lesson 2. Drawing according to the plan “Draw a picture about summer”
Program content.
Teach children to reflect their impressions in accessible ways. Strengthen the techniques of painting with a brush, the ability to hold a brush correctly, rinse it in water, and dry it on a cloth. Encourage drawing of different objects in accordance with the content of the drawing.
Methodology of conducting the lesson.
Recall with the children what they observed in the summer: the sun was shining brightly, different flowers were blooming, butterflies and bees were flying over the meadow; Beetles of different colors crawled in the grass; in the forest and in the clearing one could meet a hedgehog, etc. Encourage children to actively speak out. Listen to all the children's answers. Read them poems about summer. Offer to draw anyone who wants a picture about summer. Encourage drawing of several images (lots of bugs, flowers, bees, butterflies, etc.). At the end of the lesson, enjoy the drawings with the children and offer to choose the most beautiful images.
At the end of the month, it is advisable to conduct another lesson in drawing according to the plan.
Materials.
Gouache of different colors (or colored wax crayons), album sheets, brushes, a jar of water, a napkin (for each child).
Connections with other activities and activities.
Talking about summer, reading poems, stories, fairy tales; singing familiar songs; looking at illustrations.
Lesson 3. Modeling “Big and small carrots”
Program content.
Teach children to sculpt objects of elongated shape, tapering towards one end, by slightly pulling and narrowing the end with your fingers. Strengthen the ability to sculpt large and small objects and handle materials carefully.
Methodology of conducting the lesson.
Pick up two toy bunnies: a big one and a small one. Tell the children that two bunnies came to visit them. Ask if the bunnies are the same size. Praise children for the correct answer. Ask: “Guys, what should we treat the bunnies with? What do bunnies like to eat? If the children do not name carrot, give them a hint and offer to make their favorite carrot for the bunnies.
Examine carrots with the children, offer to make large carrots for a big bunny, and small carrots for a small one. Show how to sculpt a carrot: roll the clay between your palms, then sculpt with your fingers. During the sculpting process, approach the children and, if necessary, remind them of sculpting techniques.
When finished, emphasize: “Everyone made big and small carrots.” Offer to place large and small carrots in front of the bunnies (according to size).
Materials.
Toy bunnies (large and small), carrots. Clay, modeling board (for each child).
Connections with other activities and activities.
Care and observation of rabbits. Examination of autumn harvest vegetables, conversations about vegetables, educational games.
Lesson 4. Application “Beautiful flags”
Program content.
Teach children to work with scissors: hold them correctly, squeeze and unclench the rings, cut a strip along the narrow side into equal pieces - flags. Reinforce techniques for careful gluing and the ability to alternate images by color. Develop a sense of rhythm and a sense of color. Evoke a positive emotional response to the images created.
Methodology of conducting the lesson.
With your children, look at the beautiful multi-colored flags that decorate areas, verandas, and kindergarten premises. Draw children's attention to the shape and color of the flags. Suggest sticking beautiful flags on a string, alternating them by color. Show how to cut the strips in half. Allow the children to take the scissors and check if they are holding them correctly. Ensure that children use scissors correctly. If necessary, remind and correct the position of the fingers holding the scissors. Remind you to stick carefully.
At the end of the lesson, display all the work on the board and note the beautiful combination of colors.
Note.
This lesson introduces scissor cutting for the first time. Considering the complexity of working with this tool, it is advisable to acquaint all children (in subgroups) with scissors and how they operate in their free time a few days before the lesson. Warn children to be careful when working with scissors so as not to injure themselves or a child sitting next to them. Then offer to cut up tickets or checks for the game.
Materials.
Paper 1/2 the size of a landscape sheet (cut horizontally), 4 paper strips of two colors for each child (for different tables, prepare strips of different but well-combined colors), scissors, glue, glue brush, napkin, oilcloth (for each child).
Connections with other activities and activities.
Involve children in decorating the interior of a group room (art studio, hall, area). Didactic games.
Lesson 5. Drawing “Apples are ripe on the apple tree”
Program content.
Continue to teach children to draw a tree, conveying its characteristic features: the trunk, long and short branches diverging from it. Teach children to convey the image of a fruit tree in a drawing. Reinforce drawing techniques with pencils. Learn a quick technique for drawing foliage. Lead children to an emotional aesthetic assessment of their work.
Methodology of conducting the lesson.
Talk to the children about the fact that the apples are ripe in the orchards; they are round, ruddy, hanging on the branches of a tree. Invite 2-3 children to draw a tree at the board. Then show how you can quickly draw leaves in a circular motion without painting them. To say that children can already draw round apples on their own. If one of the guys quickly finishes the drawing, offer another sheet of paper. By repeating an already created image, children can make changes and additions on their own initiative. This should be encouraged.
Invite the children to put the finished drawings on the board; talk about how many apple trees the guys drew.
Materials.
Colored pencils or colored wax crayons, 1/2 landscape paper (for each child).
Connections with other activities and activities.
Observations on walks, excursions, reading poems, looking at illustrations.
Lesson 6. Modeling “Cucumber and Beetroot”
Program content.
Introduce children to the techniques of sculpting oval-shaped objects. Learn to convey the features of each object. Strengthen the ability to roll clay with straight hand movements when sculpting oval-shaped objects and circular ones - when sculpting round-shaped objects. Learn to pull with your fingers, round the ends, smooth the surface.
Methodology of conducting the lesson.
Consider cucumber and beets with your children. Find out what these vegetables are called and how they differ. Ask the children how to make beets. Show how to sculpt a cucumber. Then, together with the children, repeat the technique of rolling plasticine in the air to obtain an oval-shaped object and show how to round the ends with your fingers. During the sculpting process, clarify the techniques and the name of the new form.
Examine all the sculpted vegetables with the children, select images of different sizes.
Materials.
Natural cucumber and beets. Clay or plasticine, modeling board (for each child).
Connections with other activities and activities.
Didactic and printed board games that use vegetables or their images. Games to the store.
Lesson 7. Application “Cut the strips and stick them into whatever objects you want”
Program content.
Teach children to cut a wide strip of paper (about 5 cm), hold scissors correctly, and use them correctly. Develop creativity and imagination. Foster independence and activity. Reinforce techniques for careful use of paper and glue.
Methodology for conducting the lesson
. Invite children to cut a wide strip of paper into narrow strips. Show how to hold scissors and cut with them: to cut a wide strip of paper into narrow strips, you need to open the scissors (show how to spread the blades of the scissors, insert the edge of the strip, carefully connect the rings with your fingers, then spread the blades again and slide a wide strip of paper between them , squeeze the rings again and repeat these steps several times until you cut a narrow strip). So you need to cut off several strips.
Ask what items from strips can be glued on. Complete the children’s statements (you can put something on a flannelgraph). Encourage children's creativity. Suggest sticking each item, each image on a separate piece of paper. When reviewing, note the most interesting ideas.
Materials.
Strips of colored paper 5 cm wide, white paper the size of 1/4 of a landscape sheet for gluing images (3-4 sheets for each child), scissors, glue, glue brush, napkin, oilcloth (for each child).
Connections with other activities and activities.
Children playing with toys, observations during walks and excursions. When examining objects with children (climbing ladders on the site, benches for resting, tables for games, fences, lawn fences, bushes and trees, etc.), pay attention to their structure.
Lesson 8. Drawing “Beautiful Flowers”
Program content.
Develop observation skills and the ability to choose an object to depict. Learn to depict parts of a plant in a drawing. Strengthen the ability to paint with a brush and paints, hold the brush correctly, rinse it well and dry it. Improve your ability to look at pictures and choose the best ones. Develop aesthetic perception. Induce a feeling of pleasure and joy from the created image.
Methodology of conducting the lesson.
Examine with the children the flowers brought to the group, note their beauty, freshness, structure (center of the flower, petals, stem, leaves), pay attention to the variety of shapes and colors. Invite the children to show how to draw flowers.
Then show the children several other techniques for drawing petals: with the whole brush, with the end, or by dipping. Offer to draw whatever flowers anyone wants. Encourage the use of different colors of paint. Remind about the correct techniques for painting with a brush and paints.
Materials.
Gouache of different colors (3-4 colors for each table), white A4 paper or any light color, brushes, a jar of water, a napkin (for each child).
Connections with other activities and activities.
Observations in the flower garden of a kindergarten; looking at flowers in a bouquet, pictures with their images, artistic postcards.
Lesson 9. Modeling according to plan
Program content.
Teach children to determine the content of their work and use familiar techniques in modeling. To develop the ability to select the most interesting works from those created (by topic, by execution). Foster independence and activity. Develop children's imagination and creativity.
Methodology of conducting the lesson.
Invite the children to think about what they would like to make. Encourage interesting ideas, help children who are experiencing difficulties.
At the end of sculpting, look at all the images, offer to choose the most interesting ones and tell why they were chosen.
Materials.
Clay, modeling board (for each child).
Connections with other activities and activities.
During games, attract children's attention to various objects and toys, examine them, offer to name their shape, characteristic details (a bunny has long ears, a fish has fins, etc.).
Option. Modeling “Make whatever vegetables and fruits you want”
Program content.
Strengthen children's ability to sculpt familiar objects using previously learned sculpting techniques. Develop initiative, independence (encourage the modeling of those vegetables that children have not sculpted before) and creativity. Evaluate your work.
Methodology of conducting the lesson.
Bring different vegetables and fruits to the group. Tell the children that a rich harvest has ripened in the gardens (there is no need to examine each item in detail if the children have become familiar with vegetables and fruits before). You can read an excerpt from Y. Tuvim’s poem “Vegetables” (see Book for reading in kindergarten and at home. 4–5 years old / Compiled by V.V. Gerbova, N.P. Ilchuk, N.P. Baburova. - M. : Onyx, 2005. – P. 197).
Invite the children to sculpt what vegetables and fruits they want. Encourage the sculpting of different objects, especially those that have not been sculpted before. Pay attention to the modeling techniques used by children; ask how you can depict a beet tail, sculpt a carrot, cucumber, etc. Remind them of the correct sculpting techniques. Encourage finger sculpting.
Enjoy all the sculpted products, note the variety of vegetables and fruits created.
Materials.
Vegetables to look at. Clay (plasticine or plastic mass), modeling board (for each child).
Connections with other activities and activities.
Organization of didactic games with fruits, vegetables and pictures. Conversations individually or with subgroups of children about what ripens in the fall. Ask the guys which of them have seen how vegetables and fruits grow. Offer to describe what they look like.
Lesson 10. Application “Decorate a napkin”
Program content.
Teach children to make a pattern on a square, filling in the middle and corners with elements. Learn to cut a strip in half after folding it; hold scissors correctly and use them correctly. Develop a sense of composition. Strengthen the ability to carefully glue parts. Provide an aesthetic assessment of the work.
Methodology of conducting the lesson.
Invite the children to decorate the napkin with small squares of different colors, but be sure to place squares of the same color in all corners. Show how to cut strips into squares (bend the strip in half and cut along the fold). Explain and show on a flannelgraph how you can decorate a square (children choose the color of the stripes as desired). Invite all children to take the scissors correctly and check how they hold them.
At the end of the lesson, consider how beautiful the napkins turned out.
Materials.
A square sheet of white paper measuring 16x16 cm, strips of different colors measuring 6x3 cm, scissors, glue, napkin, oilcloth, glue brush (for each child).
Connections with other activities and activities.
Didactic games with objects of different shapes. With a subgroup of children, cut up tickets and receipts for games. Examination of objects of decorative art.
Lesson 11. Drawing “Colored balls (round and oval)”
Program content.
Continue to introduce children to the techniques of depicting oval and round objects; learn to compare these forms, highlight their differences. Learn to convey the distinctive features of round and oval shapes in a drawing. Strengthen your painting skills. Practice your ability to paint by lightly touching the pencil to the paper. Cultivate the desire to achieve good results.
Methodology of conducting the lesson.
Consider oval-shaped balloons with the children. Invite the children to draw this shape in the air with their hands. Demonstrate the technique of drawing an oval with pencils, accompanying the words with the direction of movement: “Round, long, round again and long again.” Invite one of the children to show at the board how to draw an oval-shaped balloon. Invite the children to start drawing balls. Invite each child to choose the most beautiful ball and paint it.
At the end of the lesson, look at all the drawings, clarify the name of the shape of the depicted objects.
Materials.
Balloons of round and oval shape. Pencils, album sheets (for each child).
Connections with other activities and activities.
Games with toys. Independent use of the didactic game “Find the same shape.”