Notes on sculpting “Amanita”
Abstract "Plasticine Crow"
Educator: Radaikina O.A.
Topic: Poisonous mushrooms. "Fly agaric".
Tasks:
— Teach children to sculpt fly agarics from four parts (hat, leg, “skirt”, clearing).
— Show a rational way of making specks (decoration) for a cap: rolling out the flagellum and cutting it into small pieces in stacks.
-To clarify the idea of the structure of the fly agaric to more accurately convey the shape and proportions of the parts.
-Cultivate interest in learning about nature and reflecting impressions in different types of artistic activities.
Develop:
curiosity, creative taste, desire to sculpt.
Materials:
modeling boards, stacks, plasticine, napkins, images of fly agarics in nature, modeling diagram.
I. Part. Introductory.
Educator:
-
“This mushroom was decorated with pine forest.
Everyone knows: he is a mo-ho-mor!
Although handsome, wonderful,
It is not edible. Dangerous."
Look guys, this is a fly agaric mushroom (show pictures or photographs). Let's look at it, what parts does the fly agaric consist of? What geometric shape does the hat resemble? Specks? And the leg? (children's answers). Look and tell me what color is his hat? What about the spots? Tell me why it was called fly-mor? (children's answers) Because he kills flies.
Today I suggest you make fly agarics. First, let's make a clearing for our mushrooms, and then the fly agaric mushroom itself.
II. Part. Main. Teacher's demonstration.
Take a piece of white plasticine in your right hand and make a fly agaric leg. Roll out the cylinder, then make a “skirt” for the fly agaric leg. Roll out the column, flatten it into a ribbon, pinch the frill and wrap it around the leg.
We take a piece of red plasticine and we will sculpt a hat - we roll it into a ball, flatten it and bend it to make a bowl. We decorate the hat with white dots. First, roll out a flagellum from white plasticine. We cut it in a stack into many, many small pieces, and attach them to the red cap.
Now let's connect the cap and the leg; the mushroom itself and the clearing.
Questions for consolidation: - Guys, what will we sculpt first? What then? How to make a fly agaric “cup-hat”? And when we make the hat, what then? (children's detailed answers)
Independent activities:
Children make fly agaric mushrooms according to their imagination, or, if necessary, based on diagrams. If help is needed, the teacher prompts and helps.
III. Part. Final.
Design of the exhibition “Dangerous Meadow” with fly agaric mushrooms. We decorate with twigs to fence the clearing or put up warning signs. We praise the children, invite them to admire their work, reinforce new knowledge, and talk about why they shouldn’t collect fly agaric mushrooms. We ask for help in cleaning the workplace, we switch the children’s attention from one type of activity to another.
Developmental activities. Modeling. Lesson No. 13. fly agaric
Target:Teach how to pinch off small pieces of plasticine from a piece and roll them into balls with a diameter of 5-7 mm, press the plasticine ball with your index finger, attaching it to the base, place the balls at an equal distance from each other; develop an interest in working with plasticine; develop fine motor skills.
Material:
Sheets of white cardboard (with a pre-prepared design or applique; white plasticine; a toy or drawing depicting a fly agaric.
Sculpting techniques:
“Pinching”, “rolling” - forming balls from small pieces of plasticine by rolling them in a circular motion between the thumb and index (or middle) fingers, “pressing”.
Progress of the lesson:
Before starting the lesson, prepare the basis for creating a plasticine picture - an image of a fly agaric mushroom on cardboard. To do this, cut out a hat from red paper and stick it on a sheet, and draw a leg.
Start the lesson with a riddle.
- Listen to the riddle. Try to guess what she's talking about.
Near the forest on the edge, Decorating the dark forest, It grew motley, like Parsley, Poisonous...
- That's right, it's a fly agaric mushroom!
Show your child a toy fly agaric or a picture of one.
- Let's take a closer look at the fly agaric. Here's his leg. And this is a hat. What's on the fly agaric's hat? White specks.
Give your child a blank with a picture of a fly agaric and white plasticine.
- Look, you have a fly agaric in your picture too. There's just something missing from him. What do you think? That's right, white specks on the cap. Let's put white specks on the fly agaric's cap so that everyone recognizes it and doesn't pick it and eat the poisonous mushroom.
Invite your child to make specks: pinch off small pieces of plasticine and roll them into balls with the thumb and forefinger of his right hand.
While the child makes specks, you can read poetry:
FLY AKOMOR
Satin cap, red-red. White peas are thrown on top. And on the leg there is a white bow. What kind of dandy is this? As I dressed up for the holiday, I rolled out into the clearing, - We know, we know! You are good and handsome, but not fit for a basket! (V. TELEGINA)
If the child’s level of development of fine motor skills and skills in working with plasticine allow, then together with him you can make a mushroom cap from plasticine. To do this, red plasticine is smeared on a cardboard base, on which the outline of a mushroom is previously drawn.
_________________________________________
When preparing the lesson, the book was used: Yanushko E.A. Modeling with young children (1-3 years). Methodological manual for educators and parents. - M.: Mozaika-Sintez, 2005. - 80 p.
Application from plasticine for children. fly agaric
Summary of organized educational activities
Manual labor lesson on the topic: “Plasticine applique “Amanita.”
Author: Svetlana Aleksandrovna Ovchinnikova, teacher of OGKOU SKOSH No. 39 VIII type, Ulyanovsk. Description. The lesson notes are intended for students in grades 3-5 of type VIII correctional schools. This development may be useful for teachers and leaders of special (correctional) schools in their work on developing visual skills. Kindergarten teachers can partially benefit from this. The summary was developed taking into account the presence in the class of students with undeveloped own speech, but who understand the spoken speech. Goal: formation of visual skills. Tasks. Strengthen the ability to create an applique from plasticine, smearing it over the base without going beyond the contours. Continue to teach children to pinch off a piece of plasticine, roll a ball between their palms in a circular motion, and use additional material in the applique - peas. Practice the ability to recognize and correctly name colors: white, red. Correction and development of attention, visual-motor coordination of hands and fingers. Material. Sample - A-4 format, toy or picture - fly agaric. For each student: a game of soft parts “Collect a fly agaric”, half a sheet of cardboard with a graphic image of a fly agaric - a red cap, a white leg, a little grass, halves of peas painted white.
Preliminary work. A conversation about mushrooms with a demonstration of pictures, drawing a mushroom according to a template, a stencil and then painting it over, assembling a fly agaric from colored flat, soft parts with Velcro, memorizing the poem “Amanita.” Lesson content. Organizing time. The long-awaited bell is given, the lesson begins. Let's sit straight and not bend over. We'll get to work. — Let's start the manual labor lesson. What lesson starts? - Right. Finger gymnastics. There is a lock on the door. (Fingers in the lock) Who could open it? They pulled... They twisted... They knocked... And they opened it. (Hands to the sides) - Guess what mushroom grew in the clearing. Listen carefully to the riddle. But here is someone important On a little white leg, He is wearing a red cap, There are polka dots on his hat. - Well done. This is a fly agaric, L. show me where the fly agaric is. - Well done. Do you like fly agaric? - Let's look at it carefully. What is this? (Leg) - Show the fly agaric’s leg. What color is the leg? - What’s that on the fly agaric’s leg? (skirt) - What is this? (Hat). - Show me where the hat is. - Well done. What color is the hat? - What’s on the fly agaric’s hat? (white dots) - Well done. This is how beautiful the fly agaric has grown. We found out what parts the fly agaric consists of. I also have fly agarics. Oh (the teacher looks into one of the bags) they are broken. Help, collect mushrooms - fly agarics. We have already said that the mushroom has a stem, a cap, and white dots. Collect carefully. Game "Collect a fly agaric".
- Well done, what mushroom did you pick? (children's work is displayed on the admiration board) - That's right. Who will tell a poem about the fly agaric. Red hat with polka dots, collar on a thin leg.
The fly agaric is beautiful to look at, but dangerous and poisonous. - Well done. Fly agaric is a poisonous mushroom. We can't eat it. But many forest animals need it as a medicine. It's winter now, everything is covered with snow, and mushrooms don't grow in the forest. How can we help forest dwellers? Today in our handicraft lesson we will make an applique of a fly agaric from plasticine. Here is a fly agaric (sample introduction).
Do you like this fly agaric? What type of mushroom will we make in the lesson? — This fly agaric is made of plasticine. What is this? - That's right, leg. What color is the plasticine on the leg? — What geometric figure does the leg resemble? (Rectangle) - What color of plasticine did I take for the hat? - Well done. What geometric shape does the hat resemble? (triangle). - Look carefully, the leg is below, and the hat is on the leg, at the top. What are the white dots on the cap made of? (from peas) - Well done. What is the fly agaric applique made of? — And now I’ll show you how to make a fly agaric appliqué. Watch and listen carefully. A fly agaric is drawn on the card - a white leg and a red cap.
The teacher shows and explains how to do the work. We pinch off a piece of white plasticine, roll the ball between our palms in a circular motion, and press it onto the base at the top of the leg.
Then smear it from top to bottom with your finger, without going beyond the contours. Who wants to help me? (The student comes to the board). — To make a skirt, take some white plasticine and roll it into a “column.” Like this. Let's press the fly agaric to the leg. Gently smooth it on top, like this. Now let's make the hat. We pinch off a piece of red plasticine, roll the ball between our palms in a circular motion, and press it onto the base at the top of the cap.
Then smear it from top to bottom with your finger, without going beyond the contours. Who wants to help me? (2 students come to the board).
“That’s how beautiful my fly agaric turned out.” There's just something missing. Who guessed? - Right. I will make white dots from peas. Like this - I apply it and press it into the plasticine.
— I showed you how to make a mushroom from plasticine. Now let's rest a little. We stretch our hands to the ceiling, like a flower towards the sun. Let's spread our arms to the sides, as if we were spreading leaves. We flap our wings like geese. And then we’ll quickly lower it. - Let's sit straight, don't bend over, We'll get to work. -What kind of mushroom will you make from plasticine? - What will you do first? (leg) - And then what? —What will you make the white dots from? - Well done. Only the cunning peas hid among the yellow ones. I think you will find them when you decorate the hat. Show how you will roll a ball of plasticine and smear it on the base. (Actions are performed in the air). “Now it’s time to get to work.” Independent activity of children. The teacher provides individual assistance. — What mushroom applique did you make? —What did you make the fly agaric from? — What did you do with plasticine? (smeared) - Who will we give these fly agarics to? (Forest animals). - That's right, this is their medicine. Guys, if you liked the lesson, show me the cheerful sun. If you didn't like it, then it's sad.
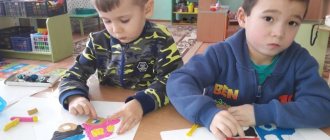
“I’m very glad that everyone liked the lesson.” And I liked how you participated in the lesson. An individual assessment of work and participation in the lesson is given. - Well done. Thanks to all. This concludes our lesson. Children's work (severe mental retardation).
We recommend watching:
DIY autumn crafts Plasticineography in elementary school. Master class Plasticineography in elementary school. Master class Plasticineography for junior schoolchildren. Cat Scientist
Similar articles:
Application from plasticine “On the lawn” in elementary school
Plasticineography for children from 4 years old
A picture made of plasticine. Master class with step-by-step photos
Plasticineography as a means of developing the creative abilities of children with disabilities
Crafts for preschoolers for March 8th. Tulip for mom