07.08.2019
Modeling from plasticine step by step is the best educational technique for preschool children (from 2-3 to 7 years old)! Children love modeling with clay because they can create anything!
Most of all, children love to sculpt: animals, people, cars, cities. Nowadays it is very popular to sculpt Smeshariki, unicorns, cats, hedgehogs and dragons. Sculpting is very useful. Step-by-step modeling develops creative thinking, imagination, fine motor skills, speech, and logical thinking several times faster.
Children from 3 to 7 years old are especially passionate about modeling. Therefore, we have selected interesting craft ideas that are very popular among children. Stock up on plasticine of different colors to make it even more interesting for your child!
How to make a caterpillar and a bee step by step
How to make a ladybug
Snail step by step for children (spiral modeling)
How to make a teddy bear
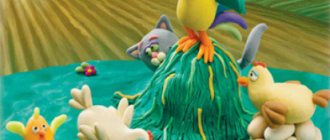
An interesting idea for sculpting: a bird in a nest
We sculpt flowers and compositions step by step
How to make a car from plasticine
Bicycle step by step
Modeling should be interesting for a child. Therefore, choose the most interesting ideas for modeling. Let the child choose what he will sculpt. When the baby is engaged, discomfort, excitement and anxiety go away. When a child creates a favorite cartoon animal, be it a bunny or a kitten, a giraffe or a unicorn, he feels good and proud of his achievements. Therefore, mommies, do not forget to praise your baby for any achievement!
Lion made of plasticine
- Two balls are the basis of the entire structure, which is united by a toothpick, and one element should be slightly rounder than the other.
- Head and torso respectively. Then you will need four sausages: two are attached to the back, the rest are glued to the front of the base.
- Use a different color to highlight the bottom of the legs and chest, highlighting them in different shades.
- Make the cheeks the same color, and black or brown the nose and button eyes.
- All that remains is to add round ears, a mane in the shape of flower petals and a tail at the back, decorating it with a red tassel.
- If desired, roll up a few gray stones and place the king of beasts on top; a few tufts of grass will not be amiss.
Mental and personal development while sculpting
When doing sculpting step by step, do it in a fun and playful way. Create a story for the beast you create, and then act it out. Use ideas from fairy tales and cartoons, and act out stories from everyday life.
What do you need for a modeling lesson?
You need high-quality plasticine. For kids, choose very soft plasticine. If it is difficult for the baby to sculpt awkwardly, then his interest in such an activity will quickly pass.
Tools for modeling from plasticine:
- modeling board;
- stacks;
- rolling pins, including those with patterns;
- molds for modeling.
How to teach children to sculpt?
Many parents think that children will begin to sculpt and develop on their own. This is wrong. You will need to be shown how to do it, go through basic lessons. In the future, the child will come up with his own characters, but initially show him how to do it.
Learn how to sculpt basic shapes:
- ball;
- egg (ellipsoid);
- hemisphere;
- cake;
- sausage;
- cylinder;
- cone;
- brick;
- tourniquet;
- spiral.
After this, mold the figures step by step. Choose an interesting animal and make it together. Help the child, praise him!
Modeling in this age group usually takes no more than 20 minutes.
Plasticine cat
The step-by-step scheme consists of three stages:
- Warming of the selected layer and, as a result, softness and pliability of the material;
- Formation of parts;
- Final assembly.
Operating procedure:
- To make a graceful, beautiful cat or a rowdy, street cat, we tear off two larger round pieces from the total mass.
- This is the future head and body: smooth the muzzle as much as possible to the shape of a ball, but the base should be slightly rolled into a sausage.
- Not too much so that the slight roundness does not disappear. Tear off five more slices, but comparatively smaller in size compared to the previous elements.
- These are four legs, as well as a slightly arched tail. All that's left is just two ears, very tiny, in the form of small triangles.
- Now we connect everything, putting the parts in their places. As a result, a scorched cat standing on four legs.
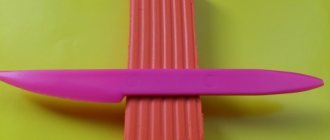
- Using a plastic knife or toothpick, make slits like toes.
- Then we add a different color muzzle, eyes, nose and “apron”.
- That's it, the pet is no longer averse to having breakfast or dinner with dry food.
From simple to complex
You can start with something simple, for example, make a snake and offer to repeat it, but take a different color of your choice. Animals made from light plasticine work especially well.
How to make a snake:
- Take a piece of plasticine and knead it in your hands.
- Place on a board and roll out to create a long, thin piece.
- At one end make the head thicker, at the other end make the tail thinner.
- For the eyes, take a different shade.
- Using a knife, sculpt a thin tongue with a forked end - details are important, this teaches children to finish the job.
The snake's body can be curved and its neck raised. This will be the first animal that the child will make on his own.
It is easy to transform a snake into a snail: to do this, the body of the snake needs to be rolled in a spiral - you will get a snail shell. The body of the snail is made separately - take plasticine of a different color and roll out an elongated part, attaching a shell to it on top.
Note!
Plasticine crafts for grade 4 - reviews of creative ideas. New products, step-by-step master classes for schoolchildren + 150 photo examples
Salt dough recipe: TOP 100 photos with simple modeling dough recipes. Ideas for DIY salt dough crafts with examples of finished work
Plasticine tank: step-by-step modeling instructions with simple work patterns. Master class for children on creating a tank with their own hands + photo reviews
It is better to use matches for fastening - this way the shape of the elements will not be disturbed. Two “antennas”—tentacle eyes—are attached to the snail’s head.
