Other sculpting ideas
There are many other ideas for building beautiful three-dimensional houses. Let's get acquainted with the most interesting techniques for their construction.
With toothpicks
This house rather resembles a 3D construction set. The parent’s task in this case is to develop fine motor skills and introduce the child to geometric shapes. For work you will need plasticine, as well as toothpicks.
It's not difficult to build. First, invite your child to make a lot of plastic balls of different colors. After that, all that remains is to show him how to use wooden sticks and plasticine balls to make different geometric shapes and combine them into one design.
With a can
To make a house from a jar and plasticine, you will need a container with a screw-on lid, plasticine of different shades, and baking molds.
The step-by-step procedure will help you in your work.
- Roll out white plasticine into a thin layer and carefully wrap it around the jar.
- Using a square cutter, cut out the window. If you don’t have a mold on hand, you can use a stack. Design the frame.
- Make a door from brown plasticine. Don't forget to provide a box for it and a door handle.
- Form a roof from the lid; to do this, it is covered with brown or red plasticine.
- The house is ready. All that remains is to decorate it to your liking, for example, with greenery and flowers.
With cardboard
The simplest option for sculpting a small house involves using a box. First you need to prepare the basic materials - plasticine, a box, stacks and napkins for cleaning your hands. The walls of the house should be made of logs, so you will need brown plasticine. The tiles on the roof are depicted using a gray mass. Bars in bright colors, such as blue or white, are used to create doors and windows.
The work is not difficult at all; even beginners can cope with it.
- Knead a block of brown plasticine in your hands and form several sausages of the same length and width.
- The resulting sausages are attached to cardboard walls, creating an imitation of logs.
- This way you need to cover the entire box. If the sausages are different sizes, you can simply trim off the excess mass.
- Cut a rectangle from a piece of cardboard and fold it in the middle to create a roof. Glue pieces of gray plasticine onto it and draw the contours of the tiles in a stack.
- Attach the roof to the walls. To close the corner bay, you need to sculpt two triangles and fix them on both sides.
- After this, all that remains is to attach the windows, shutters, pipes and other elements of the external cladding of the house. If you wish, you can even cut out the door with a sharp knife to look inside.
With branches
Fans of the tale of the three little pigs can be advised to build Nuf-Nuf's house with their own hands. To do this you will need a certain set of materials.
- Cardboard. It is best to take a sheet measuring 15x15 cm to create the base.
- Plasticine. Bright shades are suitable for decorating the foundation. To fix the branches, black, brown and gray tones are used; a little green and red paints will be needed to create an ambiance.
- Branches. It is best to take birch trees - you can find them at any time of the year. In addition, they are better than others at breaking in the right place.
- Dry leaves. They are used to decorate the roof; they should be the same size as birch.
- Wire/rope. Needed for fixing beams on the roof.
- A piece of wood. Will be needed to decorate the door. You can take a fragment of an old ruler, cork stands or veneer; even ordinary matches will do.
- In order for the palisade to hold well, it must be secured as deeply as possible in the plasticine base. The thickness of the “foundation” should be at least 1.5-2 cm, otherwise the branches will not adhere well to it, and you will not be able to adjust their height.
- First, install corner posts - 4 pieces. Then the racks are in place of the door and window openings. They should be the thickest, about the diameter of a pencil. Forks must be provided at the top to secure the beams to them.
- Next, you should fill the walls with branches, they need to be placed as densely as possible. In a real house, the middle pig brother filled the cracks with moss; in a toy house, you can glue dry leaves inside or caulk the walls with plasticine. This work should be done before you attach the roof.
- Next comes the most difficult part - installing the rafter beams. They are tied together, and then, sparing no plasticine, they are attached to the corner posts.
- Leaves are attached to the roof using plasticine. This work must be done from the bottom up.
Useful tips
And in conclusion, we will give some recommendations for working with plasticine.
- If the block is too hard, you can slightly heat it in the microwave or near a radiator before working. Alternatively, dip it in warm water for a few seconds.
- For young children it is better to use a minimum of colors. In this way, it will be possible to keep the baby occupied with the modeling process itself, without distracting him from choosing a shade. Older children need to be taught to mix colors with each other and thereby get new colors.
- It is best to wipe plasticine off your hands with denim fabric.
- If plasticine sticks to clothing, you need to place the item in the freezer for a few minutes or apply ice cubes to the stained area. After this, the mass is easily cleaned off with a plastic knife. Grease stains are treated with stain remover or dishwashing detergent and washed as usual.
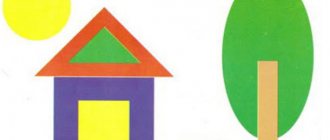
A house made of plasticine can be created not only by modeling, but also by drawing - this technique is called “plasticineography”. It is very useful for a child - it develops fingers and prepares the hand for writing.
To create such paintings you need a thick sheet of cardboard. The child puts small pieces of plasticine on it and spreads it over the surface with his finger.
To learn how to make a house out of plasticine, watch the following video.
Which plasticine to choose
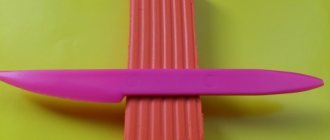
Plasticine is a universal material for modeling. It is ready for use and does not require special processing. Plasticine is flexible and comes in a wide range of colors. A child can mix different colors of plasticine with each other, obtaining new shades. For children, you need to choose good quality material. It should not be too soft and not too hard. If plasticine sticks to your hands, then it will be impossible to sculpt with it. If it is too hard, then a child’s hand will not be able to knead it, and it will be difficult to connect the parts.
For younger children, it is better to purchase wax plasticine. Due to its base, it is more suitable for fragile children's hands; it is more flexible and soft. Regular plasticine can be purchased from the age of 3. We do not recommend giving flavored plasticine to children under 5-6 years of age. If yellow plasticine smells like lemon, red like berries, orange like tangerine, then the baby will have one desire - to try it. And this is not something you should learn in sculpting lessons.
What else will you need in class?
During modeling classes, in addition to plasticine, you will need the following tools and materials:
- stack;
- rolling pin for plasticine, possibly with patterns;
- modeling board;
- molds for modeling;
- pictures for “coloring” with plasticine.
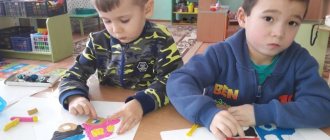
Children over 3 years old can make crafts with natural materials. To do this, you should prepare pebbles, cones, twigs, and seeds in advance.