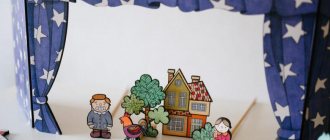
How to make a horse from plasticine
A horse is a noble animal with a proudly arched neck and a developing mane. She has a massive body and refined and at the same time strong legs. It is difficult to recreate a plasticine horse in all its natural perfection, but we will try. And to make your work easier, we offer instructions on how to make a horse from plasticine.
Features of sculpting a horse
As already mentioned, only sculptors can sculpt a natural horse, so the sculpting process is based on stylized horses. This applies not only to horses, but also to plasticine hedgehogs, so if you don’t get the perfect horse the first time, don’t be discouraged.
Such crafts are suitable for children who study in older groups of kindergarten or in primary school. Classes are held with the goal of instilling a love for animals and developing in children a love of beauty and artistic taste. In addition to these positive qualities, sculpting a horse allows you to exercise your little fingers and teaches you to analyze the appearance of a horse.
Let's start looking at instructions on how to mold a horse from plasticine.
Are there any masters of Dymkovo toys now?
The traditions of creating Dymkovo toys are still alive. This process never became automated and serial. The figurines are still painted by hand, according to the rules that existed 400 years ago, when this folk craft first appeared. However, not all young masters have the patience to complete the learning process, but those who comprehend it completely become real professionals. With their own hands they create fascinating images of Dymkovo toys, each of which is individual and unique.
The creation of Dymkovo toys was and remains a woman's profession. Flights of fantasy and knowledge of ancient traditions and customs help the fair sex to create incredible images and convey them in a whole range of rich colors.
Thanks to the Dymkovo toy, which has existed for more than 400 years, the rich history of the Russian people and their cultural heritage continues. These bright and unusual figurines delight the eye and lift your spirits; they immerse you in an exciting fairy tale, the unique and original plot of which each person comes up with for himself. And, although the Dymkovo toy has now lost its ritual meaning, it continues to be a symbol of the generosity of the soul, good spirits and boundless kindness of the Russian people.
Simple plasticine horse
This manufacturing option is good because in the process of constructing a horse with a child, you can repeat the names of the figures and correlate them with the parts of the horse figurine.
What to prepare for modeling:
- plasticine;
- board;
- stack.
Before starting work, we recommend showing your child photographs of horses. Tell your child that this animal consists of a body, a neck that is curved, an oval head and long legs. The horse is decorated with a thick tail and a luxurious mane. Once the child is familiar with the pictures, you can begin to work.
Instructions on how to make a horse from plasticine:
- Prepare the material. If it was not warm, it needs to be warmed up and kneaded.
- Roll into a ball from a single piece. Divide the resulting figure into several parts. Roll each part with a roller. Divide the resulting figures into six cylinders. Try to divide so that each separated element is the same.
- Take one piece from the cylinder and roll it out into a long but thick sausage. This will be the head. The part where the nose and mouth will be located needs to be slightly lengthened. We leave the back of the figure massive.
(Step 2) - You should have a piece of the first cylinder left. We will sculpt a neck from it. We form a figure similar to a crescent. Press the top with your fingers. This place will be intended for the mane.
- Let's start sculpting the body. Take four pieces from the separated plasticine and make an oval shape out of them. Set the workpiece aside.
- From the remaining four pieces we form the legs. They should be thick on top and thin on the bottom. Make hooves from small peas of plasticine.
(Step 3) - When all the large details are ready, you can create the horse figure. Attach the head to the body. We carefully cover all joints, do it evenly so as not to deform the product. We do the same with other parts.
- From the remaining material you need to make ears, mane and tail. Use black to make your eyes. Make nostrils on the head using a stack.
- Let's start shaping the horse. We attach the ears to the head. They should be located with a wide part near the head, and their shape should be pointed towards the top. We coat the parts to remove the joints.
(Step 4) - Place the resulting horse figure on the table. We bend the legs to create a walking horse. All that remains is to add the mane and tail. They are made from thin sausages. If there is no plasticine left, megamaster.info recommends cutting through the mane and tail with a sharp and thin object. To make your horse even more beautiful, you can add bangs.
The instructions on how to make a horse from plasticine are finished. You can admire the result. The finished horse can be used in your collection of plasticine works. If you don’t have one yet, replenish it by making a dog out of plasticine.
Painting a Dymkovo toy
Clay figurines symbolize joy and life. For decoration, a smooth ornament is usually used in combination with a geometric pattern. Contrasting shades are selected that highlight each other favorably.
Elements of people's wardrobe, horns and hooves of animals are covered with copper leaf.
Colors of Dymkovo toys
After the whitewash dries, the craftsmen begin applying patterns to the figurine. The painting of the Dymkovo toy has a meager range of colors:
- Blue.
- Green.
- Yellow.
- Brown.
- Orange.
- Crimson.
| To obtain additional shades, the main color was diluted with chalk. For example, blue was obtained from blue in a similar way. |
In the old days, craftsmen used wooden sticks wrapped in pieces of linen fabric to paint figures rather than brushes. A similar tool made it possible to create primitive patterns: lines, circles, zigzags. Nowadays, for painting, they take brushes from ferret hair.
To make the paint shine, a raw egg was added to it. Coloring was carried out in a certain sequence:
- The hair was most often covered in a brown tone.
- The eyes and eyebrows were painted with black paint.
- The mouth and cheeks were indicated with a crimson tint.
- The headdress is monochromatic.
- Pattern on the outfit.
The last stage was decorating the toy with decorative figures carved from gold leaf.
Elements of Dymkovo painting
Craftsmen always used a strict geometric pattern to decorate a clay figurine. Toy painting is a combination of circles, wavy lines and zigzags. Cells, dots and spots are required. Also included in the coloring elements are rhombuses made of gold leaf or gold leaf, which are glued on top of the applied ornament.
Each craftsman applies a pattern in accordance with personal wishes, combining different combinations. The product can be completely covered with ornaments. In some cases, the author's brevity is observed. Therefore, among the wide range of toys, it is impossible to find two identical figurines.
The painting of Dymkovo products is characterized by the use of special symbols denoting the desire for beauty and truth. All ornaments are closely related to nature and various amulets.
Every detail of the drawing has a hidden meaning. For example, a wavy line symbolizes water, a circle with a star in the center symbolizes the sun. Often the ornament contains plant elements: flowers, leaves and berries.
Characteristic features of animal painting
Each clay figurine is painted differently. Classic figurines of horsemen, roosters and other characters beloved by the people are covered with rich colors. The horse can be decorated with bright blue apples on its sides, and the turkey can acquire a fan-shaped tail.
| A characteristic feature of winged ducks was a row of horizontal frills. When you looked at the duck, it seemed like she was wearing two aprons. |
In addition, painting requires adherence to a certain sequence when applying the pattern. The first to apply is a wide strip that covers the breast of the duck. Narrow lines extend from the neck, then the master applies transverse strokes, forming a classic checkered pattern.
The painting of whistles in the shape of a skate combines the application of vertical stripes and a number of polka dots of different colors. In this case, the shades used do not combine with each other.
The most popular animals in Dymkovo toys are the horse and the duck. Much less common are piglets, cows, goats and other domestic animals. The anatomical structure of the body is usually not respected, so most of the animals resemble a horse. Only by the face can one recognize what kind of creature the potter depicted.
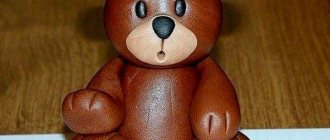
Multi-colored horse
Modeling from plasticine for children should be exciting, and in order to make it so, we recommend using bright colors and creating only interesting crafts. For example, you can make a colorful, playful horse from orange and black.
To carry out the work, we will not need new materials, the same board, plasticine of a brand convenient for work and a stack.
We proceed step by step:
- We take the main color and divide it into 2 large parts, five medium ones and four small ones. From two large ones we roll out the torso and head. From the middle ones we make the neck and legs, and from the four small ones we make hooves.
- We sculpt the body to the head. We coat the joints for the cast figure. We attach the hooves to the legs and sculpt everything to the body. When attaching the legs and when sealing the joints, be careful; the finished horse should not wobble.
- We make a lot of thin sausages for the bangs, mane and tail. Attach to the head and torso. Using a stack, we cut through and slightly open the horse’s mouth. In order for the horse to get an interesting color, make several small cakes and smear them on the back.
- All that remains is to make the eyes. We construct them from white cakes. We put black balls on them and place them on the head.
The modeling is finished, the horse is ready. Admire the result.
You can also draw a horse
History and traditions of Dymkovo painting
Dymkovo toy, 19th century. According to an ancient legend, two squads met near the city late at night. And even though they were allies, in the darkness the warriors could not recognize each other, and a battle took place that claimed many heads. Every spring, the locals held a funeral feast for the victims of the absurd, accidental, and even more tragic battle. History began to be forgotten, but the tradition of organizing a spring meeting remained. And it turned into mass celebrations, a pandemonium festival, at which it was customary to playfully throw painted stucco balls.
Here is such an interesting history of the origin of the direction. It was the demand for balls and whistles that contributed to the development of the direction. This happened in the Dymkovo settlement, the birthplace of an outstanding craft. Over time, masters began to use sculpting and painting techniques: one after another, they carefully passed on their skills to their followers. When the ritual meaning of toys began to be lost, the products themselves began to change - they became more beautiful and artistic. And today, painting of Dymkovo toys has become part of decorative and applied art; ritual significance has receded into the background.
You will learn more about the history of the craft from the article: “The history and technology of creating crafts of Dymkovo clay toys.”
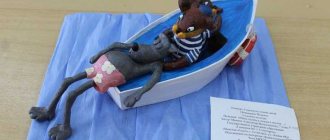
Dymkovo plasticine horse
Dymkovo horses are made from clay, and the finished products are decorated with a variety of patterns. But since we are considering plasticine modeling for children, we will make a plasticine Dymkovo horse.
Manufacturing process:
- Take your base color and divide it into two parts. One should be larger, the other smaller. We will need the first for making the head and neck, the second for the legs and torso.
- The difference between the Dymkovo horse and the others is that it has cone-shaped legs and a short and thick neck. The parts are easy to make, which is why such plasticine crafts for children are popular. For the legs and torso, roll out a thick roller.
- Using a stack, the previously obtained roller must be cut on each side in the center. This way you can get legs. The figure needs to be arched. We bend it until the legs are firmly on the surface of the desktop.
- Take the second part of the material and roll it up. From the resulting figure, mold an oval and a cone. The first part will be used as the head, the second will be needed for the neck.
- We connect the neck to the head. We iron the joints. We fasten the head and torso.
The instructions on how to make a Dymkovo horse from plasticine are coming to an end. It remains to design a few small parts.
What should be done:
- mold two cones from plasticine, these are ears, attach them to the head;
- the tail and mane for the horse can be made from thin sausages.
If you look closely at the photo, you will notice that the clay is painted. We won’t paint the plasticine, but you can add a few multi-colored cakes to the horse’s body. Smooth them over the material so that the finished figurine is beautiful.
The instructions on how to make a Dymkovo horse from plasticine are over. Of course, if you really want to make a product as close as possible to the original, you can apply patterns to plasticine using water-based paint, but this substance should only be used under adult supervision.
In another article, read the instructions for sculpting bunnies
What is a Dymkovo toy?
Notes of nodes for children of the senior group application
Dymkovo toy is one of the Russian folk crafts. This craft originated in the settlement of Dymkovo (not far from the city of Vyatka), most likely from the custom of making clay whistles for the holidays.
Today, Dymkovo toys include not only whistles, but also any craft toys made of clay, intricately and brightly colored. Each toy is a unique work of a specific master.
Some online resources sell Dymkovo toys at fairly high prices, but no one is stopping parents and children from creating something similar themselves and being, at least for a short time, the masters of Dymkovo toys themselves.
Plasticine Rainbow Dash
The cartoon about ponies is very popular among little girls. There are many characters in it, but the one we will sculpt below occupies a special place. Instructions on how to make such a horse from plasticine will be especially interesting for girls.
In our work we will use all the materials we are familiar with, with one exception. You will need a set of plasticine that contains all possible colors.
Instructions on how to make a plasticine pony craft for children:
- Let's start with making the head. For this we need blue. Roll a large and a small ball. We connect them to each other. We transform a small part into a tubercle. Using a stack on this tubercle, highlight the nostrils.
- We do not remove the stack and make holes on the face for the big and cute eyes of this horse. For the eyes you will need cakes of different sizes. We will list the colors in descending order of size. The largest color is black, followed by white, purple, black again, and the smallest white dots complete the eyes. We collect the cakes indicated by color in descending order. Decorate the finished eyes with eyelashes. This plasticine eye sculpting for children may seem difficult due to the miniature parts, so it can be done by an adult.
- Attach triangular ears to the made head. The head work is finished for now.
- Let's start making the body. Take a long block. On one side, make it narrow, then bend the part at an angle to create a neck.
- Take matches. They will be needed for fastening. We sculpt legs from medium blue balls. We pull them out to get cones. We insert a match into the base of each leg for fastening. We attach the legs to the body and the head.
- The horse must be decorated with a fluffy rainbow tail. Each individual hair of the ponytail must be composed according to the shades of the rainbow. We fasten all the parts and attach them to the horse figurine. We make the horse's mane and bangs.
- Those who have already seen the cartoon know that our horse stands out not only with its rainbow tail, but also with its wings. For them you need to make several blue cakes and apply notches on them with a tool. Attach the wings to the horse.
- Almost done. All that remains is to attach its distinctive sign to the horse - a lightning bolt.
You learned how to make Dash the horse from plasticine. The finished figurine looks very attractive. Girls will surely love such a graceful horse. If it’s difficult to make a craft, but you want to make a cute creature, try making a cat out of plasticine.
Simple coloring pages of Dymkovo patterns for young children
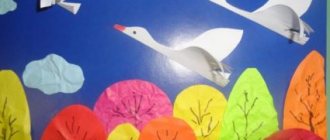
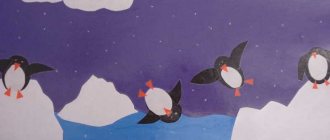
Abstract on drawing on the topic “penguins” for children of the older group
Children's development will benefit from painting large components of a drawing, using the most saturated colors.
Among the most popular options for such pictures:
| Drawing for coloring | Description of the drawing and the principle of working with it |
| Horse. The task for the child will be to color the horse in the way he thinks will be as beautiful as possible. Typically, children are asked to use red, white, orange and yellow pencils. This set of colors, as a rule, is sufficient not only for their individual use, but also for creating new shades. In this version of the coloring book, the child, if desired, can complete the animal’s face, or can simply add brightness to the picture, without adding patterns to it. | |
| Matryoshka. Coloring this picture of a matryoshka doll is best combined with telling your child the history of the origins of the original Russian toy. It will also be interesting for the child to learn the principle of playing with such a wooden doll. Pencils of red, black, white and yellow are usually used to add color to this sketch. | |
| Lady. The process of coloring the lady will also be a fun activity for kids. Despite the apparent simplicity of the design, giving it color requires thinking through the shades used in the work. To complicate the task, the child can be given the goal of coloring the outline of a woman so that the items of her clothing match each other and do not merge. For this purpose, it is recommended to invite him to choose a shade to work with from an unlimited number of pencils. Experience shows that children most often choose red, yellow, green, blue, black and white. |
Options for Dymkovo toys
The most famous images of Dymkovo toys are a lady, a turkey, a lamb, and a horse. Less common are other characters and pets. The main difference between Dymkovo toys is their bright colors and funny stories. It is easy to create certain compositions from many Dymkovo figures. The Dymkovo toy, despite its canonicity, retains the individuality of the master. Dymkovo turkey or peacock
A bright turkey, as colorful as a peacock, with a long scarlet beard decorated with gold leaf. The sizes of this toy vary: from tiny - 5 centimeters, to an impressive 40 cm. Dymkovo lady
A lady is an elegant city lady or a traditional lady wearing a kokoshnik. In the hands of the figurine there may be bread, a handbag, a bucket, or a double toy - a lady on the arm of a gentleman.
Dymkovo lamb
Lamb - the figures may differ in the size of the horns and the coloring of the body, but there is often gilding. Dymkovo horse
The horse is a traditional figurine with bright blue spots - “apples”. Male images in the Dymkovo toy are played out in the form of a rider on a horse, an idle city or village “cavalier”.
Figurines of dogs, pigs, birds, and bells are popular.
Manufacturing technology
The process of creating a clay toy consists of several stages:
- Modeling.
- Drying.
- Burning.
- Whitewash.
- Painting.
How to sculpt a Dymkovo toy
To create the product, clay or sand is taken from the river. According to classical technology, this should be Vyatka red clay. Each element of the figurine is created separately: a body is formed from a ball, onto which the remaining parts are attached. All parts are connected with a smooth transition to avoid chipping the finished product. Also, the joints are carefully treated with a damp cloth.
The main detail when sculpting is the body. First, a ball is created from a piece of clay mixed with fine river sand. Next, the required shape is pulled out of it. The smoother the process, the more beautiful the figure will turn out.
The creation of appendages (arms, legs, head, etc.) is also done from balls, but their volume is smaller. The “parts” are attached to the body, and the joint is treated with water and clay. Craftsmen sometimes use rings, grooves, and sausages as decorative elements.
For example, to make a lady, the first step is to mold a cone-shaped skirt. Next, a body with an elongated neck is attached to it. The next step is to attach the head and arms. The final stage is dressing the young lady in a beautiful scarf and hat.
Male figures are created a little differently. The torso and head are attached to the legs, which are two thick sausages. If you slightly bend their lower parts you will get legs.
| The body of the animal in the blank resembles a cone. The head and neck are attached to the sharp end. The limbs are most often large, slightly tapering downwards. The tail and horns are attached last. |
Drying and firing of Dymkovo toys
After modeling is completed, the product is dried. The duration of the procedure depends on the size of the figurine and the climatic conditions of the room. Humidity, temperature and other parameters must be taken into account. Depending on these indicators, the process takes from several days to three weeks.
After drying, the figurine is fired. Previously, a village stove was used for this. The toys were placed on a metal baking sheet and placed on firewood. After the figurine became heated, it was cooled in the same oven.
Nowadays, innovative equipment is used that not only saves time, but also makes the calcination process safe.
Whitewashing (whitening) of the Dymkovo toy
After drying and firing, the figurine acquires a red-brown tint. Therefore, before painting is applied, it is bleached. The figurine is coated with a special composition of chalk powder and milk.
After the drink sours, the solution becomes solid and a uniform white layer forms on the product. The procedure not only smoothes the surface, but also adds incredible brightness and richness to the colors.
Many attempts were made to change the composition of the mixture, but each experiment ended in failure. As a result, the figurine turned yellow or acquired an uneven surface. For this reason, even today whitewashing is carried out according to the old recipe.