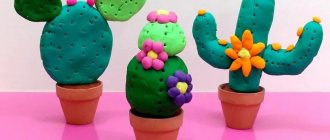
Simple crafts from plasticine
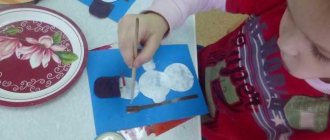
Children aged 1–2 years can easily roll balls, flatten them with their fingertips and glue them to pictures. Little hands cope with wax plasticine, heated in mother’s hands.
Adults and children perform simple crafts in a circular motion:
- Multi-colored balls for the Christmas tree.
- Grains for chickens.
- Sunflower seeds.
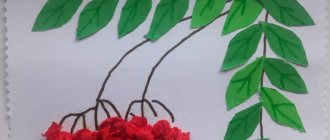
- Leaves for flowers.
- Black dots for the back of the ladybug.
- Wheels for a car.
The second technique that young children learn is how to make thin sausages. The plastic pieces are rolled out between the palms with straight movements. The results of the work are used as zebra stripes or rungs on stairs.
Pendant "Snowman"
You will need: a sheet of cardboard, a simple pencil, scissors, string, tape, plasticine in white, orange, brown, black, blue, purple and green, skewer, stack.
Master Class
- Draw a circle on a piece of cardboard, then cut it out.
- Cover one side of the circle with white plasticine.
- Make oval legs from purple plasticine, then attach them to the bottom of the circle.
- Roll out an oval nose from orange plasticine, then attach it.
- Make eyes and a smile for the snowman from black plasticine.
- Roll 2 buttons from blue plasticine, attach them and use a skewer to make 2 holes in the buttons.
- Roll the purple and blue plasticine into sausages, then form a hat as shown in the image.
- Roll a ball of white plasticine and attach it as a pompom, then use a skewer to create a “fluffy” texture.
- Make stick handles from brown plasticine, then attach them to different sides of the circle.
- Make highlights on the nose and eyes from white plasticine.
- Draw a knitted pattern onto the hat using a skewer.
- Draw lines on the legs as shown in the image.
- Make 3 leaves from green plasticine and roll 3 orange berries, then decorate the hat.
- Attach the string to the back using tape.
The plasticine “Snowman” pendant is ready!
Plasticine worm
A poem or a fairy tale about a worm will help get kids interested in modeling. Adults come up with their own stories or find material in books. They also prepare a background of flowers, trees, and grass for applique. In the picture they draw a bend line for a plasticine craft. Then the kids are taught to make a worm with their own hands:
- Identical balls for the body are rolled from the pink pieces.
- Flatten with fingertips.
- Glue to the line, overlapping the circles.
Now they roll one ball for the head, two smaller ones for the eyes. The mouth is made using a stack. All parts are attached in place. After class, the children are praised for their diligence and told that they have created a beautiful applique.
Panda
You will need: black, white and green plasticine, toothpicks, stacks.
Master Class
- Roll a ball of white plasticine.
- Push through two holes for the eyes.
- Roll balls of black plasticine, then attach and flatten them.
- Roll out a flat oval of white plasticine and attach it to the bottom of the head.
- Attach the black spout.
- Make eyes from white, green and black plasticine, then attach them.
- Make black ears and attach them to the top of the head.
- Roll out a roll of black plasticine, flatten it in the center and bend the ends.
- Roll a ball of white plasticine and glue it to the black blank.
- Connect the workpiece and the head using a toothpick.
- Mold and attach the black lower legs.
- Roll balls of white plasticine and attach them as pads to the paws.
- Draw in eyebrows with a toothpick.
- Roll a ball of black plasticine and attach it in place of the tail.
- Make a bamboo stick from green plate and attach it to the panda’s body.
The plasticine panda is ready! I recommend watching this video!
We sculpt Smesharik Krosh from plasticine. Cartoon. Kikoriki made of plasticine.
Plasticine caterpillar
The principle of making the second craft is similar, but only the balls are made from green pieces. They also additionally make an elementary pattern - holes in circles. The background for the applique can be borrowed from the fairy tale “Apple House”.
It tells that a caterpillar lived in a red apple, and a bee flew to visit it. In the evenings they sat together on a branch and watched the sun go to bed. The picture will be clear, because 2-year-old children are already very familiar with these characters.
Ice cream
You will need: plasticine of bright colors, a spatula, a stack, a wooden skewer, beads and rhinestones.
Master Class
- Roll a ball of brown plasticine.
- Flatten the ball into a flat cake.
- Draw lines with a stack, creating a waffle texture.
- Twist the workpiece to form a cup, then secure the edges.
- Roll balls of bright colors of different sizes.
- Use a skewer to process the halves of the balls as shown in the image.
- Place the balls into a waffle cup.
- Decorate the ice cream by attaching beads and rhinestones.
- Make a cherry and attach it to the top of the ice cream.
Plasticine ice cream is ready! I recommend watching this video!
DIY Making Play Doh Ice Cream Popsicles
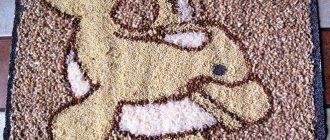
Plasticine mosaic
Children know what a mosaic is and how to play it from the age of three.
Therefore, it is not difficult for them to understand how to fill silhouettes from the inside with plasticine balls.
- Adults can only prepare templates for drawing and visual material in the form of pictures.
- The difficulty of appliqués made from small pieces is that the manufacturing process takes a week.
- But such a drawback does not affect the mood of preschoolers; their interest in the craft does not disappear.
Possibilities of using appliqué techniques for children
The formation of personality in children begins with the fact that each child forms his own passions and shows creative abilities. According to psychologists, the development of fine motor skills helps to quickly master writing and reading techniques, which is why plasticine is so popular:
- modeling and repetition of familiar forms, which helps develop memory and consolidate new images gradually learned by the child;
- manifestation of creative abilities and the opportunity to develop one’s individuality, creating original masterpieces;
- using the fingertips and receiving new tactile sensations, which stimulates the child’s speech development.
When creating applications, you can use handicrafts as an interesting and exciting process for the child’s learning and speech development. Using plasticine, you can reproduce beautiful postcards and memorable photos, select and implement original and exciting ideas for children.
Plasticine butterfly
Making an applique for children will not seem tedious or boring if the sketch is not completed immediately, but several days in advance. During the first lesson, roll out a lot of multi-colored balls, which are glued on gradually.
- First on the upper wings of the butterfly, and then on the lower ones.
- As a basis, you can use drawings with contours from coloring books.
- Additionally, a part for the body is made in the form of a thick sausage.
- Draw the antennae with a pencil or felt-tip pen.
The mosaic craft looks so colorful and beautiful that you want to keep it. For this purpose, cover the surface with decorative varnish and hang it in a frame on the wall.
Clay or plasticine?
Undoubtedly, clay crafts are more durable, but there is also more hassle with clay. This includes not only washing the young sculptor after work; if you want to preserve the clay product, then it must be fired after sculpting. Plasticine leaves virtually no marks on your hands, does not require firing or coating after completion of work, and can also be reused.
Plasticine flowers
A master class on making this craft will teach you how to create flowers from two types of plasticine mosaics: flat buttons and round balls. Prepare for the lesson:
- Plasticine in three colors.
- Ballpoint pen body.
- Sketch of a flower on light cardboard: using a simple pencil, draw a stem in the form of two lines, a leaf, a round center, 4-5 petals.
Then they begin to create miniature flat parts, shaped like buttons. They fill the stem, leaf and petals of the flower, trying not to go beyond the contours and not leave gaps.
- Knead green and red plasticine until thin cakes are obtained.
- Using the body of the pen, circles are squeezed onto them, which are then glued into place.
For the center of the flower, roll out balls of yellow pieces. And the outline of the petals, if desired, is highlighted with plasticine thread: the syringe is filled with soft plastic material, which is squeezed out of the hole with a piston.
Donut
You will need: plasticine of bright colors, a stick, a plastic spatula.
Master Class
- Roll out a ball of yellow plasticine.
- Flatten the workpiece and press the center with the round tip of the stack-bulk.
- Trim off excess plasticine from the back side.
- Make a cake from pink plasticine.
- Attach the doughnut to the donut base and make a hole in the center.
- Roll plasticine flagella in bright colors.
- Place the flagella in the freezer for 5 minutes.
- Remove and cut the frozen flagella into small pieces.
- Decorate the donut by adding sprinkles.
The plasticine donut is ready!
Plasticine painting from flagella
A subject or subject picture with plasticine flagella looks much more realistic than a simple applique. Thin sausages are rolled out from pieces between the palms or squeezed out using a syringe.
The second method is beyond the capabilities of younger preschoolers, so adults make such preparations themselves. And the children twist them into a spiral or snake and glue them onto cardboard.
Craft materials:
- Outline illustration from a coloring book. You can also draw your own design on cardboard by hand or using templates.
- Soft plasticine in the desired colors.
- Medical syringe with a volume of 5–10 ml.
- Container with hot water.
Flower
DIY plasticine crafts can be a good gift for family and friends. Mom or grandmother will surely love a beautiful flower. Moreover, it is quite simple to make.
In progress:
- tear off 7 pieces of plasticine of the same size (6 of one color and 1 of another);
- roll them into balls and put them aside for now;
- tear off 2-3 pieces of green plasticine, roll into balls, flatten and form leaves from the resulting cakes (here you may need the help of mom or dad);
- lay out the leaves in the desired order on a horizontal surface;
- connect the previously prepared balls in the shape of a flower and attach them to the leaves.
It turned out to be a beautiful gift for the holiday.
Master Class
- The first thing they do is prepare the flagella. The syringe is filled with pieces of plasticine and pressed with a piston.
- Place horizontally in hot water for five minutes or heat in the microwave.
- The syringe is taken out and plasticine threads of the required length are squeezed out.
- Children are given cardboard with an outline and flagella for laying out the picture.
Round figures (apple, cherry, flower centers) are filled according to the same pattern. First, the end of the flagellum is glued in the center. Then they twist it in a spiral, filling the entire space. On all non-round silhouettes (pear, leaves), thin sausages are glued in the reverse order: from the contour line to the middle or in a zigzag, trying not to leave gaps.
Grape
You will need: purple, brown and green plasticine, glass stack, thin wire.
Master Class
- Make a rope from purple plasticine.
- Cut it into pieces.
- Roll each piece into balls.
- Make a cone out of purple plasticine.
- Cover the cone with grapes, leaving the top part free.
- Prepare a piece of thin wire and cover it with brown plasticine, as shown in the image.
- Draw the lines to create a branchy texture.
- Attach a wire twig to the top of the grape, then stick the grapes around it.
- Make a cake from green plasticine.
- Outline the outline of the leaf and cut it out, then draw the texture.
- Roll out a thin strip of green plasticine, carefully twist it and stick it to the grapes.
Plasticine grapes are ready! I recommend watching this video!
Air plasticine for children, learning to sculpt roses
Flat and volumetric applique
Three-dimensional pictures on cardboard are created from molded parts, flagella and mosaics. The background is drawn with pencils, watercolors or made from plasticine using the smearing technique.
The most interesting topics for children are: “Birds and Animals”, “Nature”, “Based on Fairy Tales” and “Underwater World”.
A pineapple
You will need: yellow, green, dark green and any color plasticine, stack, toothpick.
Master Class
- Roll a ball of brown plasticine (you can use leftover plasticine of any color for the base).
- Give the ball a pear shape and make the base stable.
- Roll out a ball of dark green plasticine, then roll it into an oval shape.
- Make a larger cake from yellow plasticine.
- Combine the green and yellow cakes, then roll them out.
- Turn the workpiece over with the yellow side up and draw a grid with a stack.
- Wrap the brown pineapple with a yellow tortilla.
- Trim off excess plasticine and smooth the joints with your fingers.
- Make oblong leaves from green plasticine and cut out the jagged outline.
- Stick the leaves to the top of the pineapple as shown in the image.
Plasticine pineapple is ready! Also check out the champagne and candy pineapple.
Undersea world
In one craft, children are introduced to all the modeling techniques and discover the secrets that the seabed of the seas and oceans keeps.
- Waves and sand are drawn on a thick sheet or cardboard with wax crayons.
- The background is painted over with watercolors and dried.
- A yellow piece of plasticine is flattened into a cake, and dents are made with the blunt end of a pencil. The first sea plant is ready.
- Mix two colors, for example, blue and green, and roll a long flagellum. Glue to the base from bottom to top in a zigzag pattern.
- Or the sausage is squeezed with fingers on both sides, as is done when making dumplings.
- Another option is to glue green leaves on both sides to a thin sausage. Lines are drawn in a stack - veins. This is how three types of algae are obtained.
- Multi-colored corals look like a flat circle with uneven edges and through holes. A stack and a cocktail straw will help in this matter.
- The starfish consists of simple parts: a round center and 4 rays in the form of thick sausages with sharp ends. Connect them together, level the surface and make indentations with the sharp end of a skewer.
- Two types of shells are made from flagella, twisting them in a spiral and zigzag.
- For the jellyfish, roll 5-6 long sausages, a flat oval and a short flagellum for the body.
- All figures are glued to the background, starting to decorate the background with tall plants and algae.
The underwater world is populated with fish, which are sculpted from individual parts: the body is a circle or oval, the fins and tail are flat figures of arbitrary shape, the eyes are a round mosaic.
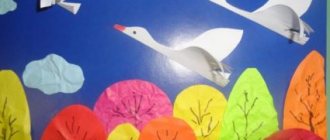
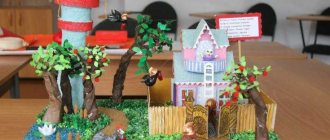
New Year's landscape
When going on winter break, children, and often adults, don’t know what to do with themselves.
Anyone can try themselves as a plasticine painter. The result of your creativity will inspire throughout the year. How to create a picture using the plasticine painting technique? The New Year will be an excellent subject for the image. First you need to draw a sketch on cardboard with a pencil. It could be a house, a bridge, a river and snow-covered trees. We will create this picture using two techniques: sculpting with strokes and sculpting with polka dots. First of all, we draw the background. We take blue plasticine, knead it in our hands, tear off a small piece and spread it on the cardboard. You need to rub the material hard to get a high-quality coupling. In order to reduce the consumption of plasticine, the background layer must be made thin. Blue strokes should be alternated with white and dark blue. This will be a river. Next we draw the sunset. It will be purple-pink. The second stage of work is sculpting the background. It will be a house, a bridge and Christmas trees. We create the house as follows. We roll small multi-colored balls from plasticine and fill the outline with them. The final action is to draw the trees in the foreground. We make the trunk using the usual method of smearing plasticine, and make the branches from strands.
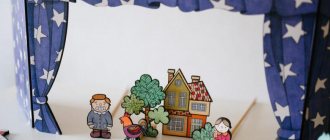
Crafts from plasticine on glass
Plasticine applique under glass in a photo frame will last for a long time. Children like this approach to the results of their work.
Miniature crafts are also made in plastic yogurt or sour cream lids:
- Using a black marker, draw the outline of the picture, either by hand or using templates.
- Spread plasticine over the inner surface, starting with small parts.
- The background is also filled with plastic material or appliqué is done on colored cardboard.
The glass with the craft is inserted into a frame. In this case, the plasticine should be inside. A catalog with photos of plasticine applications will tell adults what to do with their little fidgets.
Modeling classes, like other types of creativity, are carried out according to the principle “from simple to complex.”
This way, the child can easily master all the techniques for creating interesting crafts and prepare their hands for mastering writing. Kneading plasticine in your hands is also useful for adults: for therapeutic purposes to prevent strokes.
What you need to work with plasticine
In addition to a set of colorful clay, consider a work surface for modeling. To prevent the furniture from deteriorating, you can use a special board for modeling, or replace it with a piece of cardboard, oilcloth, or a regular plastic cutting board.
A spatula for modeling will come in handy when working with a stack. Also having a rough idea of what exactly you will sculpt, you can prepare additional accessories for crafts. These can be natural materials, such as nuts, cones and pebbles, or artificial decorations such as beads, it all depends on the ideas of the authors.
Photo applique from plasticine
Father Frost
The form of Santa Claus can be different. Most of all you will need red and white plasticine. You may also need the following color range of plasticine: pink, black, brown, blue. The most convenient and correct way to make a toy is to start from the head. After Santa Claus is ready, do not forget that an important detail of his image is a bag of gifts.
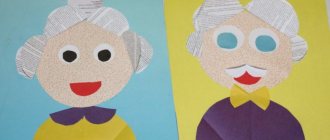
Snow Maiden
The New Year is unthinkable without such a character as the Snow Maiden. If you sit a little and work meticulously, you can get a rather original figurine. The most worth stocking up on is white, blue and yellow plasticine. A fur coat can be made from blue plasticine by rolling a cone. Use white rollers to complement the design of the Snow Maiden's clothing. After this, you can proceed to the formation of mittens and sleeves. At the last stage, make the head, shape the face, and make a hat. It is better to fix the head on the body with a toothpick.
Deer
In many countries, deer is a symbol of Christmas and New Year. From plasticine you can make both an ordinary toy and decoration for a Christmas tree. Apart from plasticine, boards and stacks, usually no additional materials are required. Most often, plasticine is used in colors such as brown (preferably several shades), white, red, black. Difficulties in work may arise when forming branched horns.
Symbol of the year – Bull
It is not advisable to ignore such a figure as a plasticine bull, since it is a symbol of the coming year. In nature, they are fierce and huge, inspiring with their power and strength. Using plasticine creativity, you can get a pretty beautiful toy or New Year's decor. Most craftsmen, when choosing the main color scheme, give preference to brown.