How to achieve information content when creating a stand?
It is better to make do-it-yourself stands for a kindergarten according to a strictly defined plan:
- At the top is a heading, written or printed large, in a straight line or with a curved base;
- Below the title are images. They should be placed across the entire width of the poster or a space should be made for words (depending on the volume of text);
- Below the pictures are direct congratulations and wishes, in prose or poetic form;
- Below is the signature (“kindergarten administration”, “Your teachers”, “Your parents”, etc.).
Visibility and its implementation
For a stand to be perceived as an interior decoration, it must be in harmony with it. You should not focus only on the informative part. Pictures, images, photographs are required next to the inscriptions on the stand.
If the stand is dedicated to the New Year celebration, it must have a decorated Christmas tree. If March 8 - mimosa or a bouquet of other flowers. If it's Mother's Day - an image of a woman's face with a smile.
A bright background created by completely covering the surface with colored paper or painting it with paints will help provide clarity.
Names of the months in children's pictures
All children love games. It will be more interesting and easier for your child to learn the names of the months if he is shown story-based illustrations or presentations. If parents independently make a presentation about the seasons for their child, it will be even better. An excellent option is to create it together with your child. This way he will remember the names faster.
By finding illustrations about each month and showing them to the child, the parent will be able to fix their names in his memory. To do this, you need to select pictures that demonstrate the life of animals in each season, the type of clothing for each season, etc.
To interest your son (daughter), the presentation must be colorful. You can also display the features of each month. For example, September - leaves fall, the school year begins, and children go to school. In presentations, you can focus on holidays. For example, December - New Year, decorating the Christmas tree and home. Be sure to include the child’s birthday in them - he will definitely know and remember this day.
Winter months
The child needs to be explained that there are 3 winter months - December (ends the year and begins winter), January (begins the year) and February (the harshest month, with blizzards and snowfalls). It is important to choose thematic pictures for the story.
Spring months
The first month of spring is March. This is the period when primroses - snowdrops - appear. The second month is called April. This is a period of changeable weather: sometimes the sun shines, sometimes it rains. The third month – May – is the time when nature begins to clothe the forest. Plot illustrations are also appropriate for the explanation.
Summer months
June is the first month of summer. In ancient times it was called “worm”. This month has the longest day and shortest night of the year - June 22. June is followed by July, the month when linden blossoms intensively. Summer ends - August - time for harvest. In addition to pictures, you can choose riddles that describe each month.
Autumn months
There are also 3 autumn months: September (early autumn), October (golden autumn) and November (late autumn). To describe the season, you can select signs for each month.
Clarity and its personification
Do not forget that the stand is made, first of all, for the audience. Both adults and small children can act as them. They understand vivid images - Father Frost, Snow Maiden, a fireman in uniform, etc., numbers that carry meaning (31, 23, 8). Symbols and branding are best left for other purposes.
The title should be as accurate and succinct as possible. There is no need to make it poetic or burden it with epithets: it is more important for children what kind of holiday they are preparing to celebrate.
The principle of accessibility: “let me touch it!”
If the stand is placed in a kindergarten or school classroom, children will inevitably become overly curious. Some people will want to take a closer look, and some will want to touch it. So that the result of creativity does not go to waste in the very first minutes of public viewing, you need to make it tangible.
For example:
- Attach felt leaves in yellow and orange tones to the stand for Autumn Day,
- For a stand in honor of Easter, attach a wicker surface that imitates a basket, or an eggshell, painted in different shades,
- Decorate the stand dedicated to May 9 with real St. George ribbons and carnations cut out of red corrugated paper.
A DIY children's educational stand is a prime example of accessibility. Its design depends on the age of the children for whom it is intended.
Such a busy board will help develop curiosity and promote exploration of the world around us.
For children 2-3 years old, felt flowers and trees of different shades and shapes will do.
The middle group can enjoy the following attached to the stand:
- Cubes,
- Pyramids,
- For an hour.
For members of the preparatory group - letters and road signs, tiny tools or any other gizmos from everyday life:
- Landline phone dial,
- Mixer valve,
- Door knob,
- Espagnolette,
- Chain,
- Old calculator,
- Wheel,
- Compass,
- Klaxon, etc.
Recommendations for making a stand
- Take a responsible approach to choosing the location of the structure. It should be well lit and accessible to everyone. Try to visualize its location in the selected location.
- A stand decorated in bright colors will look much more interesting and attractive, but its basic design should still match the style of the room.
- Take care in advance about the reliability of fasteners.
- Before you begin your crafting work, make sure you have all the necessary tools, including a sharp knife.
- Having selected the location of the structure, determine its size and prepare the materials that will be needed for decoration.
Unusual solutions for ordinary stands
A collage is the best option if you have to prepare a stand with your child as an assignment for a group celebration or to participate in a competition.
Unlimited creative freedom:
- You can include any newspaper cutouts in your collage,
- Magazines,
- Advertising pictures,
- Suitable for the topic.
The following can be glued to the stand sheet:
- Natural materials (dried leaves, small pebbles),
- Applications made of paper (snowflakes or flowers) or fabric (felt, knitted fabric),
- Handicraft small items (bugle beads, beads, beads, threads of yarn, pompoms);
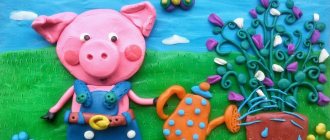
You can also make stands for children's crafts with your own hands. It can be called “Our Vernissage” or “Exhibition of Crafts”.
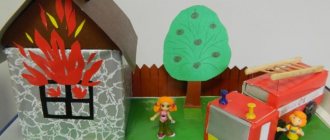
- To attach drawings to the stand, you can use pins or magnets. To demonstrate three-dimensional crafts (made of plasticine, cardboard, corrugation, etc.) - paper or knitted “pockets”;
- temporary stand, or stand-template. This will be convenient when you need to impromptu prepare for a celebration or when there is absolutely no time to decorate the group.
- For it you will need: self-adhesive letters (the entire alphabet) and numbers, button magnets, double-sided tape, a sponge (to give volume to the inscriptions), universal pictures (flowers, leaves, candles, stars, etc.);
- DIY information stands for kindergarten differ from all others by the presence of plastic frames or “pockets” for placing official information concerning parents.
- In all other respects, they should serve as decoration for a children's group: have a bright design with expressive characters - Leopold the cat, Carlson, a train, a hedgehog, a daisy, etc.
Such boards can be made in an unusual shape - in the form of a cloud or a light, a star or a sun - this way they will quickly attract the attention of parents.
Do-it-yourself stand: features and manufacturing principles
So, the first thing you need to start with is the basis of the design. Once the size of the stand is determined, you need to select a cork board and plywood of the appropriate size and glue them together using glue or liquid nails. Next, the workpiece must be painted, covered with fabric or film, and you can begin to decorate it.
You need to start designing the design with the pockets in which sheets of information will be placed. For this purpose, you can use plexiglass of a suitable size or durable stationery files. The number of pockets can be absolutely any.
Next, you need to determine the theme of the design. This could be a lesson schedule, a corner of a healthy lifestyle, congratulations on the holiday, and so on. The name of the stand is an important part of its design. The title should be bright, large and eye-catching. Remember that an information stand is a business card of an organization, so special attention should be paid to its design. Letters for the title can be cut out from bright plastic or from unnecessary magazines.
Remember about the frame of the stand. With a frame, the design will look more aesthetically pleasing and laconic.
Sheets with information and other important information can be attached to the stand using buttons or safety pins, but if we are talking about a child care facility, then it is worth finding an alternative method.
Advantages of making your own stand
- The ability to create a unique, original, inimitable design, convenient location, shape and size.
- By making the structure yourself, you can choose materials that perfectly match the interior of the room.
- You will have the opportunity to place on the stand only the information that you need, as well as choose the optimal location of pockets on the board.
- By making your own information board, you will have the opportunity to choose the color scheme that best suits the overall style of the room.
- You don't have to adapt to a design made from a template, as you can arrange the pockets and information fields as you wish.
- Handmade work is a great way to emphasize individuality and add zest to the image of the room.
Making the structure will not take much time and will not take much effort. In just 30 minutes you can make a simple, small-sized design. With stands of larger size and complexity you will have to tinker a little, but rest assured that the result will exceed all your expectations.
The stands are actively used by people, both at home and in educational, medical, transport and other institutions.
Important information, plans for the future, memorable photographs, an organizer, a list of employees, a class schedule, and this is not an exhaustive list of information that can be located on the stand.
