Jug
Wikipedia defines still life as the depiction of inanimate objects in the visual arts. Most often they paint still lifes with a jug or vase. We will not deviate from traditions.
Indicate the volume of the jug using additional semicircular lines. See step-by-step instructions on how to draw a vase.
The lines in the background need to be erased.
Add a narrow spout and a long handle to the jug.
3
Pears
Using a compass, draw two circles on the sides or trace a round object.
Making the correct shape.
Draw a thin leaf and short branches.
We have special instructions on how to draw pears.
You can draw a still life with any fruit, such as apples.
4
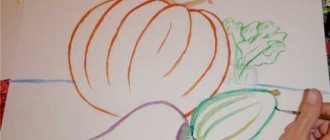
Lesson on drawing vegetables with colored pencils
If vegetables could talk, they would probably tell you incredible stories about how they appeared in the kitchen.
Europeans initially considered tomatoes brought from South America to be poisonous. That is why for a long time tomatoes decorated window sills, gazebos and greenhouses. Only when the Portuguese figured out how to use them as food, it turned out that tomatoes are not poison at all, but a storehouse of vitamins!
Crushed red peppers became the protagonist of the world's first gas attack. Guess which vegetable was considered a symbol of discord by the ancient Persians? You won't believe it - beets! The crimson-colored fruit with tops was often thrown into the house of enemies.
But garlic, on the contrary, was idolized in different parts of the world. Roman legionnaires wore it on their chests as a talisman, Afghans used garlic as a remedy for fatigue, the ancient Greek physician Hippocrates treated the lungs with it, and the “father of comedy,” the poet Aristophanes, wrote about garlic as a means to maintain courage.
How many interesting and exciting things are hidden in vegetables, modestly lying on the shelves of your refrigerator! So, let's gather up the courage and go ahead - draw a still life with vegetables.
1. First draw the outlines of the vegetables. To make the composition complete and harmonious, try to hide one vegetable a little behind another.
2. Detail the image, giving each vegetable a characteristic shape. Draw the tails and leaves.
3. Trace the outline of the vegetables with a gel pen and erase the pencil.
4. The main thing in a still life is to paint it correctly.
Let's start with pepper. Color it with a yellow pencil, avoiding the highlight area. Fill in areas of depressions and irregularities with orange and brown pencils.
5. Make the color more saturated using different shades of orange. A little attentiveness and perseverance - and you will succeed!
6. Color the stem. The pepper drawing is ready.
7. Shade the radishes with a pink pencil. Deepen the color with burgundy and red pencils.
8. Use green, yellow and brown pencils to color the cucumbers.
9. The bulb can be colored with yellow, orange and shades of brown. Don't forget the glare!
If you want to draw garlic instead of an onion, it is better to paint it with shades of pink, purple and blue.
10. The handsome tomato will be a rich red color. Brown and burgundy pencils will help to enrich the color of the tomato.
11. And finally, shade the surface of the table on which the vegetables lie. A dark brown pencil will help to correctly depict shadows around vegetables.
Drawing a fruit basket
A vitamin fruit basket will be a wonderful addition to your kitchen interior.
The vine, a symbol of fertility, wealth and prosperity, in combination with pears and sunny peaches, symbolizing youth and the rebirth of life, will effectively decorate a dacha or a school canteen. How do you like the idea of giving the school a picture you drew yourself from the whole class?
It is very simple to depict a fruit basket on whatman paper or in an album.
1. First make sketches of the basket and fruits: grapes, peach, plum and pear.
2. Draw a basket and fruits using smooth lines. Try to maintain symmetry.
3. Paint over the fruit as shown in the picture, with shadows and highlights.
4. After applying the shading, blend the pencil to achieve a smooth transition of colors. Draw weaving on the basket.
Ready!
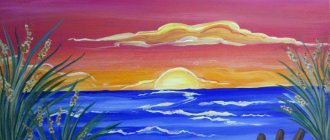
Finally, catch a selection of vegetables and fruits that are easy to draw with paints, watercolors or wax pencils. Practice correctly depicting colors, the play of light and shadow on fruits, and surprise your loved ones with your artistic talents every day.
Juicy and beautiful apple
Apples appear on our tables in mid-summer and do not leave the diet until late autumn, so they can be drawn from life. For the creative process you will need a pencil, the apple itself and a sheet of paper. After preliminary preparation, you can begin the drawing process:
- the outline of the fruit is depicted in the form of an ordinary circle; after outlining it, it is necessary to make the image naturalistic; to do this, draw a concave line at the bottom and top of the figure;
- in the lower recess an inverted crown is drawn, this will be the middle of the flower from which the apple has developed, and its upper part should be decorated with a stem, a simple stick with a leaf at the end.
You can decorate an apple in any color you choose, because green and yellow, red and orange apples of different colors grow in gardens. In the process of drawing, a child can learn to use watercolors and gouache, paper crayons or colored pencils.
What you need to draw a still life
To create a decorative still life, you need a white sheet of copy paper in A4 or A3 format. To obtain a high-quality drawing, you can draw on a blank page in a sketchbook.
The drawing is created using two brushes with numbers 2 and 5. Gouache of twelve colors is used to apply paints. If gouache is not available, watercolor can be used. In this case, the paper should be thicker.
The sketch of the image is drawn in pencil. You will also need a ruler, palette, eraser, PVA stationery glue, and a glass of water.
Step by step drawing of a still life
The sheet of paper is positioned vertically: the height of the picture is greater than its width.
At the first stage, using a pencil and an eraser, simply draw horizontal parallel lines. These lines are located vertically, one above the other, on different levels or “floors”.
For example, the first short line denotes the base of the vase, the second line along the entire width of the sheet denotes the border of the table on which the vase stands. Next, two lines are drawn above: a long line showing the expansion of the vase in the middle, and a short line showing the width of the neck of the vase.
At the very top, a short line is drawn indicating the upper border of the vase.
After this, one vertical line is drawn from top to bottom, showing the center of the vase. In total, you need to draw five horizontal lines and one vertical segment.
Next, a smooth outline of the vase is created. To do this, first, using a ruler, you need to connect the ends of the drawn segments with the ends of the lines located above.
The result is a geometric figure consisting of three isosceles trapezoids placed on top of each other:
- lower inverted trapezoid with a narrow base at the bottom and a wide base at the top. This trapezoid surpasses all subsequent trapezoids in height;
- the central ordinary trapezoid ranks third in height;
- the upper trapezoid is also turned upside down, like the first trapezoid. The lower base of the trapezoid is smaller than the upper base.
Then the boundaries of the trapezoids are smoothly rounded. The first trapezoid will turn into a very deep plate. The second trapezoid will look like an upside down soup bowl. The uppermost trapezoid will be shaped like a glass.
At the third stage, the three-dimensional outlines of the vase are created. To do this, ellipses are added to the four horizontal segments marking the boundaries of the vase.
In this case, the lower half of each ellipse will be slightly higher in height than the upper half of the ellipse.
Ellipses are drawn in places where the width of the vase changes. Since the base of the vase is characterized by a smooth transition into its wide part, an additional ellipse is drawn above the base of the vase.
There will be five ellipses in total:
- two identical ones, located one above the other, at the base of the vase,
- the widest is in the middle,
- the narrowest one is near the neck,
- at the top edge of the vase.
Then additional objects are drawn: fruits, folds of the tablecloth behind and under the vase. For example, an apple, plum or pear fruit is first depicted as ovals. These ovals are then given the natural shapes and curves of real fruit.
Use an eraser to remove auxiliary lines from the painting.
Examples of auxiliary lines:
- vertical line,
- all horizontal lines except the table border,
- lines of the upper halves of the ellipses,
- lines that are visible through obstructing fruit or objects.
The figure shows the transitions of shadows: from bright colors to halftones. To do this, each element is divided into four parts or planes for subsequent painting: the brightest part, penumbra, shadow color, reflex.
The picture is painted with gouache in accordance with the boundaries of the shadows. Since the tablecloth is blue, the palette mixes dark and light shades of this color.
Four shades of brown are used for the vase: from dark brown to light brown. For the apple, shades of yellow are used.
After applying the paints, outline the contours of objects - the borders of a vase, tablecloth, fruit - using a thin brush.
To obtain the desired paint, black gouache is mixed with PVA glue: the mixture is prepared on a palette or the gouache is poured into a tube of glue.
In order for the mixture to become thick and not spread, you need to wait about 20-30 minutes. The outlining of the contours hardens in about one hour. After this, the decorative still life is ready.
Plums and apricots
Identical in shape, these fruits are even easier to draw than apples, the only difference will be in the color chosen for coloring:
- you need to draw an oval on paper, this will be the outline of the fruit;
- the oval is divided by a longitudinal strip, and its edges need to be rounded;
- Using chiaroscuro you can convey the curves on the skin of the fruit.
It is better to paint plums in dark purple or blue, and for apricots choose pastel tones of beige or pale orange.
Summary of an art lesson in the middle group on the topic “Still life with fruit”
Lesson summary for the middle group
Getting to know the painting “Still Life with Fruit”
Task:
Continue to introduce children to the beauty of surrounding objects, teach them to notice and feel this beauty. Continue to introduce the variety of paintings, consolidate knowledge about the “still life” genre, its differences from the “landscape” genre. Learn carefully, look at the picture, highlight the means of artistic expression (color, composition). Develop imagination, fantasy; sense of color harmony; figurative speech, enriching it with epithets and comparisons. Foster a culture of viewing works of art.
Equipment: Reproduction of the painting “Still Life with Fruit”, dummies of fruit, dishes, fabric of different colors for draperies, color chips, color wheel.
Preliminary work:
- Consideration of reproductions of still lifes, the concept of “still life”.
- Compiling descriptive stories about objects, composing fairy tales about objects.
- Drawing up still lifes of various contents.
- Didactic exercises: “Say which one”, “Find cold and warm tones”, “Choose a background”, “The artist’s favorite color”, “Describe a still life”.
- Drawing objects, combining them into a collective composition.
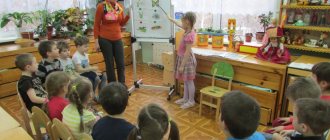
Progress of the lesson
Educator: Today in the studio you see various objects (models of fruits, berries, vases, baskets). At first glance, these are ordinary objects, but each of them has its own fairy tale. For example, this old basket told its fairy tale in my ear: “I am made of thin flexible twigs, which were colored by the generous summer sun. I am so light, but very strong, I can bear any weight. Try my smooth, shiny pen. Look through me into the sun and you will understand how beautiful I am. Choose an object that will tell you its own tale (children's stories). Since objects can tell about themselves, it means they have something to talk about with each other. What items do you think can start a conversation? What will it be about? (make a still life on the table, come up with a dialogue).
To remember the conversation between objects, the artist decided to draw these objects on paper. And he called them in one word “nature”. And the picture he produced was called “still life” (a play on the word “still life”: say it quietly, loudly, joyfully, abruptly, drawn out).
Now look at this picture (demonstration of the painting “Still Life with Fruit”). What objects do you see? Which ones are located at the top and bottom? What did they put them in? What background are they located against? What can you say about fruits? Have they been plucked from the tree long ago? How can you characterize fruit? What are they? (juicy, bright, fragrant, shiny, ripe).
What attracts you most in the picture? Why? (bring to the meaning of bright colors). Look carefully at the still life, choose the color chips whose color you saw in the picture. What colors did the artist use, warm or cool? Even the grapes are not a cold blue color, but purple, approaching the warm colors of the fruit. What can you say about the shade of green of the leaves? (show different shades of green on the color wheel: warm, cold). Do you think the artist was right in choosing such a dark color for the background? Was it possible to clearly see the fruit against a light background? Didactic exercise “Choose a background.” The heroes of the still life continue to live in the painting: they are looking somewhere, talking about something... Fantasize while looking at the painting and tell it. What did the artist want to tell us by painting this picture? (show the beauty of fruits, surrounding objects; the richness and generosity of nature). Where would you recommend hanging this painting? Why? What colors helped the artist make it so expressive, bright or muted? Didactic exercise “Choose shades” (bright and muted colors; which ones are appropriate to use?). (Children independently compose still lifes from various objects, select a background for them, and draw if desired).
Green pear with a tail
It’s best to start drawing a teardrop-shaped pear with practice, and this is a good way to reinforce your child’s knowledge of different shapes:
- a circle is drawn in the center of the sheet, a thin semi-oval is drawn on top of it, at the junction of two figures it is necessary to draw concave lines;
- At the bottom of the finished figure, a concave line and an inverted crown are drawn, as on an apple, and the top of the figure can be decorated with a fairly thick stalk.
The pear is painted green or yellow; it is best to use the shading technique to convey chiaroscuro.
Orange cut in half
Citrus fruits are not difficult to draw, but most often it’s just a ball of a certain color, and a child will like the picture of a cut orange faster:
- With a pencil you need to draw a circle on the sheet and put a dot in its center, draw rays from it to the sides with thin lines;
- Having retreated 2-3 mm from the outer edge of the peel, it is necessary to connect all the rays with curved lines, these will be slices of fruit cut across;
- the outer contour can be drawn in orange using a thick felt-tip pen, this will be the orange zest, and leave the next layer white;
- the inner segments are also drawn using a felt-tip pen, but the segments themselves are best painted in light orange;
- If you use yellow as the main color, it is easy to depict a lemon using the same technique, and red is suitable for drawing a grapefruit.
By making several identical blanks and choosing different colors, you can easily turn them into a coloring game for your child, so he can learn the main types of citrus fruits.
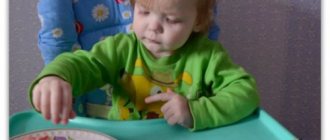
The benefits of cute food
Is it necessary to talk in detail about how useful such activities are for children? In principle, everything is clear - with the help of such tasty plates, the child will sweep off the table everything that you offer him as “paints” for such a “picture”.
But, as the experience of many parents shows, the child will learn a lot in the process of creating these useful, beautiful masterpieces.
- When placing certain foods on a plate with your child, you can read something to him or tell him about the participants in this fun action. And the child will clearly know and remember what certain fruits, berries, vegetables, etc. look like.
- By memorizing the appearance of the components, the child can get to know their other side - with benefit. He will know the benefits of not only his delicious favorite berries, tangerines, bananas, etc., but also carrots, pumpkins, onions and everything else that he doesn’t really like.
- You can enrich your child’s understanding of all this by talking about the external characteristics of the components, namely color, shape, surface features, taste, olfactory characteristics, etc.
- Clarify and expand your child’s knowledge about vegetables and fruits, or more precisely, about how and where these foods can be consumed and prepared.
- You can practice with your baby in conducting simple experiments to identify the taste of foods.
- By asking about a particular product, you will strengthen your recognition skills by describing fruits and vegetables.
- Speaking about certain ingredients, their qualities (ripe, sleepy, tasty, healthy, rosy, aromatic, bitter, sweet, sour, smooth, rough, etc.), you can also develop your child’s knowledge of the language (by practicing with him in using, for example, feminine, masculine, neuter nouns, adjectives that denote characteristics and qualities), and also expand your vocabulary.
- By preparing this or that picture-plate with your baby, you will not only teach him the basics of cooking, but also easily and excitingly cultivate curiosity in him, develop memory, speech and perception.
- By naming vegetables, fruits, berries and other products, you can make speech connections. For example, beets grow in the garden, borscht is cooked from it, salads are made, etc. The harvest, for example, of cucumbers, tomatoes, onions, etc., is harvested at that time. Collocations can be made in conjunction with the words plant, grow, water, pluck, pull out, dig up, care for, etc.
- When making such plate pictures, you can turn on good children's music. Listening to it while creating delicious and appetizing pictures, the child develops aesthetically.
Large plate with different fruits
Having learned to draw individual fruits, you can begin to arrange them, and a still life image would be an excellent solution. To make drawing easier, all objects can be placed on a large plate, which can be easily redrawn from a picture or used as a photo base:
- a plate is depicted on the piece of paper; to do this, you need to draw a semicircle; it doesn’t have to be closed, leaving space to place all the selected fruits and vegetables;
- in the foreground it is best to depict simple and quickly recognizable figures, these can be apples and pears, they can be placed horizontally and vertically;
- fruits such as plums will decorate the composition and add additional colors to the resulting picture, but it is best to complement the image with small details;
- A purple bunch of grapes will look beautiful on a plate; for this, a pile of small circles covered with an openwork green leaf is drawn behind the apples;
- all the berries must be carefully outlined and painted in a lighter shade than the outline, so the berries will not merge into one lump of color and will be clearly visible in the drawing;
- It’s very easy to draw a green grape leaf; a maple leaf template is suitable for this, only the edges of such a sketch need to be drawn with openwork lines;
- Place several cherries along the edge of the plate; to do this, two circles with a concave top are connected with a green L-shaped pin;
- It is also better to draw single cherries with petioles, this will make it possible to quickly recognize them in the picture and draw it with small details, which will emphasize the naturalism of the picture;
- The final stage of drawing will be coloring the picture; having saturated it with colors, you can begin to decorate the background; it is best to choose calm and shallow shades for it.
Using watercolor paints, it is easy to turn the resulting drawing into a real masterpiece and, after drying, place it in a frame and under glass. These paints help to paint individual fruits to imitate their real color with different shades and natural chiaroscuro reflecting the depth of color.
Simple master classes will help you learn fruit drawing techniques, which will be useful for creative activities with children of different ages. Even if children are not interested in creative lessons, they can be used to learn shapes and colors, the names of new fruits and even vegetables.
Introducing children to still life
Chugunova L.E. Pereverzeva V.A. Zimina M.P. Gubanova I.E. Chugunova L.E.
MBDOU No. 26 “Solnyshko” Belgorod region, Stary Oskol.
Still life is one of the most popular genres of fine art. Since its inception throughout the last five centuries of art history, it has been the primary source of talent for thousands of artists. This is an ideal genre for those who are just learning to draw, which is why many novice artists hone their skills in still life.
Introducing children to the genre of still life helps develop their imagination, aesthetic feelings, and artistic abilities. At the beginning, we invite the child to look at the picture, we draw his attention to the arrangement of objects, their color, shape, and the beauty of the combinations. We ask the child: “What do you think the artist wanted to tell in his picture?” He can come up with the name of the picture himself, this helps develop his imagination.
It is important to form children’s aesthetic perception of works of fine art; We teach them not only to recognize familiar objects in a still life, but also to see their beauty, the variety of shapes, colors, textures, to create a desire to create still lifes on their own, and to express their emotional attitude towards what is depicted. Talking with children, we show that the artist does not just depict flowers, fruits, vegetables, but uses paint to tell about what he noticed in the surrounding nature. In other words, in his still life painting the artist conveys his thoughts, feelings, mood and wants to share this with others.
Children draw still lifes with pencils, felt-tip pens, paints, pastels, wax crayons, etc. To depict a vase or jug, silhouettes cut from colored paper, newspaper, or magazine are sometimes used. In this vase, the child paints a bouquet of flowers and places fruits and vegetables nearby. Such still lifes are especially interesting to children because they combine collage and painting techniques. Before drawing a still life, during a walk we invite the child to look around and choose those objects or plants from which it can be composed; we ask him why he chose these particular objects (they like their color, shape, outline, size).
We offer the child the same task at home after a walk. In the room, he carefully examines the objects and selects some of them to draw. To interest a child, a poem by A. Kushner:
If you see in the picture a Cup of coffee on the table, Or fruit drink in a large decanter, Or a rose in crystal, Or a bronze vase, Or a pear, or a cake, Or all the objects at once, Know that this is a still life.
We put flowers in a jug or vase and invite the child to look at them and admire the beauty of the petals and leaves. It’s good if there is a reproduction of P. Konchalovsky’s still life “Lilac”. Looking at it, we pay attention to the heavy grapes that carry the smell of spring rain. Let's talk about the combination of colors on each lilac branch. The child should see transitions of lilac, violet, pink, blue shades that create the unique color of fragrant lilac. In the process of looking at the painting, children find the most characteristic objects: “fragrant lilac”, “the painting smells, you want to touch it with your hand”, “wonderful, tender lilac”, “it’s good to be an artist, draw pictures and give them to everyone.”
Familiarizing children with still life helps develop aesthetic feelings and reverse speech, as evidenced by the appearance of vivid associations, metaphors, and comparisons. Depending on the time of year, the content of the still life changes, and children find new subjects for their paintings.
Autumn: “Gifts of Autumn” - drawing or applique of vegetables, fruits, mushrooms from life. “branches with autumn leaves”, “Rowan branch in a vase”, “Basket with mushrooms”, “Bouquets of flowers in a vase”. We draw still lifes with paints, make appliqués, combine different image techniques (cutting from paper, fabric, drawing with a brush, foam rubber, finger, cotton wool, etc.)
Winter: “Christmas tree decorations”, “Christmas tree branch with toys”, “Pine branch with cones”. Winter still lifes bring joy to children because they are associated with the New Year holidays, gifts from Father Frost and the Snow Maiden.
Spring: “Tender snowdrops”, “Mimosa branch”, “Indoor plants”, “Fish in the aquarium”, “First spring flowers - tulips, daffodils, dandelions”.
Summer" "Summer flowers - daisies, bluebells", "Wild berries - strawberries, raspberries, blueberries", "Mushrooms - boletus, boletus, chanterelle, honey fungus, boletus."
Each season provides content for drawing still lifes. Observation in nature enriches children's impressions and knowledge, helping to convey this beauty in drawings, applications, modeling, and design. We visit museums or exhibitions with our children so that they can see original still lifes by artists. You can also consider reproductions of still life paintings by F. Tolstoy, I. Khrutsky, P. Konchalovsky, M. Saryan, I. Mashkov. The paintings of these artists convey the beauty of everyday objects and fruits of the earth, a person’s mood and his enthusiastic attitude towards the surrounding objective world.
Emotionally rich still lifes evoke aesthetic feelings in a child and a desire to create beautiful, colorful compositions.
Preparing the composition
In order to learn how to draw a still life, you need to be able to correctly select and place objects that will serve as nature.
A few simple rules will help you cope with this task.
- Items for composition should be combined by theme.
- It is important to know how to place them correctly.
Location of items
When creating a composition, you need to decide on the layout, basis and format of the picture.
The image format can be horizontal, round or vertical, and accordingly the composition is formed according to this principle.
Horizontal helps to accommodate more objects for the image, but requires drapery in the background to create a harmonious design. The main emphasis must be placed in the very center of the composition.
The round format is not in great demand because it is not the most convenient option.
The vertical format involves a small number of objects in the picture. An example of such placement would be tall vases with flowers.
There are several ways to place composition elements.
With a triangular placement, the top of the supposed figure is formed by the tallest object, objects of smaller height form the base of the conditional triangle.
Objects that will serve as a model for a still life can be arranged in a circle or diagonally.
The main secret is not to line them up, in which case the drawing will come out boring.
Items may overlap each other slightly; gaps are allowed between them.
It is important not to overload the composition with unnecessary objects; for this you should not use more than three sizes.
Another component of success will be well-placed lighting, this will help to correctly place accents in the drawing.
Color ratio
Experienced artists consider another important rule for creating a still life to be the rule of three colors, which should form the basis of the drawing. You need to choose two or three primary colors and boldly use their shades.
A painting depicting a motley bouquet of flowers in any case has two dominant colors. You can focus on white daisies or red poppies, avoiding excessive variegation that tires the eye.
Select main part
The art of creating a still life begins with the ability to correctly place objects in a composition. It is necessary to start working from life or from memory by identifying the main element on which the viewer’s attention will linger.
If there is no such object in the created composition, then additional work needs to be done on it.
This main object should stand out in size, color or shape. One of the flowers in the bouquet or the fruit in the composition should stand out noticeably.
This rule applies not only to painting, but also to artistic embroidery, photography, and even the creation of interior compositions.
Lesson summary for the preparatory group on the topic: Introduction to the genre of still life painting.
Lesson summary for the preparatory group on the topic: Introduction to the genre of still life painting.
Target. Cognitive development
Continue to introduce preparatory group children to the world of beauty and art through familiarization with still life painting. Introduce reproductions of still life. Expand children's knowledge in visual arts, talk about still life.
Speech development. Activate the words in children's speech: Tretyakov Gallery, everyday and natural still life, warm and cold colors.
Artistic and aesthetic development. Creating interest in painting, in the paintings of artists, developing the ability to carefully examine them and respond emotionally.
Progress of the lesson.
Organizing time.
Let's imagine that the sun is shining through the window in our group. We feel its warmth. Now imagine yourself as the rays of the sun. Let's stretch our hands up and say the words: sunshine, sunshine, we are your rays, teach us to be good people.
Now let’s all sit down nicely and begin our lesson with you.
Educator. In Moscow, in the city center within the garden ring, not far from the Moscow River, there is the Tretyakov Gallery.
The teacher shows an illustration.
Educator. The Tretyakov Gallery has 106 rooms and collections of paintings.
What genres of painting do you know? Today we will dwell in detail on the genre of painting: still life.
Educator. What is still life?
Children's answers.
Educator. Still life can be domestic or natural. Household still life depicting inanimate objects, household items, musical instruments, furniture. Natural still lifes depict objects of living nature: fish on the table, flowers in a bouquet, images of fruits, berries, vegetables, mushrooms and much more.
Before painting a still life, the artist thinks about how to beautifully arrange objects so that they are visible and decorate each other. Artists themselves see and allow us to do this - to see all the beauty of the world around us, not only living nature - but also the so-called inanimate nature, all the objects that surround us.
Game "Assemble a still life."
Children collect cut-out pictures and differentiate the concepts of natural and everyday still life.
The teacher shows Khrutsky’s painting “Flowers and Fruits” and invites them to look at this painting more closely.
What is shown in this picture? (Flowers, vegetables, fruits.) This picture shows flowers, they are alive, but cut into a bouquet. The apples and peaches are picked rather than hanging on the tree.
What attracts your attention in this still life? (Lots of beautiful fruits and flowers.) Where are all these objects located? (On the table.)
Look what's on the table on the right? (Peaches and apricots.) What do you think they are? (Yellow, round, juicy, appetizing, ripe, etc.) What colors did the artist use to convey the ripeness of the fruit? (Yellow, orange, brown, red, pink.) That is, all warm shades!
What else indicates that these fruits are ripe? (One of the apricots is broken, its ripe pulp and stone are clearly visible.) What feelings did the artist want to evoke by depicting these fruits? (Each peach seems to say: “How ripe, juicy, sweet I am! Try me!”)
Pay attention to the left side of the picture. What do you see? (A basket filled with grapes.) What grapes? How did the artist manage to show the ripeness of the grapes? (It is transparent, it seems that its seeds are visible, the berries shine, sparkle with amber shades.) What emphasizes the freshness of the grapes? How long ago were these berries picked? (Recently, because its leaves on the branches have not yet withered.)
Why is one of the bunches of grapes lying on the table? (There is a lot of it in the basket; it doesn’t all fit.) What did the artist want to say by drawing so many grapes in the basket? (Very rich harvest.)
What feelings did these fruits evoke in the artist himself? (Delight, admiration, joy from the wealth of the newly harvested harvest.)
Pay attention to the bouquet of flowers! What flowers are these? Who can name the most flowers in the vase?
In what colors did the artist paint the flowers? (All flowers are in warm colors.) Why were these colors chosen? (In autumn, flowers and many plants take on just this color.) Such flowers complement the fruits on the table well.
What vase are these flowers in? (This is a jug.) What material is it made of? (Is it ceramic, made of clay or wooden.) What does such a jug say? Why did the owner put such a beautiful bouquet in a jug? (Maybe he was in a hurry or likes such jugs, etc.)
Now imagine that you are standing near this table - what do you feel? (Aroma, pleasant smell from flowers and fruits.) What would you like to try from this table?
What do you think the artist wanted to draw attention to when painting this picture? (He wanted to emphasize the richness of nature’s autumn gifts.)
Who raised and collected these gifts? Can we say that this still life is about the work of the people who grew such wealth?
What else in the picture indicates the presence of a person somewhere nearby? (A glass of unfinished water, a broken peach.) Why did the artist paint these objects? (To show that the man worked hard, reaping the harvest, was thirsty, but he still had a lot of work to do, and he didn’t drink enough water and left.)
What mood does this picture evoke in you? What would you call it?
Physical education minute.
I throw the seeds into the ground, it’s time for me to water them, flowers appear from the green sprouts, the breeze breathes slightly, the petals sway.
Mimic exercise “Fruit”
Express pleasure from the pleasant smell of flowers, the aroma of apples.
Sweet apple - convey an emotional state: you eat a sweet apple, sweet grapes, sour lemon.
Express your state in situations: you see a worm in an apple, a worm is gnawing on an apple, an apple fell on your head
Exercise for chewing muscle articulation.
Game exercise “Chewing a hard pear”
Exercise for lips and cheeks
Your cheeks are as round as apples. Puff up both cheeks.
Let's hide the plum behind our cheek. We inflate alternately the right and left cheek.
Round grapes. Pull your lips forward with a narrow tube.
Banana. Smile, raise the corners of your lips up, keep your lips closed.
Now look at another picture by I. Khrutsky. It's called "Vegetables and Mushrooms". One day the artist was given a basket of mushrooms as a gift. The mushrooms were so fresh and beautiful, Ivan Khrutsky was so happy about this beauty that he wanted to preserve it and paint a picture.
What mushrooms do you see in this basket? Describe them. (Fresh, big, beautiful.) What emphasizes the freshness of mushrooms? (Their legs are not yet cleared of soil, their caps are shiny, etc.)
What else do you see next to the basket? (Lots of vegetables, fruits, poultry, fish on a platter.) What are they all like? (Fresh, juicy, beautiful, bright, etc.)
Did you notice the coins on the table? Where could they have come from here? Could one person immediately harvest fruits and vegetables, catch fish, birds, and pick mushrooms in the forest?
The teacher hands out illustrations depicting a still life and offers to decorate.
How to draw a still life step by step
Step-by-step instructions for beginning artists will help you draw a simple still life with pumpkins.
To work you need to stock up:
- album sheet,
- a simple pencil, an eraser and a sharpener,
- tassels,
- gouache 12 colors,
- water in a small container.
The order of work.
- The first line is to mark the edge of the table on which the composition is placed.
- After this, outline the outlines of both pumpkins.
- Draw the stalks of the vegetables, mark the grooves on the surface of the pumpkins.
- Below the outlines of the pumpkins, draw a couple of onions and a red pepper.
- Paint work should begin by filling in the background. The background can be decorated in light blue.
- Paint a large pumpkin orange, after marking yellow grooves on it. When painting a pumpkin, you should take care of smooth color transitions: the strokes should not be uniform in shade.
- A small pumpkin can be painted yellow and complemented with orange segmenting stripes.
- Glares of light are depicted using light strokes of white paint.
- Vegetable stalks are decorated in green, using different shades to create depth in the design.
- The onions will be light yellow with a slight brown tint; the peppers should be colored red.
- The surface of the table and the shadows on it falling from objects are painted in different shades of brown.
Still life with a simple pencil
You can learn the art of drawing by starting with pencil sketches. For the first lesson, you can take a vase as an object, placing it against the background of the drapery.
To work you need to prepare:
- album sheet,
- simple pencils,
- sharpener and eraser.
The order of work.
- First of all, the horizon line and the contours of the object are applied to the sheet. It is recommended to ensure that the image is placed in the center of the sheet. A little space should be left on top, it will be clear that the objects are on a flat surface.
- When transferring a visual image to paper, it is important to maintain proportions. This can be done simply with a pencil, measuring the dimensions of the elements of the composition with it.
- The outlines of objects are always based on a simple geometric shape. The bottom of the vase is an ellipse. It is important to correctly transfer the shape of objects and maintain all proportions.
- Having specified the proportions, the auxiliary lines can be removed and the contours of objects can be clearly drawn. Highlight the center of the composition more clearly.
- Volume is added to a still life using shading. Large spots can be outlined in advance; shadows and highlights of light must be highlighted very carefully. The folds of the drapery will require a lot of attention.
Highlighting shadows using shading with a simple pencil is a simple skill that can be developed simply with practice. To do this, it is recommended to devote several lessons to drawing folds of matter. Hatching skills will also be useful for depicting any elements of a still life.
Pencil drawings
How to draw a still life with pencil, charcoal or chalk. Here, at the last stage of work, shading is important. Still lifes often emphasize the shapes of individual elements, unlike other styles of painting, which, for example, use tracing.
To perform shading correctly, you must determine how light hits the objects being depicted.
A master class for beginners will help you understand how fruit shadows are distributed.
- Fruits with a smooth surface (grapes, apples, plums) will reflect light.
- Fruit or other textured objects (pineapple, wicker basket, orange) will eat them.
Using shading, you can highlight the most shaded areas, textures, and dark colors. An eraser or white chalk is used to mark highlights and the brightest elements of the composition.
Creating a pencil drawing step by step:
- Prepare a 2B pencil and a thick sheet of A3 paper.
- Create a captivating composition. A clear approach to creating wireframe sketches will help you create it from a group of objects.
- Draw a horizon line and select the center of the composition. It is better to start by marking the table plane with a horizontal line.
- Sketch the outlines without pressing the pencil and maintaining perspective. You can use auxiliary lines, which are then removed with an eraser.
- Erase the auxiliary lines if the shape, proportions and composition of the still life suit the author. Now you can work out the details of each element.
- Add details by drawing shadows and reflections. The more carefully this is done, the easier it is to move on to the next stage.
Tinting is carried out in two stages:
- Base tones are lightly applied to each piece to give it a three-dimensional shape.
- Shade the spaces between and around objects.
Important! Drawing light and shadow between objects should be the same as drawing the objects themselves. Shadows under and around objects will help determine shape and shadows on their surfaces.
Some beginners think: how easy it is to draw an apple! Others, on the contrary, are afraid to pick up a brush and pencil. This leads to many mistakes: first they draw the background, leaving gaps in the image where the objects will be located, then they paint all the objects one by one.
Conversely, the objects are painted first and then the background. This is not recommended because the finished image will look like objects cut out from magazines were glued to the sheet. There will be no successful composition.
Each picture needs to be painted gradually, but completely. Experienced artists return to one theme or another one by one, making several strokes at a time until the masterpiece is ready.