Making crafts yourself is very useful for children, because it helps develop imagination and fine motor skills. Besides, spending time like this is always exciting and fun.
And to make spending time creating a beautiful, unique product even more interesting, connect with your baby - this way you both will get a lot of pleasant emotions and it won’t be boring.
Materials for making fish applique
Before you start doing anything, it is important to find out what materials will be needed for the job.
Most crafts are made from paper, so it will become one of the main materials. You will also need cardboard, plasticine and other things that you want to use in your applications (for example: leaves, seeds or buttons).
In addition, to create interesting figures, you will need:
- Scissors;
- PVA glue;
- Pencils;
- Markers.
Undoubtedly, you should also stock up on patience, good imagination and a cheerful mood.
Fish applique using templates
It is possible to create amazing fish using templates that can act as a stencil, or as a basis for appliqué. Such blanks can be made by simply drawing a silhouette on a sheet of colored paper, or by printing a ready-made picture found on the Internet.
It's very easy and fun to use templates as a basis. The fish is cut out of a sheet, and then it can be decorated and decorated as you please.
Volumetric fish
You will need: a blue sheet of paper, multi-colored corrugated paper, a toothpick, glue, fish figurines (you can draw, print or take them from coloring books), scissors.
Cut the corrugated paper into small squares. Screw each square onto a toothpick, the work is painstaking. Place the blank figures on the blue piece of paper.
Cover each part of the fish’s body with twisted squares, and then fill the rest of the space of the figure tightly. Then you can add a diverse underwater world to the sheet: algae, pebbles from corrugated squares.
You can also paste over the background with different shades from blue to light blue of the corrugated sheet.
In the same way you can make one large fish. Such applications turn out amazingly beautiful.
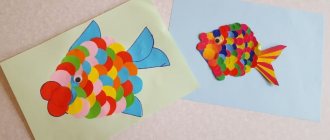
Geometric applique
This type of fish applique in an aquarium is perfect for kids, both younger and middle groups. During the creation process, they will not only have fun creating the product, but will also become familiar with a variety of shapes. Manufacturing consists of several steps:
- The first thing you need to do is find the right shades. The fish can be made in absolutely any color, and the background should be blue or blue.
- Four large circles are cut out of multi-colored paper for the bodies of the fish, four medium ones for the tails and a couple of small ones for the fins;
- Each circle is folded in half, and then any two semicircles of different colors are combined into one fish. After this, you can glue the remaining parts: tails and fins;
- Eyes and scales are drawn with a felt-tip pen.
You can add seaweed to the background by cutting strips of different lengths in green shades. It will be great to draw something using bright markers.
Goldfish applique
Everyone knows that goldfish make wishes come true. You can use various materials to make it; several information catalogs are available on the Internet. It’s both a pleasure to make such a craft and to give it as a gift.
You will need: cardboard, sheets of yellow, white, black, pink and orange (preferably glossy), glue, scissors.
We make a circle out of cardboard, you can use any template, a compass, and even a saucer can be traced. Also cut 2 circles from the yellow and orange sheet. Glue the yellow circle onto the cardboard shape.
It is necessary to cut off a quarter of the orange part in a semicircle. This will be the torso. Glue an orange one onto the yellow circle, the goldfish will have a yellow head and an orange body.
Next, cut out the tail and fins from the yellow sheet, you can use the template. Cut out the eyes from a white sheet, and the pupils from a black sheet and glue them onto the fish. To decorate, cut out small triangles from yellow or gold paper and glue them onto the orange body of the fish.
Application using origami technique
Older children (from older groups, for example) can try themselves by making an applique of a fish in an aquarium using the origami technique. There is a huge number of different schemes that are easy to find on the Internet.
They vary in degree of complexity, which means it is quite possible to choose something for yourself. Here is a simple option that your child can definitely repeat:
- Take a square of colored paper and make folds along both horizontal lines, as well as in half;
- Then unfold and fold so that the fold in the middle is inside a pair of triangles with a common vertex;
- Fold the corners from the sides of one of the triangles overlapping towards the middle. This will serve as a tail
All that remains is to turn the product over. You can decorate the fish however you like, the main thing is not to forget to draw an eye and a smiling mouth.
Technique
A beautiful applique depends on the amount of materials and technique of application. Children aged 6-7 years are probably familiar with the underwater world. They know what aquariums and fish look like; drew underwater inhabitants or painted them. Therefore, the work can be slightly diversified. Next, we learn how to do it ourselves, introducing various materials.
- Use volumetric elements made of paper. These could be fish or other creatures from the underwater kingdom. The origami technique is applicable here.
- Small parts made of plasticine. For example, a baby can mold fry. If a child has already come into contact with this material before, it will be easy for him to interact with it purposefully in the future.
- For fish scales, a mosaic of cereals (buckwheat, semolina or millet) is used.
- Ribbon applique elements are used, made using the round dance method - they are simultaneously cut out and tied together.
- For collages, pictures from magazines or stickers are used.
Fabric applique
For such a composition you will need fabric of different colors and templates according to which the parts will be cut out. Each part is cut out very carefully with scissors, because you need to work with such material very carefully.
When all the elements are cut out, glue them as planned onto a cardboard sheet or fabric base.
To diversify the composition, it’s great to glue sequins, rhinestones, small beads and similar little things.
Textile
Can be used partially, especially as large elements for the main product. For example, it could be water. Of course, children will not be able to cut out the material themselves. It is difficult to cut straight, the material crumbles.
Requires some dexterity. Parents or a teacher can help with this by making large blanks and templates in advance for the whole group.
The child can be assigned homework - cutting something out of fabric under the supervision of the parents.
Volume applique
Despite the fact that the volumetric craft seems complicated, it is quite simple to make:
- Take a red or tan sheet of cardboard and draw a fish on it. Then cut it exactly along the contour. This is a blank for a future product;
- From double-sided paper in the colors you like, cut many narrow strips of the same size, and then glue the ends of each;
- All glued strips must be attached throughout the base, placing them evenly one after another. Only the head should remain free;
- Once the striping is complete, begin decorating the fish's head. Make a bunch of balls from scraps of napkins and paste them over the desired areas. The eyes and mouth are made in the same way.
This product looks quite unusual and unique.
Application from paper strips
This fish craft is no less beautiful and is perfect for kids. To construct one, you will need to cut out a blank that serves as a base from a sheet of multi-colored cardboard. One of them - a semicircle - is glued to the paper.
The remaining material must be cut into a bunch of thin strips. All of them are glued in half and then attached to the product blank. The second blank, which is a smaller semicircle, will become the fin. Eyes and other necessary details are drawn with a felt-tip pen.
After all the above steps have been completed, you can give free rein to your imagination and come up with something of your own, original. This way your fish will turn out to be even more interesting and will not be like any other.
Hanging fish
This original craft can decorate a group in a kindergarten, a classroom at school or a room. You can conduct a master class on this craft, which will show children’s imagination not only in production, but also in decorating the space.
You will need: a ruler, scissors, a pen with black paste, a pencil, glue, a set of sheets of yellow, green, orange, red, white, thread.
For the details of the fish, you need to take paper. For example: from a yellow piece of paper, cut out a blank for the body in the form of an elongated oval with tapered ends. The tail can also be cut from an orange sheet, but smaller in size than the body.
The mouth is made from red stripes, and from the green one, make a blank for the fins, also in stripes. The eyes are prepared from a white piece of paper, the pupil is drawn with a pencil or black pen. The part for the body must be folded in half and the ends glued together; the figure should be in the shape of a droplet.
Glue the orange blanks for the ponytail together as well. Glue the tail to the body, with the tapered ends facing each other. Strips of red and green colors must be rolled into tubes and glued together.
Two red tubes are glued to the front of the fish. The sponges are ready. Glue green tubes on top and bottom of the body - these are fins. Then the eye blanks are glued.
It is better to make several colorful fish in this way. Attach these figures to strings and hang them up.
Accordion-shaped applique
This fish applique from colored paper is also easy to make yourself, and besides, the result will definitely please you. And to achieve it, you need to do the following:
- Take a regular rectangular piece of paper and fold it in half. Then, along the fold line, carefully cut it into a pair of identical parts;
- Fold the resulting part like an accordion, but do not go all the way to the end. Carefully trim off any remaining excess edges;
- Now that the most basic things have been done, you can make the remaining necessary parts from paper of different colors. Therefore, cut out the mouth, eyes, tail, and fins.
All that remains is to glue all the parts together, and then decorate the craft by painting it with felt-tip pens.
Plasticine fish
Probably everyone will like this method because of its simplicity and fun. And the end result will be a delicious goldfish. To create this underwater inhabitant you need:
- Make a base for a future application. To do this, use yellow and red plasticine;
- Next, you will need to roll out many small balls and flatten them into circles;
- The plasticine that you will have left after completing the previous steps will need to be rolled out into narrow strips;
- Next, you need to take a blue cardboard piece and mark the silhouette of a fish on it, after which you should surround its outline with circles of red shades;
- The inside of the body itself is surrounded by yellow circles. And the tail and fins are lined with thin stripes;
- An eye is also made from plasticine, which is then attached to the required location.
Once everything is ready, start decorating the background. Make seaweed, rocks, shells and other desired items from plasticine to complete the fish applique. Small pebbles or shells can be taken, even real ones, if such, of course, are available.
Use all your imagination, think through the whole composition. This way the product will look even more interesting and original. Once all the work is completed, you can place the craft in a prominent place so that it adds uniqueness to the overall atmosphere of the house and pleases the eye at any time.
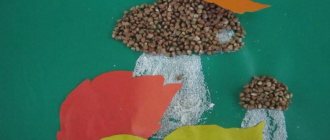
Natural materials
Chestnuts, leaves, pebbles, etc. are used. The child should have such items in limited quantities. Otherwise, the baby will lose attention to the main work.
The young worker needs to glue the sea pebbles or seaweed evenly. And follow one path in composing a composition.
Applications from other materials
If desired, you can use any available material. If you take something not quite ordinary, the product will turn out much more interesting. Here are some examples of simple crafts made from a variety of materials.
From leaves
Crafts made from autumn leaves are quite popular and loved. This is because the colorful leaves themselves are beautiful, and when they are folded into a certain composition, they become even more beautiful.
Such products add coziness when they serve as decoration in the home, and also bring a lot of positive emotions and give a good mood. In addition, anyone can handle this craft, as it is not at all difficult to create.
In order to make such an applique, you will need colorful autumn leaves. Before work, you will need to prepare them - rinse them under a weak stream of water, dry them and put them in a thick book so that they dry and straighten.
If you don’t have time to wait for the leaves to dry and straighten out in the book, you can dry them using an iron.
The basis is a piece of cardboard of any color you like, onto which a large orange leaf is attached. This will be the body of the fish. Other leaves, colored red, will become fins and a tail.
After completing the craft, decorate it with various twigs and other natural materials. You need to add algae and other seabed objects to the background.
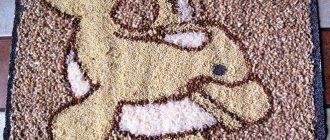
From seeds, cereals, or pasta
Making fish from seeds is not at all difficult. You just need to follow these steps:
- Select a piece of cardboard of any shade and draw the outline of the future fish on it;
- Take glue and generously coat the entire area inside the outline;
- Now you can stick seeds, cereals, or pasta onto the glue, thereby building the fish itself. It is important to do this carefully so that the product turns out neat and tidy;
- After this, attach an eye made of paper or plasticine. Fins and tail can also be cut out of colored paper of any color.
This application is very interesting and will probably appeal to many children due to its unusual nature.
From buttons
You can make such a figurine yourself using ordinary buttons. You will need a template that is easy to find on the Internet, or you can draw it yourself.
It is painted in any color you like, and then buttons are selected to match it. Then, very evenly and carefully, each of them is glued to the base. This creates a voluminous and wonderful figure. And the remaining buttons are suitable for decoration.
Now that you have learned about so many ways to make your own fish, you can try each of them with your little one. Both he and you will enjoy spending time together doing such an exciting, useful and fun activity.