Modeling from plasticine in elementary school: the benefits and goals of creative activities
When working with plasticine, fine manual motor skills develop.
During this process, children also improve and develop:
- logical thinking;
- memory;
- motor coordination;
- speech;
- perseverance and patience;
- Creative skills;
- abstract and figurative understanding;
- imagination;
- attentiveness;
- emotional condition;
- self-esteem;
- hand-eye coordination;
- manual touch;
- observation and eye.
The tasks of modeling from plasticine are:
- formation of ideas about shapes and colors;
- safety training with material during classes;
- stimulation of fantasy and imagination;
- distraction from irritating and harmful factors;
- learning to cope with one’s own anxieties and fears;
- improving the condition of the nervous system and the body as a whole;
- nurturing self-confidence;
- developing interest in creativity;
- formation of aesthetic taste;
- training in the three-dimensional method of depicting objects.
Research project “Home plasticine”
I am 9 years old, I am in third grade. In technology lessons we often use plasticine and make various crafts from it. In this regard, I had several questions:- How many children like to sculpt with plasticine?
- How safe is plasticine for children?
- What does plasticine consist of?
- How to choose the right plasticine when purchasing?
- Is it possible to make plasticine at home?
To answer these questions, I decided to conduct a survey of students in class 3 A of gymnasium No. 3. 29 students from my class participated in the survey.
I think it is not difficult to find a fun activity for a child. But besides entertainment, it should also bring benefits. Plasticine modeling is good for children's development. It allows you to realize your child’s creative ideas just as well as drawing. Moreover, studies have shown that different areas of the brain work when sculpting. There is a lot that can be made from plasticine, the main thing is that you have enough time and inspiration.
It is important that the material is safe for the child and inexpensive. Today, stores have products from different manufacturers, both domestic and foreign. Unfortunately, many types of material contain harmful dyes and other substances. In stores you can now find a huge variety of modeling materials. But you can make plasticine at home yourself. Do you think it's difficult? Not at all, especially since all the ingredients are absolutely available and safe for your children. And I decided to try making plasticine at home
The problem of the research is the contradiction between the benefits of working with plasticine and the environmental problems that arise as a result of the qualitative composition of plasticine.
The goal of my work is to prepare harmless and safe plasticine at home. Accordingly, I must complete several tasks to achieve my goal:
- get acquainted with the history of the appearance of plasticine;
- study the composition of plasticine, types of plasticine. Determine how to choose high-quality plasticine;
- make plasticine at home;
- draw a conclusion based on the results of the work.
The hypothesis will be my assumption that it is possible to make plasticine at home.
Object of study: plasticine.
The subject of the study is the production of plasticine at home.
The practical significance of my work is that the research results can be used in our lives.
1. The history of plasticine
The history of plasticine begins with the controversial issue of authorship of the invention. The German pharmacist FranzKolb patented the model mass he invented called “Plastilin” in 1880, while another contender for authorship, the Englishman William Harbutt, patented in 1899 the non-drying clay “Plasticine”, which he had invented two years earlier. Public opinion still refers to Harbutt as the author. If we take into account that both names and patents concerned masses with almost identical composition and are considered synonyms, then in order to avoid confusion we will call everything plasticine.
The invention of plasticine was the result of Harbutt's many experiments to create an easy-to-use modeling material. Not only artists, but also William’s six children fell in love with “the clay that never dries,” as he initially called it. They filled the house with plasticine castles, ships, battle scenes and fountains. The original plasticine was gray in color. Its exact formula is still a secret, but it is known that it contained calcium salts, petrolatum and stearic acid. It already went on sale in four colors, and was soon released in a variety of bright colors. At first, William planned to use his invention for educational purposes. But, seeing how much pleasure his family got from plasticine, he decided to sell plasticine commercially so that other children could enjoy it. In 1900, Harbutt opened his own factory, which operated until a fire in 1968; production has now been moved to Thailand. Franz Kolb plasticine is also still sold under the name “Munich art plasticine”.
2.Composition of plasticine. How to choose quality plasticine
Plasticine has a special consistency that allows you to make any figure out of it. Rarely does anyone think about what is in it. And this is very important, because plasticine is in close contact with the child’s skin. There is a classic formula for making plasticine, the “backbone”, which is taken as the basis, no matter what type of plasticine is chosen. It includes:
- clay powder, ground to dust;
- beeswax;
- lard of animal origin;
- ceresin;
- dyes;
- petrolatum.
Individually, each element is safe for the child’s health if plasticine is used as intended. This means that, in general, such a creative tool is not dangerous if it is not eaten.
It is important to pay attention to other elements in the composition that are not listed.
They can be harmful. Also, excessive addition of dyes will not characterize the mass from the best side. But the more Vaseline, the better. After all, it makes plasticine softer and more pliable.
Ceresin is a mixture of saturated hydrocarbons. The substance is very similar to wax, odorless. Thanks to him, plasticine has a consistency familiar to everyone.
Choosing safe plasticine
Buying plasticine for children is a responsible matter, because you need to choose not just a material for a hobby, colorful and unusual, but also safe for children’s health. Let's consider a few important points. Tip 1. Read the ingredients! The possibility of buying low-quality plasticine that is harmful to a child’s health is always present, despite the fact that strict requirements are always imposed on children’s products. Safe plasticine is made from natural ingredients (wax, fat, petroleum jelly, starch, etc.), and if you see the words “solvent”, “thickener”, “artificial flavor” or some synthetic components in the composition, then this is a reason refuse the purchase. Tip 2. Smell the plasticine! Yes, yes, just smell it. It is better if the material for modeling does not have a strong or pleasant aroma. The smell may indicate the toxicity of plasticine, and some strawberry aroma may confuse the child and make him think of tasting “candy.” Tip 3. Pay attention to the manufacturer. Sometimes, imported plasticine costs an order of magnitude more than domestic plasticine. However, if you do not see any differences in composition or color, then choose plasticine that is affordable. Also, a well-known name of the manufacturer can give more guarantees that you will purchase high-quality and safe plasticine from him. Tip 4. Pay attention to the recommended age. The age is not indicated by chance. Thus, it is easier for the little ones to master the basics of modeling from plasticine dough. And as you grow older, you will acquire plasticine for the so-called advanced little sculptors. For example, children over 3 years old like modeling kits, which contain various molds, cutters, etc. Tip 5. No traces! Of course, it is not possible to test plasticine in a store. You may have to go through trial and error, but in the end you will find the plasticine that will completely suit your child. Good plasticine should not get very dirty, fall apart, or leave greasy stains. Even if some marks remain on the clothes, they should be easily washed off.
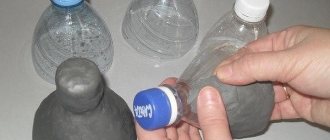
3. Making plasticine at home.
Using Internet resources and additional sources, I found several recipes for making plasticine at home:
1) Consider a recipe for plasticine prepared by heating. To prepare plasticine we will need:
- Flour – 1 glass,
- Salt - ½ cup,
- Cold water - 1 glass,
- Vegetable oil – 1 tbsp,
- Citric acid (or lemon juice) – 1 tablespoon,
- Food coloring (various colors).
In a saucepan, mix a glass of water, half a glass of fine salt, a tablespoon of citric acid and a tablespoon of any vegetable oil. Add food coloring to the mixture and place the pan with the resulting mixture on the fire. We heat our future plasticine until warm, remove the container from the heat and add flour. Knead thoroughly until an elastic, homogeneous mass is obtained. This plasticine is completely harmless to a child, but citric acid and salt give it a sharp, unpleasant taste.
2. The following recipe does not involve heating to prepare plasticine at home:
Classic salt dough
Salt dough is widely used to create crafts of various levels of complexity. Children of any age can work with it. This plasticine is made from natural ingredients that can be found in every home.
Important! This modeling mass is made on the basis of natural products; if a child takes it into his mouth, it will not cause harm to his health.
To make salted play dough, you need to prepare:
- 250 ml water;
- 1 glass “Extra” salt;
- 2 cups wheat flour.
The cooking process is as follows:
- Combine salt and flour in a bowl.
- Then gradually add water and knead the dough.
- To determine the degree of readiness of the plasticine mass, focus on its structure. If the mixture crumbles, add a small amount of water. Add flour to plasticine that is too sticky.
- Form a ball from the prepared mass, make several indentations in it with your fingers. If the dough holds its shape and does not spread, it is ready.
When kneading, you can add a little vegetable oil. Thanks to this component, the plasticine will not dry out, stick to your hands, and a crust will not form on it.
Conclusion
The hypothesis put forward was confirmed; it turns out that you can make plasticine at home, for this you need to know the exact recipe.
Homemade plasticine is very pleasant to the touch, soft, does not stick to your hands, the parts fit together very well, and the colors mix well with each other.
Homemade plasticine is environmentally friendly and harmless, it will not harm the child.
Advantages of plasticine made at home:
It's safe and harmless. Even if the child wants to taste the mass, nothing bad will happen, since all the ingredients are natural. It's convenient and practical. Modeling from homemade plasticine is a pleasure, because it is viscous, plastic, pleasant to the touch and soft. And he doesn’t get his hands dirty, which is also important.
It is not expensive. You can probably find all the ingredients at home or in your nearest store, and they are inexpensive.
It's fast! It won’t take you much time to make homemade plasticine.
Be sure to try making homemade clay! This is cool! Creative success to all!
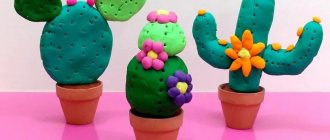
Types of beautiful and safe plasticine for children
The table will introduce safe and non-toxic types of plasticine for children:
| Plasticine type | Features of the material |
| Classical | It can be soft or harsh; quite soiled, difficult to wash. |
| Wax | Very soft and sticks well. |
| Ball | In the form of weightless granules, which are connected by harmless glue; can glow in the dark and adheres perfectly to paper. |
| Solidifying | It dries within a day and is suitable for creating entire collections of crafts, for example, Christmas tree decorations. |
| Art plasticine | The hard one is intended for three-dimensional crafts, and the soft one is for plasticineography and appliqués. |
| Floating | Non-fading crafts made from it can float. |
Techniques for creating applications from plasticine
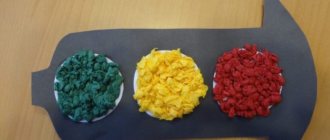
Before making the applique, you can draw a template on a cardboard sheet. Various techniques are used to create paintings from plasticine:
- Smudging. A piece of material is kneaded in the hand until soft and spread on the cardboard. Used to create background color or fill in shapes. Individual details in the picture can be made voluminous for emphasis.
- Plasticine balls. They can be used to fill an outline or to highlight accents in a drawing.
- Flattening. The ball is glued to the surface and pressed lightly with your finger.
- Scratching. Patterns are cut out on a pressed piece of plasticine. For this work, a knife or a special tool with a figured carving is used.
- Strokes. The material is smeared on the finger and applied in strokes to the work surface.
- Flagella. Sausages of different thicknesses are rolled out of plasticine to create an outline or outline the boundaries of the design.
- Extrusion with a syringe. After use, the remaining plasticine should be easily removed from the syringe body.
The application method is selected based on the child’s age group. You also need to focus on his abilities and skills.
Kitten with a heart
On Valentine's Day, you can give not only valentines, but also original crafts. We recommend that you make a kitten from plasticine step by step according to the photo instructions provided.
Sculpting technique:
- From a blue base, mold a body in the shape of a heart, a tail, and ears.
- Connect these parts and stick stripes of a lighter shade on top, creating a “cat” color.
- Make the muzzle, eyes and nose as shown in the photo.
- Detail the animal's face using a stack.
- All that remains is to attach the paws, the heart is made from a red base.
- The holiday craft is completely ready.
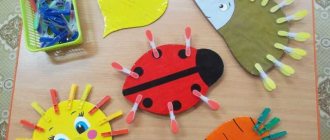
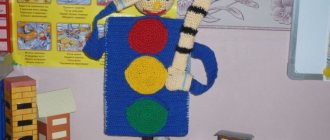
Plasticine applications for schoolchildren
It will be interesting for 2nd grade students to portray a character from a fairy-tale cartoon. Before starting work, take a ready-made template and glue it to cardboard.
Then the outline of the template is pasted over with flagella of different colors. Eyes are molded from flattened balls of plasticine. Large applique elements can be made solid.
A plasticine applique option for grade 4 is a postcard with a picture of a tank or rocket. A sheet of cardboard is cut into the shape of a shield. Balls are glued on top, from which numbers are molded.
Four large circles are flattened from below, on the sides of which there are two similar circles of reduced size - these are the tracks of the tank. A black dot is placed on each of them.
A caterpillar strip in the form of an inverted trapezoid is formed from brown plasticine flagella. A thick green tourniquet is placed on it.
A green semi-oval is placed on the right side, to which the flagellum is glued. A red star is stuck on it. At this point, the plasticine application is considered complete.
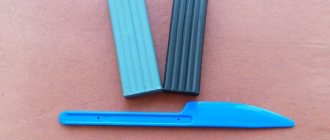
Materials and tools for modeling
In addition to the spatula, it is worth thinking about preparing the workplace.
Suitable working surface:
- Special board;
- Oilcloth;
- Sheet of cardboard;
- Kitchen cutting board.
Some natural and artificial materials may also be useful, such as:
- Cones;
- Nuts;
- Pebbles;
- Beads;
- Rhinestones, etc., it all depends on the intended product.