What to make
Before starting a lesson, every parent thinks about what can be made from plasticine. Imagine a little, imagine yourself as a child, think about what will interest your son or daughter most. Children's crafts may involve the use of many additional materials, which include: flowers, leaves, acorns, cones, and chestnuts.
It is equally important to choose high-quality plasticine, for example, Hey Clay Zalipaki . It differs from the usual one in that it does not stick to hands or furniture, and is much brighter and easier to mold. After 24 hours it hardens and becomes a toy. Includes a free application for step-by-step modeling training.
Ideas for what can be molded from plasticine:
- Animals and birds. Interesting and funny hedgehogs, bunnies, and turtles will delight your little one. In addition, such plasticine crafts for children are made very quickly and simply.
- Thematic figures. Undoubtedly, for every child the New Year is a special, long-awaited event, because it is associated with toys and various gifts. Simple crafts made from plasticine in the form of a Christmas tree decoration, a snowman and, in fact, the Christmas tree itself will lift your spirits on the eve of the holiday.
- Flowers. Mesmerizing compositions made with a child will look as if they were alive. Depending on the age of the baby, you can make flowers with a minimum number of details, as well as more complex volumetric compositions.
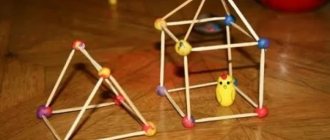
- Trees. Having mastered easy crafts from plasticine, you can move on to more complex figures. Of course, a child will not be able to mold a tree on his own; he will need the help of an adult. But after taking a few steps in creating a craft, the child will be able to easily complete the job he started.
- Vegetables, fruits, sweets. Even novice craftsmen will be able to master the process of creating miniatures of their favorite delicacies. Select the necessary colors of plasticine, then you can safely start creating.
Isn't it fun and interesting to make crafts from plasticine with your own hands? Let's get started with this exciting activity right now. Prepare plasticine, glass, cardboard and some available materials and you can start working. We will teach you how to make a wide variety of crafts from colored plasticine; such an activity for kids will be entertaining and will cause a lot of positive emotions. Well, let's get down to business?
Modeling is one of the types of fine art. It plays an important role in the process of raising and educating preschool children. With its help, the child learns to give shape to an object, conveying its characteristic and most pronounced features. Modeling from plasticine or clay is one of the compulsory activities in kindergarten.
Creating even the simplest figure from clay or plasticine is a creative process that develops children's imagination.
So, for example, a small clay ball appears to a child as an apple, a ball or an orange, and a closed clay sausage can be a ring, a hoop or a donut.
During classes, the child learns to create an object, based on his existing ideas about shape and size. Trying to realize his plan, he often focuses on minor details, omitting the main thing.
One of the tasks of modeling is to teach the little man to set priorities correctly - to sort details according to their degree of importance.
Thus, sculpting:
- introduces the structure and proportions of all kinds of objects;
- promotes the development of fine motor skills, as it requires precise movements of the fingers;
- develops observation skills;
— teaches you how to implement a plan by setting priorities correctly.
In kindergarten, acquaintance with modeling occurs at the age of three, when children well understand the teacher’s instructions, are able to distinguish the shape of basic geometric shapes and find similarities and differences between them.
Both materials, both plasticine and clay, are flexible and plastic; with their help, you can create an endless variety of three-dimensional shapes.
There are 5 stages in mastering sculpting skills:
1. Getting to know the material - you need to tell the child about the properties of clay and plasticine and show what can be made from them. Some children at first refuse to pick up the material because of its unattractive appearance, but the majority show genuine interest - they begin to crush it or smear it on the table surface, while getting considerable pleasure.
2. Sculpting techniques . Making sticks or sausages. The teacher demonstrates the procedure, and the children, in turn, try to repeat. In this way, they learn the basic skill required for sculpting - rolling out material and shaping it into a specific shape. It can be a ball, cube, pancake, sausage. At this stage, the child learns to work with both hands at the same time and coordinate his movements.
3. Having mastered rolling out sausages, you need to learn how to make rings out of them. The child, repeating the movements of the teacher, closes the ends and receives a circle, donut or ring.
4. Basic modeling skills have been successfully acquired, which means it’s time to move on to more complex shapes - pyramids and cones. Children learn to roll out material at a certain angle, holding their hands in a vertical position, and master the skills of rolling and flattening.
5. The final stage of teaching preschoolers is the creation of figures of people and animals. You can begin this stage when the child learns to control the force of pressure on the material. Please note that the form in children's work is simplified: the head of a person or animal is made in the form of a small ball, and the limbs are cylinders.
Thus, modeling classes are an integral part of the comprehensive development of a child. Perseverance, precise work of the fingers, an understanding of the shape and size of different objects - these qualities and skills acquired in modeling classes will be useful at school. That is why in kindergarten a lot of time should be devoted to studying this discipline.
Modeling in kindergarten is divided into subject, plot and decorative.
Object modeling appears first in kindergarten classes. Children learn to sculpt simple objects and items: animals, people, furniture, dishes. Along with mastering the skill of modeling, the baby learns something new about living and inanimate nature.
For example, by depicting animals and people, the child understands for himself what parts of the body they have. In addition, the child enriches his vocabulary and also learns general concepts: furniture, dishes, animals.
The plot modeling appears a little later. This is a rather complex type of visual activity, as it requires serious intellectual effort from the child. Firstly, you need to think through the plot, draw up an action plan (what details and figures need to be sculpted), arrange all the elements in the desired composition, and also maintain the proportions of the objects. Children model the plots of fairy tales and short stories, then learn to talk coherently about their plot depiction. This develops smooth, detailed speech and creative abilities.
Decorative modeling is associated with completing tasks for the manufacture and decoration of various objects. It shapes the child’s aesthetic taste, creative abilities, and introduces folk crafts. Since there are many small details in decorative modeling (in ornaments, patterns), it actively develops subtle and precise movements of the baby’s fingers. This stimulates the speech centers of the brain and prepares the hand for writing. Children sculpt and decorate dishes, make souvenirs and decorations.
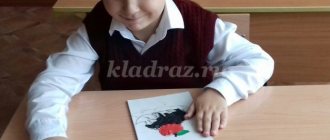
Hedgehog
A small forest animal with thorns will end up right on your table. Even a small child can make a cute rodent. Modeling from plasticine for children is incredibly exciting fun.
How to make:
- Prepare the materials necessary for work. Make a small ball from a brown base.
- Now you need to stretch the resulting workpiece a little; the ball should turn into a drop-shaped figure.
- Next, we sculpt a nose and eyes for the hedgehog from plasticine with the children. Attach everything to the body.
- You will need to place the seeds on the surface of the sculpted figure with the pointed part facing up. Attach the “needles” in the same way as shown in the photo.
- When the empty spaces on the body of the forest animal are filled with seeds, place the plasticine figurine on the cardboard. All is ready!
Basic techniques for sculpting with plasticine. Materials for design, manual labor
Basic techniques for modeling with plasticine.
Before you start modeling from plasticine, you should learn its basic techniques, such as rolling, rolling, flattening, pinching, pulling and smoothing, etc. Mastering them will help you create the necessary shapes and give the figures the appropriate position.
Rolling up. Place a piece of plasticine between your palms, press lightly and perform circular movements to form a ball. The ball must be turned periodically to make it round.
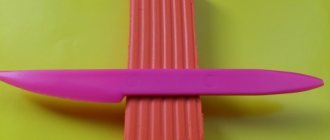
Rolling out. Allows you to turn a plasticine ball into an egg or cylinder. Roll the ball and use straight-line hand movements to transform it into a cylinder. The egg will turn out if you place your hands at an angle relative to each other and roll it out.
Flattening. To get a flat cake or disk, first roll it into a ball, then squeeze it tightly between your palms, or press it against the table with your palm. Small depressions and bends of the surface are conveyed by indentation - pressure from fingers, a stack or auxiliary tools that form the structure - tubes, gears, etc.
Topping. Gives a certain texture to the surface of the product, which is necessary when making small parts on a large model. To do this, grab a little plasticine with your fingers connected and release it, giving it the desired shape. Pinching is carried out by squeezing the fingers, gathered into a pinch, in the part of the mold where a new part is created.
Pulling back. It is similar to the previous technique, but after gripping the plasticine, it is pulled back and a new element or part is formed. By lightly pulling a piece of plasticine with a pinch - by pulling - you can form part of the image from the pulled material.
Smoothing. Used to create a smooth transition from one part to another when connecting and for rounding. Performed with fingers or a stack. At the same time, you can remove excess plasticine. Flat and smooth surfaces require smoothing, which is done with your fingertips.
Cutting. Dividing a bar with a stack or cutter into separate pieces.
Compound. Applying and lightly pressing parts together. In this case, it is necessary to balance the force and prevent deformation of the parts.
Mixing plasticine.
When working with plasticine, “pure” colors are not always suitable. Sometimes, for the intended color scheme, mixing different colors and types of plasticine is used. The proportions are adjusted until the desired result is obtained.
Mixing plasticine is practically no different from mixing oil paints. In both cases, it is undesirable to use more than three colors, since otherwise a lump of indeterminate color will form. Remember the primary colors: yellow, red and blue. When they are mixed, new, derivative tones are obtained. By mixing yellow with blue you get green, yellow with red - orange, red with blue - purple.
If you mix plasticine with a small amount of black, you achieve a darker tone of the same color, and vice versa, mixing colored plasticine with white, you get pastel colors. In practice this happens as follows. Take 2 pieces of plasticine of different colors, first warm them up well in your hands and roll them into one roller. The resulting roller is bent in half, obtaining a thicker and shorter roller, it is again carefully rolled out and folded in half, etc. Rolling and bending continues until the piece of plasticine becomes uniform in color, without spots or streaks. It is not advisable to mix 3 colors at once; it is best to first mix 2 colors until homogeneous, then add a third color to the result.
Color Mixing Chart:
Pink (for sculpting arms, legs, face) = 1/5 red + 4/5 white
Dark gray (for sculpting a wolf) = 3/5 black + 2/5 white
Light gray (for sculpting a bunny) = 7/8 white + 1/8 black
Light green (herbaceous) = 1/2 green + 1/2 yellow
Light green (for leaves) = 1/3 yellow
Light green (for leaves) = 1/3 yellow + 2/3 green. If you add 1/5 white, you can use it to make young leaves.
Purple = 1/3 red + 3/3 blue.
Ocher = 1/ yellow + 1/2 brown
Marble: rolls of plasticine of different colors are twisted into a rope and lightly mixed, preventing the colors from being completely absorbed
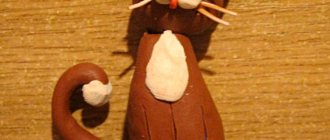
Kitten with a heart
On Valentine's Day, you can give not only valentines, but also original crafts. We recommend that you make a kitten from plasticine step by step according to the photo instructions provided.
Sculpting technique:
- From a blue base, mold a body in the shape of a heart, a tail, and ears.
- Connect these parts and stick stripes of a lighter shade on top, creating a “cat” color.
- Make the muzzle, eyes and nose as shown in the photo.
- Detail the animal's face using a stack.
- All that remains is to attach the paws, the heart is made from a red base.
- The holiday craft is completely ready.
Methods for teaching modeling in different age groups in preschool educational institutions
Methods of teaching modeling in kindergarten age groups
First junior group
.
During modeling classes at the beginning of training, it is best to unite children in groups of 5-6 people. The teacher sits down at the table next to the children and slowly, measuredly demonstrates the necessary actions with clay, explaining in a fun way what he is doing. Modeling should be an interesting activity for the child. You cannot force children to do modeling if they don’t want to. And yet, the teacher can try to emotionally influence the child: having molded some toy in front of him, let him touch the clay, knead it, show him how to tear off small pieces and put them back together. Initial classes are conducted for 5-8 minutes with each subgroup.
As the children become familiar with the material and learn to use it, they can move on to front-line activities with the whole group. Teaching methods are visual and effective. The children first imitate the actions of the teacher, repeating the formative movements. It is important that the children note the relationship between the nature of the actions and the resulting form, and therefore the teacher not only shows, but also explains: “I’ll put the ball on my palm and cover it with the other palm, and then I’ll squeeze it between them - I’ll get a cake.” And he repeats again: “When we flatten the ball between our palms, we get a flat cake.” Children need such explanations at every lesson, and only at the age of three will they be able to independently use some skills in their activities. In addition to learning according to the assignment, the teacher offers children modeling according to the plan, where they can consolidate acquired knowledge and combine the resulting forms at their own request. Every lesson should be fun. It is interesting for kids two to two and a half years old to watch how a rattle, a mushroom, a bird, a matryoshka, a girl, a bunny are formed from a piece of clay in the hands of a teacher. They enjoy recognizing these objects, giving them names and determining the shape of the parts. The duration of such an activity should be no more than 10-12 minutes, so that the kids still have a desire to see the modeling of another object. The teacher sculpts no more than 2-3 objects. You can end the lesson with a nursery rhyme or song.
These classes are conducted with the whole group.
. The teacher sits at the table, and the children sit on chairs arranged in a semicircle and watch the teacher’s work. It is good to begin direct teaching of modeling to children of this age by playing with the object that needs to be depicted. For example, you can let kids play with balls and roll them between their palms. This is done so that they better understand the nature of the spherical shape, and at the same time the action that is necessary during sculpting. It is good to carry out similar games and exercises before class with all children and during class with those who are not doing well. Children 2-3 years old still have insufficiently coordinated hand movements. The teacher needs to ensure that when depicting a particular shape, the children’s hands move in a certain direction. Some people don’t succeed right away, so the teacher can take the child’s hands in his own and show the necessary movements. You can arouse interest in children by drawing their attention to the imagery of the depicted object, for example: “The ball is round, you can roll it on the board”, “The column is long, even”, “If you put all the columns that you have sculpted on a board, you will get a fence " The teacher invites the children to find out what happened. If they don't find out, then he speaks himself. Then he takes a pre-glued paper house and places it near the fence, placing a toy hare, rooster, etc. next to it. Modeling activities should activate children's thinking. In order to teach children to think in a certain direction, you can ask questions: what happens if you attach a column to a ball? What happens if you attach a clay stick to a cake? If the children find it difficult to answer, the teacher suggests the result and demonstrates objects or figures sculpted in advance (rattle, mushroom, etc.). Questions of this nature encourage the children not to mechanically use sculpting methods, but quite consciously, thinking about the image of the object being depicted. During repeated classes, questions may be posed in a slightly different way. “Children, I have a ball and a post,” says the teacher, “what needs to be done to make a rattle?” To develop intelligence and independence in solving a topic, you can offer each child ready-made, familiar shapes: 2 balls (one large, the other small), a disk and 2 columns. Children look at them with the teacher, determine the name (ball, cake, column) and begin to sculpt an object of their choice from these shapes. During the work process, the teacher guides the children in the correct, interesting use of forms with questions and advice. Thus, all teaching methods in this group have a certain specificity, aimed at developing intelligence and mental activity during modeling, at mastering basic technical and some visual skills. Each lesson is structured in such a way that the teacher asks the children questions that would help them develop independence, become active, and includes playful moments and situations. Of great importance when teaching children are properly prepared material (in this case, clay) and equipment, thick (1 cm) and heavy boards lying tightly on the table surface, since they should not move during modeling. You cannot offer lightweight supports, such as oilcloth, because children have a desire to play: they wrap the clay in oilcloth, distracting themselves from the activity. To more successfully consolidate sculpting skills and learn new techniques, classes should be held not once a week, but twice. After the children have mastered the material well, you can move on to the usual alternation of classes.
Second junior group
.
In this group, children continue to master various shapes: ball, cylinder, disk, distinguish them, navigate the size of these shapes, and make simple figures from them. Teaching techniques for the first younger group are also used in working with children 3-4 years old. When studying the shape of objects, it is not enough to just look at them at the beginning of the lesson. It’s good if each child holds a ball, a ball, an orange in his hands, and feels their volume and size. The teacher should conduct such an introduction to the form of the subject in groups of 5-6 people one or two days before the lesson. He invites children to take an object and grasp it with one or two hands. You can suggest showing the object between the palms: if it’s a ball, then in a circular motion, if it’s a cylinder, then in a longitudinal motion. The children's attention is directed to the basic shape of the parts, their number and basic proportional relationships.
Such active acquaintance with objects helps the child understand not only the shapes, but also the movements that are necessary to depict them.
In part, these tasks were set in the first junior group. Another goal is pursued here - the child, getting acquainted with the basic geometric shapes, must recognize them in other objects, for example, a ball in an apple, berries, etc. The beginning of modeling lessons, as a rule, involves the teacher showing depiction techniques and explaining them. He takes a lump of clay with one hand, places it on his open palm, and with the other hand makes the necessary movements. It must be shown in such a way that the actions are clear and understandable to children. In order to make sure that children have mastered a particular technique, you can invite the whole group or individually to each child to repeat this movement. After this, the guys can start drawing. The demonstration of techniques is accompanied by an explanation that must correspond to the actions.
“I take a piece of clay,” says the teacher, “I put it on my palm and roll it out like this - back and forth, back and forth.
This is what the column turned out to be.” Demonstration and explanation should take no more than 3-4 minutes. Teaching modeling in the second younger group, as well as in children 2-3 years old, should include the development of independence, and therefore in cases where children are already familiar with the techniques, they should not be shown what they have learned again and again. For example, when depicting a disk, there is no need to show the sculpting of the original shape. You must immediately take a pre-prepared ball, place it on your palm and flatten it, covering it with your other palm, giving the children the opportunity to independently remember how to make a ball. Play techniques are used with three-year-old children.
You can play on the theme of the lesson, offer a game with the resulting figures, and add some details to them. For example, if the children were sculpting a rabbit, then offer to place a pre-made carrot next to each figure; Place a small flag in the hands of a sculpted nesting doll or doll. In the case when children sculpt chickens, you can place the figures on a green sheet of paper depicting a meadow. These techniques will help children not only create objects, but also put imaginative content into their work. Reading fairy tales to children has the most beneficial effect on the development of imagination, creative independence, and awakens interest in visual arts. For example, the guys know the fairy tale “Kolobok” well. The teacher invites them to make a bun that rolls along the path. Sculpting a spherical shape is familiar to children, and the teacher directs their attention to the figurative representation of the form. The teacher reads the fairy tale again to remind the children of the details. Children verbally describe the appearance of the kolobok and path, compare its shape with other round objects. It is noted that in the picture the kolobok has eyes, a nose and a mouth. At the beginning of the lesson, the teacher shows the children how to use a stick to depict the eyes and mouth of a kolobok, and how to make a path by flattening a clay column with your finger. After the explanation, everyone starts modeling, and the teacher places green Christmas trees, prepared in advance to depict the forest, on a separate table. The children work, and the teacher guides them to the right decision with questions and advice. When the modeling is finished, the products are placed on the table so that all the paths are directed towards the Christmas trees. Children with a teacher sit near the table and examine the work, noting that the koloboks are happily rolling along their paths into the forest. The teacher simultaneously asks questions that force the children to think about the topic, modeling techniques, and the result of their work. Some classes may begin or end with a nursery rhyme or song that deepens children's imaginative understanding of the subject being depicted.
Middle group
.
At the beginning of the year, according to the program, children repeat the material they have covered: they engage in modeling, work on the form. During walks with children, the teacher uses natural materials as a visual aid. For example, in winter, children, under the guidance of a teacher, build a snowman and at the same time sort out the shape and number of parts. Children can fashion a rabbit, a girl in a fur coat and other objects from snow. In addition, before starting modeling, the teacher shows toys depicting birds and chickens. He draws the children's attention to the entire object as a whole and then to the shape of the body, head, tail, shows how to examine the object: first determine the shape of the parts, then, fixing attention on the smaller parts, runs a finger over them and suggests doing the same actions guys. They repeat these movements. During classes, you can limit yourself to just a visual examination, circling various parts with a stick and asking the children to independently determine their shape, proportions and location. For examination before sculpting, toys and sculptures are selected, artistically executed, with a beautiful, but monochromatic color.
In cases where it is not possible to select a suitable object, you can use a pre-prepared sample of a slightly larger size than the figures that the children will sculpt. The sample is usually given before the lesson so that the children have time to look at it, and remains in front of them throughout the lesson. Children of the middle group are familiar with the image of a ball, cylinder, disk .
During the first lessons, the teacher reminds them of ways to depict these forms, clarifies the position of their hands and shows how they can use their fingertips to make the form more accurate. When sculpting objects from several parts, the teacher resorts to incomplete demonstration. For example, when children are making carrots, he only shows them how to make a column, molded in advance, one end that needs to be pointed, and the other made thick and somewhat rounded; To depict the body and head of a rabbit, you need to make an oval out of a cylinder. The image of the main forms need not be shown; the guys already know how to do this. But the methods of connecting the parts must be shown, since the strength of the created figures will depend on their assimilation. In addition, the teacher invites the children to show where they will start working, how they will sculpt a shape or connect parts. You can ask this to children who cope well with depicting objects, and in some cases, to those children who do not cope well with the task, so that they believe in their abilities. This makes it possible to activate children’s thoughts; they begin to more clearly imagine the progress of work and actions with clay. In the middle group, much attention is paid to the correct transfer of proportions.
To do this, the teacher needs to show from time to time how to divide a lump of clay to get the required number of pieces of a certain size, and how to check their length. For example, when depicting the hands of a doll, the teacher shows how to divide a column into two equal parts, and then, adding both halves, check whether they are the same or not. When children have mastered this technique, you can only remind them so that they do not forget to check whether they have determined the length of the parts correctly. Just like in drawing classes, when modeling, the artistic word is used in order to evoke more vivid images of objects in children and create an emotional mood. These can be poems, songs, riddles, nursery rhymes that begin or end classes. When selecting literary works, it is necessary to take into account the specifics of modeling, and therefore descriptions of objects should relate more to shape, structure, size and less to color, smell and other properties. Expanding children's understanding of the shape, proportions of objects and methods of modeling, it is important to have small conversations with them about their works. Basically, the teacher himself has to talk about the quality of the work performed. Sometimes he invites the children to decide for themselves how the form is sculpted, its structure and proportions are conveyed, and whether the parts are firmly connected. When depicting a chicken, a snowman, a girl, dishes and other objects, you can offer children a stack to apply small details - eyes, mouth, nose. In the future, children will become familiar with the three-dimensional image of small details, but in this group, while the actions of the fingers are not yet sufficiently developed, these details can be applied in a stack using a graphic image. In addition, preschoolers of the middle group can cut clay into pieces in stacks, sometimes removing excess, thus gradually getting used to sculpting with a tool. Children's work with a stack requires special attention from the teacher. It is important to teach children to use it correctly, in a timely manner, to perform only the necessary operations, and for this it is necessary to show them how to work. For example, to mark the eyes of a chicken, it is placed on a board, held with the left hand, and the eyes are marked with a stick in the right hand.
Senior group
.
In this group, the teacher gives children more independence in choosing a topic, the opportunity to think about it in advance and carry it out. You can teach children to plan their work during observations, before reading literary works.
To do this, you need to warn them that they will be sculpting the object that they are looking at in the picture or that they are reading about.
This makes it possible to prepare children in advance for the upcoming lesson, clearly perceive the features of the subject and, to some extent, think about its image. If the child knows exactly what he should be working on, this will give him the opportunity to sculpt more purposefully and confidently. It is important that children learn to understand and convey in sculpting the character of what is being depicted. To do this, the teacher must select objects with clearly defined features for the image. The guys, as in the previous group, first examine the objects. Sometimes you can come up with games with the toys that the children have to fashion. But the game does not provide the opportunity to systematically examine an object. Basically, for visual activities, it is necessary to develop in children a visual perception of the environment based on acquired knowledge and experience. The teacher conducts visual analysis here in the same way as in other groups. At the beginning of the lesson, the children examine the object from all sides, knowing that this is necessary so that during sculpting all sides are performed equally well. For the object being demonstrated, it is advisable to have a special device - a stand with a turntable, which will make it possible to show the child the opposite side of the object.
After this, the object is returned to its previous position.
Children 5-6 years old are already able to analyze the structure and shape of objects. The teacher, circling the form with a gesture, invites the children to talk about it and give a description of its characteristic features. If the children find it difficult to answer, the teacher does it himself. Children are familiar with many modeling methods.
They know how to create basic forms and modify them, and therefore the teacher does not need to resort to showing images at every lesson.
Increasingly, he relies on the independence of children in resolving certain issues. The teacher’s task
is to understand the child’s plan and help him, if necessary, in its implementation. Those guys who unsuccessfully chose the sculpting method need to prove that there is another, more convenient and suitable one. It is important that children learn to choose the most effective one from the many possible ways, which will allow them to create an expressive image. For example, a dog or cat can be sculpted by drawing from a whole piece of clay or from individual parts. Modeling from individual parts takes longer and, as a result of children's execution, gives a mostly static image, but from a whole piece it makes it possible to immediately outline the main details and install them in the desired position. This method is complex, but in the older group the children are familiar with it and can use it independently. The difficulty of drawing a shape from a whole piece for a child is that you need to determine by eye the amount of clay for a particular part. Children 5-6 years old can already determine by eye how much clay is needed for the parts, but the further process - clarifying the proportions and shape - is still difficult for the child. And here the teacher should help, pointing out shortcomings in the image. This help consists of leading questions, additional analysis of the form, and suggestions of some visual means. In addition, children need to read interesting stories, fairy tales, poems in which this or that image is clearly revealed. Sometimes riddles are used, but, as in the middle group, it is necessary to select texts so that the description of the object is more concerned with listing parts, shape, size, and actions. For example: With horns, a beard, A very short tail, Gores if he’s angry, Who is this? (Goat.) At the end of the lesson, the teacher shows the children their work and asks them to evaluate how the proportions are maintained, the form and movement are executed. The guys answer, and the teacher complements their answers. It is important that children learn to critically and kindly evaluate their modeling and the work of their comrades.
Preparatory group
.
In this group, the teacher should pay great attention to teaching children the ability to plan their work, think in advance about the image of the shape of an object and its dynamics. This is necessary for the development of children's independence and creative activity. Here, just as in the older group, children are asked to think about the content of the modeling, some of its depiction techniques, and even the material before the lesson. For example, it is proposed to sculpt your choice of animals from the zoo. The teacher gives the children the task of choosing and thinking about the content for the image, the shape of the proportion, the position, as well as the amount of clay, and the length of the frames. Only after this the guys start working. To form visual perceptions, the teacher shows children toys
depicting people, animals, pictures depicting individual objects and episodes from fairy tales and stories.
While observing and examining different objects, the teacher invites the children to take a closer look at the shape, proportion, position of parts and action, texture, some details and additional objects that enhance the characteristics of the image. It is very important that children learn to see the characteristic features of objects, know how to select them, and for this it is necessary to introduce them to expressive, easily remembered images: an elephant, a hippopotamus, some breeds of dogs (boxer, shepherd, dachshund). The children will look with interest at fairy-tale characters: Baba Yaga, Emelya, the Snow Maiden, Vasilisa the Beautiful, the Frog Princess, etc. Children will remember their distinctive features more quickly and are easier to depict in sculpting. For example, by sculpting the long neck of a giraffe, a child immediately makes the image similar and expressive. But that’s not all: you also need to depict the specific proportions of the legs, and therefore the teacher identifies several distinctive features. So, when examining a giraffe, he draws children’s attention to the proportions, shape of parts, details on the head - ears, horns. In addition, it is important that preschoolers simultaneously master the image of an object in a certain position, in action. Movement in modeling is easier for them than in drawing, since they actually act with parts of the object and they do not need to resort to conventional methods of representation, as in drawing
. It is important that the child has a good idea of how a person’s arms and legs bend while walking, running, jumping, how a goose cranes its neck at the moment of defense, how a dog runs, etc. To expressively depict movement, you need to have a stock of visual images that accumulate in the process of cognition of the surrounding world. The teacher draws the children's attention to how skiers run and skaters glide on the ice. In order for the children to understand the actions of fairy-tale characters, you can show them illustrations depicting the same hero in different positions. The teacher invites the children to take the poses that they are going to portray. For example, one of the children is asked to take the position in which a skier is while running. Already at the beginning of the lesson, the teacher strives to lead the children to an independent decision about the course of work with leading questions. Then, in an effort to preserve individuality in each child's work, he shows the children some sculpting tools that will help make the image more precise and expressive. Some techniques, such as depicting a texture in a stack, can be shown to all the children at once, but basically you have to prompt or show each one separately. Individual work in this group takes on special importance in visual arts classes. Frontal demonstration of modeling methods is used to a limited extent, since the teacher directs all attention to preserving creative manifestations in children. The teacher observes how the child plans the work, where he started it (prepared parts by dividing the clay, or is going to sculpt from a whole piece). With questions, the teacher directs the children to the correct image of a characteristic and expressive form and dynamics. For example, he turns to a child and suggests: “Think about the position of the rooster’s neck and head when he sings? How thick is the neck near the head and near the body?” If the children sculpt not from their imagination, but from a model, then for those who find it difficult, the teacher offers to examine the object again in order to clarify the shape. Modeling from a model (life) is offered to children with great care, only for a deeper analysis of the shape and proportions of the object. Trying to develop greater independence in children, the teacher, after defining the task and giving the necessary instructions, remains aside for some time and gives the children the opportunity to begin the image on their own. As they begin to work, he approaches them and gives the necessary instructions. If collective modeling is expected, then the teacher divides the children into groups and gives each one a task. At the end of the lesson, everyone discusses the sculpted figures, comparing them with the model or with what they once saw. Mostly, children themselves evaluate products. In cases where the works are small, they are placed on a special board with names, and if they are large (plot modeling), then the children are given labels and they attach them to their works. When teaching children to think through a plan in advance, you can sometimes offer to make pencil sketches. This is especially useful when they make beads and decorative plates. While drawing, children are asked to depict the future plate on paper with a pencil, deciding its size, shape and content (pattern, plot). During the lesson, the child must sculpt it, guided by his sketch. In order to teach children to work on a sketch and then create a record based on it, the teacher does all the work himself, and the children observe. Next, they are given the task of drawing a plate with a pattern and sculpting it during class. Making decorative plates with relief images can begin with a conversation about what they are, then organize an exhibition of finished products. The teacher, analyzing the plates, explains to the children that they can depict one object, with a decorative pattern and plot. From the conversation, the children will learn how records are made, painted and fired in a muffle furnace to make them bright, shiny and durable. They explain to the children that they themselves can make the same ones to decorate the room with them, and for this they invite everyone to come up with a plate and make a preliminary sketch during the drawing lesson. Children should learn from the teacher that the clay for making plates must be very soft, and the paint with which they are painted is called engobe, it is prepared from clay and water (clay is diluted with water until the thickness of liquid sour cream) and applied with a brush to the product in a thick layer by dipping brushes for the product. If the product is made of white or gray clay, then the engobe should be made of red, and vice versa. The day before the lesson, the teacher invites the children to prepare clay and engobe with him for making records. Children and their teacher carefully sort the soaked, soft clay with their hands, cleaning it from impurities and making it more elastic, and put it in finished form into plastic bags or a tank. Then they prepare the engobe by diluting the clay in glass jars with water and stirring it with sticks to the desired state; the jars with the engobe are tightly closed with lids. After the preparation has been completed (the next day), they begin to work on the records. The work is designed for two classes: in the first one they make plates, in the second they work on relief and coloring.
Turtle
Make a small plasticine craft with your child; with step-by-step instructions you will very quickly master the entire manufacturing process. A funny turtle will complement your collection of crafts.
How to sculpt:
- Prepare several circles of different sizes using a brown and green base.
- Use a brown circle to form a “shell” for our turtle.
- Flatten small circles from the brown base and attach them to the “shell”, forming a characteristic color for this animal.
- Sculpt legs and a head from a green base and attach to the prepared body.
- Make indentations on the muzzle where the eyes will be placed, draw a nose and mouth.
- Then attach the eyes too.