Ant from plasticine - modeling insects with children from 6 years old
You can make ants from plasticine with children aged 6 years and older. As you know, ants do not live alone - they are social animals and form entire colonies - anthills. Strict order reigns in anthills. Each ant knows exactly its duties and fulfills them. No matter how small the ant is, it is one of the most powerful inhabitants of our planet. After all, he can lift ten times his own weight! If people had such strength, then two not very large men could easily carry a car from place to place. And a preschool child could carry his tired mom and dad home from a walk without any problems. Ants are also great builders. After all, compared to their size, an anthill is a real skyscraper. When working on this craft, you can use natural materials. And not only to make legs for ants from twigs, and not from plasticine. Create your own small anthill by sketching sticks and straws. And then “populate” it with cheerful and hardworking ants.
Stages of modeling an ant from plasticine
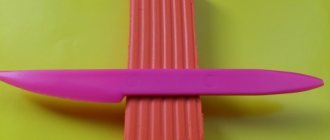
Divide the plasticine block in half. Make an elongated ellipsoidal egg from the half. You can even make one end pointed. Divide the remaining piece in half and form a ball and a short carrot cone.
Connect all three parts to each other.
Roll long black sausages from black plasticine. Make six legs out of them: four short ones and two longer ones. And two short and thin mustaches. Both legs and antennae can be made not only from plasticine, but also from wires or twigs.
Stick the legs to the ant's chest and the antennae to the head.
Make eyes. Cut through the mouth with a stack.
Ant from plasticine - modeling insects with children from 6 years old. Our plasticine ant is ready to hit the road or start working for the benefit of his native anthill! If you mold a dragonfly from plasticine, you can act out Grandfather Krylov’s famous fable “The Dragonfly and the Ant.”
How to make a fly from plasticine
1. Before work, be sure to think with your child what a fly
, what body parts does this familiar insect have? To make the head, body and legs, use black (gray) plasticine, the wings can be made of blue (white) material, and red is needed for sculpting huge eyes.
Fig.1 Colors of plasticine used
2. Roll 3 black balls, the size of each subsequent one should decrease slightly.
Fig.2 Rolling plasticine balls for flies
3. Deform the largest ball into an oval part. Fasten all 3 pieces by piercing the middle part with a match or toothpick. Press down on the largest oval piece to secure it and deform it.
Fig.3 We fasten the blanks for the fly with our own hands
4. Using a stack, apply longitudinal stripes to the back and transverse stripes to the back of the insect.
Fig.4 Applying longitudinal stripes
5. Place two large red cakes on your head as eyes.
Fig.5 Making the eyes of a fly from plasticine
6. Turn two blue balls into droplets by pressing with your fingers on top and sides.
Fig.6 Making droplets
7. Apply a stack of mesh onto the resulting parts. Attach them as insect wings to the back.
Fig.7 Making wings for a fly with your own hands
8. To make 6 fly
, take black plasticine, roll out a thin sausage and cut it into 6 segments. Attach the paws to the abdomen.
You can make ants from plasticine with children aged 6 years and older. As you know, ants do not live alone - they are social animals and form entire colonies - anthills. Strict order reigns in anthills. Each ant knows exactly its duties and fulfills them. No matter how small the ant is, it is one of the most powerful inhabitants of our planet. After all, he can lift ten times his own weight! If people had such strength, then two not very large men could easily carry a car from place to place. And a preschool child could carry his tired mom and dad home from a walk without any problems. Ants are also great builders. After all, compared to their size, an anthill is a real skyscraper. When working on this craft, you can use natural materials. And not only to make legs for ants from twigs, and not from plasticine. Create your own small anthill by sketching sticks and straws. And then “populate” it with cheerful and hardworking ants.
Stages of modeling an ant from plasticine
Divide the plasticine block in half. Make an elongated ellipsoidal egg from the half. You can even make one end pointed. Divide the remaining piece in half and form a ball and a short carrot cone.
Connect all three parts to each other.
Roll long black sausages from black plasticine. Make six legs out of them: four short ones and two longer ones. And two short and thin mustaches. Both legs and antennae can be made not only from plasticine, but also from wires or twigs.
Stick the legs to the ant's chest and the antennae to the head.
Make eyes. Cut through the mouth with a stack.
Ant from plasticine - modeling insects with children from 6 years old. Our plasticine ant is ready to hit the road or start working for the benefit of his native anthill! If you blind, you can act out the famous fable of Grandfather Krylov “The Dragonfly and the Ant”.
Master classes for children on modeling on the topic “Insects”, detailed description and photo.
Modeling is a fun pastime. Both adults and children enjoy making crafts from plasticine, dough, clay and many other plastic materials. For kids, modeling is also an excellent opportunity for all-round development. Kneading the modeling material with your fingers helps improve fine motor skills. Memory, imagination and creativity develop. Children learn to concentrate and concentrate. Classes often have a theme and are accompanied by stories about the subject of modeling, so kids increase their vocabulary and the amount of information about the world around them. The theme of modeling for activities with children can be anything. And of course, it’s more interesting to sculpt something that the kids have already seen, for example, insects. A beautiful multi-colored butterfly or a bright green caterpillar will be excellent models for creating crafts with your own hands. You can sculpt from different materials and adapting any master class to the raw materials that are available is not difficult. While playing on the lawn, the kids have seen a grasshopper more than once and, no doubt, will want to make one. Grasshopper. To make a grasshopper you need:
- Working board or table;
- Plasticine in different shades of green and brown;
- Knife for cutting (stack);
- Wire;
- 2 beans for the eyes.
- Roll 2 ovals (larger and smaller) from green plasticine and connect them. The result is a head and torso.
- Bend 2 small pieces of wire and cover them with green plasticine. These are the hind legs.
- Attach them to the back of the body.
- Attach bean eyes to your head.
- Use small balls of brown plasticine to make pupils and nostrils for the grasshopper.
- Form several sausages from green plasticine of a different shade. These are the front legs of a grasshopper.
- Cover 2 twisted pieces of wire with brown plasticine. These are the antennae of a grasshopper.
- Fasten all the components.
- Plasticine in yellow, white, red, orange, blue, black and purple;
- Knife for cutting (stack);
- Toothpicks.
The grasshopper is ready. Multi-colored caterpillar. To make a caterpillar you need:
In this craft you will need to mix plasticine of 2 colors. Yellow + orange = light orange, orange + red = red-orange and red + blue = light purple.
The caterpillar is ready. All that remains is to plant it on a piece of paper. Bee. Before sculpting a bee, you need to tell the children that these insects are not only beautiful and bright creatures. They are beneficial. They provide honey and pollinate flowering plants so that fruits can ripen on them. Even the smallest children can create a bee. The tools and materials you will need are the same as in previous cases.
The bee is ready. Ladybug. All children know what a ladybug looks like. Even the smallest sculptor can sculpt it.
The ladybug is ready. Butterfly. Older kids can be asked to make a butterfly. Before this, you can go for a walk and carefully observe how butterflies flutter from flower to flower. The beauty of sculpting a butterfly is that the child can choose any colors to create it. The brighter the merrier. To create a butterfly you will need:
- Work surface (board or table);
- Plasticine of different colors;
- Knife for cutting (stack);
Form:
The butterfly is ready.
Comments
Caterpillars made of plasticine - modeling from plasticine with children from three years old
Plasticine caterpillars are an easy craft to make with kids. Funny caterpillars can become one of your baby's first sculptural masterpieces. We present two different models. Both of them are created using the simplest modeling techniques from plasticine. Even if the balls for the first or the “sausage” for the second caterpillar turn out to be uneven, the work will still be successful and will be decorative. And for kids this will serve as an excellent exercise in working with plasticine. You can make small details - eyes, antennae - yourself or use ready-made options. For example, plastic eyes for soft toys and wires - regular or chenille - for antennae. All caterpillar decorations can be made from plasticine, but this is difficult for small children. Therefore, we recommend using ready-made beads and seed beads.
Plasticine caterpillar - modeling with children from three years old
Let's roll six or more multi-colored balls.
Let's connect the balls together. For convenience, you can use a cardboard base.
We decorate the caterpillar with ready-made beads or seed beads. We make antennae from pieces of wire or toothpicks. The plasticine caterpillar is ready!
Plasticine caterpillar - modeling with children from three years old.
Caterpillar-worm made of plasticine - a craft for children from three years old
Let's make a long carrot cone. With kids, just make a sausage cylinder. If it turns out lumpy, it’s not a problem.
We decorate the caterpillar with ready-made beads. You can make the eyes yourself or use industrial ones. Let's cut the mouth with the stack.
Let's turn the worm into a centipede caterpillar. Cut the cocktail stick into pieces and stick these pieces into the abdomen. From the same sections we will make antennae-horns. The plasticine worm caterpillar is ready! Now you can turn it into a plasticine butterfly!
A caterpillar made from plasticine and cocktail sticks - a craft for children aged three years and older.
Preparing for sculpting
Before you start learning how to make animals from plasticine, you should take care of preparing your workplace. The surface of the table at which modeling will be done should be well lit. In addition, you should protect your workplace from plasticine. It is for such purposes that special boards are used. But if you don’t have one, you can simply cover the table with a piece of oilcloth so as not to get it dirty. For kids, you can stock up on various shaped molds, and then sculpting animals from plasticine will become an even more exciting activity. You can also purchase special gloves for handles so that the plasticine does not rub into the skin during work.
Butterflies from plasticine - modeling insects with children from three years old.
A plasticine butterfly is an interesting craft for preschool children. The main difficulty children may have when depicting a butterfly is sculpting the wings. But if you use additional material to create the wings - cardboard - then this problem will be immediately solved. In this form, the craft immediately becomes so simple that it is suitable even for three-year-old children. This is exactly the kind of butterfly we propose to make in the first version. And for children 5-6 years old (senior and preparatory groups of kindergarten) and older, butterflies can be made more complex and interesting. All other options are suitable for this age. We provide templates for cutting out wings from cardboard, but, of course, you can easily draw the wings yourself.
A plasticine butterfly with cardboard wings is a simple craft for children aged three years and older.
Let's make a sausage-cylinder.
Cut out the wings from cardboard in advance. This needs to be done by an adult.
Wings template for a simple craft with children - plasticine butterfly with cardboard wings. Let's decorate the wings with a simple plasticine molding. For example, roll up multi-colored balls and press them, flattening them onto the wings.
Stick the cardboard wings into the plasticine sausage body. In principle, the work can be completed here.
If you want, you can make butterfly antennae from straws, twigs, or chenille wire. The plasticine butterfly is ready.
A plasticine butterfly with cardboard wings is a simple craft for children aged three years and older.
A plasticine butterfly with cardboard wings is a simple craft for children aged five and over.
This model is very similar to the previous one, but we will sculpt the body in more detail. In addition, children will be able to show their imagination and artistic taste by designing wings. Shape the sausage into a cylinder. Roll it in the middle with your finger to make a butterfly “waist”.
Let's roll a round ball. Using your fingers, pull out two small horns - antennae - from plasticine. This is the head of a butterfly.
Let's press the parts together.
Let's take cardboard wing blanks (the template in the previous model) and decorate them with plasticine molding as your imagination dictates.
We stick the finished wings into the plasticine body.
If you want, you can make beautiful antennae from thin plasticine flagella.
A molded plasticine butterfly is a craft for children aged 5 years and older.
This option is primarily decorative. We do not sculpt, but rather draw with plasticine. Such a butterfly is convenient because it can be hung on a ribbon or glued to a group composition. Cut out the silhouette from cardboard.
A molded template for a butterfly made of plasticine - crafts for children aged 5 years and older. We start by creating the body. We make a head from the ball. The two sausages make up the body, and their thin flagella make up the antennae.
Let's decorate the butterfly as your imagination suggests.
We attach a ribbon to the back side with tape - now the plasticine butterfly can be hung.
A molded plasticine butterfly is a craft for children aged 5 years and older.
