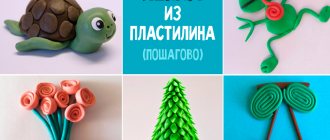
Children and especially boys really like flying machines. In these lessons, children will learn how to easily sculpt helicopters for various purposes - military, fire (Ministry of Emergency Situations) and beautiful cartoon helicopters for the little ones.
The ideas of 4 plasticine helicopters will appeal to a future defender of the fatherland, a fire rescuer or an undecided little pilot. On their own with step-by-step photos or with the help of a teacher (parent), the children will make interesting crafts with their own hands that they can play with and give as gifts.
Cartoon helicopter made of plasticine
Let's look at how to make a cute helicopter from plasticine. This time it's friendly and cartoonish. A very easy modeling lesson for kids.
How to show that this figure is cartoon? First of all, you need to use bright shades, combine them with each other, without fear of going too far with color. And secondly, the eyes will help us, that is, the helicopter is like a toy, we need to show the eyes, mouth, maybe eyebrows. The cartoonish appearance will emerge and make for a fun sculpting lesson.
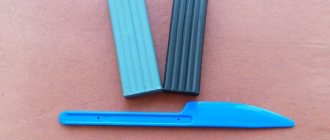
To sculpt a helicopter you need to prepare:
- a set of bright plasticine;
- spatula from the set.
How to make a cartoon helicopter step by step
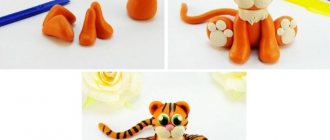
- Take a block of plasticine, for example, blue, and sculpt a body - a part that resembles a barrel. Smooth it out on all sides, and also attach the tail at the back and bend it slightly upward. There is no need to make a long tail.
- Using a light blue or gray mass, make a front glass, that is, a fairly wide cake. It is better not to use white plasticine, as it will be needed later for sculpting the eyes. Otherwise, these details will merge, they will be the same in shade, and the eyes will get lost against such a background.
- Now make the rear propeller. Bright light green plasticine was used here. Gather the 3 blades together and attach to the tail.
- Glue eyes onto the windshield, adding pupils and eyebrows. The appearance of an unusual helicopter is already taking shape.
- Also make skis, for example, from purple plasticine, and the main blades that allow the helicopter to move through the air. To do this, you can combine red, yellow or other bright shades. Don't make the details big. Everything should be compact, miniature and very cute. This is exactly the task.
- Glue the blades on top of the helicopter body, which now looks like a kind of head, and place the entire structure on skis, bending the sharp part upward.
- If desired, you can add a mouth, and the bright figurine will be ready. Now you know how to make a cartoon copy of a helicopter from plasticine together with your kids.
Target:
Artistic and aesthetic development:
Teach children to sculpt an air vehicle (helicopter) in a constructive way from parts of different shapes and sizes. Clarify your understanding of the structure and method of movement of a helicopter. Pay attention to the methods of fastening parts (smoothing, use of natural material). Develop elements of creative imagination, eye, fine motor skills, coordinate hand and eye movements.
Speech development:
develop situational business communication.
Cognitive development:
broaden your horizons, clarify your understanding of the branches of the military and military equipment.
Social and communicative:
to create a desire to help their comrades, to complete the work they have started, to create a desire to please their dads. Develop a positive attitude towards warrior defenders.
Material:
plasticine, stacks, natural material, illustrations of military branches, military equipment.
Progress of the lesson
Draw children's attention to illustrations of military branches and military equipment.
Remember what conversations were held during the week, games were played, and for whom greeting cards were made. Once again clarify the meaning of the holiday - “Defender of the Fatherland”.
Invite children to make helicopters as a gift for their dads, grandfathers, and brothers.
Consider a toy helicopter or illustration.
Ask what parts does a helicopter consist of?
The helicopter has a body where the pilot's cabin is located. The body is round with a large window on the front and sides. At the back is the tail of the helicopter. At the top there is a large propeller, it has three blades, with the help of them it flies. A helicopter rolls on wheels on the ground. The helicopter is an indispensable assistant for border guards, soldiers, rescuers and many other services.
There is a demonstration of helicopter modeling.
We divide a piece of green plasticine into two parts. We leave the larger part for sculpting the body, the smaller part for the tail of the helicopter.
Knead the large lump and roll it into a ball, then turn it into the shape of an egg and flatten it on a sheet of blue cardboard.
For the window, take white plasticine, roll out the column, flatten it and attach the plate to the front of the body, smooth it. We sculpt the tail, roll out the column to the required length, bend one of the horses up and attach it to the body.
We make the wheels from black plasticine, roll two small balls, attach one to the body, one to the tail.
We make the propeller blades from yellow plasticine by rolling thin, small sausages.
After the show, play the game “Planes”.
Divide the children into three teams, place flags of different colors in different sides of the group, hand out medals of a certain color to the children. At the command “Prepare for flight,” the children must bend their arms and begin to perform circular movements. Create the impression that the planes are refueling and starting their engines. The next signal is “Fly”. Straighten their arms and run in different directions. The last command - “Landing” - means that all team members form into unique units in accordance with the color of their medal. The team whose line was built the fastest wins.
The game is played 2-3 times. You can use musical accompaniment for the game.
After the game, model helicopters. Summing up the lesson
Military helicopter made of plasticine - easy instructions for children
This lesson provides step-by-step instructions for sculpting a military helicopter, a craft that boys will really enjoy. It is advisable to make a strategic helicopter in dark colors; here green plasticine was taken as a basis, and you can add brown, gray and other shades.
An aircraft with a large propeller, a tail section, and a landing gear is not difficult to make, since the step-by-step lesson explains in detail all the secrets of modeling.
To sculpt a helicopter you will need:
- plasticine;
- thick cardboard;
- scissors;
- spatula for plasticine.
How to make a military helicopter from plasticine step by step
- Choose green, brown or gray plasticine for the base, and a second color will be needed to create spots, that is, the camouflage effect.
- Sculpt a teardrop-shaped green piece, another thin green sausage and glue them together to show the body of the helicopter and the tail section.
- Make small balls from blue and white plasticine and, pressing them against the body on both sides, show the portholes. Attach the windshield in front and glue 2 long green pieces on top - the base of the propeller.
- To make wide blades, it is better to use some kind of dense base, such as cardboard, as in this case. Cut out 2 strips of cardboard, spread a thin layer of plasticine, blue was used here, and glue them together crosswise.
- Now it's time to show the spots on the body of the helicopter, creating a camouflage color. Use beige or gray plasticine for this.
- Glue the propeller on top.
- Add a chassis from below by molding small tablets from gray or black plasticine. Show the side door, make a border with a stack.
- Attach additional parts such as a small propeller at the tail, signal lights and other options. In this case, a photograph of a helicopter will help you, in which you can examine small parts and, using plasticine of the desired color, attach them to the body.
- Now you know how to make a military helicopter from plasticine, and be sure to repeat this easy master class with your child.
GCD move
Children are standing on the palace.
Educator: Guys, today we will sculpt a military vehicle, and guess what riddle:
The car is hanging in the air.
Stands still. Doesn't fly.
She saves souls
At sea and on land. Children: ( Helicopter )
Teacher: (shows the children a toy helicopter )
.
That's right, but what do you think: why is it called that? (children's answers)
Educator: A helicopter is an aircraft designed to perform a variety of work and does not require large and flat areas for takeoff and landing. The helicopter can move in any direction and, if necessary, hover in the air. Therefore, it is often used by border guards, soldiers, travelers, and rescuers.
Now, guys, look at the helicopter and tell me what parts it consists of?
(The teacher clarifies: the body is oval in shape with a large window in front and on the sides, the tail looks like an arrow with a propeller at the end. The large propeller is at the top, it has two blades. The helicopter rolls on wheels ).
Educator: - Guys, come and sit down at the tables and let's start sculpting a helicopter . Let's think about where to start sculpting a helicopter . - From the body. - Right! What shape is it? - Oval. - Right. Look how we will sculpt a helicopter : Divide a piece of plasticine in a stack into two unequal pieces. It turned out to be one big piece and the other small. From a large piece we sculpt the body of a helicopter : we roll it into a ball, and then we turn it into an oval (an egg, we smooth it out; on the wider side we make a window - we flatten the yellow ball, we get a disk (cake)
and apply it to the body;
-make a tail from a small piece - roll out a “carrot”
, we attach it to the body of the future
helicopter , we apply these parts, we attach a small propeller at the end (we roll a small ball out of plasticine, flatten it to form a flat cake);
-we make a large propeller (roll out a long sausage, fold it in half and cut it into a stack, flattening the ends). the helicopter body , in the middle, smear it; here we attach a large propeller; at the bottom we attach the wheels (we mold disks from black plasticine)
.
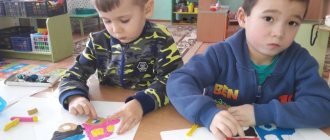
The teacher invites everyone to get to work and provides assistance to the children as needed. Teacher: - What fun helicopters .
Well done guys, you all did a good job. Now, let's take a rest.
We board the helicopter (children crouch)
Let's take flight! (they start up the helicopter )
We are flying above the clouds (hands to the side)
Firefighter helicopter made of plasticine
A fire helicopter in the form of a small figurine can be bought for a child, because there are toys and construction sets on sale. But it’s much more interesting to make such a model yourself and use ordinary plasticine, which gives many possibilities. You can sculpt toys and real models of any kind of equipment by looking at photographs and adding all kinds of details.
In this lesson, we’ll look at how to build a firefighting helicopter with the kids, preferably red, so that the model is recognizable.
To sculpt a helicopter, prepare:
- red, white, gray plasticine;
- toothpick
How to make a fire helicopter step by step
- The main color for work is red. The main parts will be made from this mass: body, tail, and other parts. White will be needed to apply the stripes, because the color of this helicopter model is unique. Gray is needed for additional parts, including the propeller.
- Form a small block from the soft red mass.
- On one side of the block, sharpen the bow. On the other side, glue the tail, gradually tapering towards the end.
- Glue a trapezoidal piece pointing upward to the tail. Roll out very thin string sausages from the white mass and glue them on both sides along the body, as well as on the tail part.
- Make the front glass and side windows from light gray plasticine and stick them on. These should be very thin cakes that need to be smoothed along the edges.
- Add gray plasticine. From it, make a small propeller with flat blades for the rear part, and at the top of the mount for the main propeller.
- Since it is necessary to make long blades, and the plasticine may sag, because it is soft at the first stage, it is better to disguise a toothpick or other stick inside. Glue gray plasticine on both sides, smooth it out and attach it on top.
- Since such a helicopter is used by the Ministry of Emergency Situations to extinguish fires, it is possible to attach signal lights, siren lights on top, and add additional parallelepipeds on the sides - these are containers with water. The helicopter is designed to extinguish large fires in the forest or other places.
- The resulting interesting helicopter model is a wonderful and desirable toy for boys.
How to make a military helicopter
Children can make a Mi-171Sh military helicopter from plasticine. Its design consists of the following parts:
- rear tail rotor
- cabins
- tricycle chassis
- blades
To make this transport-assault vehicle you need not only to skillfully select the right shades, but also to mix them in a special way. To make a toy military object, you will certainly need plasticine of two colors (brown and green).
You should practice mixing different colors of plasticine in advance. In this case, you can focus on images of real aircraft. In this case, a feeling of the desired proportion will appear.
You need to sculpt a helicopter as follows:
- Knead pieces of plasticine of different colors in your hands. Then we carefully connect these blanks. As a result, you will get a multi-colored mass of a spotted shade needed for sculpting a vehicle, from which you need to form an oval-shaped block.
- We turn the blank into a fuselage. To do this, you need to give it a characteristic shape and press the back of the part with your fingers.
- From plasticine we make a long helicopter tail, which tapers on one side. We turn its wider side into 2 rounded parts (for this you need to add balls of the same color).
- We attach the entire resulting structure to the fuselage from above. In this case, the tail section must be brought far back.
- Raise the tail of the vehicle up.
- We attach the tail rotor blades to the side.
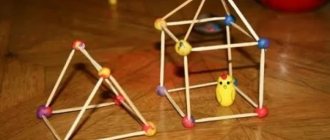
- In order to give the chassis stability, you need to use matches. First you need to make two small black wheels.
- We insert matches into the workpiece on both sides. We attach wheels to its opposite ends.
- Let's start making the front support chassis (double).
- It is necessary to add to the design a front glass molded from gray plasticine, rollers located on the sides and top of the toy aircraft.
- We attach gray porthole windows.
- To give strength to the main rotor, we use thin wire. This will allow the plasticine blades to remain suspended.
- We fix the main rotor at the top of the toy vehicle.
A military helicopter will be an excellent craft for the celebration of February 23rd. It can also be made on the eve of Victory Day, May 9.