Summary of a lesson on application in the middle group of kindergarten. Flowers
Summary of direct educational activities in the middle group on artistic creativity on the topic: “Flowers.”
Author: Novozhilova Irina Gennadievna, teacher of GBDOU kindergarten No. 104, St. Petersburg. Description of the material: synopsis of GCD for children of the middle group on the topic: “Flowers.” This is a summary of a lesson on applique with non-traditional drawing methods, aimed at the artistic and aesthetic development of children. It will be of interest to teachers of middle and senior groups, as well as teachers of additional education. Purpose: making crafts with your own hands. Program content: Teach children to create a three-dimensional applique on a sheet of fabric paper, decorating it with unconventional drawing methods. Teach children to beautifully build a composition on a sheet of paper, develop imagination, fantasy and fine motor skills. Objectives: To develop independence in creating a composition. Evoke in children a positive emotional response to the beauty of nature. Develop the ability to work in a team, coordinate your actions with each other. Material for clarity: Pictures of flowers. Finished work.
Required material: Beautiful pieces of fabric, cut along the contour of the flower; white paper in the shape of an oval; plate, gouache. A bag with colorful shreds. Glue brushes. Rags and oilcloth. Specially made “pokes” according to the number of children: a cap from a felt-tip pen with foam rubber inserted inside. Preliminary work: Reading poems and conversations about spring and spring flowers.
Examination of flowering plants, illustrations, photographs. Drawing flowers in free time. GCD progress:
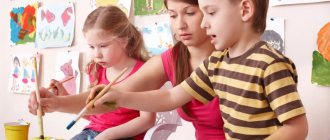
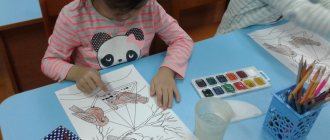
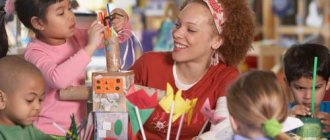
Educator: Hello guys. Let's hold hands and stand in a circle. Now close your eyes, I’ll say: “One, two, three” and you and I will imagine that we have turned into beautiful flowers. Educator: One, two, three, we didn’t just stand in a circle, we were a big beautiful meadow. Open your eyes. Oh, how many beautiful flowers there are! Anya, what kind of flower are you? Styopa, what about you? (Asks each child) Children answer : mother - and - stepmother, chamomile, snowdrop, etc. Educator: Great. Let's make one big, beautiful meadow of flowers right on our carpet. He takes out a bag of colorful shreds and offers them to the children. Children : make up a collective composition from multi-colored scraps. Educator : what a beautiful clearing you have created! I just want to walk along it, smell the scent of flowers. What flowers grow in your meadow? What colors are there more? The children answer. Educator : Well done, guys, now let's make the same clearing, only smaller and give it to mom. Go to the table. Look what I prepared for this. Children sit at tables on which there are scraps of fabric, glue, glue brushes, pokes with foam rubber, green paint, and white oval paper. Educator: take and place on your sheet as many scraps as there are flowers in your meadow. Now you need to glue each piece. You need to work carefully, use a small amount of glue so that the work is not dirty. Children do the work, independently arranging the scraps according to their ideas. The teacher helps, if necessary, individually. Phys. just a minute. The children leave the table. “On the lawn in the morning we started a game. I am a snowdrop, you are a bindweed. Stand in our wreath. One, two, three, four Move the circle wider. And now we are streams, Let's run in a race. We hurry straight to the lake, The lake will become big. Stand in a circle again, Let's play sunshine. We are cheerful rays, we are frisky and hot." (Children perform movements in accordance with the text) Educator : Well done, guys. Take your seats. Look what is missing in our clearing? Children : offer their options. Educator : And I suggest you make our clearing even more beautiful so that the white paper is not visible. We will make green grass on it. To do this, we will take these special pokes, put them in a plate with green paint and apply them to our work. Like this (shows). Now you and I have a real clearing with spring flowers.
Educator : Well done, guys. Now let's put your works on one common table so that each work can be seen by everyone, and together we have a whole flower field.
Lesson reflection : the teacher discusses with the children what they did during the lesson; what happened; what was the most interesting; what was difficult and what was easy and simple.
We recommend watching:
Summary of GCD in the middle group “Visiting the Traffic Light” Summary of GCD in the middle group on the theme “New Year” Summary of GCD for children in the middle group. History of children's toys Summary of GCD for FEMP in the middle group
Similar articles:
Summary of continuous direct educational activities in the middle group
Summary of GCD in the senior group on the topic “So that your teeth don’t hurt”
Summary of GCD in the middle group on the topic “Journey to the autumn forest”
Summary of GCD in the middle group on the topic: “So summer is over”
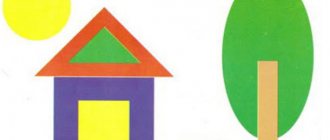
Flower meadow
The fabric applique attracts with its brightness. It can become a wonderful decoration for clothing, interior items, or an original souvenir.
The master class presented in the article will tell beginning needlewomen how to easily make an applique “flowers from fabric” with their own hands.
You need to prepare for work:
- sketch paper;
- needles, scissors, threads;
- glue;
- fabric (it is advisable to use different types of fabric).
Stages of work:
- Draw the petals (you can print ready-made templates or use flower-themed coloring books).
- Carefully cut out the blanks.
- Place the prepared samples on a cloth and secure with needles. Then draw the contours of the petals and cut them out, not forgetting to make room for hemming the edges of the parts.
- The edges need to be folded and ironed carefully. Make up a composition at your own discretion, first secure each element with needles, and then baste (for ease of work at the next stage).
- All parts are carefully sewn to the product using an invisible seam.
These appliqués can be used to decorate sofa cushions, summer hats, and dresses. The panel will look beautiful. To do this, take thick cardboard, stick green velvet paper on top and “scatter” bright flowers throughout the space and glue them.
The picture can be inserted into a frame under glass. An amazing gift, the price of which is the love of creativity.
Goals
♦ Teach children to work in a new technique for performing three-dimensional applique - creating an image using twisted strips of paper.
♦ Continue to learn how to combine various appliqué techniques to create a beautiful, harmonious composition, using previously acquired knowledge.
Lesson materials
♦ Illustrations depicting flowering meadow plants.
♦ A sample of an appliqué made from twisted strands of paper, made by the teacher on the eve of class.
♦ A4 cardboard in various colors.
♦ Scraps of various fabrics with large floral patterns.
♦ Colored paper.
♦ Paper napkins - white or colored, cut into 4 parts.
♦ Landscape paper, cut into small squares (with a side of 7 cm).
♦ PVA glue (it is better if it is in tubes with a narrow spout).
♦ Brushes for glue.
♦ Scissors.
♦ Various waste materials: pieces of foil, cotton wool, foam rubber, corrugated or velvet paper, neatly folded in small boxes.
♦ Paints - gouache or watercolor, paint brushes, jars of water.
Progress of the lesson
Preparing for the lesson.
The teacher asks the attendants to place oilcloth napkins on the work tables (they are used so as not to stain the tables with glue: it is necessary to teach children to work carefully); paper or cloth napkins for blotting up glue (and for drying dirty hands); scissors, tubes or bottles of glue. The teacher lays out all the materials needed for work (cardboard, scraps of fabric, landscape paper cut into small squares (about 7x7 cm), waste material, paints) on a separate table, accessible from all sides, and to which Children can come freely.
Part 1
Explaining new ways of working
Educator:
- Dear guys, today on my table you see a bouquet of spring flowers - dandelions. Beautiful? But dandelions look even more beautiful in a meadow, in nature - where they grow. Unfortunately, these flowers do not last long in vases and quickly fade. But in the meadow, in the clearing, they will delight us for a long time, like little suns peeking out of the green grass. But the flowers that we will make today will not wither and will delight us for a long, long time. Because we will make these flowers from paper, fabric, cotton wool, foam rubber.
Today I want to tell you about another interesting applique method that we have not used yet. Look at this flower. (The teacher demonstrates a sample of the appliqué he made from twisted strands of paper.) What do you think this flower is made of? From paper twisted into a flagellum. I'll teach you how to do it.
First you need to make a tourniquet from a napkin. What do you think, why exactly from a napkin and not from landscape paper? That's right, because the napkin is softer, the rope from it will be thinner, it can be folded and bent in any direction, at any angle.
So, I take a thin napkin. It can be white, or it can be colored. If there are no colored napkins, the finished flower can be painted in any color with gouache or watercolors.
To work, we need a fourth of the napkin. I roll it into a tube, and then roll the flagellum out of the tube, pressing it tightly with my fingers. I smear glue on one side of the flagellum and stick it on a sheet of cardboard, rolling it into a spiral, or making one petal out of it, or the middle - it all depends on what kind of flower you are planning to make.
What kind of flowers do you think would turn out well if made this way? (Dandelions, clover, roses.)
You can use another method of application. It is good for depicting daisies. I cut out the center from yellow paper, the petals from white. First, I glue the petals onto the cardboard, but not completely, but only on one, inner edge. Then I press the petals with the yellow round center. And then I carefully twist the petals onto a pencil, hold it a little, remove the pencil - I get curved daisy petals.
Let's remember how else you can make flowers for applique? Look, there are scraps of fabric with a floral pattern on the table. You can cut a flower directly from the scrap and paste it into your composition. How should it be cut so that the edges of the flower do not fray, so that the sloppy edges of the threads do not stick out from them? That's right, first you need to glue the entire piece of paper onto landscape paper - a small piece of paper, wait for it to dry a little, and only then cut out the flower.
You can make flowers from pieces of cotton wool, foam rubber, foil - from everything that you see on the table.
Now think about what will be depicted in your composition. Maybe it will be a large flowering meadow. There are a lot of flowers on it, and they will all look small and small. What can such small flowers be made from? (From lumps of corrugated paper, pieces of cotton wool, foam rubber.)
Or maybe, against the general background of a flower meadow, you will depict 1-2 flowers larger in the foreground.
Or maybe your background will consist of a piece of fabric with a floral pattern? What material will you use to make the grass?
Think this through. Mentally imagine what will be in your composition, how it will look as a whole. Also think about the order in which you will do the work. After that, go to the table and select everything you need to realize your plan.
Part 2 Getting the job done
While doing work, the teacher plays soft music. He helps children with advice, reminds them of various work techniques, rarely resorting to demonstration and effective help.
After finishing the work, the teacher asks several children to talk about their work according to the following plan:
1. What are you up to?
2. What did you get?
3. Why did your plan change?
4. What techniques did you use in your work?
5. Do you think there are any shortcomings in your work and what are they?
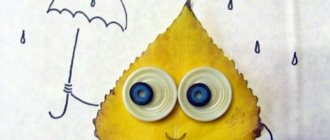
Volumetric fabric flowers
An applique of such flowers diversifies interior items. A minimum of components and tools are required. Many housewives have collected multi-colored pieces of various fabrics. For this craft it is better to use cotton. There will also be buttons.
Need to prepare
- tissue components;
- flat buttons of various colors in two sizes;
- handicraft tools;
- thin cardboard.
You can get started:
- Make a template out of cardboard - a circle. It is advisable to prepare blanks of different diameters.
- Transfer the stencils to the fabric. Trace the silhouettes (not forgetting the seam allowances), cut them out, turn the edges in, sew with a regular seam, and iron.
- Tighten the thread to form a bag.
- First sew a button of a larger diameter into the middle of the product, and sew a smaller button on top.
- Attach the resulting three-dimensional flower to the intended base in different ways (sew or glue).
- Similarly, make the required number of multi-colored flowers.
Hand-made appliqué of pressed dried flowers is used in room decoration along with purchased designer items and accessories.
Today on the decor market you can often find paintings in the oshiban style from various manufacturers. It's worth trying to create them yourself.