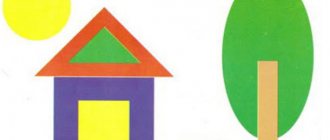
Summary of a lesson in the middle group on the application “Spring. Signs of spring."
Lesson summary for the middle group on application
"Spring. Signs of Spring" .
Target:
Strengthen the skills of cutting and making collective appliqué.
Tasks:
consolidate the ability to identify signs of spring;
continue to develop children’s coherent speech, thinking, and memory;
consolidate the ability to cut corners of a square to obtain a rounded shape, cut a sheet of paper along a planned and imaginary line, carefully glue parts, work with different types of paper in different ways;
consolidate the ability to hold scissors correctly and operate safely with them.
cultivate interest in the world around us and the changes occurring in it.
Material:
blanks for collective application, glue, brushes for glue, oilcloths, napkins for glue, prepared background for crafts, object pictures, plot pictures for the game.
Educational areas:
Cognition.
Consolidate knowledge about the season: spring.
Ability to work with paper
ability to navigate on a sheet of paper.
Communication:
Exercise children in forming words by analogy. (diminutives)
Health:
develop basic mental processes: memory, attention;
correctional work: develop fine motor skills of the hands.
Socialization:
cultivate a culture of behavior and the ability to perform the assigned task.
Preliminary work:
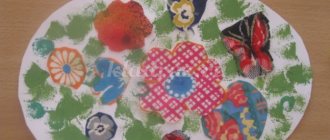
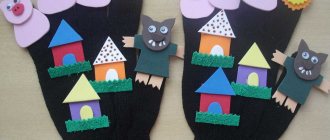
Conversations about spring and viewing illustrations on the topic. Cutting out parts from colored paper for a collective applique: butterflies, birds.
PROGRESS OF THE CLASS:
Org. moment
:
Educator: Guys, do you want to know what I brought you today? Yes? I brought you a smile and I want to share it with you. Let's smile at each other.
Conversation:
Guys, what time of year is it now? Why? Name the signs of spring (children, looking out the window, name the signs of spring). Remember the name of the spring months.
(n/game “What did the artist mix up?”)
Now let's play. There are pictures on the table depicting the seasons, but the artist has mixed everything up and needs to find the mistakes.
(Children look at the pictures and name mistakes in a conversation).
Main part:
And now I will show you my picture. What time of year does it depict? Notice how sad and cheerless she is. Let's take a look and think about what is missing there?
(children look at the “Spring” background and offer to add the missing spring details).
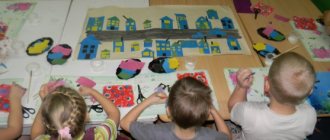
Let's revive this picture and make it beautiful and colorful together.
I have prepared paper blanks, and we will depict the signs of spring that we have listed on paper using appliqué.
(Children choose what details of the picture they will create).
(repetition orally of ways to create selected parts of the picture)
Spring landscape and appliqués “Babbling streams”
Let's start today's master class with step-by-step instructions for beginning needleworkers, which can also be used during classes with children in the junior group and in the middle group of kindergarten.
To create a spring applique you will need:
- colored paper;
- silver cardboard;
- glue;
- cotton pads;
- scissors;
- simple pencil.
- Draw a wavy stream and sky on the wrong side of the blue paper and carefully cut it out.
- Cut out a circle and eight equal strips from yellow paper, form sun rays by folding the strips in half and gluing them to the back of the circle.
- On a green sheet, draw bushes of lilies of the valley with stems, and on a black sheet - seagulls, and also cut them out.
- Gradually start gluing large parts of the craft - this is a stream, sky and sun.
- Then place the seagulls and lily of the valley bushes in random order, fix everything with glue.
- Complete the applique by gluing snowdrifts, ice blocks and lily of the valley flowers from cotton pads.
This work evokes mixed feelings and is associated with the breath of spring. Rather, this is due to the fact that nature was in a fettered state for a long time, and with the appearance of the sun, the icy shackles melted, giving a second chance to breathe.
Spring crafts from salt dough
Young children are just beginning to learn about the seasons, so spring-themed children's crafts are especially important at this age. Also, do not forget about the development of fine motor skills, so the most preferred type of creativity is modeling. You can sculpt from plasticine or salt dough.
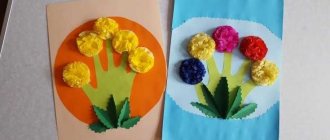
The simplest sculpting technique is stretching. This is how you can make a cosmos flower. To do this, place 8 pink plasticine balls in a circle. The child must smear the balls into stripes towards the center of the circle.
Then a ball of yellow plasticine is placed in the center, which needs to be given the texture of the middle of a flower using a toothpick. If you make about 10 of these flowers on a green background, you will get a flower field.
Yarn titmouse
This work on the theme of spring will be of interest to both preschoolers and their parents, since it differs not only in its originality, but also in its level of complexity.
For the craft you will need:
- yarn in grey, white, yellow, green, brown, black and blue;
- scissors;
- PVA glue;
- brush or cotton swab (for spreading glue);
- a simple pencil;
- cardboard or whatman paper.
- Draw a branch with a bird sitting on it on a piece of whatman paper. As an idea, you can use a photo sketch attached to the step-by-step instructions with a description.
- Cut the yarn into small shavings without mixing colors.
- Coat the sketch area with glue and sprinkle shavings of the desired color on top.
- Thus, it is necessary to fill the entire space of the sheet, and then put the craft aside for several hours until it dries completely.
Where to get ideas and instructions for work
The most important source of any idea is your own imagination. Well, instructions or tips with photos can easily be found on the Internet, in special books, magazines. If you want to study this area in depth, you can attend master classes, watch video lessons on the Internet, purchase specialized literature and get information from there.
Spring is one of the most wonderful periods of the year. In spring, nature comes to life, animals wake up, birds return from warm countries, trees acquire white outfits, rivers melt, the first rays of the sun begin to warm...
At this time of year, you want to admire all the delights of nature and try to remember these moments. Spring crafts are one of the best ways to present, convey, and share the spring mood with others!
Spring crafts from natural materials
Of course, spring is not as rich in natural materials as autumn, but if you look closely, you can find interesting ideas for creativity. For example, you can make herbarium panels from dried primroses. Or you can make a hair craft that will fully show the spring awakening of life.
To make hair wool you need a nylon sock, sawdust, wheat, and thread. Pour some sawdust and form a little ball on the side, this will be the spout. We tie it with thread.
Then we pour in grain and a little less than half of the sawdust and tie it with thread. Pour out the remaining sawdust and tie it. It turns out a head with a nose and a torso.
We extend two ball-handles on the sides of the body and secure them with thread. You can draw eyes or buy ready-made ones. The hairworm should be planted in a tray from a flower pot and watered. After some time, his “hair” will begin to grow.
Spring crafts from beads
Products made from beads look very attractive. Working with beads is not at all difficult and even a child can do it.
You can weave the first spring flower, a snowdrop, from beads. You will need white and green beads, and silver wire. We string 5 beads onto a wire 35 cm long, at one end we thread three beads from the other end so that we get a loop, inside which there are two free beads and three are put on two wires at the same time.
In the next row we put on 5 beads and thread them all with the second end of the wire in the opposite direction. Next we do it according to the scheme: 7,7,7,5,5,3,3,2. Then we make three rows of two green beads and one row of one green bead. You need three such petals.
For the core, we string 4 white, 1 green, 4 white and twist a loop, making three loops. We collect the flower, twist all the ends of the wires to form a stem. Then the stem is wrapped with green threads to match the leaves. The leaf is made similarly to the petals according to the scheme: 1,2,3, (25 times 4),2,1.
If you make a bouquet of snowdrops, it will be an excellent flower craft for kindergarten.
Spring birds
This application on the theme “Spring” is more suitable for children in the senior group and in the preparatory group of a preschool institution.
For work you will need the following tools and materials:
- cardboard for background;
- colored or printed paper;
- glue stick and glue moment;
- scissors;
- black marker or colored pencil;
- buttons;
- half beads for eyes;
- a simple pencil and eraser.
- Print out the spring applique templates below on a thick sheet of paper or cardboard. If you don’t have a printer, you can draw the outline of future stencils with your own hands. The bird’s wings do not have to be made the same as shown in the picture; you can show your imagination and make them, for example, in the shape of a heart, star or flower.
- If the sketches are ready, you can start cutting and tracing on colored paper. For our craft, it is also necessary to prepare an island (semicircle) of arbitrary size and several leaves for a flower; as a basis, you can use a droplet-shaped template (wing).
- Glue the parts according to the assembly diagram, and use a marker to draw the legs and stem of the flower.