Materials and equipment needed for the lesson
Before starting the lesson, you need to prepare all the materials that will be needed during the lesson. They can be divided into 2 categories:
- Demonstration. Illustrate what children need to do. Since the goal of the lesson in the middle group is to draw a beautiful bird, it is necessary to show this animal. This can be done using a computer and a projector connected to it or illustrations from books.
Note! Children should see not only the familiar birds that live in Russia (sparrow, waxwing, woodpecker, owl), but also exotic ones (kiwi, peacock, flamingo). This will help the children realize how diverse the world around them is.
You can give children coloring books as practice."
- Handouts. Necessary for drawing. These include A4 drawing paper, pencils or paints, brushes and sharpeners, and water in special glasses. If desired, you can distribute templates, but it is better for children to learn to draw on their own.
Important! Give each child a cloth with which they can dry their brush. The fabric will also come in handy if someone gets dirty with paint, which often happens even among adult artists. If the purpose of the lesson is to draw with pencils, then you need to distribute an additional piece of paper that can be used to shade hard lines. Paper is also needed to prevent the material from imprinting on their hands, which children can place directly on the drawing.
What to do if your child doesn't speak at age five
Practical part of the lesson, drawing
Before starting the lesson, the teacher needs to decide on the drawing technique and materials. There are several types that young children can quickly master:
- Drawing with pencils: using thick and thin lines, mixing colors, shading.
- Watercolor: painting in one or more layers, mixing colors, using brushes of different thicknesses, adjusting the transparency of layers.
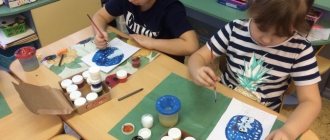
- Gouache: Layering different colors on top of each other.
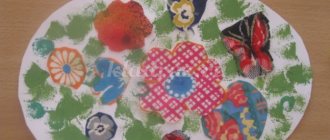
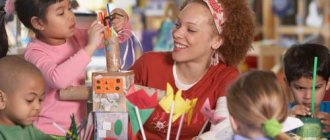
Note! When using gouache, you can paint without brushes. To do this, you can ask the children to cover their hand with paint and apply it to a blank sheet, and then give free rein to their imagination. Such a drawing is not only faster, but also more interesting, because children will have to improvise and figure out how to make a bird out of their hand. For example, the bent thumb can be the head of a bird, and the other four can be wings or a tail.
Drawing with a handprint"
Musical accompaniment
To prevent children from getting bored, you can play music in the background. Since the topic of the lesson is “beautiful bird drawing in the middle group,” then choose the singing of birds. In this case, you can put different votes, asking you to guess who it belongs to.
Decorating a theater corner in kindergartens
Step by step drawing process
Before you begin the creative process, you need to show the children a sample of the drawing that they have to complete. It is better if the teacher makes it with his own hands, so that the children can see the finished drawing and what it should look like.
The bright bullfinch is familiar to every child."
A short summary of drawing with children:
- Schematically depict simple shapes that will be the head and body of the bird. These will be a circle and an oval, respectively.
- Connect the head and body using curved lines representing the neck. Draw legs and wings to the body.
- Go to the head: draw the beak, eyes, crest (optional). Children should be given freedom at this stage, let them choose for themselves what type of bird their bird will look like, be it a penguin or even a rooster.
- Trace the contours with the necessary materials, and then untwist everything else.
- Draw plumage and other decorations on the bird.
Important! You can offer to draw clothes or other elements typical of people on the bird. This will not only complement the drawing, but will also help the child develop thinking, because he does not just give the animal human traits, he wants to highlight something in its character, i.e. thinking about creating a complete image. For example, if a child draws luxurious decorations for a bird, then he wants to emphasize that this bird is beautiful, and if he gives it a book in its paws, then this means that it has remarkable intelligence.
Summary of the drawing lesson “Beautiful Bird” for children 4-5 years old
Lesson notes
«Beautiful bird»
for children of a general developmental group, aged 4 to 5 years
Date of:
Educational area:
Artistic and aesthetic development
Class:
Drawing
Priority:
Artistic and aesthetic development is integrated with physical development, social and communicative development, speech development, cognitive development.
Target:
development of children's creative abilities and interest in drawing.
Tasks:
Educational:
Teach children to draw a bird, conveying the shape of the body (oval), parts, beautiful plumage.
- Practice drawing with paints and a brush.
— Expand ideas about beauty, figurative ideas.
Educational:
— Develop figurative perception and imagination.
Educational:
— Foster a humane attitude towards the environment.
Preliminary work:
Observing birds while walking, looking at illustrations, sculpting birds. Examination of folk toys depicting birds.
Forms of work:
Individual, joint activities of the teacher with children, independent activities of children.
Methods:
Verbal:
questions for children, riddle.
Visual:
A sample of a drawn bird, a toy – a bird, a picture – a bullfinch.
Practical:
productive activity, physical education.
Types of children's activities:
gaming, communicative, motor, productive.
Individual work:
Offer a bird stencil.
Materials and equipment:
Demo material:
A sample of a drawn bird, a toy – a bird, a picture – a bullfinch.
Handout:
Colored pencils (colored wax crayons or felt-tip pens), paper 1/2 the size of a landscape sheet (for each child).
Motivation:
Progress of the lesson:
Introductory part
Motivational moment:
Educator:
Guys, what time of year is it now?
( children's answers
)
That's right, it's winter now. In the fall, we talked about migratory birds. They fly to warmer regions for the winter. And now we will talk about birds that remain for the winter. What are these birds called? ( children's answers
) What wintering birds do you know?
( children's answers
)
A bird should come to visit us, but first you must guess the riddle, what kind of bird is it?
Red-breasted, black-winged,
Loves to peck grains
With the first snow on the mountain ash
He will appear again.
What kind of bird is this? ( bullfinch
)
Educator:
That's right, it's a bullfinch. Look, the bullfinch has arrived.
Educator:
Bullfinch, why are you so sad? (whistles in the teacher’s ear that he has no friends) How can we help him?
( children's answers)
II. Main part
Educator:
The bullfinch got its name from the word snow, as it flies to our city with the first snow, lives all winter, and then flies off into the forest again.
This is a very beautiful and calm bird. She has a red breast, a small black head, a long tail, and a strong and thick beak. What do you think bullfinches eat? ( children's answers
) That's right, bullfinches eat tree seeds, cone seeds, and rowan berries.
This bird has a very weak voice. All you can hear is quiet whistling. But his song has many shades. With their whistle they can call friends or warn of danger.
Bullfinches are very friendly and always live in a flock. That's why our bullfinch wants a lot of friends
Let's look at a sample first. Look at the bullfinch.
What parts does a bird consist of? ( children's answers - torso
) What shape is it?
(oval)
What color?
( children's answers
)
What head? ( it's round, small and black
) The head is smaller than the body. It is located in front and slightly above.
What's on the head? ( eyes, beak
) Where does the torso end? (with his tail) What tail? (long and black)
We looked at the bullfinch. Now let's rest a little.
Physical education minute.
Paws get cold in the cold
At the pine and spruce.
(We are in a standing position, legs slightly to the sides, arms extended along the body and also slightly spread to the sides, palms parallel to the floor - we represent a spruce tree. We roll from our toes to our heels - we warm our “frozen” legs)
What kind of miracle? On the birch
The apples are ripe.
(We raise our heads up, pull our arms straight up, begin to jump high, as if trying to pick apples from a tree)
(We stop, lower our straight arms along the body)
I'll come closer to her -
And I can’t believe my eyes!
(We take a few steps forward, smoothly and slowly turn our heads alternately to the right and to the left - we “don’t believe our eyes”)
A flock of scarlet bullfinches
Stuck around the tree!
(making quick forward and backward movements with your “wing” palms laid back)
Educator:
You need to step back a little from the branch. And draw an oval and color it. I'm drawing a head. It is smaller than the body, located in front and slightly above. I draw a circle, paint it, draw a beak. On the other side I draw a tail. It is long and black. Two legs. On the body I draw an oval-shaped wing with a slightly pointed end. So the bullfinch is ready. And now you get to work.
Educator:
Guys, you helped our bullfinch. Look how happy he was. What a big and friendly family he has. Bullfinch says thank you!
III.Final part
Educator:
Guys, who came to visit us?
- Why did he come to us?
- How did we help the bullfinch?
— Did everything work out for you or did you have difficulties?
Now we will go outside and look at what birds fly to our site.