If you decide to take up drawing with your baby, remember that in the first years of life a little person actively learns and discovers the world around him. And drawing for him is also a kind of game, an experiment, a way of realizing his childhood fantasies.
After all, you can play not only with cubes and dolls. You can invent and draw interesting stories on paper, make paper clothes, beds and furniture for the same paper dolls, draw road maps for toy travel, etc.
Show your child as many ways of drawing as possible, and soon you will notice manifestations of his own imagination.
What do drawing lessons give a child?
- Your baby will develop fine motor skills and hand coordination, and this is directly related to the development of intelligence. This means that your child will learn to reason logically, he will have a good memory, attention and coherent speech.
- Drawing prepares a child's hand for writing.
- While playing drawing, the little artist will learn to distinguish colors and shades, size and number of objects.
- Not being able to express his feelings in words, your baby will be able to express them through creativity. Knowing this, psychologists successfully help children get rid of their fears through drawing.
Why does my child draw everything black?
Many kids draw with a black, brown or simple pencil; they like to draw with a pen. It's not scary. It’s just that this drawing turns out clearer and brighter. At an early age, color is not as important as it is for older children.
The main thing for them is that the drawing stands out against the general background. Black is clearly visible on white.
Children are all different. How can I find out about my child’s special needs?
System-vector psychology of Yuri Burlan distinguishes people by vectors. There are eight of them in total. Each person, including a child, has from 1 to 8 vectors; today, people with 3-6 vectors are most often found. Vectors determine the characteristics and differences of children.
Activists and “Hustlers”
Children with the skin vector are active, mobile, restless. They do everything quickly, but not very carefully. Fidgets. If they sculpt, they will sculpt everything around. If they draw, then they draw action. Often drawn with a simple or black pencil. They prefer expressive, “fast” drawings. Ideally they do not draw or paint over objects. They may not finish their work and easily switch to a new topic.
It is easier for these kids to sculpt and make crafts; such artistic activities are more suitable for their activity. However, they still need to learn discipline and control over their actions. In drawing, the process is easier to control with materials such as pencils, crayons, and felt-tip pens.
When to start drawing lessons?
Children develop an interest in drawing very early. They see how older children and adults draw and write, and try to imitate them. You can stimulate this interest and not wait for the child to ask you for pencils or paints, but specifically invite him to draw.
At first, let him just watch you draw. After all, his hands are still quite weak to hold a brush or pencil. From about 4 months, you can invite your child to paint with his fingers and palms. And when his hands get stronger, that is, closer to the second year of life, first offer him a brush, then pencils and felt-tip pens.
Don’t rush to teach your child to draw from the very first lessons. Let him just scribble funny doodles on paper. This is the first stage of drawing that your baby goes through. Experts call it the staining stage . Until about 2 years of age, your little artist will play with a pencil, simply scratching it on paper and not creating specific images.
At this stage of child development, you can teach your baby:
- hold a pencil, felt-tip pen, etc. correctly.
- draw points, lines, circles, ovals,
- paint over the shapes.
Drawing with young children. Yanushko E.A
1. E.A. Yanushko Drawing with young children (1-3 years old). Methodological manual for educators and parents. – M.: Mosaic synthesis, 2006 – 64 pp. 2. Margret Rettich Drawing lessons in verse. Publisher: Potpourri, 2006. Paperback, 128 pp.
Lesson 1. Hide the bunny from the fox!
Purpose of the lesson:
Learn to hold a pencil or felt-tip pen correctly; draw (sketch) yourself; developing interest in drawing.
Material for the lesson: pencils (wax crayons are possible) or felt-tip pens. Paper.
Progress of the lesson:
(It is better to conduct the lesson at the children's table, but you can draw while sitting on the carpet).
Offer your child a piece of paper with a picture of a hare. Hares can be like this:
For the first lesson, the picture should not be very large (so that the child’s pen does not get tired, and he himself does not get tired of painting).
Give the child one pencil or felt-tip pen, the color of which will match the color of the outline of the drawing (so that after painting the hare is not visible - he is hiding). Show your child how to hold a pencil correctly. (do not allow your child to hold a pencil in his fist; relearning is more difficult than teaching)
Look who came to visit us? That's right, it's a bunny. A fox is chasing a bunny, she wants to catch him. Let's help the bunny hide .
Show your child how to hide (draw) a hare by drawing lines up and down:
If your child can’t do it on his own, take his hand with a pencil in yours and draw a few lines together.
When the entire bunny is painted over, play:
Well, now the fox will not be able to catch up with the bunny. What a good fellow you are, you helped the bunny!
This exercise can be repeated several times. You can use the bunny again, or you can use other characters. You don't have to save someone, you can just play hide and seek.
Images for this and subsequent activities are included.
_________________________________________
The following book was used to prepare the lesson:
E.A. Yanushko Drawing with young children (1-3 years old). Methodological manual for educators and parents. – M.: Mosaic synthesis, 2006 – 64 pp.
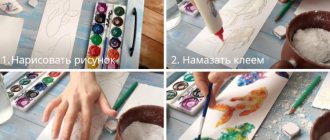
Lesson 2. Doodles Purpose of the lesson: To teach the child to hold a pencil or felt-tip pen correctly; see objects in lines and intersections; developing interest in drawing. Materials for the lesson:
pencils (wax crayons can be used) or felt-tip pens. A sheet of paper of any size (you can even use Whatman paper).
Progress of the lesson:
It is best to draw where the child will feel comfortable and relaxed. (It is advisable to wait until the child himself says or lets him know that he wants to draw).
- Look what I prepared? – correctly, this is paper (leaflet) and pencils (felt-tip pens). - What are we going to do with you? – we will draw correctly.
Let the child draw as much time as he wants, don’t stop him. When the drawing is finished ask him what he drew. If the child himself does not know what it is, offer him several options:
— Maybe it’s raining? – let’s finish drawing the cloud (finish it yourself). - Or maybe this is a house? - let's finish the roof. - Or maybe it’s a fish? – let’s draw her eyes, a tail, etc.
Here's what might happen:
* The purpose of such activities is to teach children to see images in lines and their intersections. Such activities will help the child move to another stage of drawing. Otherwise, children can stop at the scribble level for a very long time - they are satisfied with the way they draw.
Lesson 3. Drawn stories
[ ]
01.05.2008, 17:44
Purpose of the lesson:
Teach your child to see an image on paper.
Develop an interest in drawing. Material for the lesson:
pencils (wax crayons are possible) or felt-tip pens. Paper.
Progress of the lesson:
It is better to conduct the lesson at the children's table, but you can draw while sitting on the carpet. In this lesson you will draw more, commenting on each stage of drawing. The child will observe and prompt. And if he wants, he will draw with you. Invite your child to draw and choose any subject together. The plot must be close to the child and interesting to him. Your baby can take part, telling you what to draw and which pencil to take.
You can use poetry when drawing, for example:
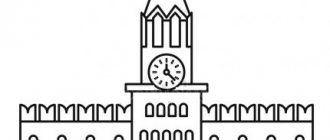
But here are the four sides - we drew the Square. From the square we will now have a House.
Well, what is a house without a roof! Here it is lower, here it is higher. If the house has a fireplace, the Turret is visible above it.
To make our house bright, let's draw windows in it.
Draw the door, my friend - You can now enter the house. And of course, we will certainly build strong walls.
Draw the roof quickly, And then - a chimney on it, Above the chimney - a column of smoke, We cover the house with tiles.
Let's draw windows in the house, a beautiful entrance door. There is a sign on the door to know who lives here.
So, smelling the aromas, the guys gathered in the kitchen. We can draw skillfully! Here is a stove, and in it is an oven.
On the panel there are knobs and buttons, on top there are round burners. Now, to the delight of everyone, the slabs are completely flat.
In the kitchen there are forks, spoons, teapots, plates, bowls, cups, saucers and knives... What have you forgotten? Tell me!
House by house... Look - the city has grown on the page! Margret Rettich
***** I draw walls, roof, windows, vents, porch... They shout to me, but I don’t hear, I draw a ring pond. The garden is closer to the water, there is an apple orchard nearby... They shout to me, but I don’t hear, I’m painting the heavens. And then in the corner, higher up, I’ll draw a red circle... They shout to me, but I don’t hear, I paint the meadow. They shout at me, but I don’t hear. That is, I hear, but I am silent. I draw what I see - I don’t want to be distracted!
Lesson 4. Sticks.
[ ]
20.05.2008, 21:02
Purpose of the lesson:
Teach your child to hold a pencil (felt-tip pen) correctly in his hand;
draw sticks - straight vertical lines. Develop an interest in drawing. Materials for the lesson:
pencils (wax crayons can be used) or felt-tip pens of different colors, a sheet of paper. Various sticks.
Progress of the lesson:
It is better to conduct the lesson at the children's table. Prepare several different sticks in advance to show your child. These can be twigs, counting sticks, Chups sticks, cocktail tubes.
- Look what this is? - These are sticks. - Look how different they are: long and short, thick and thin. But they are all straight and even. - Let's try to draw a stick in the air.
(take the child’s hand and draw a line in the air).
- Now let's draw a stick on a piece of paper.
- Look how I draw. First, draw a stick on a piece of paper and let your child look.
- Now take the pencil you like and draw a stick too.
(For a child to learn to draw correctly, you need to show the process of drawing a stick by moving his hand).
- Now let's draw only short sticks.
- And now the long ones. - And now only blue (red, yellow, etc.) If the child is not tired, invite him to draw lines connecting the dots.
________________________________________
Lesson 5. Mushrooms.
[ ]
04.06.2008, 16:00
Purpose of the lesson:
Teach your child to hold a pencil (felt-tip pen) correctly in his hand;
draw sticks - straight vertical lines; do not go beyond the border of the drawing; develop an interest in drawing. Materials for the lesson:
pencils (wax crayons are possible) or felt-tip pens of red, orange, brown colors; toy mushroom or cut out of cardboard; sheet of paper: a straight horizontal line is drawn at the bottom of the sheet - this is a path; above, at a distance of 5-7 cm from it, semicircles or triangles of red or brown colors are mushroom caps. (see picture)
Teaching methods:
Drawing with an adult; finishing the details.
Progress of the lesson:
It is better to conduct the lesson at the children's table, but you can draw while sitting on the carpet.
Show your child the fungus.
- What is this? That's right, it's a mushroom. Look, this is a hat, and this is a leg. - Now show me: where is the mushroom’s cap? - Now show me where the leg is?
(help if the child finds it difficult to show)
- The leg is straight, like a stick.
(together with your child, draw a straight line in the air with your hand) Show the child a sheet with a blank for the drawing, explain what it is.
- Look, there are mushrooms growing in the clearing on the path.
These are mushroom caps. -Where are the legs? - no legs! - Now I’ll finish drawing the legs of the mushrooms - like this! - Now try to finish drawing the legs of the mushrooms. Give the child a pencil (felt-tip pen) and help if the child can’t do it.
- What a great guy you are!
Now listen to the poem: Hat and leg, Not tall, Next to the path Grew up... (fungus)
_________________________________________
Lesson 6. Spatulas.
[ ]
07.06.2008, 00:42
Purpose of the lesson:
Teach your child to hold a pencil (felt-tip pen) correctly in his hand;
draw sticks - straight vertical lines; control the length of the line, its beginning and end; develop an interest in drawing. Materials for the lesson:
pencils (wax crayons are possible) or felt-tip pens; children's spatula; sheet of paper: a row of semicircles is drawn at the bottom of the sheet - this is the tip of the blade. To make it easier for the child to determine from which point to start drawing lines, indicating the handle of the scapula, you can draw points at a short distance above the semicircles.
Teaching methods:
Finishing the details.
Progress of the lesson:
It is better to conduct the lesson at the children's table, but you can draw while sitting on the carpet.
At the beginning of the lesson, show your child the shovel. - Look what I brought. What it is? - That's right, it's a spatula. - Look, the spatula has a handle to make it comfortable to hold. - What is a spatula for? - That's right, to dig. - What can you dig with a shovel? - Sand, earth. - Let's draw a shoulder blade.
Draw a semicircle on a blank sheet of paper. - Look what I drew? - This is a spatula. - Do you think she will be comfortable digging? - Of course not. — The spatula is missing something. What do you think? - Of course, pens. - Look, I’ll finish drawing the handle now. The handle is straight, like a stick. - Well, now it’s a real spatula. - Now try to draw handles for the spatulas.
Give the child the blank. Help if the baby can't do it. You can draw the shoulder blades and handles of the same color, or you can draw them in different colors. As you draw, pronounce the names of the colors.
Read the riddle poem:
I walk next to the janitor, shovel the snow all around, and help the guys make a slide, build a house. (Shovel)
_________________________________________
Lesson 7. Flowers.
[ ]
07.06.2008, 01:06
Purpose of the lesson:
Teach your child to hold a pencil (felt-tip pen) correctly in his hand; draw sticks - straight vertical lines; do not go beyond the boundaries of the boundary line - “grass”; develop an interest in drawing.
Materials for the lesson:
pencils (wax crayons can be used) or green markers; flower on a stem; sheet of paper: at the bottom of the sheet there is a green line drawn - this is a clearing, above at a distance of 5-6 cm there are flowers arranged in a row.
Teaching methods:
Finishing the details.
Progress of the lesson:
It is better to conduct the lesson at the children's table, but you can draw while sitting on the carpet. Show your baby a flower on a stem.
- Look what a beautiful flower. This is the head of the flower, and this is the stem [/b ](accompany the story with a demonstration).
On a blank sheet of paper, draw a green line.
- Look, this is a clearing.
Above, draw some flowers.
- These are the heads of the flowers, but where are the stems? The stems need to be drawn - like this.
(Show your child how to draw the stems.)
Give your child a blank sheet.
- Look, there’s a whole meadow of flowers here. Only they don't have stems. Let's plant some flowers in the clearing and draw stems for them.
Read the poems:
My flowers.
The groves are turning green, everything is green all around, the flower bed is turning green under my window.
How many yellow and blue flowers are there! It was I who lovingly raised them.
She planted a flower in the ground behind a flower. In the summer I watered every petal.
For me, there are no sweeter flowers in the world. Even the sun in the sky is shining more cheerfully.
_________________________________________
Lesson 8. Threads for balls.
[ ]
28.06.2008, 18:05
Purpose of the lesson:
Teach your child to hold a pencil (felt-tip pen) correctly in his hand; draw sticks - straight vertical lines; adjust the length of the line, do not go beyond the boundaries of the sheet of paper; develop an interest in drawing.
Materials for the lesson:
pencils (wax crayons can be used) or felt-tip pens of different colors; a balloon with a thread tied to it, a sheet of drawing paper with a blank: a number of circles of one or more colors are drawn on the top of the sheet of paper. For the first lesson, it is better to offer a blank with “tails” on the balls. (Polina likes the balls with tails). And during repeated lessons, you don’t have to draw “tails”.
Teaching methods:
Finishing the details.
Progress of the lesson:
It is better to conduct the lesson at the children's table, but you can draw while sitting on the rug. Show your child the balloon.
- Look, what is this? - That's right, it's a balloon. — Do you like playing with balls? - What is this on the ball (point to the string)? - That's right, it's a thread. - Why does the ball need a thread? So that he doesn't fly away. - Hold the ball by the string. It is very convenient to hold the ball by the string.
Draw a series of circles - balls - on a piece of paper. These are balls, and so that the balls don’t fly away, we’ll draw strings for them - like this.
Give your child a sheet of paper and markers. — You also have balls drawn on your piece of paper. Oh, they're about to fly away, they have no strings. Draw strings for the balls.
_________________________________________
Lesson 9. Grass.
[ ]
28.06.2008, 18:08
Purpose of the lesson:
Teach children to hold a pencil (felt-tip pen) correctly in their hand; draw sticks—straight vertical lines; control the length of the line, its beginning and end; develop interest in drawing.
Materials for the lesson:
Green pencils or markers;
a sheet of paper for drawing in a format with a blank: a horizontal brown line is drawn at the bottom of the sheet - this is a clearing, and at the top of the sheet there is a yellow sun. Teaching methods:
Drawing details.
Progress of the lesson:
It is better to conduct the lesson at the children's table, but you can draw while sitting on the rug. Draw a yellow sun on a piece of paper.
- Look, in my picture the sun is shining, it’s warming up, warming the earth.
Then draw a horizontal straight line in brown at the bottom.
- And this is a clearing.
Now draw vertical lines of green color - the grass.
— But green grass grew in the clearing.
Give your child a sheet of paper and a green pencil or marker.
- Look, the sun is shining in your picture too. Draw green grass.
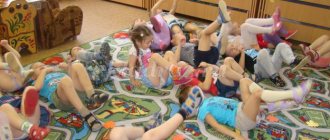
* All of your child’s work can be hung on the wall; children really like it.
Lesson 10. Rain.
[ ]
24.07.2008, 16:42
Purpose of the lesson:
Teach children to hold a pencil (felt-tip pen) correctly in their hand; draw sticks - straight vertical lines; do not go beyond the boundary line; develop an interest in drawing.
Materials for the lesson:
Blue or light blue pencils or markers; a sheet of paper for drawing with a blank: at the top of the sheet of paper a blue cloud is drawn, and at the bottom there is a horizontal line - “earth”, so that when drawing rain, children do not go beyond the lower boundaries of the sheet of paper.
Teaching methods
: Finishing the details.
Progress of the lesson:
It is better to conduct the lesson at the children's table, but you can draw while sitting on the rug.
Before starting class, read a poem to your child.
— Listen to the poem:
Rain, rain, have fun! Drip, drip, pour water. On a flower, on a leaf. Drip, drip, drip! On the path, on the meadow, Drip, drip, drip! A cloud in the sky is blue - Drip, it’s raining heavily! Drip, drip, drip...
-What is this poem about? That's right about the rain.
Draw a cloud of blue cetus on a piece of paper.
- Guess what it is? That's right, it's a cloud.
Then start drawing horizontal lines, accompanying them with the words: “Here it’s raining: drip, drip, drip!”
Give your child a sheet of paper and a pencil or felt-tip pen.
- Look, you also have a cloud drawn in your picture. Draw rain!
While the child is drawing, you can tell him a short folklore poem:
Rain, rain, more rain, I’ll give you some grounds, I’ll go out onto the porch, I’ll give you a cucumber. I'll give you a loaf of bread and water it as much as you want!
You can draw heavy (solid lines) and light rain (dashed lines). Encourage your child to vocalize the “drip, drip, drip” pattern. You can draw puddles on the ground.
* All of your child’s work can be hung on the wall; children really like it.
Lesson 11. Paths.
[ ]
24.07.2008, 16:57
Purpose of the lesson:
Teach your child to hold a pencil (felt-tip pen) correctly in his hand; draw “paths” - straight horizontal lines; develop visual perception of space; develop interest in drawing.
Materials for the lesson:
Black (or gray) pencils or felt-tip pens; small toy car; sheets of paper for drawing with a blank: a car is drawn in the upper left part of the sheet (in the next lesson you can draw a walking man).
Teaching methods:
Drawing in the air; drawing with an adult; finishing the details.
Progress of the lesson:
It is better to conduct the lesson at the children's table, but you can draw while sitting on the rug.
In class, play out the situation with a car: draw a road for it on a piece of paper (two straight parallel lines at a distance of 6-8 cm), roll a toy car along the drawn path. Invite your child to drive the car without driving over the edges of the path.
- The car is moving - beep! This is the road we have, now the car is driving along the road.
Invite your child to run his finger along the “road” and draw a “road” in the air. Then draw horizontal lines—the “road”—on a piece of paper.
Give your child a sheet of paper and markers.
- Look, you have a car drawn in the picture. Draw a straight path! The cars drove along the paths. Draw more paths!
* All of your child’s work can be hung on the wall; children really like it.
Lesson 12. Circles.
[ ]
31.08.2008, 18:10
Target:
Teach your child to hold a pencil (felt-tip pen) correctly in his hand;
draw circles, place them evenly on a sheet of paper; develop an interest in drawing. Materials:
Pencils or felt-tip pens of different colors; blank sheets of paper.
Teaching methods:
Drawing in the air; drawing with an adult.
Progress of the lesson:
At the beginning of the lesson, explain to your child that they will be learning to draw circles. First, draw a large circle in the air with your index finger and ask your baby to guess what you drew and repeat the movement after you. Then draw a small circle in the air.
— Guess what I drew in the air? (Big circle.) Now draw a big circle in the air, like I did. Well done! - Now what did I draw? Yes, a small circle. Draw a small circle in the air. Now we will learn to draw circles on paper.
Show your child how to draw circles - draw on an easel or on a piece of paper. Draw your child’s attention to the fact that circles can be large or small, use different colors. You can suggest tracing a plate with your finger along the outer edge and a hoop along the inner edge.
Give your child a piece of paper and ask them to choose one pencil or marker. Show your baby how to draw circles by moving his hand. From the starting point you need to draw a circle clockwise or counterclockwise and return. In the future, encourage your child to draw circles on their own.
To reinforce the skill, ask your child to complete this task several times. To make it interesting for your child, diversify the tasks: ask them to draw large, medium, small circles, only red or only blue, or multi-colored. _________________________________________
Lesson 13. Balls.
[ ]
03.09.2008, 17:01
Target:
Teach your child to hold a pencil (felt-tip pen) correctly in his hand; draw circles of different diameters, place them evenly on a sheet of paper; develop an interest in drawing.
Material:
Pencils or felt-tip pens of different colors; a blank sheet of paper for drawing; toy balls of different sizes.
Teaching method:
Collaborative drawing.
Progress of the lesson
Start the lesson by reading a poem. — Listen to the poem:
My cheerful, ringing ball, where did you run off to? Yellow, red, blue, Can't keep up with you!
Then show your baby the toy balls. Please note that balls can come in different sizes and colors. - Look at my balls. This one is big, but what is this one? That's right, little one. This ball is red. What color is this ball? - Let's draw balls.
Give your child a piece of paper and pencils or markers of different colors. - Let's draw a lot of balls to make it fun to play!
Remind your child how to draw circles by moving his hand. From the starting point you need to draw a circle clockwise or counterclockwise and return. In the future, encourage your child to draw the balls themselves.
Lesson 14. Balls.
[ ]
25.10.2008, 17:01
Target:
Teach your child to hold a pencil (felt-tip pen) correctly in his hand; draw circles; develop an interest in drawing.
Material:
Pencils or felt-tip pens of different colors; a blank sheet of paper for drawing with a blank for drawing: threads for balls; balloon.
Teaching method:
Finishing the details.
Progress of the lesson
Start the lesson with a riddle (you can ask one or two riddles):
- Guess a riddle:
I held your tail in my hand, you flew - I ran. (Air balloon)
Today everything is rejoicing! In the hands of a child. Balloons are dancing with joy... (Balloons) - You and I also have a balloon. Here he is! Let's play with him. I'll throw it, and you catch it.
After the baby has played enough, invite him to sit at the table.
- Now let's draw a lot of colorful balls on strings. Look, there are already strings on the piece of paper, and you need to draw a ball for each string.
Remind your child how to draw circles by moving his hand. From the starting point you need to draw a circle clockwise or counterclockwise and return. Next, invite your child to draw the balls on their own. _________________________________________
Lesson 15. Apples.
[ ]
25.10.2008, 17:28
Target:
Teach your child to hold a pencil (felt-tip pen) correctly in his hand; draw small circles; arrange the circles evenly, do not go beyond the contour; develop an interest in drawing.
Material:
Pencils or felt-tip pens in red, yellow and green colors; apple; a sheet of drawing paper with a drawing blank: outline of a tree.
Teaching method
: Finishing the details.
Progress of the lesson
At the beginning of the lesson, hide the apple in the box.
Start the lesson with a riddle
- Look at the box I have. Are you wondering what's in it? Then guess the riddle:
Round, rosy,
I'm growing on a branch.
Adults love me
And little children.
(Apple)
- Of course, that's right, it's an apple! And listen to the poem:
The apple is ripe, red, sweet,
The apple is crunchy, with a smooth skin.
I'll break the apple in half
I'll share an apple with my friend. (Ya. Akim)
- Now let’s open our box and see what lies there.
If the child has a desire, you can give him an apple to eat.
Talk to your child about where apples grow. Remember that an apple is a fruit. Remember what color apples are. What do they taste like?
Offer your child a piece of paper with a blank and markers.
- Look what you have drawn on a piece of paper?
- That's right, it's a tree. Do you know what it's called? It's called an apple tree. What grows on an apple tree?
- Well, of course apples. Only for some reason there are no apples on our apple tree. Let's draw?
— There will be a lot of apples on our apple tree. What color do you want the apples to be?
— The apples are hanging on the branches, and some have already fallen to the ground.
How to teach a child to hold a pencil correctly?
A correct three-finger grip needs to be developed gradually. And you can start long before the baby starts drawing with a pencil.
First, the child learns to grasp objects with his thumb and forefinger. This skill is formed at approximately 9-10 months. Special games will help him develop.
- With loose objects - mosaics, small stones, buttons, beads. You can simply sort them out, or you can place them in containers with two fingers.
- With clothespins. Cut out various shapes from cardboard (for example, a Christmas tree, a hedgehog, the sun, etc.) and invite your child to attach clothespins to them. Clothespins can also be attached to the rim of a bucket, to each other and, of course, to clothing and rope.
- With tweezers. Teach your child to use tweezers to transfer small toys, pieces of foam rubber, and pasta from one container to another.
When small fingers can easily perform these manipulations, begin to form a three-finger grip. To do this, use the following tips:
- Regularly place the pencil in your fingers correctly. But don’t do it too annoyingly, otherwise your baby will become uninterested in drawing.
- If you give a small piece of pencil or chalk, the child simply will not be able to hold it with his fist and will take it exactly as he should hold a pencil or pen - with three fingers.
- Buy a special triangular rubber tip for pencils and brushes or thick pencils with a triangular cross-section. Round pencils are difficult for children to hold.
- After 3 years, you can show your baby the next technique. Place the pencil point down on the table and hold it with your left hand. Fold the three fingers of your right hand into a pinch and place them on the top of the pencil. Now slowly move the pinch down the pencil. When your fingers are almost at the stylus, they will definitely take the correct position.
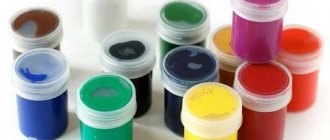
Choosing pencils and markers
So, short and triangular pencils will teach your baby to hold them correctly.
In addition, the first pencils for drawing should be very soft so that they can leave a mark on the paper without strong pressure. These can be wax and plastic pencils, water-based pencils. They are easily sharpened with ordinary sharpeners, leave soft and even strokes, and the designs are rich and bright. Such pencils do not stain your hands, are easily washed off clothes, and have no odor.
And of course, your baby can easily draw with felt-tip pens. Now on sale there are harmless markers with ink based on food coloring. They also sell felt-tip pens that can be easily washed off your hands and clothes.
Where to start drawing?
First, show your baby how to use the new item correctly. Draw something simple and understandable to the baby - lines, simple figures, a house, a cloud, the sun. After this, give the child a pencil and be sure to praise him if he draws at least a couple of strokes or dots.
Take the baby's hand in your hand and slowly draw together with him, first straight and wavy lines, circles, ovals, then gradually complicate the image. This way you will help your child master basic movements faster and use his muscle memory.
The lesson will be interesting and educational if you read poetry or sing a song and at the same time draw what you are talking or singing about. The more songs, poems, fairy tales, and jokes you know, the easier it will be for you to come up with a plot for the drawing.
Don’t forget about Suteev’s fairy tales “The Mouse and the Pencil”, “The Rooster and the Paints”, “The Capricious Cat”. All kids, without exception, love these fascinating fairy tales in pictures. In addition, they show step by step how to draw, for example, a cat.
The most important rule of drawing with a baby!
Have enough patience and don't get irritated while painting with your two year old! Even if he, expressing a desire to draw, forced you to unscrew 8 caps from the gouache, and then a minute later switched to another activity. Just close the jars and put them away until next time, but under no circumstances reproach your child or force him to draw with force. Believe me, only in this case there will be real benefits from the classes!
Add your drawing methods in the comments. Let's help our kids grow up smart and with a developed artistic taste!
If you are interested in learning other ways to develop fine motor skills, you can read about playing with cereal here.
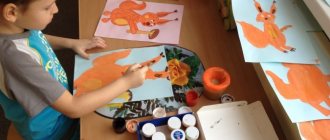
I want to show our drawings in the nursery. There are not many of them (since adaptation to kindergarten took place with “frequent snot”), but you can see what is offered to kids in kindergarten. For those interested, look at examples of drawing in a nursery.
Learn to draw lines
In order for the child to be able to draw what he has in mind, he simply needs to learn how to draw a variety of lines with a pencil - straight, wavy, close them into a circle, oval, etc. And if it costs us, adults, nothing to draw any line with a pencil, then for a child it is real work. The child has not yet learned to control hand movements and it is still difficult for him to handle writing instruments.
So one of the first things you can teach a young artist is to draw lines. To do this, invite him to play the following games.
"Connections". This game not only gives you the opportunity to practice drawing straight lines on paper, but also develops logical thinking. You need to prepare for it in advance. Draw or stick images on a piece of paper and ask your child to connect them with lines, following a certain logic. You can give your child the following tasks:
- Connect identical butterflies (cars, flowers, berries...) with lines.
- Connect cookies of the same shape with lines.
- Connect the fruits to the plate with lines.
- Connect objects of the same color.
You can gradually make the tasks more difficult.
“Complete the picture.” Invite your child to fill in the missing details. Let them be just straight lines at first, for example:
- mushroom stems;
- umbrella handles;
- tree trunks;
- rays of the sun, etc.
Let the baby connect the flower heads with the vase, the balls with the man’s hand.
Draw a cloud and make it rain with your child. Draw the ground, and let the child draw the grass.
Stencils. Teach your child to draw using a stencil. Nowadays, stores offer a wide selection of stencils on different themes - animals, vegetables, fruits, sea creatures, etc. You can also use the edges of a sorter cube as stencils.
This activity trains muscle memory. By tracing stencils, the child learns to draw closed lines and shapes.
"Circle the object." Place cups, cubes, frames and inserts on a piece of paper and trace with a colored pencil. Then match the corresponding object with the figure drawn on the paper. This game teaches you how to trace flat shapes, as well as relate a flat image to its outline.
And of course, don’t forget to trace your baby’s hands - this activity brings great joy to little artists.
"Paths". Draw paths on paper - two parallel lines. Invite your child to first trace them with his finger and then run a pencil over them.
You need to trace with your finger so that the baby understands the task. It also develops muscle memory. If you remember, at school students first write letters and numbers in the air with their hands and only after that - in their notebooks.
To make it interesting for your little one, come up with a plot. For example, draw a ladybug at the beginning of the path, and a house at the end. Now, together with your child, help the ladybug get to the house. You can also help the truck get to the garage, the ship to sail to the island, and the butterfly to fly to the flower.
What and how to draw with a child aged 2-3 years?
A two-year-old child is able to repeat simple visual shapes: lines, dots, circles, triangles, polygons. If you are studying the alphabet, then also letters (a separate material will be devoted to this topic).
At this age, children already understand that they can depict the world around them on paper. Adults are often asked to draw something specific, and they begin to make attempts to do it themselves.
From the author: my daughter did not yet know how to speak, but she drew a wavy line and said “sh-sh-sh,” which means “snake.”
— A child can paint over the shapes drawn by an adult . Shading (shading) is a good way to quickly master a tool and develop hand-eye coordination. And even if the shading “goes” beyond the boundaries at first, over time the baby will get better and better.
To interest your child, you can come up with games and stories. Draw a mouse and a cat. “Oh, the cat is about to catch the mouse!” Let's help her hide!
— Drawing lines. Playing trail games is also very interesting. Draw animals on one edge of the sheet and the food they eat on the other. For example: mouse, squirrel, hare and cheese, nut, carrot. Offer to draw paths along which each animal can walk to its lunch.
— Drawing points. Rain, grains for a chicken, sand on the beach, seeds in a ripe watermelon - these and other scenes can be played out to teach a child to put dots. At the same time, pay attention to the pressure, tell your child what the result will be if you press the pencil harder/weaker.
— Stamping. In FixPrice stores or in stationery departments you can buy simple stamps with animal figures, leaves, and drops. Teach your child to use them, and then “draw” your story. In addition to prints, a story can “contain” sticker characters.
You can make your own stamps. Cut out a figure from a PVC packaging substrate (greens and packaged confectionery products are sold on such substrates in stores). Glue onto a piece of foam using a hot glue gun. The foam should be of such a shape and size that it is comfortable for the child to hold it. Soak a sponge in colored water or ink to color the stamp.
— Using an eraser. Show how to use an eraser. “Here is the path (draw with a simple pencil). Winter came, a strong wind blew, it covered the path with snow and it became invisible.” You can come up with other stories.
Another great erasing exercise: draw with chalk on a slate board, give your son/daughter a brush and a glass of water. The task is to erase the drawn lines with a wet brush. If this seems a little complicated for now, then wiping it with a regular rag will definitely do!
— Drawing from a stencil, tracing figures. The child himself will be able to draw from a stencil when he is closer to 3 years old and older. But at 2 it’s not too early to start introducing him to this method of depicting objects! Start tracing arms, legs... maybe the baby will lie down completely on whatman paper and you will trace him - it’s so exciting! Show how to trace stencils outside and inside (cut out the shapes yourself from thick cardboard; the edges can be covered with tape to last longer).
An alternative way to work with a stencil is to use a roller. Dip a roller (small size) into the paint and roll it over the surface of the paper inside the stencil. Let the baby repeat. It doesn’t matter if it goes abroad a lot, the drawing will still turn out good.
Most importantly, don't limit yourself to the lessons provided! Use your imagination, play with your baby, help him develop his sense of beauty and transfer what he has in mind to paper. Here are some more ways to draw.