Application - what is it?
Applique is a type of decorative and applied art, the principle of which is the technique of cutting, applying and attaching parts to a base. The name comes from the word applicatio, which in Latin means “application”.
Composing images using the appliqué method is the oldest technique for decorating household items among different nationalities, which is still used today. By gluing or sewing figures cut out from various materials onto a selected background, you can get not just a picture, panel or postcard, but also a real masterpiece.
Classification of application techniques
Since this type of image is distinguished by its silhouette, color distribution and expressiveness, pictures can be created using different techniques. Application techniques define:
color spectrum:
- monochrome,
- black and white,
- multicolor;
form:
- flat - elements cut from flat material are attached to the base;
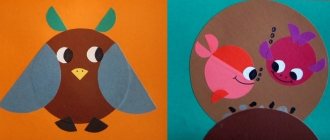
- volumetric (convex) – elements of the surface layer have a volumetric shape, for example, lumps of cotton wool;
subject:
- subject – individual objects are depicted;
- plot - semantic display of action, plot, event;
- decorative – pattern, ornament, as decoration elements.
What are the benefits of the application?
Modern appliqué techniques for children combine the use of different types of textures. You can create a craft from plain, colored paper, bright fabric and waste material. For example, seeds, various types of cereals, and dried plant parts can be used in the work.
Today, many templates have been developed that allow you to create thematic compositions. They allow you to stimulate the attention, memory and imagination of a preschooler.
Professional teachers should prepare unusual topics for creative activities that arouse children's interest.
This type of creative activity is used to develop a teenager’s capabilities. Thanks to this, it is possible to develop your horizons and identify your main talents.
LiveInternetLiveInternet
Quote from Tatyana57
Read in full In your quotation book or community!
APPLICATION.
TYPES OF APPLICATION. Applique (from the Latin “attachment”) is an interesting type of artistic activity - it is a way of working with colored pieces of various materials: paper, fabric, leather, fur, felt, colored beads, beads, woolen threads, embossed metal plates, all kinds of matter (velvet , satin, silk), dried leaves... Paper applique for children can be a very interesting and educational activity. While working with the application, children develop motor skills and imagination. And an important point is also communication with you. Teach your child to see beauty in the world around us. Help him create something with his own hands. Even if it doesn’t work out well at first, don’t forget to praise the child. After praise, the child will try even harder. Of course, it’s easier to start drawing with pencils or paints. But believe me, applique work is much more useful and exciting; it will develop design thinking, tactile sensations, and will also help in learning colors and shapes. In order to start making appliqués, you need to prepare in advance - come up with a plot and make paper blanks... MOSAIC FROM PIECES OF PAPER. This mosaic is good for developing fine motor skills. The most interesting and accessible for preschool children is applique paper made of bright colors. The very type of material and the ease of its processing stimulate the child’s creative activity and make it easy to master manual skills. The paper for the background is most often taken thick, the tone is selected depending on the content of the image in order to emphasize a certain situation. For example, flowers are placed against a green background of a clearing or meadow, silhouettes of birds are pasted against a blue background of the sky, and fish are pasted against the background of the blue depths of a river or sea.
Draw an outline of the image on paper. For younger children, it is better to draw some objects without small details. For example: flower, butterfly, heart. Now cut out this drawn figure. Prepare small pieces of flowers. paper. Better yet, give this task to your child. Let him prepare them himself, tearing the flowers with his hands. paper or pictures from magazines. You can also make circles using a hole punch. Grease the cut out shape with glue and fill it with pieces of paper. Glue the finished form onto a sheet of paper or cardboard. For older children, you can complicate the applique by choosing a more complex shape. APPLICATION FROM GREATS AND SEEDS. Using seeds and cereals to create paintings and crafts always attracts children, and adults also enjoy working with such material. Watermelon, melon and other seeds make very beautiful works. For applications from seeds and cereals, the following materials are needed: cardboard, various seeds, various cereals, paints, felt-tip pens, dried leaves and PVA glue. 1. Draw an image of the future painting on cardboard. 2. Apply PVA glue thickly to this image. 3. Sprinkle cereal or seeds on this picture. This application can be made using one type of cereal, or it can be complicated using different types of cereal. APPLICATION FOR BABIES FROM LEAVES.
You need to prepare in advance for the application of leaves. 1. Collect and dry tree leaves between the sheets of a book. in a couple of days the leaves will be ready. If you don’t want to wait, you can speed up this process and dry the leaves with an iron. To do this, wrap the leaves in a napkin and iron them. 2. Now you need to come up with a future composition from the existing leaves and select more suitable leaves, flowers, and grass for it. 3. On a piece of paper or cardboard, draw the outline of your picture and spread it with PVA glue. 4. Place the leaves in the desired place and dry them at the end. APPLICATION FOR BABIES FROM NAPKINS.
1. Draw the outline of the picture on a piece of paper. 2. Let the baby finely tear napkins or thin paper. 3. Together, roll the pieces of napkins into balls. 4. Spread the image with PVA glue and fill the entire space with these balls. Details of the image can be painted in different colors. The result will be a voluminous and beautiful picture VOLUME APPLICATION FOR BABIES. By doing appliqués with your child, you can teach him not only flat images, but also three-dimensional ones. The volumetric applique looks more realistic and is perceived much better by the baby. To make voluminous appliqués, it is better to first crumple the paper in your hands, then smooth it out and cut out the desired shape. Next, this form needs to be glued and you can additionally fill in the missing details with felt-tip pens or pencils. You can make, for example: a ladybug, a beetle or a turtle...
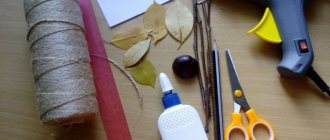
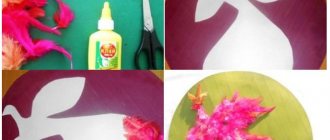
Here is an example of “Lily”. For the applique you will need: 1. Colored paper 2. glue 3. Styrofoam 4. scissors, 5. pencil How to make a voluminous lily: Cut out a heart-shaped leaf from green paper. Next, cut out petals of the same size from a different color of paper. You can limit yourself to 6 petals, or you can make our lily more magnificent and voluminous, for this you will need more petals. Now we wrap each petal one by one around a pencil and glue it in the center of the green leaf. We make the core from a piece of polystyrene foam or from other materials (sponge, colored paper) That's it, Lily!
FABRIC APPLICATION. You can prepare in advance and collect the remains of multi-colored fabric in a certain place. It is advisable to collect fabric of various textures and colors. Here it is important to show the child by example how fabric helps to display something in a picture more vividly and at the same time easily. For example, fabric with flowers depicted along the contour is cut out and glued. (good glue or paste). and paint on a vase or table. The result will be a very colorful and capacious image. There are fabrics that can well depict a house, a hat for a person, a handbag or the body of an animal.
EGGSHELL APPLICATION. One of the interesting and exciting ways to create applications is egg mosaic. Paint the shell with different colors of gouache and lay it out to dry. Once the shell is dry, it is ready to use. First you need to draw the outline of the design on paper and coat it with PVA glue. Now you need to fill certain places in the drawing with different shell colors. Let the painting dry.
Series of messages “Application”:
Part 1 - APPLICATION. PATTERNS. Part 2 - APPLICATION IN KINDERGARTEN AND AT HOME - 1. 3-4 years. ... Part 5 - PAPER APPLICATION. Part 6 - APPLICATION. MAGIC RUGS. Part 7 - APPLICATION. TYPES OF APPLICATION. Part 8 - APPLICATION. MY CHILDREN'S WORKS. Part 9 - Boy with a ball Part 10 - Cheerful turtle Part 11 - Leaves applique.
Methodology for using templates
By working step by step with templates for paper crafts, children aged 6-8 years can accurately reproduce an exemplary composition.
With another approach, the child himself makes a choice among a large number of modules, cut out in the form of stripes, circles and other elements, creating unique color combinations.
Saving time is another factor that speaks in favor of using drawing or carved templates.
Elements that are difficult to perform independently (silhouette and perforated parts, drawings with polygons or strict requirements for sizes and proportions) allow you to create beautiful aesthetic works, which creates additional motivation for doing manual labor.
Bird stencil for applique - bullfinch, owl, starling, chicken - template, photo
Bird stencil for applique - bullfinch, owl, starling, chicken - template, photo:
Bird stencil for applique Bird stencil for applique
Bird stencil for applique Bird stencil for applique Bird stencil for applique Bird stencil for applique Bird stencil for applique Bird stencil for applique Bird stencil for applique Bird stencil for applique
Applications for 1st grade
For the youngest children in school, so that they quickly adapt to a different mode of work, it is necessary to think through the lessons in a fun and interesting way; this is where technology lessons come to the rescue, where you can make a variety of crafts. For work it is best to use:
- colored paper;
- multi-colored cardboard;
- pencils of different colors;
- scissors;
- glue.
If you offer them an interesting topic, they will work hard for a long time to create their work of art.
The most important thing in working with first-graders is to be able to organize them for creativity while completely capturing their attention.
A primary school teacher can make connections between subjects, i.e. In the lesson on the world around them, they get acquainted with the topic “Animals of our region”; you can continue to consolidate the material already at work by inviting them to make an application on this topic.
You can diversify the work as follows, distributing animals among students and initially inviting them to make a craft about the character they got.
For the next lesson, they can be asked to prepare an interesting story about an animal, thus preparing a presentation of their work.
Seven-year-old children will perceive this type of creativity well, since they really like to play games and read fairy tales, so they can also be asked to make an application to a work or fairy tale they have studied.
What is an application and its benefits for schoolchildren
There are applique lessons on all sorts of topics. You can create works from various types of materials - paper, fabric, natural components. In your work you can use: sunflower seeds, pumpkin seeds, buckwheat, semolina, dried leaves or branches.
Creative compositions are possible on all sorts of topics - vegetables, fruits, animals, people, etc. Teachers can prepare interesting topics for applications that are of interest to schoolchildren. This creative activity is aimed at the broad capabilities of adolescents; it is able to develop the horizons of school-age children, find their talents and determine their abilities.
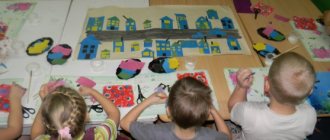
Applique classes in primary school are a fascinating type of learning for schoolchildren. During these lessons, schoolchildren learn about the world around them, develop their ability to use scissors and pencils, and improve them. The process of thinking about where it is better to stick this or that figure allows children to develop artistic taste and imaginative thinking.
The school lesson on application is multifaceted in the process of developing teenage thinking. Here children learn to recognize geometric shapes, distinguish colors, and natural phenomena. Classes instill accuracy and attentiveness in the student. The need to create this or that image forces the student to determine the characteristics of the object: what color it is, shape and size. To create their own small masterpieces, children need a flight of imagination and inspiration.
Palms
It’s easier for kids to work using ready-made stencils. At the same time, even accurately tracing a cardboard template causes difficulties for many. To make work easier, children are given three-dimensional shapes - cubes, cups. Your own palms will also do, especially since you can make a lot of original crafts from the latter.
Principle of operation:
- On paper, the child traces his own palm, trying to carefully outline all the fingers.
- Independently or with the help of a teacher, the child cuts out the paper according to the shape.
- A craft is glued together from ready-made parts, the diagram of which was suggested by the teacher. Options can be given to choose from.
To glue the palms, you can use a glue stick or plasticine. The proposal to create one Christmas tree or a snowman from the palms of the whole class will also be an educational moment - a clear demonstration of what children can do together.
Herringbone
The simplest Christmas tree, which even children of the younger group can handle, is a pyramid glued together from triangles. After fixing the main shape on a cardboard base, you can invite children to decorate the Christmas tree with buttons or confetti that will imitate balls. Older children can cope with more complex options - an embossed and voluminous Christmas tree.
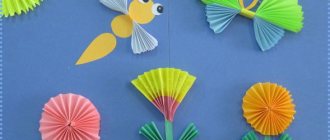
To make a Christmas tree from cut ribbons, you need to prepare 5-6 strips of paper. In this case, long ribbons will be required for the lower tier, and short ones for the upper tier. You can cut the workpieces to length in advance or during assembly. The basis of the craft is a cone glued together from cardboard or thick paper. The Christmas tree can be made traditional green and then decorated, or creative.
Simple small Christmas trees can be assembled into a garland or placed in a frame. In the first case, the paper must be double-sided. You can corrugate a cut out isosceles triangle manually, pressing the folds with a ruler or pencil. Children from 5 years old can handle making such an accordion.
Other ideas for creating a Christmas tree out of paper:
Animal stencil for applique - cat, hedgehog, hare, dog - template, photo
Animal stencil for applique - cat, hedgehog, hare, dog - template, photo:
Animal stencil for applique Animal stencil for applique
Animal stencil for applique
Animal stencil for applique Animal stencil for applique Animal stencil for applique Animal stencil for applique Animal stencil for applique Animal stencil for applique Animal stencil for applique Animal stencil for applique Animal stencil for applique
Fairy lights
Children can be involved in making a New Year's garland to decorate the classroom or school Christmas tree. What is difficult to do alone, children will do together. The main thing is that the sizes and general appearance of the segments that schoolchildren make are the same. This is the only way a set of crafts will look like a single whole. Colors and design details may vary. You can divide children into groups, each offering its own type of segment.
There are many options:
- Simple balls made from stapled circles or paper strips.
- Chains assembled from strips.
- Ornaments cut from a single sheet folded into an accordion.
- Stars, Christmas trees, snowflakes strung on threads, symbols of the coming year.
- Boxes folded using origami technique.
- Segments made of paper strips are ornaments using the quilling technique.
In kindergarten and elementary grades, it is important that the work be signed, even if the child has made at least one snowflake. From middle school, work can become a collective endeavor.
Theoretical foundations of teaching applications in technology lessons in primary school
Chapter 1. Theoretical foundations of teaching applications in technology lessons in primary school
1.1 Application implications for comprehensive development
Artistic and creative activity is an activity that occurs in a child under the influence of literary, musical or works of visual art. This same activity, in turn, has a huge impact on the comprehensive development of the personality of a preschool child. In this regard, let us cite the statement of L.I. Novikova, who claims that: “The theory and practice of education in preschool institutions have revealed that artistic and aesthetic activity has an incomparable impact on the overall development of the child; a healthy emotional sphere is formed, thinking is improved, the child becomes more sensitive to beauty in art and in life” [9, p.172].
In elementary school, fine arts activities are represented by such types as: modeling, drawing, design, appliqué. Each of these types has its own characteristics in displaying the child’s impressions of the world around him. Let us pay attention to the fact that when practicing appliqué, preschoolers become familiar with the simple geometric shapes of various objects, parts and silhouettes of which they cut out and paste on. Creating silhouette images requires a lot of thought and imagination, since the silhouette lacks details, which are sometimes the main characteristics of the object [3, p.47].
Having compared different interpretations of the concept of “appliqué”, we settled on the definition given by M. A. Gusakova: “Applique is the simplest and most accessible way of creating artwork, which preserves the realistic basis of the image itself” [4, p.20].
The main features of appliqué, continues M. A. Gusakova, “are silhouette, flat generalized interpretation of the image, uniformity of the color spot (locality) of large color spots” [4, p.25].
The following types of applications are used in kindergarten:
- subject, consisting of individual images (leaf, branch, tree, mushroom, flower, bird, house, person, etc.);
‒ plot, reflecting a set of actions, events (“Victory Salute”, “Flight into Space”, “The Birds Have Arrived”, etc.);
- decorative, including ornaments and patterns that can be used to decorate various items of clothing and household items.
In teaching applicative skills in a preschool educational institution, the following general tasks are solved:
1) compiling decorative patterns from various geometric shapes and plant details (leaf, flower), placing them in a certain rhythm on a cardboard or fabric base of various shapes;
2) compiling images of objects from individual parts; plot image;
3) mastery of various techniques for obtaining parts for appliqué from different materials, for example: cutting with various techniques, tearing, weaving; as well as the technique of attaching them to the base: gluing, sewing;
4) developing a sense of color, knowledge of primary colors and their shades, the ability to create harmonious color combinations;
5) formation of a sense of form, proportions, composition.
During applique classes, preschoolers become familiar with the simple geometric shapes of objects, the details of which they must cut out and paste. Thus, S.V. Arapova writes that: “Creating silhouette images requires a lot of work of thought and imagination, since the silhouette lacks details, which are sometimes the main features of the object” [6, p.35].
Also, applique classes contribute to the development of elementary mathematical concepts in preschoolers. Children, according to the authoritative opinion of T. S. Komarova, “get acquainted with the names and characteristics of the simplest geometric shapes, gain an understanding of the spatial position of objects and their parts (left, right, corner, center, etc.) and quantities (more , less)". These complex mathematical concepts are easily acquired by preschoolers in the process of creating a decorative ornament or when depicting an object in parts.
In addition, by doing appliqué, preschoolers develop a sense of rhythm, color and symmetry. On this basis, artistic taste is formed. As the team of authors rightly notes: E. A. Dubrovskaya, T. G. Kazakova, N. N. Yurina, “a big role in the applique belongs to its color design, which has a huge impact on the development of children’s artistic taste.” Color has an emotional impact on a child, captivating him with its colorfulness and brightness. Therefore, it is important to purposefully develop a sense of color as the most accessible idea of the beauty of the surrounding world and works of art [10, p.68].
By providing preschoolers with colored paper, the teacher develops in them the ability to select beautiful color combinations. At the same time, children do not need to make up colors or paint over shapes themselves. Applique encourages preschoolers to plan the organization of work, which is especially important here, since in this type of art “the sequence of attaching parts is of great importance for creating a composition (large forms are glued first, then details; in plot works, first the background, then background objects, obscured others, and last but not least the objects of the foreground).”
Performing applicative images contributes to the development of hand muscles and coordination of the child’s movements. Preschoolers learn to use scissors, carefully and correctly cut out shapes and parts, turn a sheet of paper, and lay out parts on a sheet at an equal distance from each other.
It should also be noted the role of appliqué classes in the labor education of preschoolers.
Preschoolers develop a work culture; they prepare the necessary materials and tools in advance, put their workplace in order, and plan the sequence of task completion. In preschoolers, general and fine motor skills of the hands are improved and coordinated, qualities such as accuracy, speed, and smoothness are formed. According to S. V. Arapova, “this becomes possible with systematic, planned classes, organization of independent artistic activities, consistent implementation of program requirements in each age group, gradual complication of tasks as experience is gained.” Preschoolers must learn to diversify the acquired skills in other types of artistic and creative activities [5, p.17].
Thus, the level of mastery of the skills and abilities provided for by the application program makes it possible to implement and determine the degree of readiness of each child for successful learning at school, further mastery of the content and techniques of various types of artistic craft.
1.2. Techniques for creating paper applique
The concept of “appliqué” includes methods of creating works of art from materials that differ in their properties and texture, united by the similarity of the execution technique. Each material has its own characteristics, which have a decisive influence on the application technique. For example, paper, straw, dried plants, birch bark are attached to the background with various adhesives; fabrics, leather, fur, felt are usually sewn on; poplar fluff is applied to velvet paper without glue.
Applique is the simplest and most accessible way to create artwork, which preserves the realistic basis of the image itself. This makes it possible to widely use appliqué not only for design purposes (in the production of visual aids, manuals for various games, toys, flags, souvenirs for holidays, decorations for festive and other costumes, design of wall newspapers, stands, exhibitions, kindergarten premises), but and in the creation of paintings, panels, ornaments, etc. The main features of the appliqué are silhouette, flatness, generalized interpretation of the image, uniformity of the color spot (locality) of large color spots [12, p.76].
Traditional appliqué techniques
The application can be substantive, consisting of individual images (leaf, branch, tree, mushroom, flower, bird, animal, house, car, person, etc.); plot, reflecting a set of actions and events. The applique is made by gluing or sewing pieces of one or another material of various colors onto the main background (paper, fabric, leather and other materials). The finished product made in this way is also called appliqué. According to their content, applications can be divided into: subject, plot, ornamental, and font. As a rule, they are made in multi-color or single-color (silhouette).
Subject appliques (leaves, fruits, vegetables, flowers, mushrooms, insects) are made from cut out geometric shapes. They are the simplest and most accessible for primary school students to complete.
Plot appliqués consist of several different figures, often made in motion, and serve to illustrate literary works: fairy tales, fables, poems. At the request of children, plots can be chosen on various topics (agriculture, industry, construction, science fiction, etc.).
Silhouette applique: all figures are cut out of paper of the same color. And very often beautiful silhouette scenes are obtained, cut out of light paper and pasted onto a dark background or vice versa.
Ornamental appliqués are used for the design of albums, wall newspapers, invitation cards, greeting cards, stage decorations, costumes, and decoration of work objects. In the design, a lot of space is given to text, and then the importance of font applications is great, when headings, slogans, posters, and educational tables are decorated with beautiful letters made of colored paper.
Based on the type of application, applications can be divided into flat and volumetric.
Flat applique is performed by cutting out parts from paper, fabric, leather and other materials, then gluing them onto a paper base.
Broken applique. In some cases, paper parts are made by tearing. The edges of such parts turn out uneven. This method of applique is good to use when depicting animals, trees, fluffy snow, or a fur hat. The torn edges of the parts create the impression of fluffiness and roughness [12, p.65].
Applique mosaic is made from small pieces of colored paper, which can be cut with scissors or prepared using the tearing method. Paper mosaics are used to create both contour and solid images.
Volume applique. Volumetric appliqué, which creates some appearance of volume, has become widespread in practice. It increases the artistic possibilities of student work and expands the creative capabilities of children.
Napkin applique is the optimal type of applique for working with preschool children. This is both easy and safe to perform, since no scissors are required. This can be an application of flagella and lumps, which just trains the coordination of movements of the fingertips.
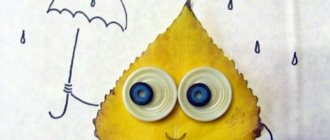
From natural materials - Dried leaves are a wonderful material for artistic combination. The different shapes of the leaves themselves will tell us what can be created from them. A maple leaf resembles a hedgehog and an octopus, an oak leaf resembles the tail of a fish, a poplar or birch leaf resembles the head of a fox, bear, dog, cat, etc.
This is a great opportunity for children to pick up, apply, arrange and experiment with leaves.
Paper applique can be single-layer or multi-layer. Single-layer work includes those works in which the parts are glued in one layer completely or partially. When performing a multi-layer appliqué, smaller parts of a different color are glued onto large parts in two or three layers.
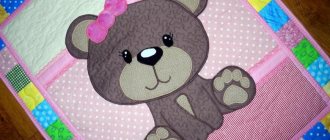
Fabric applique - Pieces of fabric are widely used in circle classes. The flowers and leaves you like are cut out from them. Then a basket or vase cut out of colored paper is glued onto the paper base. Flowers and leaves made of fabric are arranged into bouquets and glued, creating the necessary composition [13, p.17].
Innovative appliqué techniques
This type of application includes a relatively young technique – quilling. Quilling is the art of making three-dimensional compositions from long and narrow strips of paper twisted into spirals.
In English, this handicraft is called “quilling” - from the word “quill” or “bird feather”. Unlike origami, which originated in Japan, the art of paper rolling originated in Europe in the late 14th and early 15th centuries. In medieval Europe, nuns created elegant medallions by twisting paper with gilded edges onto the tip of a bird's feather. When viewed closely, these miniature paper masterpieces created the complete illusion that they were made of thin gold strips. Unfortunately, paper is a short-lived material and little has survived from medieval masterpieces. However, this ancient technique has survived to this day and is very popular in many countries around the world. Paper rolling quickly spread in Europe, but because paper, especially colored and high-quality paper, was a very expensive material, paper plastic art became an art for ladies from the wealthy classes.
In England, Princess Elizabeth was seriously interested in the art of quilling, and many of her creations are kept in the Victoria and Albert Museum in London. We associate paper with the idea of fragility and fragility. But quilling refutes this statement - you can put, for example, a cup or a heavy book on a filigree volumetric stand, and not a single curl of paper lace will be harmed. You can assemble a candy vase from paper elements and safely use it for its intended purpose - it will not fall apart or break. In general, quilling is an opportunity to see the unusual possibilities of ordinary paper.
Also one of the new techniques for us is Iris folding.
Iris folding Iris Folding (iris folding) - filling the picture cut out along the contour with multi-colored stripes. Iris folding originated in Holland. This technique is also called "rainbow folding".
The technique of folding strips into a rainbow spiral is called iris folding. This technique originated in Holland (the Netherlands), local craftsmen folded their work in multi-colored stripes. This needlework technique is still little known in Russia. It is not as complicated as it seems at first glance, the main thing is to be careful and careful.
This technique creates the effect of a three-dimensional image, so the works look unusual.
There is special paper designed for Iris folding, but regular colored paper will also work. Fabric, wrapping paper, pages of old glossy magazines, floral paper and much more can also be used for crafts. It all depends only on your imagination.
Its principle is as follows:
1. The selected fragment of the picture is cut out along the contour.
2. On the reverse side, strips of colored paper are glued onto the drawing strictly in a certain order, in accordance with a pre-prepared template or a diagram.
3. The wrong side is sealed with a clean sheet of paper.
4. The application, if necessary, is supplemented with details.
There are many diagrams, templates and pictures for technology. At the same time, the schemes for iris folding are quite simple to make yourself. All children who can hold scissors will enjoy working with new technology. For small children (5-6 years old), it is better to prepare a diagram, but older children can draw it themselves.
Applications made using the iris folding technique are an excellent decoration for greeting cards, collages, book covers, bookmarks, notes and photo albums.
Star
A luxurious eight-pointed Christmas star can be made even without blanks and patterns. You will need squares of thick paper, a ruler, a pencil and scissors. You will only have to mark the diagonals and transverse folds; for density, you can press them with the tips of scissors so that the folds are expressive. Having made four cuts, we fold the rays.
After gluing, you need to squeeze the corners so that the star acquires volume. After this, we glue the two blanks at an angle so that the craft takes on its final form.
Rainbow in the clouds
You will need: colored cardboard, scissors, glue stick, cotton wool, stapler.
Master Class
- Cut 7 strips of paper of different colors so that each piece is shorter than the previous one. The red stripe should be the largest and the purple stripe the smallest.
- Arrange the stripes in the following order: red, orange, yellow, green, blue, indigo and violet.
- Fasten the strips of paper together using a stapler.
- Roll 6 cotton balls.
- Glue 3 cotton balls at the base of the rainbow as clouds.
Rainbow in the clouds is ready!
i Z O-knowledge
Decorative and applied arts. Types and techniques of DPI Tweet
Author of the article: Victoria Masalab
Applique (from Latin appllcatio - to apply, apply) is a type of arts and crafts based on modeling a realistic image by attaching parts consisting of various textured, structural or textural materials (fabric, paper, etc.), of a certain shape, size and color on one plane into a single compositional ensemble.
The main distinctive characteristics of the applique are such visual qualities as: generality of shape and color, expressiveness and flatness of the image, silhouette and clarity of the contour construction of details and composition as a whole.
The decorative technique of applique is used as an independent artistic product in the form of a panel, and as a decorative element in decorating a wardrobe (as a type of embroidery), furniture or interior items (decoupage).
Performing application work has a positive effect on the development of intelligence and creative abilities, and has a beneficial effect on the general psycho-physical state of a person. This technique is especially relevant for working with children, since it promotes the development of fine motor skills, forms spatial thinking, and develops imagination. Applique classes are suitable for different age groups. Already from a very early age (from 3-4 years), a child is able to independently master the first steps in this creative process, working in the technique of torn (broken) applique or using pre-cut parts. For older children, more complex work options are provided; Here the child is invited to independently cut out or sculpt the parts and place them on a plane. In senior groups, goals are set for solving even more complex problems in application technology, both in compositional content and in color. In addition to the positive qualities listed above in the development of a child’s physical and intellectual capabilities, the applique technique also helps to introduce the child to the cultural diaspora in which he lives, teaches him to honor the customs and traditions of his people.
Types of application techniques
Despite the apparent simplicity of the application technique, it has a wide range of classifications of types and their combinations, which provide the opportunity to produce decorative and applied products of varying levels of complexity. Using the table as an example, let’s look at all possible options for application techniques, which can be roughly divided into four points:
Flat, cut ( single-layer ) applique is made by cutting out the details of the composition and attaching them to the base (background) in one layer, covering the canvas completely or partially. This is the most common, traditional and basic type of appliqué technique.
Multi-layer ( overlay ) applique is performed by attaching the parts of the composition overlapping in several layers. One example of this type of application is the “iris folding” technique.
Silhouette applique is the production of a decorative composition based on a combination of simple, clear, laconic, one-color silhouettes of objects or objects on a contrasting background.
Volumetric applique is a variety of techniques that provide the possibility of creating a 3D effect in applique work by attaching flat parts to a base in several layers, folding them or attaching volumetric objects (assemblage technique), as well as sculpting a volumetric composition from plasticine.
The torn ( torn ) appliqué technique is made from soft, pliable materials (paper napkins, cotton wool, poplar fluff, etc.) by tearing them off manually (without the use of sharp objects) and gluing them to the base. The edges of such parts turn out uneven and abrupt. This technique allows you to create a blurry effect in a decorative composition, which gives it lightness and picturesqueness. Also, this type of applique technique is suitable for the youngest students, since there is no need to use sharp objects.
Mosaic ( modular ) application is carried out on the principle of designing a solid image, consisting of many individual colored parts, by attaching them in one layer to the base. Mosaic applique is divided into two types: contour (the parts are attached along the contour of the image) and solid (the parts cover the entire surface of the decorative composition).
A symmetrical application is built according to the principle of the law of balance and subordination. The details in such a decorative composition are located on the canvas parallel to each other or relative to a common axis and have the same shape and size.
Asymmetrical appliqué consists in the free arrangement of diverse figures on the plane of the canvas in accordance with the laws of constructing a dynamic artistic composition.
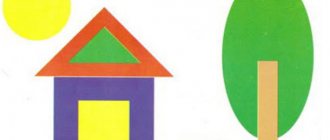
Geometric applique is based on the construction of plot, subject or ornamental compositions, mainly or partially, from details based on simple and clear geometric shapes. The construction of such laconic compositions develops imaginative thinking and imagination.
Non-geometric appliqué, unlike geometric one, is free from conventional frames in the form of the shape of parts, and does not impose restrictions on creative searches with simplified forms.
Subject applique involves simple modeling of an image symbolizing a certain object or object based on the construction of its characteristic shapes, proportions and colors.
Plot application involves complex modeling of an image depicting an action or event, and is built according to the laws of artistic composition, including such aspects as diversity, dynamics and aerial perspective. Subject applique often combines a combination of techniques such as: multi-layer applique, volumetric, asymmetrical, full-color, etc.
Ornamental appliqué is a decorative composition built according to the laws of symmetry, balance, rhythm and proportionality. There are two types of ornamental appliqué, based on geometric or plant elements. All ornamental compositions are subject to either a linear or centric construction scheme.
Font application is laid out in the form of a text font and is used mainly for the design of headings.
Thus, applique in its pure form or in a combination of various combinations allows us to produce various products: from simple crafts in kindergartens to serious artistic products in decorative and applied arts.
When preparing for work, you should take into account the characteristic features of the materials being compared, their structural components, and the installation means with which they will be attached to the base. For example, you can assemble paper parts and dried leaves into a single composition by gluing them with PVA glue. For materials with a denser structure, other methods of fastening and installation are suitable; fabric, leather, fur and felt are sewn on.
History of the application
The appliqué technique has been known to mankind since time immemorial, when Homo sapiens began to need to sew clothes from pieces of animal skins. Applique became widespread as a decorative technique in the era of the Ancient World.
In Medieval Europe, appliqué was used everywhere and was a popular decorative technique for decorating clothing and interior items. From this period of time, appliqué began to have a social status. Applique for the nobility was made in a highly artistic manner from expensive high-quality materials and became a type of embroidery technique. It was actively used in the design of clothing of clergy and heads of powers, where it began to have a symbolic meaning. The applique of a simple working person often had the character of patches in thin, poor clothes.
With the beginning of mass production of paper, cut-out paper silhouette appliques came into fashion. The founder of this technique is Etienne Silhouette, the chief financial controller at the court of Louis XV.
In Russia at the end of the 18th century, the silhouette appliqué technique also came into use. So, for example, Count Tolstoy F.P. was seriously interested in silhouette appliqué and devoted a large amount of his time to this activity. Tolstoy's works are highly artistic, distinguished by their subtlety of work and professionalism, they are presented in many museums in Russia. Also known are the brilliant works in the Gothic style of the folk craftsman Kapiton Akaki and the masterly carved works of Lev Yudin.
During the Soviet Union, the appliqué technique began to be used on leather, felt, suede, etc., and began to develop in the form of combinations of styles and techniques. Exhibitions of decorative and applied arts were held on a regular basis, where products made using the appliqué technique were widely presented.
The site contains photographic materials borrowed from open Internet sources.
title=”LiveInternet src=”data:image/gif;base64,R0lGODlhAQABAIAAAAAAAP///yH5BAEAAAEALAAAAAABAAEAAAAIBTAA7″ alt=””/>
Also on this topic:
Iris folding – Rainbow folding
Decorative and applied arts. Types and techniques of DPI
Artichoke
Volumetric applique “Cacti”
You will need: double-sided colored paper in green and red, a sheet of cardboard, scissors, glue.
Master Class
- Cut out the templates.
- Prepare 5 templates for each cactus. There are 25 ovals in total.
- Fold each template in half.
- Cut sharp spines from red paper.
- Glue the spines to the green blanks.
- Assemble one cactus from 5 blanks, as shown in the photo.
- Make 5 cacti in the same way and glue them onto a piece of cardboard.
- Cut out 4 flowers from red paper and glue them to the tops of the cacti to make them bloom.
The volumetric applique “Cacti” is ready!
Applications for 3rd grade
Children grow up, and with this their ability for self-realization grows. Skills in working with scissors, glue, and colored paper have already been developed by the 3rd grade, so at this age it is already possible to structure lessons aimed at developing imagination and flight of thoughts.
In the 3rd grade, you can include in your classes an introduction to different types of techniques for cutting out objects. For example, you can use the technique of folding paper in half or into an accordion and cutting out symmetrical shapes. The interesting technique is not for cutting, but for tearing off figures; the modern technique - decoupage - is fascinating.
Crafts “Christmas trees”
We offer you 4 options for how to make a craft with a Christmas tree. We will make cards, applications and a New Year's toy.
New Year's card "Delicate Christmas tree"
Let's make a postcard - a transformer. When closed, the Christmas tree looks like an ordinary one, but as soon as you open the postcard, the holiday begins!
Craft “Christmas tree” from a sleeve
Crafts made from bushings are a special love! Such affordable material and so many interesting things you can make from them, for example, a Christmas tree. To do this, we will fold the sleeve in half and make cuts. The final work can be used as a Christmas tree decoration. This craft can be done by children aged 3 years and older.
You can think about what a green beauty might look like in the “Living Christmas Tree” master class. Download the finished template. Children under 4 will need help cutting out as the lines are curved.
Or make an applique from paper circles. For children under 4 years old, make a lot of blanks from colored paper and show them how to fold them. Then they can handle it themselves! As an additional decoration, we use semolina, which is so similar to snow.
For older children (from 6 years old), we invite you to try out elements of the origami technique to create your own New Year’s cards. Three craft options for your choice!
Sources
- https://dnevnikmastera.ru/applikaciya-dlya-1-2-3-4-klassa
- https://urokirukodelie.ru/applikacziya-v-shkolu-1-2-3-4-klass/
- https://hobbi.guru/podelki-iz-bumagi-s-shablonami/
- https://podelochkin.ru/applikacziya-1-2-3-4-klass
- https://orechi.ru/podelki/novogodnie-podelki-iz-bumagi
- https://gamejulia.ru/origami-dlya-1-klassa.html
- https://svoimirukamy.com/podelki-iz-tsvetnoj-bumagi-dlya-mladshih-klassov.html
- https://svoimirukamy.com/applikatsii-iz-bumagi.html
- https://creativebaby.ru/50-zimnih-podelok-dlya-detey-s-shablonami/
[collapse]
Applique as a type of decorative fine art
APPLICATION
Applique as a type of decorative fine art
Applique (from the Latin applicatio - overlay) is a way of creating artistic images from various shapes, figures, cut out of any material and glued or sewn onto the appropriate background.
A variety of materials are used in appliqué: leather, felt, cloth, birch bark, fur, fabric, straw, paper. Different peoples of our multinational country use appliqué to decorate their national costume, household items, and homes. Paper applique appeared in the 16th century and developed in subsequent centuries. At the beginning of the 17th century, a fashion for paper silhouettes arose in France and in a short time spread to all European countries and Russia. The walls of homes began to be decorated with small silhouette portraits and everyday scenes. The silhouette received its name from the surname of Etienne Silhouette, a French official of the 17th century who, following fashion, was fond of cutting out paper. Various stories were told about him, and one day some artist drew a caricature of him, which was made as a shadow. This method of depiction began to be called a silhouette. Many professional artists were interested in the art of silhouette: Albrecht Durer, Peter Paul Rubens. This art also attracted the famous storyteller Hans Christian Andersen. In Russia in the 19th century, the most popular were the silhouettes of F. I. Tolstoy, who created multi-figure compositions of various content. The art of silhouette also attracted 20th century artists M. V. Dobuzhinsky and K. A. Somov. The following artists are considered major masters of this art: G. I. Narbut, N. V. Ilyin, E. S. Kruglikova. Many graphic artists now successfully use the silhouette as an independent means of artistic expression when creating bookplates, posters, and book designs. Applique as a type of activity for preschool children
Applique is one of children’s favorite types of visual activity: children are pleased with the bright color of the paper, the successful rhythmic arrangement of the figures, and the technique of cutting and gluing is of great interest to them. Children, by performing application work, acquire new knowledge and consolidate ideas acquired in other classes. All types of visual activities for children, including appliqué, are aimed at developing certain knowledge in children, developing skills, practicing skills and nurturing personality. The specificity of the application gives children the opportunity to more actively acquire knowledge about color, the structure of objects, their size, planar shape and composition. The applique allows you to move cut out shapes and compare them by placing one shape on top of another. This allows you to quickly acquire compositional knowledge and skills, which is important not only for creating plot and decorative applications, but also for drawing