What five experiments with a magnet should you do with your preschool child?
Content
Experiment 1. “What materials does a magnet attract?” Experiment 2. “What do you think will happen if...” Experiment 3. “What do you think happened before...” Experiment 4. “Who is most likely to get paper clips out of the water without getting their hands wet?” Experiment 5. “Find the treasure”
Do you remember how, as a child, you anxiously brought various “pieces of iron” to black stones, checking to see if there was a magnet in front of you? How did they try to “deceive” the compass needle by rotating around themselves in place? How did you try to magnetize a screwdriver in order to tighten naughty small screws in a construction set’s parts? And they were always surprised - after all, this magnet works!
Playing with magnets and learning about their properties always arouses genuine interest among children of older preschool age.
The visual and didactic manual “Experiments with magnets for children 4–9 years old” (LLC “NPC “TIO””, educational and methodological set “ENOTIK”) meets the current needs of interested teachers. The main objective of the manual is to form children’s ideas about the properties of a magnet; expand knowledge about the use of magnet properties by humans; develop cognitive initiative and independent research activities in the course of joint partnership between a child and an adult.
The benefit includes:
- game cards 210x150 mm – 12 pcs.
- autodidactic cards with answer options 70x70 mm – 24 pcs.
Game cards illustrate experiments with magnets. The autodidactic cards provide answer options for each experiment - correct and incorrect. On the back of the card with the correct answer there is a picture of a joyful raccoon holding a magnet, on the back of the card with the wrong answer there is a perplexed raccoon spreading its paws to the sides.
| The task was completed correctly. | The task was completed incorrectly. |
To carry out the experiments, you will need flat two-pole magnets and the objects shown on the cards: metal clips, an eraser, a sheet of paper, a wooden block, a nut, etc. – by the number of participants.
| Flat magnets. |
In organizing work with the manual “Experiments with Magnets,” you can use the following options for tasks for children:
Experiment 1. “What materials are attracted by a magnet?”
Up to 20 children can participate in the experiment at the same time. For this you will need: objects with and without magnetic properties; real objects, magnet; game top with arrow; tray. Participants stand around a table with a top in the center. Objects are placed around it: a pine cone, a button, a paper clip, etc. The participants in the game are given the task: “Take turns rotating the top. When the arrow stops in front of an object, think: can it be magnetized to a magnet?” Invite the children to hold a magnet to the objects one by one to test their assumptions. Let them test in practice which of these materials will be attracted to a magnet.
Conclude: a magnet attracts metal objects.
Experiment 2. “What do you think will happen if...”
To play, you will need large cards with task options and small cards with answer options. Participants in the experimental activity are asked to look at the sequence of pictures on the card and answer the questions: what will happen to the magnet and the object shown on the card if they are brought closer to each other. Children, using magnets and real objects, confirm or refute their guesses in choosing the appropriate card with a picture of a possible answer.
| What happens if… | Hypothesis testing. |
For each correctly completed task, the winner (team of players) receives a chip. The one who has the most chips at the end of the game wins.
Experiment 3. “What do you think happened before...”
For the experiment, you will need small cards with the correct answers and large cards with the sequence of actions performed. Up to 20 children can take part in the experiment at the same time.
| Card task for the game “What do you think happened before...” | Selecting the correct answers and justifying them. |
Participants receive small answer cards and are instructed to look at the result of the experiment with magnets and choose the appropriate card that shows what preceded the specified result.”
The adult checks whether the children are completing the task correctly and asks the participants to justify their decision. For the correct answer, players receive a chip. The game is repeated up to three times with changing game cards. Based on the results of all stages, the winners are determined.
Experiment 4. “Who is most likely to get paper clips out of the water without getting their hands wet?”
For the experiment you will need a container of water, 10 paper clips and a flat magnet. If one child takes part in the experimental activity, then the adult asks him to think and guess how to get paper clips out of the water without getting his hands (or any other objects) wet? Children usually realize that this can be done with a magnet, using its ability to act on metal objects at a distance. In case of difficulty, the adult demonstrates to the child the sequence of actions and invites the child to complete the task independently.
If several children take part in the experiment at the same time, then, at a signal from an adult, the players try to remove paper clips from their containers. The participant who manages to do this first wins.
Don't get your hands wet.
Experiment 5. “Find the treasure”
| Treasure |
For the experiment you will need dry sand (it can be replaced with salt) and a “treasure”: several metal objects that act as treasures. The treasure can be old keys, coins or mother’s unwanted jewelry. Invite your child to use a Neodymium magnet to find a pirate treasure buried in the sand.
You can organize competitions among several participants at once, offering each a limited time interval, for example 30 seconds, to search for hidden objects.
I have no doubt that your children will be VERY interested!
Glushkova Galina
,
Candidate of Pedagogical Sciences, Art. teacher at GBOU School No. 1598, Moscow.
Study of magnet properties
To find out the properties of magnets, we conducted experiments.
Experiment No. 1
“Are all bodies attracted by a magnet?”
The purpose of the experiment: to determine what objects a magnet can attract.
Procedure of the experiment: For this experiment, we took various objects: pen, paper, ruler, metals from the Metal Collection educational set and, in turn, brought a magnet to them.
Result: magnets attract only some metal objects (cast iron, steel), and some metals, paper, plastics, wood do not experience its attraction.
Experiment No. 2
“Can a magnet transmit its force?”
The purpose of the experiment: to find out whether metal objects can be magnetized.
Procedure of the experiment: in this experiment we attached a nail to a magnet and another to it.
Then they carefully detached the magnet from the top nail, and the nails remained fastened for a few more seconds.
Result: magnetic force can pass through objects and substances.
Experiment No. 3
“Are all magnets attracted to each other?”
Goal: Find out whether magnets always attract each other. A magnet has two poles: “north” and “south”
The course of the experiment: for this experiment, we brought magnets to each other, placing them with the same poles - the magnets repelled each other. When we turned one of the magnets with the other pole, the magnets were attracted.
If you take a piece of magnet and break it into two pieces, each piece will again have a “north” and a “south” pole. Those with the same poles will repel, and those with different poles will attract.
Result: magnets with the same poles repel, and magnets with different poles attract.
Experiment No. 4
«Can a magnet work through other materials?
Purpose: to determine whether the properties of magnets appear through barriers.
Procedure of the experiment: in this experiment we tried to magnetize a paper clip through paper; steel plate through a glass of water.
After pouring water into a glass and placing a steel plate in it, we tried to remove it using a magnet.
Result: in all experiments the magnet retained its properties.
A magnet can work through paper, water and even glass.
Experiment No. 5
Do magnets have the same strength?
Purpose: to determine whether the magnets have the same strength?
Procedure of the experiment: for this experiment, I first took three magnets of different sizes and three identical coins. I laid out the magnets in a row on the table, put a ruler on the table and laid out the coins close to it, but at a distance from the magnets. I slowly push the ruler with coins towards the magnets
Result: some coins are attracted to the magnet immediately, others only when they come close to the magnets.
Magnets attract even from a distance. The larger the magnet, the greater the force of attraction and the greater the distance over which the magnet exerts its influence.
To confirm this experiment, I took two magnets: one large, the other small, and paper clips. There were 3 paper clips attached to the small magnet, and 7 to the large one.
Result: Not all magnets are the same, different magnets have different strengths, this strength depends on the size of the magnet.
Abstract of OOD "Magnets"
SOFTWARE CONTENT
Content
Creating conditions conducive to the development of children's cognitive activity, curiosity, desire for independent knowledge and reflection through experimentation
- Development of cognitive interest in children, through familiarization with the technique of conducting experiments with magnets, to form an idea of a magnet and its properties, the ability to compare, contrast, and draw conclusions
- To update children's knowledge about the use of magnet properties by humans, the ability to communicate with peers during experiments
- Familiarity with safety rules when conducting experiments
- Development of independence and initiative
Equipment: metal, plastic, wooden objects, containers with water, paper clips, a piece of fabric, observation sheets, magnets according to the number of children, a simple pencil, buttons.
Dear colleagues, today I would like to present to you a master class “Magnet and its properties”.
Childhood is a time of searching and answering a variety of questions from a child. The child learns about the world around him. The process of cognition is creative and our task is to support and develop the child’s interest in research discoveries and create all the necessary conditions for this.
This topic is relevant because in the educational process experimentation is a teaching method that allows a child to model in his mind a picture of the world based on his own observations and experiences. Children actively work with a magnet, without thinking about its properties, the history of its appearance, or its significance in human life.
The magnet is accessible to children and a universal material, widely used in children's toys and construction sets. Children have a desire and need to use magnetic objects. To do this, you can involve parents in joint experimental activities with children, involve them in doing creative homework, and cultivate vital activity in children and parents.
Therefore, research activities with a magnet interested me and the children in my group. I invite you to the laboratory where we will become young scientists.
Lesson plan
Educator
. We're going to the laboratory today. What is a laboratory? A laboratory is a place where experiments are carried out, objects and their properties are studied, and answers to many questions are found.
Educator
. Before entering there, you need to remember the rules of safe behavior:
- work in their places;
- do not touch equipment without permission;
- listen carefully;
- do not interrupt each other;
- perform all tasks accurately and diligently;
- maintain silence and order.
Children
go to the laboratory.
Educator
. Today, some object was brought to our laboratory for research. Try to guess what it is? (Mystery)
- It can be small, big,
iron is very friendly with it (magnet)
I’ll tell you now how the magnet was found.
An ancient legend. In ancient times, on Mount Ida, a shepherd named Magnis tended sheep. He noticed that his iron-lined boots were sticking to the black stones that lay under his feet. The shepherd took off his boots and saw that his bare feet were not attracted to the strange stones. Magnis realized that these strange black stones did not recognize any other materials except iron. The shepherd took several of these stones home and surprised all his friends. This is how the name “magnet” appeared on behalf of the shepherd.
Educator
. Guys, you are all familiar with this subject. – Magnet – Yes, this is an ordinary magnet, but it keeps many secrets. We will explore its properties.
Educator
. And now we will unravel the first secret
Experiment No. 1 “What attracts a magnet”
There are objects mixed up on the table, we need to sort them out. What items, please list.
Educator
. Children, what kind of objects do you think a magnet will attract?
Children
. Metal
Educator
. Will our assumptions be confirmed? We will conduct an experiment and write down the results on observation sheets. Bring a magnet to each object in turn, put the objects that are attracted in a red plate, and those that are not attracted in a blue one.
Educator
. Tell us what you did and what happened? What objects were attracted by the magnet and what objects were not attracted by the magnet?
Children's answers
.
Experiment No. 2 “The magnet is not afraid of obstacles”
Educator
. What do you think will happen if you put a sheet of paper or cloth on metal objects, let's check. Now put a piece of paper on the iron objects and bring a magnet: What happened? Show? And now a piece of fabric
Children
. Iron objects were magnetized to a magnet through paper and fabric.
Experiment No. 3 “Don’t get your hands wet”
Educator
. Is it possible to use a magnet to remove a paper clip from the water without getting your hands wet? Let’s check it out.
Each child has a glass of water.
The child puts a paperclip into a glass and a magnet is drawn along the outside of the glass from bottom to top, the paperclip “stretches” behind the magnet.
Educator
. What do we see?
Children
. The paperclip follows the movements of the magnet.
Children
. Magnet can work through glass and water
Educator
. Guys, where do you think people use magnets?
Children
. In toys, construction sets, note holders, you can collect scattered buttons, in medicine for examination and treatment, on the railway, for trains.
Educator
. What do you think, my young scientists, did we cope with the task?
Children
. Yes
Educator
. Through experiments we learned a lot about magnets
Result:
- Magnet attracts iron
- Magnet works through paper and fabric
- Magnet works through water and glass
Literature
- V.V. Shchetinina “A child in the world of search: search activity of preschool children”
- ON THE. Korotokov “Cognitive and research activities of older preschoolers”
- E.V. Muradova “Familiarizing preschoolers with the world around them” - experimentation
- O.V. Dybina, N.P. Rakhmanova “Entertaining experiments and experimentation for preschoolers”
Card index of experiments and games with magnets
Table of contents
PART 1. EXPERIMENTS AND EXPERIMENTS WITH MAGNETS
……………………………………………………………………………………………….. 4
EXPERIMENT 1. WHAT MATERIALS DOES A MAGNET ATTRACT?…………………………………………………………………………………………………………………………………….. 4
EXPERIMENT 2. MAGNETS ACT AT A DISTANCE……………………………………………………………………………………………………………………. .6
EXPERIMENT 3. A MAGNET HAS TWO POLES…………………………………………………………………………………………………………………………………………… ……………… 8
EXPERIMENT 4. HOW TO SEE THE MAGNETIC FIELD? ………….. 9
EXPERIMENT 5. MAGNETIC PROPERTIES CAN BE TRANSFERRED TO ORDINARY IRON……………………………………………………………………………………………… 10
EXPERIMENT 6. MAGNETIC FIELD OF THE EARTH…………………………………………………………………………………………………………………… ……………….. eleven
PART 2. GAMES WITH MAGNETS
……………………………………………………………………………………………………………………………………. 12
MAGNETIC PUPPET THEATER……………………………………………………………………………………………………………………………………………… ……….. 12
VOLUMETRIC LABYRINTH…………………………………………………………………………………………………………………………………………………… ………………………. 15
PICTURE MAZE “CAT AND MOUSE”…………………………………………………………………………………………………………………………………………… ….. 16
PENCIL POINT-MAGNETIC CONSTRUCTOR ON A CAN……………………………………………………………………………………………………………………………………. 18
FUNNY KNOCKS……………………………………………………………………………………………………………………………………… ……………………………. 19
CONCLUSION………………………………………………………………………………………………………………………………… ……………………………………. 21
3
miracle of magnetic experiments and experiments (preparatory group) on the topic
Is everything attracted by magnets?
Purpose: Determine the properties of magnets to attract metal objects
Materials: objects made of wood, metals, plastics, steel, paper; magnet.
During the experiment, it is necessary to divide all objects into two groups: metal and non-metal. Bring the magnet one by one to the objects of the first and second groups. We define that non-metallic objects are not attracted to a magnet, but some metallic objects are attracted to a magnet, and some are not attracted to it.
Conclusion: magnets have the ability to attract objects made of iron or steel, nickel and some other metals. Wood, plastic, paper, fabric do not react to magnets.
“How to get a paperclip out of water without getting your hands wet”
Goal: Continue to introduce children to the properties of magnets in water.
Material: A glass of water, iron objects, magnet.
While putting away paper clips after the children's experiments, Uznayka "accidentally" drops some of them into a glass of water. The question arises, how to get paper clips out of the water without getting your hands wet. After the children manage to pull the paper clips out of the water using a magnet, it turns out that the magnet acts on iron objects in the water. Same experience with sand.
Conclusion. Water does not interfere with the action of the magnet. Magnets act on iron and steel even if they are separated from it by water.
"The Power of Magnets"
Purpose: To introduce a method for comparing the strength of a magnet.
Material: Large horseshoe-shaped and medium-sized strip magnet, paper clips.
Invite the children to determine which magnet is stronger - a large horseshoe or a medium-sized strip magnet (this could be a dispute in which fairy-tale characters well known to children participate). Consider each of the children's suggestions on how to find out which magnet is stronger. Children do not have to formulate their proposals verbally. A child can express his thought visually by acting with the objects necessary for this, and the teacher (or the gnome Uznayka) together with others helps to verbalize it.
As a result of the discussion, two ways to compare the strength of magnets emerge:
1. by distance - the magnet that will attract the steel object (paper clip) is stronger at a greater distance (the distances between the magnet and the place where the paper clip attracted by it is located are compared);
2. by the number of paper clips - the stronger magnet is the one that holds a chain with a large number of steel paper clips at its pole (the number of paper clips in the chains “grown” at the poles of the magnets is compared), or by the density of the iron filings stuck to the magnet.
Pay attention to the experiments - “tips” with two magnets of different strengths, which can be shown to children if they have difficulties:
1. identical steel paper clips attract one of the magnets from a greater distance than the other;
2. one magnet holds a whole chain with more paper clips at its pole than the other (or a thicker “beard” of iron filings).
In these experiments, have children determine which magnet is stronger and then explain how they figured out what “tipped” them to the answer.
After counting the number of paper clips at the poles of different magnets and comparing them, children come to the conclusion that the strength of a magnet can be measured by the number of paper clips held in a chain near its pole.
Thus, the paperclip in this case is a “yardstick” for measuring the strength of the magnet.
Additionally. Instead of paper clips, you can take other steel objects (for example, screws, pieces of steel wire, etc.) and make chains from them at the magnet poles. This will help children become convinced of the conventionality of the chosen “measure” and the possibility of replacing it with others.
Conclusion: The shape and size of a magnet affects its strength. Horseshoe magnets are stronger than rectangular magnets. Among magnets that have the same shape, a larger magnet will be stronger. Magnets attract even from a distance. The larger the magnet, the greater the force of attraction and the greater the distance over which the magnet exerts its influence.
Magnets have the property of attracting metal objects. Magnetic force can act through various objects and over a considerable distance. Not all magnets are the same, different magnets have different strengths, this strength depends on the shape and size of the magnet.
“What determines the strength of a magnet?”
Goal: To develop logical and mathematical experience in the process of comparing the strength of a magnet through objects.
Material: Large tin can, small piece of steel.
The confused gnome suggests making a large magnet. He is confident that a large iron can will produce a strong magnet - stronger than a small piece of steel.
Children give their suggestions as to what would make the best magnet: a large tin can or a small piece of steel.
You can test these proposals experimentally: try to rub both objects equally, and then determine which of them is stronger (the strength of the resulting magnets can be judged by the length of the “chain” of identical iron objects held at the magnetic pole).
But for such an experimental test, a number of problems must be solved. In order to rub both future magnets equally, you can:
- rub both pieces of steel using the same number of movements (two children rub, and two teams count the number of movements made by each of them);
- rub them for the same amount of time and do it at the same pace (in this case, to record the time of rubbing, you can use an hourglass or a stopwatch, or simply start and finish this action for two children at the same time - with a clap; to maintain the same pace in this case, you can use a uniform check).
Conclusion: that a stronger magnet is obtained from steel objects (for example, from a steel needle). A tin can produces a very weak magnet or no magnet at all. The size of the item doesn't matter.
“Electricity helps make a magnet”
Purpose: To introduce children to the method of making a magnet using electric current.
Material: A battery from a flashlight and a spool of thread, onto which insulated copper wire 0.3 mm thick is evenly wound.
The future magnet (steel rod, needles, etc.) is inserted inside the coil (as a core). The size of the future magnet should be such that its ends protrude somewhat from the coil. By connecting the ends of the wire wound on a coil to a flashlight battery and thereby running an electric current through the wire of the coil, we will magnetize the steel objects located inside the coil (the needles should be inserted inside the coil, with their “ears” in one direction and their points in one direction). another).
In this case, the magnet, as a rule, is stronger than when it is made by rubbing a steel strip.
“Which magnet is stronger?”
Purpose: Compare the strengths of magnets made in different ways.
Material: Three magnets of different shapes and sizes, steel clips and other metals.
Invite children to compare the properties of three magnets (using paperclips or other steel objects as “yardsticks” to measure the strength of the magnets):
- the magnet resulting from this experiment;
- a magnet made by rubbing a steel strip;
- factory-made magnet.
"Magnetic needle"
Purpose: To introduce the properties of a magnetic needle.
Material: Magnet, magnetic needle on a stand, needle, red and blue stripes, cork, vessel with water.
Show the children a magnetic needle (on a stand), give them the opportunity to experimentally verify that it is a magnet.
Have children place the magnetic arrow on the stand (making sure it can rotate freely on it). After the arrow stops, children compare the location of its poles with the location of the poles of magnets rotating on threads (or with magnets floating in bowls of water), and come to the conclusion that their locations coincide. This means that the magnetic needle - like all magnets - shows where the Earth is north and where it is south.
Note. If your location does not have a magnetic needle on the stand, you can replace it with an ordinary needle. To do this, you need to magnetize it, marking the north and south poles, respectively, with stripes of red and blue paper (or thread). Then place the needle on the cork, and place the cork in a flat vessel with water. Floating freely in the water, the needle will turn in the same direction as the magnets.
"Compass"
Purpose: To introduce the device, the operation of the compass and its functions.
Material: Compass.
1. Each child places the compass on the palm of his hand and, having “opened” it (an adult shows how to do this), watches the movement of the arrow. As a result, the children once again figure out where is north and where is south (this time using a compass).
Game "Teams".
Children stand up, put compasses on their palms, open them and follow the commands. For example: take two steps north, then two steps south, three more steps north, one step south, etc.
Teach children to find west and east using a compass.
To do this, find out what the letters – S, Yu, Z, V – mean, which are written inside the compass.
Then have the children turn the compass on their palm so that the blue end of its arrow “looks” at the letter C, i.e. - on North. Then the arrow (or match), which (mentally) connects the letters Z and B, will show the direction “west - east” (actions with a cardboard arrow or match). Thus, children find west and east. A game of “Teams” with “use” of all sides of the horizon.
“When a magnet is harmful”
Purpose: To introduce how a magnet acts on its surroundings.
Material: Compass, magnet.
- Let the children express their guesses about what will happen if you bring a magnet to the compass? - What will happen to the arrow? Will she change her position?
- Test children's assumptions experimentally. By holding the magnet close to the compass, children will see that the compass needle moves with the magnet.
- Explain the observation: a magnet that approaches a magnetic needle affects it more strongly than earthly magnetism; the arrow-magnet is attracted to a magnet that has a stronger effect on it compared to the Earth.
- Remove the magnet and compare the readings of the compass with which all these experiments were carried out with the readings of others: it began to show the sides of the horizon incorrectly.
Find out with your children that such “tricks” with a magnet are harmful to the compass - its readings “get lost” (therefore, it is better to take only one compass for this experiment).
- Tell the children (you can do this on behalf of Find out) that a magnet is also harmful for many devices, the iron or steel of which can become magnetized and begin to attract various iron objects. Because of this, the readings of such devices become incorrect.
A magnet is harmful to audio and video cassettes: both the sound and the image on them can deteriorate and become distorted.
It turns out that a very strong magnet is also harmful for humans, since both humans and animals have iron in their blood, which is affected by the magnet, although this is not felt.
Find out with your children whether a magnet is harmful to the TV. If you bring a strong magnet to the screen of a switched-on TV, the image will be distorted and the color may disappear. after the magnet is removed, both should be restored.
Please note that such experiments are dangerous for the “health” of the TV also because a magnet can accidentally scratch the screen or even break it.
Let the children remember and tell Learn about how to “protect themselves” from a magnet (using a steel screen, a magnetic anchor.
"Earth is a magnet"
Purpose: To identify the actions of the Earth's magnetic forces.
Material: A plasticine ball with a magnetized safety pin attached to it, a magnet, a glass of water, regular needles, vegetable oil.
Conducting the experiment. An adult asks the children what will happen to the pin if you bring a magnet to it (it will be attracted because it is metal). They check the effect of a magnet on a pin, bringing it to different poles, and explain what they saw.
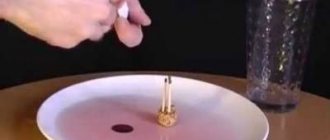
Children find out how a needle will behave near a magnet by performing an experiment according to the algorithm: lubricate the needle with vegetable oil and carefully lower it to the surface of the water. From afar, slowly, at the level of the water surface, a magnet is brought up: the needle turns its end towards the magnet.
Children lubricate the magnetized needle with fat and carefully lower it to the surface of the water. Notice the direction and carefully rotate the glass (the needle returns to its original position). Children explain what is happening by the action of the Earth's magnetic forces. Then they examine the compass and its structure, compare the direction of the compass arrow and the needle in the glass.
"Polar Lights"
Goal: Understand that the aurora is a manifestation of the Earth’s magnetic forces.
Materials: Magnet, metal filings, two sheets of paper, cocktail straw, balloon, small pieces of paper.
Conducting the experiment. Children place a magnet under a sheet of paper. From another sheet at a distance of 15 cm, metal filings are blown through a tube onto the paper. Find out what is happening (the sawdust is arranged in accordance with the poles of the magnet). The adult explains that the magnetic forces of the earth act in the same way, delaying the solar wind, the particles of which, moving towards the poles, collide with air particles and glow. Children, together with an adult, observe the attraction of small pieces of paper to a balloon electrified by friction with hair (the pieces of paper are particles of the solar wind, the balloon is the Earth).
"An unusual picture"
Goal: Explain the action of magnetic forces, use knowledge to create a picture.
Material: Magnets of various shapes, metal filings, paraffin, a strainer, a candle, two glass plates.
Conducting the experiment. Children look at a painting made using magnets and metal filings on a paraffin plate. The adult invites the children to find out how it was created. Check the effect of magnets of different shapes on sawdust by pouring them onto paper under which the magnet is placed. They consider the algorithm for making an unusual picture, perform all the steps sequentially: cover a glass plate with paraffin, install it on magnets, pour sawdust through a sieve; lifting it, heat the plate over the candle, cover it with a second plate, and make a frame.
"Magnet draws the Milky Way"
Goal: to introduce children to the property of a magnet to attract metal, to develop interest in experimental activities.
Material: magnet, metal filings, sheet of paper with a picture of the night sky.
Conducting the experiment. Observe with adults the night sky, in which the Milky Way is clearly visible. Pour sawdust into a wide strip onto the sky map, simulating the Milky Way. We bring the magnet on the back side and slowly move it. Sawdust representing constellations begin to move across the starry sky. Where the magnet has a positive pole, the sawdust is attracted to each other, creating unusual planets. Where the magnet has a negative pole, the sawdust repels each other, representing separate night luminaries.
"Magnetic Theater"
Goal: To develop the creative imagination of children in the process of finding ways to use magnets, dramatizing fairy tales for the “magnetic” theater. Expand the social experience of children in the process of joint activities (distribution of responsibilities). To develop emotional and sensory experience and speech of children in the process of dramatization games.
Material: Magnet, steel clips, sheets of paper. Materials needed for drawing, appliqué, origami (paper, brushes and paints or pencils, felt-tip pens, scissors, glue).
As a surprise for the gnome Wizard's birthday, children are invited to prepare a performance in the theater that uses magnets (the gnome Wizard is very passionate about them).
A “hint” for setting up a magnetic theater is an experiment in which a paper clip moves along a paper screen under the influence of a magnet.
As a result of searches - experimentation, reflection, discussion - children come to the conclusion that if any light steel objects (paper clips, circles, etc.) are attached to paper figures, then they will be held by a magnet and move across the screen with help (the magnet is brought to the screen from the other side, invisible to the viewer).
After choosing a fairy tale to stage in a magnetic theater, children draw scenery on a paper stage-screen and make “actors” - paper figures with pieces of steel attached to them (they move under the influence of magnets controlled by children). At the same time, each child chooses the most acceptable ways for him to portray the “actors”:
- Draw and cut out;
- Making an application;
- Made using origami method, etc.
In addition, it is advisable to make special invitations for the gnome Wizard and all other guests. For example, these: We invite everyone to the first performance of the amateur children's magnetic theater “MIRACLE-MAGNET”.
"Catch a Fish"
Goal: To develop children's creative imagination in the process of finding ways to use magnets and inventing stories for games using them. Expand the transformative and creative experience of children in the process of constructing games (drawing, coloring, cutting them out). Expand the social experience of children in the process of joint activities - the distribution of responsibilities between its participants, the establishment of work deadlines, and the obligation to comply with them.
Material: Board game “catch the fish”; books and illustrations that help children come up with plots for “magnetic” games; materials and tools necessary for making the game “Catch the Fish” and other “magnetic” games (in quantities sufficient for every child to take part in the making of such games).
Invite the children to look at the printed board game “Catch a Fish”, tell how to play it, what the rules are and explain why the fish are “caught”: what they are made of, what the “fishing rod” is made of, how and thanks to which they manage to “catch” paper fish with a fishing rod and magnet.
Invite the children to make such a game themselves. Discuss what is needed to make it - what materials and tools, how to organize the work (in what order to do it, how to distribute responsibilities between the “manufacturers”).
As the children work, draw their attention to the fact that all of them - the “makers” - depend on each other: until each of them finishes their part of the work, the game cannot be made.
After the game is ready, invite the children to play it.
Research work Magnets and their properties (grade 3)
9
Research project
“Magnets and their properties”
One day one of my classmates brought a magnetic toy, a Bakugan, to school. I really enjoyed playing with her. Since then I have been interested in magnets. I began to wonder if everything is attracted by a magnet? Does a magnet always retain its magical attractive force? Is it possible to magnetize an object?
Hypothesis: I assumed that
- magnet attracts all metal objects;
- You can create a magnet yourself if you study the properties of magnets.
Subject of research: magnets, their properties
Purpose of the study: to find out what objects and how a magnet attracts.
Tasks:
define:
- what is a magnet, what shape does it come in;
- identify types of metals that interact and do not interact with a magnet;
- where are magnets used?
- learn to formulate conclusions and make small “discoveries” when setting up an experiment.
Progress of the study:
“Here in front of you is an ordinary magnet,
He keeps many secrets within himself.”
A magnet is a body that has a magnetic field. In nature, magnets are found in the form of pieces of stone - magnetic iron ore (magnetite). It can attract other similar stones to itself. In many languages of the world, the word “magnet” simply means “loving” - this is said about its ability to attract to itself.
There is an old legend about a magnet
.
In ancient times, on Mount Ida, a shepherd named Magnis tended sheep. He noticed that his iron-lined sandals and a wooden stick with an iron tip were sticking to the black stones that lay in abundance under his feet. The shepherd turned the stick upside down and made sure that the tree was not attracted by strange stones. I took off my sandals and saw that my bare feet weren’t attracted to me either. Magnis realized that these strange black stones did not recognize any other materials except iron. The shepherd took several of these stones home and amazed his neighbors. The name “magnet” came from the name of the shepherd.
In fact, more than two thousand years ago, the ancient Greeks learned about the existence of magnetite, a mineral that is able to attract iron. Magnetite owes its name to the ancient Turkish city of Magnesia, where the ancient Greeks found this mineral. Now this city is called Maniza, and magnetic stones are still found there. Pieces of found stones are called magnets or natural magnets. Over time, people learned to make magnets themselves by magnetizing pieces of iron.
The properties of magnets often seem almost magical.
To begin with, I read in children's encyclopedias and on the Internet what a magnet is. Next, I conducted several experiments with magnets.
Experiments
I invite you to my mini-laboratory for further research on the magnet and its properties.
“The important thing is experimentation!
Every moment of it is interesting to us.”
We have a wonderful suitcase in our class - the “Permanent Magnets” laboratory. After opening it and examining the contents, I learned that magnets can come in different shapes and sizes: rectangular, square, round (disc), horseshoe-shaped (horseshoe) or donut-shaped, rod-shaped (rod). Show.
Experiment 1
Equipment:
- bar magnet with unmarked poles
- a few nails
Conducting the experiment:
I'll put some nails on the table. I'll bring the magnet to the nails. The nails were attracted to the magnet.
Conclusion:
The force with which a magnet acts on nails is called magnetic force
.
Experiment 2
Is everything attracted by magnets?
Equipment:
- bar magnet
- gold
- silver
- kit for studying the magnetic properties of materials in a plastic box:
- iron plate
- piece of cardboard
- piece of cloth
- copper plate
- rubber eraser
- nail
- aluminum screw
- wooden disk
- pebble
- clip
- iron screw
Conducting the experiment:
I will bring the magnet to different items from the set. Magnetic force acts on paper clips, nails, iron bolts, iron plate. But it does not work on an aluminum bolt, gold, silver, a piece of cloth, a wooden disk, a rubber eraser, cardboard or copper plates.
Result:
I entered the results of the experiment into a table. (Show slide from presentation).
A table is a diagram for recording the results of an experiment.
Conclusions:
Some metal objects are attracted to a magnet, and some are not attracted to it.
I learned that magnets are pieces of steel or iron. But a magnet only attracts certain metals, such as iron, steel and nickel. Other metals, for example, aluminum, gold, silver, copper are not attracted to the magnet. Wood, rubber, paper, fabric do not react to magnets.
Application in life
Magnets are used to make jewelry: necklaces and bracelets can have a magnetic clasp or be made entirely of magnets (show kids some magnetic jewelry). Magnets are also used in children's toys (show children a magnetic construction set made from balls or another toy).
Experiment 3
Does a magnet work through other materials?
Equipment:
- magnet
- glass jug
- clip
- water
Conducting the experiment:
- I'll throw a paperclip into the jug. I bet I can pull the paperclip out without getting my hands wet.
- I'll put the magnet against the jug at the level of the paperclip. After it approaches the wall of the jug, I will slowly move the magnet up the wall.
Result:
The paperclip follows the movement of the magnet and rises upward until it approaches the surface of the water. Thus, it can be easily taken out without getting your hands wet.
This is because...
...that magnetic force acts through both glass and water. If the walls of the jug were iron or steel, the paperclip would still move, but less easily because some of the magnetic force would be absorbed by the wall of the jug. Using this property in life
Due to their ability to attract objects underwater, magnets are used in the construction and repair of underwater structures: with their help it is very convenient to secure and lay a cable or keep a tool at hand.
Magnets can work through paper, so they are used, for example, to attach notes to the metal door of a refrigerator.
Experiment
4
Equipment:
- thread
- carnation
- magnet
- knife
Carrying out:
I will hang a small nail on a thread and place a magnet near it.
Problem:
How can you make the nail swing like a pendulum without touching either the stud or the magnet?
The problem is solved as follows.
You need to take a knife and then place it between the pole of the magnet and the nail, then remove it. Magnetic force passes freely through all bodies except iron. Iron is a magnetic shield. Thus, when a knife is placed between a magnet pole and a nail, it blocks the path of the magnetic lines of force to the nail, and the nail hangs vertically. When we remove the knife, we thereby give the power lines the opportunity to act on the nail. The nail is attracted to the magnet with greater or lesser force and deviates from the vertical. By doing this, I quite quickly set the nail into an oscillating motion.
Conclusion:
Magnetic force passes freely through all bodies except iron. Iron is a magnetic shield.
Experiment
5
Equipment:
- bar magnet
- 5 paper clips
- 5 nails
Carrying out:
I will hang several paper clips one after another from the magnet so that they form a chain. The greater the magnetic force, the longer the chain can be made.
Conclusion:
Magnets can be weak or strong.
Experiment 6
Which parts of a magnet attract objects more strongly?
Equipment:
bar magnet with marked and unmarked poles, 5 paper clips, 5 nails.
Carrying out:
I'll try to collect the nails using a magnet. ( Show.)
Most of the nails are located along its edges.
To check the result I use a paper clip. ( Show.)
The middle of the magnet has no effect on the paper clip at all, and its ends attract it most strongly.
Conclusion:
From this experiment and from children's encyclopedias, I learned that those areas in which the magnetic field has the strongest effect are called the poles of the magnet
.
Experiment
7
Equipment:
- plastic test tube
- bar magnet unmarked
- bar magnet marked
Carrying out:
I'll try to bring two magnets with their poles to each other. Depending on the orientation of the poles, magnets will attract (opposite poles) or repel (like poles).
I will bring together the marked (same-name) poles of the magnets. They push away.
Now let's place the magnets in the test tube. One magnet hovered over another. This happened because I arranged them with the same poles facing each other.
Conclusion:
Opposite poles of magnets attract, like poles repel.
Every magnet, even the smallest one, has two poles - north and south. The North Pole is usually colored blue, and the South Pole red.
Application in life
The ability of magnets to repel is used on railways in China and Japan. Some high-speed trains do not have wheels: powerful magnets are installed inside the train and on the rails, which are turned towards each other with identical poles. Such trains practically fly above the rails and can reach enormous speeds.
Experiment
8
Equipment:
- bar magnet with unmarked poles
- bar magnet marked
- minicarts
Carrying out:
I'll put the magnet in the mini cart. I'll try to move it with a magnet without touching it. Depending on the relative position of the poles of the magnets, the cart can be “pulled” or “pushed.” (Show.)
Conclusion:
Magnets can attract or repel other magnets.
When approaching, its opposite poles attract, and its equal poles repel. The properties of a magnet are most pronounced at its edges - the magnetic poles.
Experiment 9
Is it possible to create a magnet?
Equipment:
- bar magnet
- two thick needles
Carrying out:
- I rub the needles with one end of the bar about 40 times (I will rub in one direction).
- I will bring the needles one to the other, first from the eye, then from the point.
Result:
The needles either attract or repel, depending on the ends that are brought together.
This is because...
...that rubbing the needles with a magnet caused them to become magnetized. They behave like two magnets, mutually attracting or repelling, depending on the approaching poles.
Conclusion:
Any iron or steel object can be magnetized by rubbing the object against one of the poles of a magnet.
CONCLUSION
Through experience, I learned that magnets are pieces of steel or iron that attract various objects made of iron, steel, nickel, cobalt, chromium, or materials consisting of alloys of these metals. But a magnet only attracts certain metals, such as iron, steel and nickel. Other metals, for example, aluminum, gold, silver, brass are not attracted to the magnet.
There is also a magnetic screen through which magnetic force cannot pass. This is iron.
But the most interesting thing was that you can create a magnet yourself if you rub any iron or steel object against one of the poles of the magnet.
The properties of magnets are used in technology and in everyday life. Magnets are used to lift heavy loads in factories, magnetic devices are used in hospitals for treatment and diagnosis, magnets help people navigate in space, with the help of magnets sound is made audible in a telephone handset and the speaker of a tape recorder and TV, information in a computer and on plastic cards is recorded using magnetization .