The benefits of step-by-step drawing
Parents should understand that it is much easier to teach a child to portray people using sequential actions than through observations and sketches. In addition, you need to remember the benefits of this method of drawing:
- developing the ability to follow clear instructions;
- the ability to separate an entire object into individual parts;
- the ability to bring your own vision into the picture;
- manifestation of independence.
Required Tools
Before creating your first painting, you need to make sure you have the necessary equipment:
- a workplace with good lighting;
- a simple pencil, you can immediately purchase both a soft and hard version, for a small child - preferably with edges;
- paper - individual sheets or album;
- eraser;
- sharpener;
- colour pencils.
Age characteristics
You can start drawing people step by step until you are four years old. The main thing is that the baby can already hold a pencil and be familiar with the existence of simple geometric shapes. What are the features of drawing at different ages:
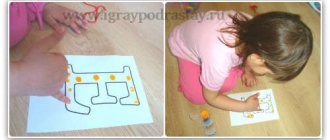
- up to 3 years old, a child will be able to draw a basic man if he uses a prepared template;
- from 3 to 4 years - you can start drawing a person with an image of a snowman or matryoshka doll;
- from 4 to 5 – complicate the picture, add detail to your nesting doll;
- from 5 to 6 – draw a person using simple shapes: ovals, circles, rectangles, lines;
- From 6 years old you can begin to depict people in more detail, draw them in different poses, in motion or at rest.
Consultation on the topic “Drawing a person with preschool children”
Methods of drawing a person in different age groups.
Every child is an artist.
The difficulty is to remain an artist,
leaving childhood.
Pablo Picasso
Drawing is a very useful activity for children, a necessary activity for full and comprehensive development. By drawing, a child learns the harmony of the world around him, becomes liberated, develops his individuality, and becomes a creative person.
The image of a person is the most difficult thing in the development of visual creativity of preschool children, which, gradually becoming more complex, occupies a place in children's drawings throughout preschool childhood.
Children whose attention and visual memory are poorly developed are lost. Basically, in the drawings of children, people stand with their arms outstretched helplessly and their legs spread apart. And only talented, gifted children can convey movement.
Drawing a person should be introduced into work with children as early as possible. Young children are not yet afraid of making mistakes, they like everything, and drawing a person in children’s drawings occupies one of the most preferred places in their visual activity. But the quantity and quality of images of people directly depends on how a child (especially of older preschool age) can do it.
In order for a child to be able to convey his plans in a drawing, he must have visual and technical skills. Often, a child, dissatisfied that his image is not done at the proper level, may simply refuse to draw human figures. Experience shows that due to difficulties in depicting a person, children try to avoid depicting the image of a person in independent creative activities. Based on this, it is necessary to teach children how to draw a person, showing a variety of ways to depict them, in accordance with their age and individual abilities. The main principle of teaching children of any age to draw is clarity: the child must know, see, feel the object or phenomenon that he is going to depict. Children should have clear, precise ideas about objects and phenomena. There are many visual aids used in drawing classes. All of them are accompanied by verbal explanations.
Slide No. 2
Children begin to try their hand at drawing the human figure shortly after three years of age. At this time, they use several basic strokes with which they can portray a person: mom, dad or another family member. The child draws the figure according to the same pattern: “Stick, stick, cucumber, here comes the little man!” The image of a person is preceded by drawing simpler forms - a snowman, tumbler, matryoshka, dolls, where the relationships and shapes of the parts may be somewhat disrupted.
Perception of surrounding life is the basis of teaching methods. Therefore, all images with which lines, circles, and dots are associated must be previously perceived, and not only visually, but in active activity. Active knowledge of the subject creates the prerequisite for active actions when drawing. Children's conversations during work cannot be prohibited; they activate children's thoughts and awaken their imagination. The teacher should skillfully guide these conversations, connecting them with the resulting image. T. G. Kazakova recommends including other means of influence, such as music, in the drawing process. This will further increase the emotional mood of children and, consequently, the figurative expressiveness of the drawing.
During the lesson, children are active all the time; the image that they embody in the drawing should live in their minds. As already mentioned, one of the effective methods of visual teaching is a drawing by the teacher. But educational drawing, even for the smallest children, should be visually literate, not simplified to a diagram. The image should be kept alive, corresponding to the real object. It is important that the visual image from the drawing does not diverge from the image of the real object, then the correct image will be preserved in the children’s memory. Showing drawing techniques is important until children acquire skills in drawing simple shapes. And only then can the teacher begin teaching preschoolers how to draw using visual aids without the use of demonstration.
The image of the object should be in close-up, with a clearly defined shape, if possible isolated from other objects, so as not to distract attention from the main thing.
It is important for all children to maintain faith in their abilities, interest in drawing, and creativity.
Teaching preschool children to depict a person is a complex and painstaking process, requiring the teacher to be able to take into account a number of requirements in his work and create the necessary conditions for children's creativity. It is necessary to find pedagogical techniques that can arouse interest in drawing a person, emotions, and the imagination of children, intensify the drawing process, evoke a desire to evaluate the drawing, and find elements of expressiveness in it.
A child in the world around him does not catch everything that his eyes see, therefore, in classes on developing the ability to portray a person, it is necessary to teach children observation skills in order to more fully and truthfully convey the characteristic features and traits of the person being depicted. In the process of educational work in this direction, children develop an understanding of the created image, the beauty and expressiveness of a portrait drawing.
In addition to all that has been said, a free and creatively created image by a child of the world of people will not only allow him to experience the joy of creativity, the joy of creating expressive images, but also, finally, will help him more easily enter into real relationships with the surrounding world of people, that is, it will provide one of the ways to carry out the process socialization of a preschool child.
Slide No. 3
In the middle group
The teacher is faced with the task of teaching children to correctly depict an object, conveying its main features, structure, and color. Children entering the middle group already have basic visual skills that allow them to convey the shape and some characteristics of objects. This is why the teacher’s requirements for children are increasing. These program requirements are based on developing the ability of more conscious perception, the ability to distinguish and compare objects with each other in the process of their detailed examination before class. That is why in the middle group the use of nature begins to occupy a greater place. Drawing people is quite a difficult, but at the same time interesting activity. In order for the child to want to learn this, try to come up with some story for him about the person you are going to portray. The easiest way to draw a human figure is a circle-head and a triangle-dress. The head is depicted, with an extended sundress towards the bottom. “Snow Maiden” - head, widened fur coat towards the bottom, arms from the shoulder.
Slide No. 4
Draw a horizontal line at the bottom of the sheet, commenting on your actions with the words: “What a wide sundress!”
Slide No. 5
Place a dot in the middle of the top of the sheet. From this point, draw inclined lines to the ends of the horizontal line.
Slide No. 6
Then draw a circle (head) on the top of the equilateral triangle.
Slide No. 7
To the left and right of the vertex of the triangle we draw rectangles, orienting the children to the fact that their length is equal to half the height of the triangle (sundress).
Slide No. 8
The image is supplemented with details (facial features, hair, palms, collar, etc.). Children may not depict legs.
By the end of the year, the image becomes more complex, you can add the “raised hand” movement.
At this age, when depicting a person, a child should learn to show the following in the drawing:
1. Proportions of the figure (ratio of head, torso, arms and legs).
2. The structure of the figure (head, neck, shoulders, torso, legs, etc.).
3. Movement of arms, legs, head.
4. Convey the comparative height of the figure of an adult and a child.
Slide No. 9,10,11
In the older group
Children are encouraged to draw in more detail. You can suggest a drawing scheme from geometric shapes, a head drawing scheme.
Slide No. 12
Children draw a person in clothes. Therefore, before starting to draw, it is necessary to invite children to look at a doll or a child in beautiful clothes. Clarify by asking children the shape of the dress, head, arms, legs, their location and size.
Slide No. 13
Drawing begins with the shape of the body, i.e. from a shirt or blouse, shorts or skirt. We mark the middle of the body, since this line (waist line) becomes a guideline when drawing arms in motion.
Slide No. 14
Next, draw an oval of the head, neck, arms, legs, etc. The length of the arms and legs (approximately) is equal to the length of the combined height measurements of the shirt and shorts (or blouse and skirt).
Slide No. 15
The size of the head depends on whether the picture shows an adult or a child. The size of an adult's head fits 7-8 times the height of the entire figure. In a child, this size ranges from 4 to 5 times.
Slide No. 16
Facial proportions: the head is oval in shape. To depict the face, the head is divided by transverse lines into three parts: from the top to the brow ridges, from the brow ridges to the tip of the nose, and from the end of the nose to the end of the chin. The teacher draws an oval of the face on the board, notes auxiliary lines, explaining that they are noticeable, shows how eyes are drawn, the distance between the eyes is small, no more than one eye, inside the eye there is a colored circle and a small pupil. Asks what is above the eyes (eyebrows). He further explains that a person’s nose is the same color as their face, so you only need to draw the tip of the nose. You can draw the tip of the nose with a short line or depict nostrils. From the tip of the nose to the end of the face, the lips are in the middle.
- Children, look at each other. Do you see that the upper lip is different in shape from the lower? There are, as it were, two waves on the upper lip, and one on the lower lip (draw lips). We draw ears and hair.
Slide No. 17
The head drawing should clearly show facial features, ears, and hair.
All movements of the human figure are performed from the front.
Slide No. 18
In the preparatory group
We introduce children to the human structure. Consider the structure of the human figure and the proportional relationship of parts. The figure shows that when determining proportions, any part of the body, usually the head (its height), is taken as a scale unit. The height of the entire human figure is 7-8 scale units (including the head). The dimensions of the length of the body and head together are approximately equal to the length of the legs. The arms are one unit longer than the body (reach mid-thigh). The arm to the elbow is longer than the forearm; The elbow is at waist level (about halfway across the body). The width of the figure at the shoulders is approximately two units. The legs at the knees are divided into two equal parts.
To make it easier for you to teach how to draw a person, we first teach you how to draw a diagram,
and then from it - a little man. A person has a round head - draw a circle. Short neck - draw a vertical line. Now we draw a horizontal line - this is the line of the shoulders, it is wider than the head. Now I’ll draw a longer vertical line - this is the line of the body, it is equal to the size of two heads. Below I will draw the line of the hips, it is equal to the line of the shoulders. On the body I will mark the waist line, it is equal to half the shoulder line. Now I will draw a line of arms obliquely from the shoulders to the line of the hips. From the line of the hips we draw the lines of the legs; they are longer than the torso.
Several lessons are devoted to drawing diagrams until all children have mastered it, since this is the basis of the basics.
Slide No. 19
In the preparatory group, children depict a human figure in profile. This method is more complicated, but the drawing is more expressive. A profile image conveys movement better.
"Man on the move."
Of course, it would not be easy to draw a person in motion if there was only one way of drawing, because we are all so different and our perception of the surrounding reality is also different.
Fortunately, there are several ways of drawing and everyone can choose the most suitable one for themselves. Today we will talk about three ways
to depict the figure of a moving person.
Slide No. 20
First schematic drawing
- traditional drawing, where we draw the human body with straight lines, and then “dress” it in clothes.
Explanation:
And so, we take a sheet of paper and outline with a pencil, a barely noticeable line, the size of our person. Then, using lines, we depict the human skeleton, taking into account its proportions and the inclination of the torso, head, as well as the position of the arms and legs. Having drawn a diagram, we “dress” a person in clothes. The schematic representation is traditional and well known to everyone, so it does not cause any difficulties
Slide No. 21
The second way is to draw with ovals.
With this method, we convey the proportions of the human body using ovals of different sizes.
To master the method of drawing with ovals, take a blank sheet.
The entire drawing of a person consists of seven ovals the size of his head. That is, the full height of a person will be equal to seven circles, in one of which you will draw the head and neck. With the help of such a scheme, the proportions of the drawing will be strictly observed. The main thing is to draw the ovals the same. Let's try to make a drawing of a standing person and make the markings as on the slide, namely for the head and neck, shoulders and collarbone, chest, abdomen, legs and arms. Apply all these parts of the body to the previously prepared diagram, separately. First, on a drawing of a person, you need to draw an oval for the head, then an oval for the shoulders and circles for the joints. Next, draw two ovals placed on top of each other, the higher oval should be larger than the lower oval, this will be the chest and stomach of the person. Then you need to draw an oval for the hips, and then two ovals attached to the hips, these are the person's knees. The next step is to draw the legs and outlines for the arms as shown in my drawing. Now all that remains is to draw the general shape of the person’s torso and get the outline of a standing person. This is a very simple method, but it is very effective for those who have never drawn a person and helps to maintain exactly his proportions in the drawing. It will not be at all difficult for you to draw the general shape of the human body. Just trace all these ovals and circles with a pencil. The line can be very approximate, because the person in the drawing is standing in clothes, remove all unnecessary contour lines and draw clothes for the person
Slide number 22
The third method is drawing with arcs
, where we can depict a human figure using arcs, long and short, turned in different directions.
Let's take a blank sheet of paper and try to draw, for example, a figure skater. We put a point just above the middle of the sheet (neck), draw two lines down from it, the arcs are wide at first, but gradually narrowing down, the lines are parallel. Then we draw two arcs upward, according to the same principle (hand), see the direction of the lines on the slide. We draw two arcs in the same way parallel to the lower lines, but a little more curved and a little shorter (the second leg in perspective). From the point where we started the drawing, we outline an oval (head), all that remains is to work out the small details, hands, skates, hair, dress. Middle-aged children can easily cope with this drawing, it is so simple.
If you wish and to make drawing easier, you can use all your drawing skills and techniques in one image.
For all methods, without exception, a basic understanding of the proportions of the human body is required.
Simple algorithm
If you are wondering how to teach a 5-year-old child to draw a person, especially if he has no previous experience in such drawings, then you should start with a simple plan of action. Moreover, it will be correct if you first show how to portray a person, and then, if necessary, guide the baby’s hand, helping to repeat the sequence of actions and the correctness of the lines.
- Draw an oval that will become the head.
- Below it we draw a large rectangle, but at a small distance from the oval. This will be the torso.
- We connect the rectangle and the oval using two straight lines - this is the neck.
- Add four rectangles to create arms and legs.
- On the hands we draw the fingers in the form of small rectangles.
- On the legs we draw some kind of boots.
- On the head (on the sides) we add two circles - these are the ears. We add curls inside them.
- We draw facial features. We do this in the most basic way. The eyes are small circles, the nose is a vertical line, the lips are a concave arc.
- Adding clothing items.
- You can start coloring.
I’ll tell you about myself: I’ve never been able to draw people, or maybe I just didn’t want to learn it. Animals, nature, still lifes - that's it, please. My son also has not yet shown interest in this kind of drawings. He loves to depict various types of transport, buildings and nature.
Step-by-step drawing of a man standing
Children 6–7 years old are already familiar with basic drawing techniques. They learned to depict a person in full height, from the waist up, in a static pose and in movement. Drawing from life begins in the preparatory group and in primary school. As auxiliary material in the lesson, it is necessary to have reproductions of paintings, photographs, and samples of work. Before the lesson, it is advisable to talk with children about the beauty and aesthetics of a person, about the fact that each of us is beautiful and unique.
Step 1
As usual, the construction of a figure begins with a simple pencil sketch. First, they look for the correct placement of large body parts on paper. Then there is an image of an oval head and torso, consisting of two trapezoids touching at the waist.
Step 2
From the upper corners of the large trapezoid you need to draw lines of the arms, and from the bottom of the small trapezoid - the lines of the legs. A common mistake is that the arms and legs are the same length; children need to be reminded that the upper limbs are shorter.
Step 3
The next step is to give the limbs volume. The shoulders, forearms, thighs and shins are depicted as elongated ovals, tapering downwards.
Step 4
A difficult task for a preschooler is to draw hands and feet. Therefore, it is often recommended to depict the fingers and palm in the form of a mitten, and the lower part of the leg in the shape of a triangle. But some children are persistent and want a real realistic drawing; they can be explained how small details are made.
Step 5
At the next stage, unnecessary lines are removed and the silhouette is completed. The sketch of the figure is outlined with a pencil, the head is connected to the body. They add a characteristic detail - a ball in the boy’s hand.
Step 6
Now you need to dress the little man, then draw the eyebrow growth lines, outline the location of the nose, eyes, and mouth.
Step 7
The light pencil drawing ends with detailing of items of clothing, shoes, and facial features. Hair is depicted using abrupt lines.
Step 8
To get a natural skin tone, use beige or orange. When coloring, you do not need to press hard on the pencil.
Step 9
When painting clothes, it is better to use different shades of the same color, highlighting light and shadow, so the drawing will be more vivid and realistic.
Preschoolers need complete freedom in creativity.
There is no single and correct drawing option; you cannot correct a child’s work if he wants to act in his own way. If necessary, the right solution can be found through conversation and leading questions.
Basics of Proportions
How to teach a 7-year-old child to draw a person if he already has good experience behind him? It's time to introduce him to the correct proportions of the human body.
- The head is outlined.
- A vertical line is lowered, which will include seven more ovals of the same size.
- The center of the chest is at a distance of two measured units (ovals below the main one, which is the head).
- Three units will lead to the navel.
- The pubic bone is marked after four units.
- The center of the knees will be indicated by a measured area of five heads and the distance from the top of the head to the future eyes.
- The middle part of the shin is 7 units.
It is also important to consider the following points:
- the width of the head and the female shoulder are equal;
- The shoulder width of men is equal to one measured unit;
- the width of the chest corresponds to three units;
- the elbow of the person depicted should be at the level where the thigh begins;
- the oval, which represents the torso, should be larger than the one that represents the pelvis.
How to teach a 5-6 year old child to draw a person: proportions
Teach your child to see the invisible. Before drawing a dressed figure, you need to outline the frame, understand the position of the arms and legs, the direction and rotation of the body relative to the head, etc. Use diagrams; you can always remove extra lines from the drawing with an eraser.
infourok.ru
When a child learns to think in diagrams, he will not have any difficulties when drawing a human figure.
Preschoolers aged 5-6 years can safely explain how the figure of an adult differs from the figure of a child. The module with which we “measure” the figure is the head. A lot depends on how many times the head is “placed” in the diagram of the human figure.
artrecept.com
Show a photo of a child standing next to an adult. Offer to measure (with a ruler, strip of paper, etc.) how many times the child’s head “fits” in his entire figure. Do the same with the adult figure. The child himself will conclude that children have larger heads (relative to the proportions of the whole body).
sovetunion.ru
In adults, the head “fits” 7-8 times (ideally). If you take this into account when drawing a person, the figure will come out proportional and similar.
profymama.com
It is enough to draw a simple diagram several times in order to continue drawing fat and thin people, men, women and children.
Male and female figures are different. These differences can easily be shown in the diagram using geometric shapes. Men have broad shoulders, women have broad hips.
Very soon your child will learn the basics of drawing a person and will be able to portray the whole family!
Drawing of an experienced kid
Older children who understand what human figures are like will be able to draw more detailed pictures with a pencil.
- We schematically draw a future person by making sketches. We depict it with simple geometric shapes.
- We draw the neck, make characteristic curves on it, and decide on the width.
- We depict the line of the shoulders, taking into account whether we are a man or a woman.
- We mark the waist; its width also depends on the gender of our person.
- We draw the arms, mark the elbows and hands.
- Let's start with the legs, draw the presence of the knees, make the hips wider than the shins, draw the feet or boots if our little man is wearing shoes.
- We finish drawing the ears, hair, and do the detailing of the face.
- You can start drawing out the details of the clothing.
- We color our picture, bringing the little man to life.
Recommendations
Parents should understand that teaching a child to draw a human figure can be a difficult task. In this case, the following points must be observed:
- do not push the child, do not expect quick results;
- do not criticize his first attempts, much less laugh at him;
- diligence and consistency of actions, regular training will bear fruit;
- you must always follow the algorithm of actions, do not change points;
- during your first attempts, you can use a template, then samples, and then move on to drawing on your own;
- Praise your child even for the smallest victories.
Now you know how to teach a child to draw a person. Remember the need for consistent training. Never put pressure on your child, demanding quick and high-quality results from him. Do not force drawing if the child does not like this type of activity at all. Creative impulses must come from the heart and be filled with the emotional experiences of the little one.
Summary of a lesson on drawing a person in the middle group “Cosmonaut”
Prydikhina Natalya Yurievna
Summary of a lesson on drawing a person in the middle group “Cosmonaut”
Form of work: subgroup
15 people took part (subgroups of 7 and 8 people).
Goal: Teach children to draw a person.
Tasks:
Teach children to draw a person with a pencil, conveying the characteristic features of the appearance of an astronaut.
Develop the ability to hold a pencil correctly and perform simple actions with it: draw parts of the body consisting of circles and ovals of different sizes.
Develop the ability to convey the shape and structure of the depicted object, taking into account the correct proportions of all parts of the body;
Develop fine motor skills of the hands, aesthetic taste, diligence, desire to draw.
Cultivate: accuracy, perseverance, interest in the results obtained
Preliminary work:
Examination of pictures depicting a person, features of the appearance of an astronaut dressed in a spacesuit. Learning the movements and words of finger gymnastics, physical education, and communicative games. Making riddles on the topic: parts of the human body. Reading the stories of E. Permyak “What are hands for”, “About the nose and tongue”, S. Marshak “We are given one head”. Conversations about the functions of human body parts.
Progress of the lesson:
Educator:
Guys, this week we talked about space and astronauts. What is the name of the first cosmonaut who flew around the Earth?