The topic of this article is do-it-yourself winter crafts for kindergarten. That is, by the hands of the children themselves. There are some peculiarities here that must be taken into account when performing such crafts. Kindergarten children do not yet know how to perform very complex tasks. Their fine motor skills are underdeveloped, they lack strength, and they have not learned to think abstractly and creatively. Everything has its time.
Therefore, kindergarten crafts should be simple - that is, ones that any child of this age could handle. This is the first condition. And there is a second thing: although the crafts are simple, one of the adults must be present when making them. What if a child can’t do even the simplest craft? In this case, adults should prompt and help. In addition, adults should watch how children follow safety precautions when making winter crafts. Although they are simple, the children still have poor skills, their hands do not obey, and therefore, even with the simplest work, the children can get hurt.
Well, besides, adults should give kids creative ideas for crafts. It can be difficult for children themselves to come up with such ideas. Now let’s talk in more detail about winter children’s crafts for kindergarten.
Multi-colored rainbow craft - a simple craft made from colored paper
You need colored paper, 2 cotton pads, 2 pieces of cardboard, glue and scissors. Production time is 20-30 minutes.
This simple but colorful craft can be done while studying weather, precipitation, spring, rainbows, English, mathematics and counting. And also when repeating colors with children of an earlier age - 3-4 years old.
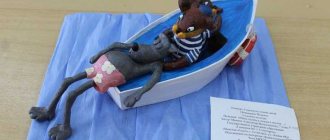
Original works made from cones and acorns
Of course, forest or waste material is always in great demand. Especially in the autumn period. Because the gifts of nature can be found on paths and in parks and forests. If you have a desire to create something ingenious from ordinary pine cones, then here’s an idea for you, go for it.
Pour acrylic paint into a cup and dip each piece. After drying it, place it on any tray covered with oilcloth.
Then, from durable cardboard, you can even use a box, cut out a ring and decorate it with cones, they are glued with a glue gun. Just be careful not to get burned.
Carry out this procedure only together with adults.
Try to glue the cones tightly to each other so that there is not much space between them.
Here's a wreath for you, isn't it cute? I really liked it. By the way, you can also use it as a New Year’s craft.
You can also make a bouquet from them, who would have thought, but it looks so beautiful, especially if the vase is made by your own hands.
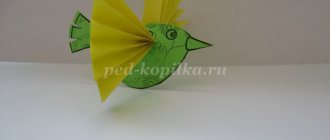
I recently showed you a lot of ideas about what else can be done on this topic in this article. These can be bunnies, hedgehogs, owls, foxes, etc. and any other animals. Here are a few more ideas for inspiration.
I would like to show you one more video. In it you will see a bunch of new products this year. Enjoy watching.
As for acorns, there are also creation options from them. People or animals are usually made, but also cutlery and cups. Additionally, matches or twigs are used.
Well, if you want to distinguish yourself, then make an original thing, this is a brooch. Good luck.
A simple plasticine craft - a willow in a vase
In this lesson, children will learn how to sculpt thin sausages from plasticine and make beautiful applications from them. They will decorate a vase with willow and make branches from cotton swabs.
The craft can be done with children 5 years old when studying nature, preparing for the Easter holiday, as well as when preparing a gift for mother and grandmother. Grandmothers will especially be happy with such a homemade gift!
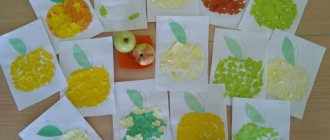
Crafts “Gifts of Golden Autumn” for an exhibition or competition
In my previous note, we have already considered many options for what you can make with your own hands from various types of materials, it can be natural, fruits, vegetables, and even waste. This time I will show you a few more options, which are also no less beautiful and attractive.
And perhaps I’ll start with a non-traditional, but a paper-plasticine miracle. Take cardboard and make blanks of maple and oak leaves. You will also need glue for ceiling tiles and a CD for the job.
Take plasticine of different colors in your hand and roll it into a ball.
Advice! You can use modeling dough instead of plasticine.
Roll out with your hands, as if painting the surface of the leaves.
Glue the finished blanks onto the disk using glue.
Mask the middle with oak leaves and roll up the red rowan berries. This is such a cool masterpiece with an autumn theme.
Do you want to create something extraordinarily cool from real rowan berries? I propose to make a picture of rowan in the form of a squirrel. You need to draw the image of a squirrel on cardboard (from under a box, thick) and then cut it out.
Use decorative tape to connect the edges of two cardboards. Or glue with regular PVA. And then fill the image of the animal with berries. It looks original and beautiful! She's a charmer, isn't she?
The next craft is a flower vase, you can make it yourself. Take any glass container and wrap it with woolen thread or twine. When doing this, first paint the jar with glue. You can see the stages of work below in this figure:
Now prepare the bouquet and place it in a vase. And a gift or souvenir for the exhibition will be ready. Good luck!
Now make a funny little guy in the shape of a sun. Cut out a circle from colored paper, glue eyes, mouth, and nose onto it. Or you can draw all these details with a marker.
Then cover the diameter of the circle with dry leaves.
Also, in order to comfortably hold the sun with your hands, glue a stick. Or then stick it in a glass, which you can also build yourself.
With preschool children in the park, collect dry leaves and then invite them to decorate them with felt-tip pens, or better yet, with acrylic paints.
It turns out to be quite wonderful and cool, you won’t be able to take your eyes off it!
You can go the other way and make a cool bouquet. I remember that I haven’t shown you anything like this before. But, I repeat.
You can give this to your mother, grandmother, or your favorite teacher.
Tasks for each group
To develop creative thinking in children of the nursery and junior kindergarten groups, it is proposed to make simple things. These are mainly contrasting paper applications and simple modeling from plain plasticine.
By the senior group, children's skills are growing and they are mastering new techniques for working with materials. Girls are interested in quilling (creating images using twisted paper parts).
Boys enthusiastically take on the creation of three-dimensional “military” models, reproducing tanks, planes, ships and combat vehicles using parts made of cardboard, wood or plastic.
DIY New Year's wreaths: 40+ master classes of New Year's wreaths for the door
Preparing for the New Year is sometimes even more enjoyable than the celebration itself. The whole family, including the youngest residents, can take part in the interior decorating process. You can decorate an apartment or house for the New Year holidays in a variety of ways, but recently New Year's wreaths, which we know better from romantic Hollywood Christmas films, have become very popular.
Volumetric Christmas tree made of paper: making a craft for kindergarten
From strips of colored paper you can make a postcard or a picture with a three-dimensional Christmas tree. What you will need: Whatman paper for the base, green, brown and yellow paper, ruler, scissors, glue. We cut the green paper into strips of equal width. We cut out a star from the yellow bug, and a stump from the brown one. Glue a stump onto whatman paper, fold strips of green paper into an air loop and glue the ends. We glue a strip of double-sided tape onto whatman paper, onto which we glue paper loops. We make five rows of loops in this way, decreasing by one each time. Glue a star on the top and the craft is ready!
Or, as an option, you can make a three-dimensional Christmas tree in this way:
Snowman postcard: New Year crafts for children
With kids you can make a simple but very original card in the shape of a snowman. You will need whatman paper (for a postcard), colored paper of orange and any other color, and a black felt-tip pen. We make a postcard from whatman paper, glue a horizontal strip of colored paper in the middle and a smaller strip diagonally (it turns out to be a scarf). We draw eyes, mouth and buttons. Cut out a carrot from orange paper and glue it onto the snowman's face. All you have to do is sign and the New Year's card is ready!
Mixed media painting: watercolor and wax
An excellent New Year's craft would be a painting using watercolors and wax crayons. There is no need to run to the store for special crayons; for this you can use a regular candle (preferably not colored). Draw something with wax on a sheet of paper: it could be a snowflake or Christmas trees in the snowdrifts, and then paint it all with watercolors. In places where there is wax, the paint will spread and the baby will get an extraordinary picture.
Do-it-yourself voluminous paper Christmas tree: New Year's crafts for children
A simple three-dimensional Christmas tree for kids. To make this you will need a square sheet of paper and scissors. We fold the sheet into a triangle and once again make cuts in a checkerboard pattern. Next, we unfold the sheet, attach a thread to the top, and hang the Christmas tree! The craft is ready! You will find a detailed MK with photos below.
Christmas wreath made of paper for children: step-by-step master class with photos
Or here’s another version of a paper craft for the New Year in kindergarten. For such a wreath we will need: a cardboard ring, green paper, a red bow (you can tie it yourself from a ribbon), scissors, glue (you can use double-sided tape). We cut the paper into strips of approximately 2-2.5 cm. We fold it like an accordion and glue the outer ends to a cardboard ring. Add a bow and the craft is ready!
Need more paper crafts? We have!
"Little Heart"
Kids really like everything bright and unusual. Then any process of creating a craft is interesting and mysterious. For the proposed option, you will need bright multi-colored paper with a corrugated base plus thick cardboard. An even heart shape is drawn on a thick sheet of paper. You can use a 20x20 cm stencil.
It is necessary to cut it out and additionally cut small squares of 2x2 cm in size from corrugated paper. Small areas of the heart are coated with glue. A square is glued to these places. You will need a toothpick to lift the edges. This fills the entire surface.