An interesting creative technique that both adults and children like is cut-out appliqué. Any crafts made from colored paper are an interesting activity; many have tried their hand at making appliqués.
Carefully cutting out paper with scissors often helps children learn different artistic techniques. You can instill an interest in working with crafts through the most unusual techniques. Studying the features of cut appliqué will help you express your ideas and bring very original works to life.
Features of cut-off appliqué
This technique is simply irreplaceable for the development of intuition and love of creativity. In the process of working, children form a composition on cardboard, they learn to evenly and accurately glue the elements of the composition from paper pieces. Children begin to learn methods of color solving, develop manual motor skills and observation skills, discipline their approach to work, and actively use their imagination.
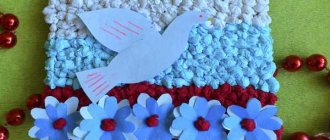
Tear paper applique is one of the types of applique that perfectly conveys the texture of any image. Any image (bird, cloud, plant, tree, person) is depicted using pieces of torn paper. Elements must be of different colors and formats. No scissors are needed here, which will be a plus - children will not get hurt.
Advice. To glue the pieces, you often use a glue stick - it will help avoid spreading. The advantage of the “torn” technique is the absence of scissors, because very young children can injure themselves and others with this tool.
The composition is created quickly and simply; even a child over 4 years old can handle it. Therefore, such creative tasks are often given to children in different kindergarten groups.
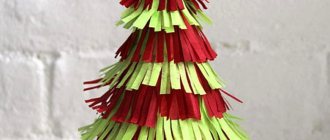
Using napkins for applique
If you tear a napkin into small pieces and stick it on, you will create a volume effect and the craft will turn out airy.
If you are doing a craft with the image of trees, the trunks are cut out or drawn, and the leaves will be light, made from napkins. Pieces of napkins can also be rolled into balls.
Principle of operation
To complete the application, you can follow simple universal rules:
- Choose the basis for the future work. This is most often cardboard, white or colored. The main thing is that it does not get wet from the glue and can withstand the weight of the future composition. An alternative is thick white paper.
- They think through the composition and idea of the future film. The drawing is applied with light strokes onto the cardboard.
- Choose shades of color for the drawing, the overall color scheme.
- Prepare pieces for applique. They need to be cut into different sizes, but it is better to help the baby with this process. At the beginning he will try to do everything “right”, then it will become easier. It is important to tear the paper carefully, then the drawing will be beautiful.
- Take a glue stick and fill the space of the applied pattern with scraps of colored paper. First, large pieces are glued on, and the area is finished by gluing small pieces.
- The surface of the entire pattern is glued in advance, then the small pieces are simply pressed.
- The finished application will look like a mosaic, especially if there are small gaps between the pieces.
Advice: it is better for a teacher or parent to observe how carefully the child glues the composition in order to direct his strength in the right direction in time. It is important not to go beyond the edges of the drawing.
MAGAZINE Preschooler.RF
Abstract of the GCD “Break application” - “Porcini mushroom” in the middle groupGoal: to introduce children to a new technique of working with paper: tearing, performing work using the tearing appliqué technique.
Tasks:
Educational:
- introduce children to the technique of cut appliqué
- master the technique of cut appliqué
- expand children's knowledge about various methods of appliqué
Educational:
- develop children's imagination
- develop fine motor skills of hands
- develop interest in artistic creativity
- develop observation, memory, imagination, attention, logical thinking.
Educational:
- continue to develop emotional responsiveness in children
- cultivate interest in nature and aesthetic feelings.
Equipment and materials for carrying out GCD:
- cardboard with an outline image of a mushroom
- colored paper:
- brown (mushroom cap)
- beige (mushroom stem)
- green grass)
- glue
- glue brushes
- oilcloth - lining
Conducting GCD:
Organizational stage
Educator: - Hello children.
Children: - Say hello
Educator: Guys, this morning I met a forest dweller near the kindergarten. Want to know which one?
Children: Yes
Educator: then guess the riddle: “Under the pines, under the fir trees there lies a bag of needles . (Hedgehog)
Educator: That's right, well done.
Educator: The hedgehog told me a very sad story, he didn’t notice at all how autumn had come, but after autumn the cold season of the year, winter, will come. All the inhabitants of the forest have been collecting berries and mushrooms for a long time, but he has not collected anything. So a hedgehog came to our kindergarten to ask the children to help him collect mushrooms for his family, which they really like to eat in winter.
Educator: Guys, do you agree to help the hedgehog?
Children: Yes
Educator: Well then, today we will go to the forest where the hedgehog lives and we will collect only edible mushrooms, namely the white mushroom, because the white mushroom is the largest mushroom in the forest.
Physical education minute:
Kolya walked and walked and walked and found a porcini mushroom. One - fungus Two - fungus
Three - fungus, I put them in the box.
We looked at everything around us, there are no mushrooms anywhere anymore
And everyone sat down quietly. The teacher reads a poem, and the children imitate the movements of a mushroom picker: they walk,
bend down and put the mushrooms in the box.
Educator: Guys, look at what parts does the porcini mushroom consist of?
Children name the parts of the mushroom (leg, cap)
Educator: Well done.
The teacher shows pictures of mushrooms and an application with the image of a mushroom (ceps).
Children: Looking at pictures
Educator: Today we will make a mushroom (ceps)
To produce our works, we will use a very interesting and unusual type of applique: “Break applique”
You and I will not cut the paper, but tear it off, that’s why it’s called “BREAKING”.
Let's repeat it again:
Tear applique is obtained because we tear the paper and do not cut it with scissors.
Educator: Children, there is cardboard in front of you, and what do you see on the cardboard?
Children: Image of a mushroom.
Educator:
That's right - this is the outline of our mushroom. You also have colored paper on your table - brown, beige and green.
Educator: The paper needs to be torn into small pieces to design our application.
And now we will prepare our fingers for work.
Finger gymnastics “Mushrooms”
Amanita muscaria is a dangerous mushroom Children threaten with their index finger
And the second is a fox, a red-haired sister. Children extend their fingers one by one.
Third fungus mushroom, pink ear
And the fourth mushroom is the bearded old man morel
The fifth mushroom is white
Eat it with confidence!
Educator: Well done! We are ready to get to work.
Educator: First, you need to tear up pieces of paper.
We will tear off small pieces of brown paper from a sheet of paper, then beige and green.
Pieces of paper should be placed in different plates:
- brown (mushroom cap)
- beige (mushroom stem)
- green (grass)
Before we begin, we must review the safety rules when working with glue.
Next stage: Gradually fill in the silhouette of the mushroom with colored pieces.
Apply glue to the silhouette of the mushroom and gradually fill in the inner contours of the mushroom pattern (brown for the cap, beige for the stem, green for the grass) in a mosaic style.
Educator: What beautiful work you have done!
The work was done neatly and beautifully.
Hedgehog: Guys, what big porcini mushrooms you managed to find and make for my whole family. Thank you very much, now we will be full all winter.
Educator: Guys, what a great fellow we are, how many mushrooms we collected today. What mushrooms were we looking for for the hedgehog today?
Children: porcini mushrooms
Educator: Our porcini mushrooms are enough for the winter not only for the hedgehog’s family, but also for all the animals in the forest, let’s take the mushrooms to the clearing.
Children and the teacher organize an exhibition in the group or reception area.
Educator: This concludes our lesson.
| Next > |
Decorating the work
Ready-made compositions can be supplemented with decorative materials. Tasks can be different - in level of complexity, topic, scale and amount of materials. The broken applique in the older group will differ in execution from the younger one, so the process can be complicated.
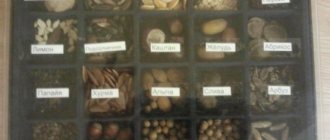
To decorate their work, children can use a variety of available and purchased materials:
- shells, pebbles, pebbles (small);
- dried leaves and flowers;
- beads and seed beads, glass beads, small rhinestones (with precautions and under adult supervision);
- threads, ribbons, bows and wool;
- buttons, buttons;
- parts of old toys.
Children can frame the result of their efforts and present it to a competition or exhibition. But the main thing is that the kids enjoy the creative process. If the painting decorates the interior, the children will be very pleased.
Templates for cut appliqué
It will be very convenient if you prepare beautiful templates in advance for working with scrappy techniques. You can get the template from anywhere:
- cut from a magazine;
- use old coloring books;
- draw with your own hands.
Children can also create these patterns on their own. After all, drawing the outline of a cat or butterfly does not require much skill, just like tearing off pieces of colored paper.
At the first stage, when the baby is just getting acquainted with this technique, you can offer him a ready-made template - for example, from an old coloring book. As they gain experience, children themselves will want to try to draw their own version of the outline drawing. These can be animals, landscapes, clouds, flowers and bouquets, kittens or puppies. The outline drawing should not be too detailed or complex. The main thing is that it serves as a good basis for further gluing with torn elements.
Bunny made of paper
To create such a craft, pre-prepared templates with images of animals are perfect. In the photo of the broken appliqué you can see a bunny; thanks to the use of this technique, an interesting texture is created, the character looks more voluminous.
To create beautiful crafts, you can take templates by cutting them out of magazines, old coloring books, or print them from the Internet. You can also draw the figure yourself on paper or cardboard.
Crafts technique:
- Tear off the paper strips and then finely tear them into pieces.
- Glue these elements like a mosaic onto a pre-printed or drawn image.
- Try to make small distances between the pieces so that they do not overlap each other.
- The nose and eyes can also be torn from dark-colored paper or drawn on.
- Makes a great craft!
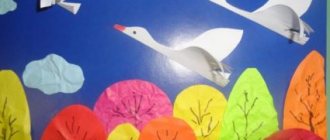
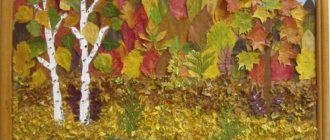
Example of a craft “Autumn Tree”
Let's look at a sample of a broken autumn tree applique. This is a simple and very beautiful option for children in the middle or senior kindergarten group.
For work you will need materials:
- glue stick;
- set of colored paper: yellow, orange, brown, green, blue;
- cardboard base (you can use white paper);
- additional decorations in autumn style: golden beads, small stones;
- a cloth for wiping off glue.
Work algorithm:
- Invite your child to apply the drawing to the base. Let it be a large tree with a lush crown. You can draw the sun and clouds in the sky, and bushes and paths on the ground.
- Next, select the main shade for the wood - yellow, orange, brown. The paper is torn into pieces and evenly pasted inside the contours of the tree. Dark colors are used for the trunk, light colors for the crown.
- They cover the sky with blue pieces, leaving space for clouds.
- The sun is decorated in yellow. Thin rays can be drawn with a pencil or felt-tip pen.
- The finishing touches are glued on – pebbles on the ground, beads on the tree as fruit.
The picture is ready, it can be framed. You can also wipe off any excess glue on the image before the glue dries completely.
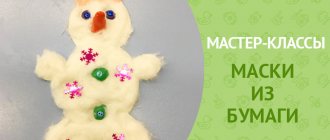
Application using cotton wool
- You will need a piece of cotton wool or cotton pads.
- You can give the children the task of tearing the cotton wool into small pieces.
- Draw images on a piece of cardboard.
- Pre-paint the cardboard or take a colored sheet.
- Decorate the background by gluing pieces of colored paper or painting it.
- Lay out and glue pieces of cotton wool inside the outlines drawn in pencil.
Using this technique, you can also create more complex images, where all the details of the composition, even the smallest ones, are made of cotton wool.
Examples of finished works
For inspiration and ideas, you can look at drawings on the Internet with your children. Examples can be found on various creative sites; it will also be useful to look at art galleries and choose a simple drawing for a further “broken” imitation of the original.
The product of children's creativity can be simple and unpretentious. But this is a very effective means of activating imagination and various skills. And children get great pleasure from working with colored materials. In the process of painstaking work, children become diligent, neat and patient, which is very useful for further development.