Materials for work
Proper organization of a lesson in plasticineography requires the presence of a basic set of working tools:
- Thick cardboard or large sheet of paper.
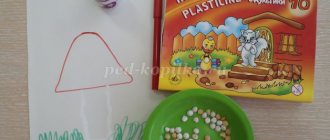
Materials and tools for working with palstiline Depending on the age and practical skills of a particular child or group of children, on the working surface you can draw the outline of an object, the inside of which will be filled by the child.
- Set of multi-colored plasticine. It is not recommended to provide a child with more than 7-8 colors of plasticine, as this may cause distraction. The need to obtain a shade that is not in the presented set will stimulate the imagination of the young creator, as well as encourage him to experiment by mixing the viscous mass.
- Hand wipes and antiseptic. Necessary for removing plasticine residues from the skin of your hands.
- Stacks. Special small plastic knives designed for working with plasticine.
- Modeling board. On a separate wooden surface, the child will create a specific detail of the object by rolling, cutting, smearing plasticine, which will subsequently be transferred to cardboard or paper used as a base.
- Original image. If a child is given a task to create a specific picture, he should be provided with a final image, demonstrating what he should get as a result of his creative activity.
Drawing with plasticine: basic techniques
A number of techniques are already known to children, because drawing with plasticine is preceded by learning to sculpt.
Kids already know how to:
- roll up;
- roll out;
- flatten;
- pull out;
- give the desired shape to a piece of plasticine.
What skills do children acquire when learning plasticineography?
To draw with plasticine, children will have to learn:
- pinch off;
- smear;
- press in;
- smooth;
- mix colors;
- add texture using stacks.
There are many ways to create an image:
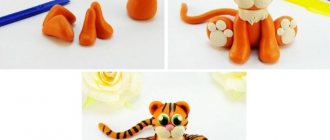
1. Direct . Different colors of plasticine are used. The most popular patterns are vegetables, leaves, mushrooms, and fish. Direct plasticineography is the first acquaintance with unusual drawing. Large and simple shapes are used, which are easy for even kids to work with.
2. Stained glass (reverse) . A drawing is applied to the plexiglass plate with a marker. The resulting contour is filled with plasticine. Reverse plasticineography is very effective. Very often, sour cream lids are used as a base.
3. Mosaic. The figure or design is created with multi-colored plasticine balls. Mosaic plasticineography is very simple. The secret to beautiful drawings is a good selection of colors and accuracy. An example of such a technique is the master class “Cockerel Fish”, the body of which is lined with mosaics.
4. Contour. This method is practiced by older children. The contour is filled with plasticine flagella, which are squeezed out using a syringe. The material must be heated. For this purpose, use either a microwave or hot water. A plasticine sausage is placed in a syringe without a needle and heated along with it.
5. Multi-layered. The material is applied with multi-colored strokes. The painting is created by layering. The result is a three-dimensional image. Like, for example, in a plasticine Easter card.
6. Textured. The convexity of the image varies. Children learn to create high reliefs, bas-reliefs and counter-reliefs. Textured plasticineography is one of the most difficult types, which is why it is taught to children in preparatory groups. Look how we made a fairy tale character - the Gruffalo.
7. Modular. They perform the elements separately using different techniques, and then build a single composition from them. For example, you can create a relief image from flagella, balls and sausages.
Using this technique you can create a wonderful underwater world.
The description is just an example; everyone will have their own fantasy underwater kingdom. See detailed instructions on how to make an underwater world from plasticine here.
To make corals and algae, you can mix colors to achieve beautiful tints. For example, blue, violet, blue, light green and dark green shades are suitable for making underwater plants. Corals and shells are sculpted from pink, yellow, and white plasticine.
When all the parts are ready, they are attached to a painted sheet of paper.
The craft helps you remember what the inhabitants of the underwater world look like and gives you an idea of scale. It uses figures of different shapes, so children will have to remember all the plasticineography techniques they have learned.
When creating a three-dimensional image, children are faced with the concept of measure. If you overload the picture with details, the whole effect will disappear. Instead of a bright and mysterious underwater world penetrated by the sun's rays, you will get a pile of plasticine figures.
The image contains many small and large details, so it will take a lot of patience and perseverance to reproduce all the inhabitants of the seabed.
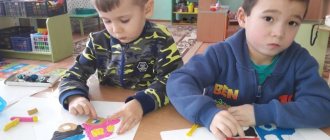
This work is great for group work in a kindergarten group. Children learn the skills of teamwork, distribution of responsibilities, mutual assistance, and they will achieve excellent results!
Templates for plasticineography
Templates must be appropriate for the age of the students. If in the younger group preference is given to simple forms, then in the older groups complex images are created, with many elements, with different relief.
The templates are great for kids to get creative with. At the first stage, the contour is simply filled with plasticine. You can build the work differently and use a template on a sheet already covered with plasticine. A butterfly with a flower is made using this technique.
For this craft, leftover plasticine or old crafts are suitable, because you will need beautiful multi-colored tints.
Small pieces of plasticine need to be smeared on paper, trying to make as thin a layer as possible. Print a template that includes the butterfly outline, stem, three leaves, flower core and petals.
Cut out the printed parts from a plasticine-coated sheet. On white paper, use colored felt-tip pens or wax crayons to draw the earth with strokes. Glue the cut out colorful parts. Sculpt the body of a butterfly from plasticine and create a texture on it using a stack. Using a felt-tip pen, draw antennae for the butterfly and make plasticine eyes.
Pupils of the younger group can also cope with this craft. She teaches how to work with a template and trains the skill of smearing plasticine in an even, thin layer. Cutting out parts from a sheet covered with a layer of plasticine requires care and should not be rushed.
The “recycled” use of plasticine shows that opportunities for creativity can be found in already used objects and seemingly unnecessary items.
Types of plasticineography in preschool educational institutions
At the preschool educational institution, six types of non-traditional plasticine modeling techniques are practiced, each of which has its own characteristics of performing a creative task:
- direct plasticineography - the picture is drawn up on a horizontal surface (children roll up parts from plasticine in the form of “balls”, “sausages”, place them on the base, while the outline of the picture can be applied to the substrate in advance) - starting from the second semester of the first junior group,
- stained glass or reverse plasticine (plasticine parts are laid out on the back side of transparent plastic or plexiglass along pre-applied contours) – children 5–6 years old,
- contour modeling - the picture is laid out with flagella (thin “sausages”) of different thicknesses (a drawing is applied to the base, with flagella laid out along the borders of the image - this gives it volume, then the internal elements of the picture are laid out with flagella) - second semester of the second junior group or middle group, depending on the level of preparedness of children, in particular, the development of the ability to roll thin sausages or squeeze plasticine from a syringe,
- multi-layer modeling - the image is obtained by sequentially applying layers of plasticine (from “flat cakes” of different colors we make a “layer cake” from dark to light shades, we bend the workpiece in the center or roll it into a “sausage”, cut it into parts) – older groups,
- mosaic technique - laying out a picture with plasticine balls of different sizes - second junior, middle groups,
- modular modeling - elements are made using different types of techniques (“balls”, “sausages” of direct technique, contour flagella, etc.), and then these modules are assembled into a single composition,
- textured technique - creating plasticine paintings of varying degrees of convexity (bas-relief - the image stands out from the background by less than half, high relief - the image appears above the background by more than half, counter-relief - the drawing goes deeper into the background) - preparatory group.
Video: contour plasticineography - master class
Photo gallery: examples of crafts in different types of plasticine
Direct plasticineography is the initial level of crafts that can be laid out in contours or placed on a substrate without them
Modular plasticineography combines elements of different shapes: balls, flagella, sausages, etc.
Textured plasticineography involves using elements of varying degrees of convexity
To make a background for stained glass plasticine, it is enough to place a sheet of paper with contours printed on it under a transparent base, and the craft can be made with different types of plasticine designs, including multilayer
To complete multi-layered crafts, children require a certain amount of muscle strength to make the transitions smooth.
For contour plasticineography, flagella of different thicknesses are used.
Video: reverse plasticineography technique
Plasticineography circle work
The plasticineography circle is organized with the aim of expanding the range of topics for crafts, as well as to attract additional materials into the creative process.
List of useful resources for club activities
Before you start developing a work program for a circle for drawing with plasticine, you need to familiarize yourself with the intricacies of the methodology for working with preschoolers in this type of modeling technique:
- Davydova G.N. Plasticineography for kids. – Scriptorium, 2003,
- Shnitskaya I. O. Application from plasticine D.: Phoenix, 2008,
- Yanushko E. A. Modeling with young children (1–3 years). Methodological manual for educators and parents. – M.: Mosaic - Synthesis, 2006.
Circle work gives additional time to create complex paintings from plasticine
Self-education materials
As materials for self-education as part of mastering the technique of plasticineography in a preschool educational institution, the teacher needs to get acquainted with the developments in the field of development of fine motor skills using modeling in preschool children of different ages:
- Anishchenkova E. S. Finger gymnastics for the development of speech in preschool children. – M.: AST: Astrel, 2006,
- Bolshakova S. E. Formation of fine motor skills of the hands: Games and exercises. - M.: TC Sfera, 2009,
- Koltsova M. M. Motor activity and development of child brain functions. – M.: Pedagogy, 1973,
- Pavlova L. The importance of developing hand actions // Preschool education. 1984, No. 1,
- Tsvintarny V.V. We play with our fingers and develop speech. - St. Petersburg: Hardford, 1996.
Important nuances of drawing up a work program for a circle
Drawing up a program for a circle based on plasticine drawing includes taking into account the following aspects:
- features of the age of the wards (mastery of the types should be built sequentially, and the techniques should correspond to the muscular strength of the kids, for example, smoothing is mastered only with older preschoolers - kids simply do not have enough strength to smooth out the transitions of shades and elements),
- form of conducting lessons (games - for younger and middle groups, plot stories - for older preschoolers),
- methods and techniques of interaction with children (with kids these are mainly verbal methods, in older groups - practical),
- equipping classes (involving ICT),
- lesson schedule (usually one lesson per week, with children 5–7 years old it is possible to conduct two lessons per week),
- expected results of work,
- list of topics for classes.
Fragment of the activity program of a plasticineography circle for children 5–6 years old
In my practice, in the work program of the circle on non-traditional modeling techniques “Plasticine Crow” in the senior group, I covered the following positions:
- using a computer and a multimedia projector to demonstrate finished works, templates and videos with the procedure for completing crafts, which contributes to the development of creativity in children,
- working hours of the circle - classes are held 2 times a week after naps,
- lesson duration - 30 minutes,
- Among the themes being developed are “Expanses of Space” (mosaic plasticine), “Blooming Apple Orchard” (contour drawing with plasticine), “Gzhel” (stained glass plasticine), etc.
It should be noted that thematic planning with a description of the objectives of each lesson forms the main part of the program.
Table: Chernyshova A.A. fragment of thematic planning for a plasticineography circle in the senior group for September
| Order number | Topic name, main tasks | Number of hours | the date of the |
| 1 | Introduction.
| 1 | September |
| 2 | "Snake"
| 1 | |
| 3, 4 | “What is autumn without mushrooms”
| 2 | |
| 5 | “Autumn Forest” (landscape)
| 1 | |
| 5 | “Let’s decorate the service” (still life)
| 1 | |
| 6 | "Let's decorate a tie for dad"
| 1 |