Autumn painting made of plasticine
Let's start with the most difficult, and at the same time, the most exciting task - sculpting an autumn landscape. To do this you need to prepare in advance:
- a thick sheet of cardboard, preferably blue, which in the picture will depict a blue autumn sky and the same blue autumn distances;
- plasticine of various colors;
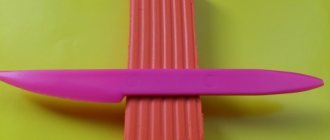
- stack (this, if anyone doesn’t know, is a special knife for cutting plasticine, which is usually sold along with a package of plasticine);
- a smooth board without roughness or burrs for rolling out plasticine;
- paints and brush (optional).
Let's start creating.
- From plasticine of all autumn colors (yellow, brown, red) we roll out sticks of different thicknesses and lengths.
- Having prepared plasticine sticks, we begin to make autumn leaves from them. Of course, fashioning a piece of wood from plasticine is a difficult task, but in this case it is not necessary. We make spirals from plasticine sticks (aka “snails”). To do this, the stick needs to be rolled into a spiral - a task that any child can easily cope with.
- Having made a sufficient number of spirals, we begin to stick them to the cardboard, forming the crown of the tree. What exactly the crown should look like in terms of size, contours and color palette depends entirely on the child’s imagination.
- Having finished with the crown, we begin to make the trunk and branches of the tree. We roll out sticks of different lengths and thicknesses from black or brown plasticine. These are fragments of tree trunks.
- By the way, about the color scheme. It is not at all necessary that the trunk be exclusively black or brown. Maybe the child is an impressionist or abstract artist at heart, and sees the autumn forest in his own way - in some other colors. Well, so much the better, and there is no need to convince him of anything.
- We begin to form a tree trunk from the bundles. Of course, it should be below, under the crown. We stick several flagella to this place from top to bottom. We try to keep them parallel to each other. Several flagella under the crown are already a full-fledged trunk.
- We make many more flagella of different colors. Roll them into spirals. These are fallen autumn leaves. We place them below under the tree.
- In this way you can sculpt one tree. Or maybe several at once. You will get a full-fledged plasticine grove.
- We make a circle and thin sticks from yellow plasticine. This is the autumn sun and rays. We stick them on top of the picture.
- If you have the desire and ability, we paint the space between the trees or around the tree in autumn colors. It will turn out great - both plasticine and paint.
- Finally, we prepare a frame for the picture (what is a picture without a frame?). To do this, we make long plasticine strips of any color and paste the picture along the contour. You can do this using simple plasticine strips, or you can weave several strips in the shape of a braid - it will be even more beautiful.
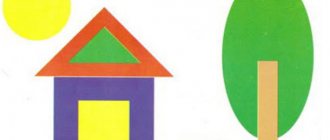
The result will definitely be a highly artistic product - a real autumn plasticine landscape. For example, like the one in these photos.
This video will tell you how best to make a picture from plasticine.
This video will teach you how to sculpt a beautiful autumn tree from plasticine.
Each tree consists of fragments: trunk, crown, individual branches, berries and leaves. They also need to be able to sculpt beautifully. How to do this better, look at another video.
Autumn words and pictures.
It would be quite useful to look at pictures with your child on the theme “Autumn” and study “autumn” words: leaves, rain, umbrella, puddles, falling, mushrooms, leaves, yellowed, etc.
Will help:
— Colorful autumn presentations.
— Autumn pictures that you can hang on the walls and periodically discuss them with your child.
— A selection of autumn photographs that can be viewed on a computer screen or printed as cards.
Just look at the illustrations with your child, name the objects that are depicted on them (cloud, leaf, tree, fallen leaf, wet puddle, etc.), ask to find the objects in the picture (show with your finger, where is the tree?), describe what what is drawn in the pictures in simple sentences (it is raining, there are puddles on the ground, the girl is dressed warmly, etc.).
Making mushrooms
The autumn forest is so rich in mushrooms! That’s why I really want to sculpt them from plasticine! They are beautiful both on their own and as part of a plasticine autumn landscape. Once sculpted, they can be placed in the above-mentioned painting, and as a result it will turn out even more beautiful.
This miracle of nature is very easy to put together:
- First, we sculpt a mushroom stem from plasticine of any color;
- then we make a hat. It is clear that its production also requires plasticine of all colors. Real fungi, as you know, have caps of all kinds of colors;
- connect the stem and the cap.
It is clear that if fungi are supposed to be placed in the picture, then they should be flat.
You can also sculpt three-dimensional fungi – in their natural form. Making them is no more difficult than mushrooms for application.
By the way, about the volume
Plasticine is a fertile material for creativity. They can be used to sculpt full-fledged three-dimensional figures. Mushrooms have already been mentioned. And, besides them, the child will happily make other gifts of autumn nature: a variety of vegetables, fruits, a whole bunch of grapes, and even a head of cabbage. In general, whatever he wants and can do. Moreover, sculpting all this beauty is not at all difficult. Here, look at the photo.
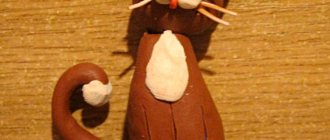
How to sculpt different animals
Children love animals very much, and willingly draw them and sculpt them from plasticine. Well, that's great. We'll show you how to do it better.
Let's start with the snail. It's not difficult to make.
- We sculpt the body of evidence. It should resemble a carrot: one end is thicker, the other is thinner.
- Bend the carrot at a right angle.
- From the thick part we make the head of the snail. At the very top we stick two plasticine sticks with spirals at the end - snail horns. A little lower – we make the eyes. They can be sculpted from plasticine, or you can stick store-bought ones. Below the eyes we stick a plasticine mouth.
- A snail's house can be made from different materials. First of all, of course, from plasticine. To do this, roll the plasticine into a thin strip, twist it into a spiral and place it on the snail’s back. In addition to plasticine, chestnut or walnut look great as a house.
Now let’s sculpt a beautiful caterpillar.
The good thing about this craft is that even a very small child can do it. As a matter of fact, children's “plasticine” creativity in most cases begins with the creation of a caterpillar.
- We make balls of any color from plasticine. It is better if each subsequent ball is smaller than the previous one.
- We place the balls in a row, starting with the largest (this is the caterpillar's head) and ending with the smallest (this is its tail).
- We connect them with thin soft wire or fishing line. A very young child will probably not be able to cope with this operation, so he needs help.
- We place horns on the caterpillar's head. They can be made from ordinary matches or from plasticine.
- We give the caterpillar a face: eyes, nose, mouth. It’s better to stick on store-bought ones, and everything else is made from plasticine.
- If desired, make plasticine legs for the caterpillar (two for each ball on both sides). And, of course, the handles: they are attached to the ball that follows immediately behind the head.
The cheerful, mischievous, cute caterpillar is ready!
And if you also attach wings to it, you will get a wonderful dragonfly or butterfly.
Of course, it is impossible to talk about all their plasticine products in one article. Yes, this is not necessary. Another thing is more important - to introduce a child to creativity from a very young age. And the easiest way to do this is with plasticine. In general, we create, we dare, we comprehend the world! And plasticine helps us!
Plasticine craft ideas
How to sculpt with kids
Some useful tips for sculpting with kids:
- Start as early as possible. Is your baby almost a year old? - it's time to introduce him to dough or soft mass for modeling. Let him just pinch off pieces or make dents. This is very useful for the baby. In any case, much more useful than learning to “read from the cradle.”
- The younger the child, the softer the material for modeling should be. Start with salt dough or a special modeling compound such as Play Doh.
- Plasticine allows you to do things that cannot be done with dough or mass. Therefore, do not delay your acquaintance with this material. But for starters, also choose the softest one possible, for example, Beam Krokha (Labyrinth, Ozone, My-shop).
- At first, classes can last 5–15 minutes, but over time the duration of the class can be increased.
- Prepare materials and tools for sculpting in advance. Remove everything unnecessary from the table.
- Come up with a plot for each lesson, play it out. This way you can keep your child interested in modeling.
- Repeat activities that your child especially liked. But don't forget about diversity.
Store your child's crafts in a special folder, and don't forget to show off your work to guests.
Also, for variety, I recommend using ready-made manuals for classes, which I will write about at the end of the article.
I find most of the ideas for modeling in Elena Yanushko’s book “Sculpting with Young Children” (Labyrinth, Ozone, My-shop).
This manual contains a detailed description of the progress of each of the 153 lessons. This includes what you can say to your child to get him involved in a particular activity.
They are designed for children from 1 year old to at least 3 years old. They do not require complex preparation.
Modeling + color study.
Review with your child two pieces of paper printed on a piece of paper. One of them is red, and the other is yellow (Download a picture with leaves
).
Only the mice ate holes in the leaves! This needs to be corrected urgently.
To play, you will need pre-prepared lumps of soft plasticine - yellow and red.
Show your child that “we will put red lumps on a red leaf and press them down with our fingers, and yellow lumps - on a yellow leaf, so we will close all the holes!”
Most likely, at first the child may get confused and put lumps of plasticine on a leaf of the wrong color. Therefore, actively help your child complete the task - say the name of the color he is currently working with, and tell him which piece of paper to attach the plasticine to.
This game not only develops modeling skills, but also helps to remember colors - during the work, the child will hear the words “red, yellow” from the mother many times, and this will definitely affect how quickly the baby remembers the names of the primary colors.
(When I give similar tasks in the early development group to children from 1 to 2 years old, then first (over several lessons) we always do “preparatory” exercises - we attach yellow plasticine berries to yellow plates drawn on paper, and red “berries” - on red ones, or we attach yellow/red lumps (apples) to yellow and red baskets drawn on paper, etc. - i.e. first we learn to attach yellow plasticine separately from red in a more free form, and only then make it more complicated , asking to attach the plasticine to a certain place).
Lacing - mushrooms
Starting from 1.5 years old, your child can learn to string beads on a cord. To teach this skill, it is better to purchase a set of children's beads, which comes with a cord with a wooden needle.
Since our activity is in the autumn, you can string leaves or mushrooms from paper glued onto cardboard onto a string.
You can download the file with mushrooms and leaves by clicking on the image below. Each pair of mushrooms in this picture is “mirror”, so if desired, the mushrooms and leaves can be made double-sided (glued to each other).
A game to develop attention - “find all the leaves in the room.”
Place the leaves throughout the room. Place some of them in visible places, and hide some, but so that the child can still find them.
Ask your child to find all the leaves and put them in a bucket.