Although every child knows what frogs look like, it can be difficult for him to depict them from memory (or even looking at a photo). The body of these amphibians has a unique shape that is difficult to immediately replicate. To figure out how to make a frog from plasticine, you can use step-by-step master classes that offer various ways to create these cute swamp inhabitants.
- Step-by-step instructions on how to make a frog from plasticine
- Rules for sculpting small parts and recommendations for working with plasticine
- What is the difference between light plasticine and regular plasticine?
- Options for which frogs can be molded from plasticine
- Application of plasticine frogs on cardboard for beginners and children
- Simple volumetric crafts of frogs from plasticine
- Princess Frog
- A simple frog for kids and beginners
- Realistic frog
- Combination with other materials
- Detailed crafts of the frog princess
- Photo examples of finished crafts and paintings of frogs molded from plasticine
Once you learn how to collect a frog, you shouldn’t stop there. You can fashion him a friend, a family, or create a whole large lake full of amphibians - the baby will get better at each new craft, and repeating the same actions is useful for the development of logic and fine motor skills.
Step-by-step instructions on how to make a frog from plasticine
Amphibians are not only green. The frog can be made beige, brown, or even yellow.
We sculpt a frog from plasticine step by step:
- Roll into a ball and flatten it slightly to form a body.
- Make two identical sausages and mold their ends.
- Attach the legs to the body.
- Stick eyes made of white and black circles onto the face.
- Create a “face” with a stack.
- Roll two paw balls, flatten them and scratch your fingers on them.
- Make a water lily sheet from plasticine of a different color.
- Glue the paw to the base, and the body on top.
The figurine is ready, all that remains is to decorate it with a pink flower.
Let's make a frog together
Below we will look at how to make a frog from plasticine. There's nothing complicated about it. But to make a plasticine frog beautiful and believable, follow the mandatory tips.
- Prepare green and white plasticine.
- Roll two balls from green plasticine. One ball should be slightly larger than the second.
- Stick these two balls together.
- Make two more small green balls and attach them on top, next to each other.
- To make the eyes, stick thin white circles onto two small green balls. Now form pupils from any other color, for example, blue and stick them to a white base.
- Push through the nostrils and mouth with a toothpick.
- How to make hind legs? Roll two sausages from the green mass, then bend them and flatten the front part so that it looks like flippers.
- Secure the limbs to the lower body.
- Make the front legs shorter than the hind legs. They will be straight, but the foot should also be flattened. The frog has three “fingers” on each leg. Mark the membranes with a toothpick. The plasticine frog is almost ready.
- You can place it in any position. She can sit, lie on her belly, or even stand.
- The assembly order can be changed, as well as the colors.
The plasticine frog is ready. It turned out cute, and the child will certainly be delighted with his own craft.
Rules for sculpting small parts and recommendations for working with plasticine
Subtleties of working with plasticine and useful tips:
- It is best to sculpt crafts on a special mat, but you can replace it with a sheet of plastic or linoleum.
- The plasticine should be cut in small portions, and the remaining pieces should be immediately glued onto a block of the desired color.
- The mouth, nostrils, fingers and other small details are cut out using stacks or toothpicks.
- To prevent the plasticine from sticking to your fingers, they are periodically moistened with water (to do this, you need to place a convenient container on your work table).
- It is better to assemble crafts starting with large parts and gradually adding smaller ones to them.
- By mixing pieces of different colors you can get new shades.
When working, you must ensure that the plasticine does not fall on the floor and does not get tangled in your hair.
What is the difference between light plasticine and regular plasticine?
Light plasticine (also called air plasticine) is a colored self-hardening mass that does not stick to your hands and does not have an unpleasant odor. The material hardens completely in the open air within several hours (this depends on the size of the finished product). After this, crafts made from light plasticine cannot be deformed or stick together, and they can be played with like plastic figures (or put on a shelf and admired).
If a child is interested in modeling, then the Frog Princess made of light plasticine can become the first figurine in a collection of fairy-tale characters that he will gradually collect.
Summary of the modeling lesson “Meeting of Ivan Tsarevich with the Frog Princess”
Summary of organized educational activities in the preparatory group “Meeting of Ivan Tsarevich and the Frog Princess”
Koklyaeva Anna Viktorovna
Preparatory group teacher
MADOU d/s "Parus"
Notes on the lesson modeling in the preparatory group
Meeting of the frog princess with Ivan the prince.
Program content:
Development of creative abilities through modeling. Improving the skill of using plasticine. Formation of a sense of composition, proportion, and dynamics of action.
Improve the ability to work with various materials (plasticine).
1. improve knowledge of the concepts of round, rectangular and square shapes; consolidate the skill of forming in two ways (patterning and in-depth relief), teach children to carefully use plasticine.
2. develop children’s constructive abilities;
develop memory, logical thinking and attention. Cause the need to supplement the main image with details
3. cultivate respect and attention, and patience for each other, careful attitude towards surrounding objects, cultivate the ability to correlate one’s actions with the actions of an adult.
Equipment
: arrow with a note, pictures - with the image of a frog, plasticine, stacks, cardboard.
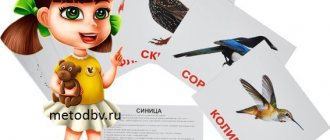
Demo material
: cards with images of frogs, a book with illustrations (a large book of fairy tales)
Handout
: plasticine, stacks, cardboard.
Preliminary work:
reading the Russian folk tale “The Frog Princess”, looking at pictures of a frog, guessing riddles. Conducting didactic games: lotto “In the world of fairy tales”.
Progress of classes:
The children are engaged in independent play activities.
1. Introductory part
Educator: Guys, I was watering the flowers here, I don’t understand what this is lying here? Let's collect the toys and see what they are?
Children's answers (arrow)
Educator: There’s another note here, let’s sit down on the chairs and I’ll read you what’s written here.
“Hello guys, my name is Ivan Tsarevich and I need your help. My bride is lost, help me find her."
Educator: Guys, can we help Ivan Tsarevich?
Children's answers (yes)
Educator: Wait, Ivan Tsarevich, arrow, bride, what fairy tale is this from?
Children's answers (The Frog Princess)
Educator: let's guess the riddle:
“An arrow flew and fell into a swamp,
And in this swamp, someone raised her.
Who, having said goodbye to green skin,
Options for which frogs can be molded from plasticine
Detailed master classes explaining how to make various frogs from plasticine.
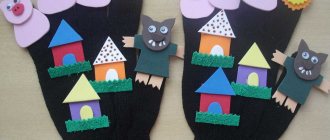
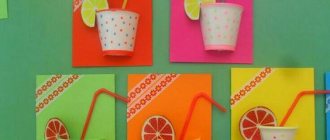
Application of plasticine frogs on cardboard for beginners and children
Assembling a mosaic applique from plasticine is not only exciting, but also useful. Rolling a large number of identical balls develops fine motor skills and the baby's eye.
Plasticine frog applique for children step by step:
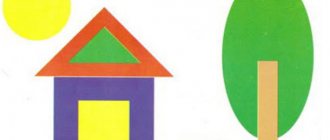
- Draw (or print) a diagram of the drawing.
- Fill the outline with green balls, starting from the top.
- Make a mouth out of the red sausage.
- Decorate the knees with light spots, and the tips of the paws with brown pieces.
For applique you should use thick paper or cardboard. Regular office sheets are too thin for such heavy material.
Simple volumetric crafts of frogs from plasticine
When sculpting figures, it is not necessary to completely repeat the proposed master classes: starting from them, you can create your own unique crafts.
Princess Frog
To interest your child in modeling, you should invite him to make a cute Frog Princess. To do this, you need to sculpt an ordinary figurine of an amphibian and decorate it with a crown (you can add an arrow if you wish).
Step-by-step sculpting of the Frog Princess:
- Make a body out of two balls, slightly flattened horizontally.
- Roll two pairs of sausages and shape them into paws, as shown in the photo.
- Glue the hind legs to the sides of the workpiece.
- Attach the front legs.
- Form a stack of fingers.
- Make eyes and draw a muzzle.
- Make a crown from yellow plasticine.
Depending on the age of the author of the craft, you can increase the number of details.
To make the teeth of the crown neat, they are cut with a stationery knife on a plane, and then the part is twisted, and if it is difficult for a child to make an arrow from plasticine, it can be replaced with a toothpick.
A simple frog for kids and beginners
Following the step-by-step photo of how to make a frog from plasticine, an older child will be able to assemble the figurine on his own. Adults can prepare the blanks for the baby, and all he has to do is assemble the craft.
Modeling in the preparatory group “The Frog Princess”
Group: preparatory (age 6 to 7 years)
Program content:
Educational:
- To develop children’s ability to convey the proportional relationship of parts and details (torso, head, paws, eyes).
- Strengthen the ability to cut out a variety of objects using previously learned techniques.
Educational:
- Develop fine motor skills of the hands, coordinate the work of the eyes and hands.
- To develop children's creative abilities, attention, thinking, memory.
Educational:
- To cultivate perseverance and interest in artistic creativity and modeling.
- To cultivate a love for Russian folk art and fairy tales.
Preliminary work: reading the Russian folk tale “The Frog Princess”, looking at illustrations for the fairy tale.
Materials: plasticine for each child, a set of stacks, modeling boards, multimedia projector, DW disk for each child.
Progress of the lesson
(children enter the art studio and stand in a semicircle towards the multimedia projector screen)
Teacher: Good afternoon, guys, look at the screen. Today we will start our lesson with a journey through a fairy tale.
Try to guess what this fairy tale is called? Several objects appeared here (arrow, bow, needle).
Children: (list fairy tales).
Teacher: That's right, these objects are from the Russian folk tale “The Frog Princess.” Today we will sculpt one of the main characters of a fairy tale, or rather one heroine of this fairy tale. Who do you think we will sculpt?
Children: The Frog Princess.
Teacher: Now let’s remember the fairy tale a little.
- What words does the fairy tale begin with? (In some kingdom, in some state)
- Where did Ivan Tsarevich's arrow hit? into the swamp)
- What is the real name of the frog? (Vasilisa the Wise.)
- Why did Vasilisa the Wise become a frog? (She was a princess who was bewitched by Koschey the Immortal.)
- Where and when did Ivan Tsarevich first see the frog in the guise of Vasilisa the Wise? (When the king invited everyone to the feast)
Teacher: You know the fairy tale very well. Now I invite you to a fairy-tale workshop, where I will first tell you how to make a frog (children stand at their convenience in front of a multimedia projector and perform movements to the music that are projected on the screen)
Teacher: Go to the board and carefully look at the picture. Who is in this picture? What does the frog hold in its paws, what is on its head?
Children: (they list the arrow, and a crown shines on its head)
Teacher: Let's look at the sequence of sculpting a frog (the teacher shows how to sculpt a frog)
- First we’ll make the body: roll it into an oval. Don't forget about proportions (the head is smaller than the body)
- Now let's roll up the future head of the frog princess - a small ball, make a mouth out of red plasticine with a crescent, and make two nostril points with the tip of the stack. For the eyes we will need to roll two small green balls, which we attach to the head. We attach a small white ball to each eye and a small black pupil in the middle. Now the frog looks at us and smiles.
- Now we need to connect two main parts - the body and the head. Attach the two hind legs to the sides of the body. Now our frog can sit comfortably on the water lily. Also mold two front legs with membranes at the tips, which we make using a stack, and connect them to the finished craft.
- The frog itself is already ready, but we still need to sculpt a few additional details. For example, a crown, because without it she would not be a princess. Make an accessory from yellow plasticine. Plant the swamp princess on a green leaf - a water lily.
- The habitat for our future frog is ready - it will be a pond (the discs are coated with blue).
Teacher: Come in and take a seat in our fabulous workshop.
First, heat the plasticine in your palms until it becomes soft. Pay attention to the sculpting sequence. Those who sculpt quickly can sculpt Ivan Tsarevich if they wish (pupils sculpt on their own to calm music)
Reflection.
Teacher: Look what a wonderful pond we have, and what frog princesses live in it.
- Which frog did you like best? Why?
- What was the hardest thing to put together?
Teacher: Funny little frogs invite you to dance their playful dance with them.
Musical physical school
DIY plasticine frog with photos and videos
When the baby is about two years old, you can start modeling with plasticine. This work will not only develop creativity, but also fine motor skills.
In addition, many children like this type of creativity because the figures turn out to be very realistic and fun.
One of these could be a frog made of plasticine; you can learn more about making crafts from the material below.
Making a frog is not difficult, but you need to spend your time to complete it with your baby. It is important while working to try not to force the baby to do something, but simply sculpt all the parts together in a playful manner, while playing. Then you can be sure that the child will enjoy the process, and in the future he will increasingly turn to plasticine to make some interesting crafts.
Cheerful wah
For children, plasticine is a very convenient material with which you can create anything. You can decorate a shelf in a nursery with such crafts or play with them.
Let's make a frog together
Below we will look at how to make a frog from plasticine. There's nothing complicated about it. But to make a plasticine frog beautiful and believable, follow the mandatory tips.
- Prepare green and white plasticine.
- Roll two balls from green plasticine. One ball should be slightly larger than the second.
- Stick these two balls together.
- Make two more small green balls and attach them on top, next to each other.
- To make the eyes, stick thin white circles onto two small green balls. Now form pupils from any other color, for example, blue and stick them to a white base.
- Push through the nostrils and mouth with a toothpick.
- How to make hind legs? Roll two sausages from the green mass, then bend them and flatten the front part so that it looks like flippers.
- Secure the limbs to the lower body.
- Make the front legs shorter than the hind legs. They will be straight, but the foot should also be flattened. The frog has three “fingers” on each leg. Mark the membranes with a toothpick. The plasticine frog is almost ready.
- You can place it in any position. She can sit, lie on her belly, or even stand.
- The assembly order can be changed, as well as the colors.
The plasticine frog is ready. It turned out cute, and the child will certainly be delighted with his own craft.