Didactic game "Seasons"
The middle group plays, preschoolers 4-5 years old.
The purpose of the didactic game “Seasons” is to form and consolidate knowledge about the sequential change of seasons, instilling a respectful attitude towards nature.
The activity helps preschoolers:
- remember the seasons of the year and the sequence of their alternation;
- correctly identify visual seasonal signs;
- consolidate ideas about the features of the 4 calendar times;
- develop observation, visual memory, ability to concentrate, speech skills;
- cultivate love in nature, a caring attitude towards its objects;
- see natural beauty in all seasons.
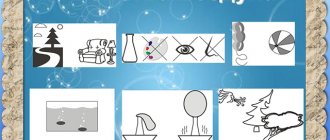
For the game, you need to prepare 4 illustrations depicting the same landscape in different seasons, cut out cards with depicted signs, objects and phenomena of each season.
Children look at pictures of seasonal landscapes. The teacher shows the cards one after another, and the students choose images that correspond to the selected illustrations of the seasons, name what is depicted, and explain the choice. The first participant to choose the correct cards without errors wins.
For older groups, the game can be complicated.
To make it more difficult, the teacher himself lays out the cards according to the pictures of landscapes, but incorrectly. The children's task is to move the cards to the appropriate seasons.
Game rules and manufacturing instructions
Didactic game Seasons, download templates, educational games for children, games for comparing the seasons, smart Velcro
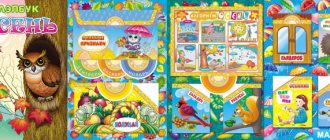
Didactic game Seasons 4 seasons.
The set includes 7 A4 sheets + 12 A4 sheets (enlarged version of the game) for by yourself .
The material is intended for educational activities with children aged 1 - 5 years.
By arranging the figures and creating his own funny story, the child will get acquainted with the seasons, learn to understand how winter, spring, summer and autumn differ from each other.
What's included:
4 sheets - four colorful playing fields depicting the seasons.
2 sheets with details of signs of each season (47 figures to cut out)
1 sheet with samples for the game.
Game "4 seasons and 12 months"
Kindergarteners aged 3-4 years play, that is, the younger group.
Game objectives:
- teach the relationship between calendar times and a certain palette;
- develop mathematical skills - the ability to count to 4 and 12, divide geometric shapes into equal parts, name the months sequentially;
- develop memory, ability to concentrate and think logically.
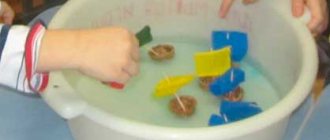
For the lesson, you need to make a circle, divide it into 4 equal parts, paint each part with a color corresponding to the season: blue - winter, green - spring, yellow - summer, red - autumn. Children must guess which season each part of the circle belongs to and tell why this color was chosen.
For the middle age group, the task is made more complicated; each season of the circle is divided into 3 months.
"Seasons" for older preschoolers
For a preparatory group of preschoolers, you can play a game using computer technology. The teacher needs to prepare slides depicting pictures-answers to questions and riddles. From the presented pictures, children must choose the correct ones and click on them with a computer mouse.
The goal of the game is to form ideas about seasonal changes in nature and develop cognitive abilities through the use of computer technology.
Objectives of the didactic game “Seasons”:
- formation of ideas about the world around us, about the relationship between the changing seasons and objects of living nature and humans;
- consolidation of knowledge about the signs of spring, summer, autumn, winter;
- consolidation of knowledge about deciduous trees, hibernating animals, migratory birds;
- developing the ability to answer questions, solve riddles, speak competently and consistently;
- increase in cognitive activity;
- development of speech skills, increase in vocabulary;
- development of memory, hearing and vision perception, finger motor skills, ability to concentrate, and think logically.
The first group of slides concerns autumn. The teacher asks a riddle, the children guess what season is depicted. Next, the teacher asks questions: by what signs did the pupils identify autumn, what color are the leaves on the trees, what clothes are the people in the picture wearing, why are they dressed that way. The next slide shows autumn leaves, children must name which tree they came from.
The second group of slides concerns winter, children guess the riddle, tell how they identified winter, how people are dressed. On the second slide, from the animals presented, those that hibernate are selected. In the third of the presented pictures, choose the correct answers to riddles about a snowflake, a snowman, snowfall, frost, frost, icicles.
Next, preschoolers look at spring, guess the riddle, explain the choice of pictures, and tell how people are dressed. On the second slide, choose migratory birds from among the depicted birds. In the third of the presented images, choose answers to riddles about snowdrops, the sun, grass, streams, drops, rooks.
Next, the children look at summer, give an answer to the riddle, explain the choice of the picture, and explain why the people in it are lightly dressed. On the second slide, count the number of butterflies in forward and reverse order. At the third stage, edible mushrooms are selected from the presented mushrooms.
At the end of the game, the teacher asks the children to draw their favorite season.
Seasons - do-it-yourself didactic game
Useful tips
Watch the video if you are too lazy to read
Watch the video if you are too lazy to read
The seasons are one of the first topics in natural science that a person encounters in early childhood, when he is just beginning to explore the world. In order to quickly and more clearly explain to a child what the process of changing seasons is, the easiest way, of course, is to use colorful illustrations on this topic.
Today we invite you to make such a visual aid with your own hands. This craft will help you not only explain to a very young child what the seasons are, but will also become an excellent entertaining game for older children, who will be able not only to play it, but also to take a direct part in its creation.
Since one of the most striking objects by which one can trace the entire cycle of changing seasons are trees, we will take, for example, an apple tree as an example.
To make our tutorial game we will need:
- paper (white for the picture and blue for the background
);
- thin pencil;
- transparencies (oilcloth or plastic cover
);
- nail polish of different colors;
- thin brush.
So let's get started.
Take a sheet of white paper and with a thin pencil begin to draw an apple tree on it.
We draw only the trunk, branches of the tree and a piece of earth from which our apple tree grows.
Now we need a transparent film of the same format as the sheet of paper on which we drew.
We also need to prepare several bottles of nail polish in different colors.
We put the film on the drawing, take a thin brush, apply brown nail polish on it and begin to carefully trace the contours of our drawn apple tree on the surface of the film.
We completely transfer the drawing onto the film with brown color, painting over the trunk, tree branches and the ground.
We put aside the tree that has already been painted with varnish on the film, take a clean film and apply it again to the drawing.
Winter
The first season that we will draw will, naturally, be winter, because this is where the year begins.
First we need white varnish, a small amount of which we will pour onto a piece of paper.
Using a thin brush, apply white varnish in dotted movements to the contours of the apple tree branches. This method of applying varnish will create the illusion of snow sticking to the tree branches.
Now take the blue varnish and add it to the white.
Mix both varnishes with a brush to obtain a delicate bluish tint.
Using the same point movements, we apply blue varnish to the contours of the branches of the apple tree and with the help of two colors ( white and blue
) we form the crown of our apple tree.
Spring
Cover our drawing again with clean film.
First, we now need to prepare a green varnish.
Using point movements using a thin brush with green varnish applied to it, we begin to draw the leaves of our apple tree.
We paint the grass at the foot of the tree with the same green varnish.
It's time for flowers.
Take a pale pink varnish and pour a few drops onto a piece of paper.
Using dotted movements, we draw the flowers of our apple tree on its branches, alternating with the already drawn leaves.
Now we mix the pale pink polish with a brighter shade of pink so that our flowers don’t look so monochromatic.
Using precise movements, we add new ones - brighter ones - to the already drawn flowers and form the crown of our apple tree from the now multi-colored flowers.
We remove the film from the drawing, and we get this blank on the theme of spring.
Summer
We cover our drawing with a new clean film and, with the help of green varnish, using the dotted movements already familiar to us, we draw the summer foliage of our apple tree and the grass at its foot, thicker than we did for spring.
Now we apply bright red varnish to the brush and draw ripe red apples on the branches.
To add even more color to our summer, let's paint a few bright dandelion flowers on the grass with yellow varnish.
Autumn
With the onset of autumn, apple tree leaves are known to turn yellow, red and orange.
Let's start with red.
Again we cover our drawing with a clean film, apply red varnish to the brush and draw red leaves on the branches of the apple tree.
We add yellow leaves to the red ones, and, having mixed red and yellow varnishes, we also draw orange ones, forming the crown of our apple tree from all these multi-colored leaves, and, of course, we draw on the ground the leaves that have already fallen from the tree.
This is how we ended up with an autumn theme.
It's time to see how our guide to studying the topic “Seasons” works.
We take plain colored paper, for example blue, and attach to it the tree we drew on the film at the very beginning.
On top of the film with a painted tree we apply a film with a winter theme.
So we have the composition “ Winter Apple Tree”
«.
Having replaced the winter theme with the spring theme, we will see the picture “ Spring Apple Tree
«.
By attaching a summer blank to the tree, we create a new composition on the theme “ Summer Apple Tree”
«.
Well, we complete our cycle by attaching a blank on the theme of autumn to the tree. Now we have before us “ Autumn Apple Tree”
«.
See what the whole process of creating this craft looks like in the video.
So we made a game-aid on the theme “Seasons”. Now your child will not only understand this topic better, but will also be able to teach this to his friends, not just by playing the game, but also, perhaps, by creating it with them with his own hands.