Dedicated to needlewomen. It turns out that it’s not at all difficult to make a puppet theater with your own hands from paper - printable templates are at hand. You need a little patience, which lovers of creativity have more than enough of. And a minimum of items. The ready-made patterns presented in the article will make the task much easier. Here you will find plenty of details for your favorite activity. All that remains is to save the images and then print them on a printer.
Why are such theaters made? All children love fairy tales. Why, even adults are not averse to listening to exciting stories with a happy ending. The works are very interesting to listen to, however, visually they are perceived in a completely different way. They are better remembered and leave more vivid impressions.
There are many variations for making puppet theaters. The easiest one is to make it out of paper. Available materials, a minimum of time, you can involve children in creating - here is a small set of advantages that are enough to resort to such needlework.
Don't be limited by the printable templates below. Diversify your puppet theater with decorations from improvised materials.
Are your children too young to carve on their own? Invite them to collect the scraps in a separate box. Also an important contribution. And then gather a family evening watching a paper play that is interesting not only to watch, but also to present to the audience.
Choosing a piece
You will need to decide in advance on the characters of your theatrical production in order to find suitable templates for the paper finger theater. Most often, for the very first children's productions, teachers and psychologists advise taking simple, long- familiar fairy tales and stories. On the Internet you can often find templates for finger theater made of paper for such fairy tales as Turnip, Teremok, Kolobok, Masha and the Bear, Three Little Pigs and so on /
When organizing a holiday for a child, it is important to take into account all the nuances. One of the main things is not only impressions, but also memories that need to be recorded. You can order lively and bright photographs from children's parties here at an affordable price. A team of professionals will capture all the brightest moments and convey the most vivid emotions in the photographs.
In any case, you should take for the game a work or story from a book that is familiar to your child. Perhaps you have even been to a real puppet theater, have already seen some kind of play, and the child liked the plot.
Benefits and advantages of the game
The creation of a puppet theater plays an important role in the development of children. The child not only plays with toys, but also makes doll patterns with his own hands. Then he begins to invent, like a director, in his imagination any events related to the characters. With the development of imagination, children's thinking will be much easier to perceive and assimilate new information, which will have a great impact on future studies.
Here are some advantages of such a product for preschoolers:
- Stimulates the development of the child's speech and promotes the development of memory and imagination.
- Excellent for developing teamwork and cooperation skills with other children.
- By independently choosing the plot, characters and lines, it will help to reveal the child’s internal problems.
- Will help the child feel more relaxed and less shy.
- Behavior skills and search for solutions are developed, which in the future will help to behave sustainably in stressful situations.
- It can be one of the forms of learning a foreign language.
- Reveals the child's musical abilities and acting talents.
- It will help you become a creatively developed person, with good abilities for self-knowledge and self-realization.
- Will allow you to get more attention from family and friends.
The kids reproduce the director's play, which allows them to relax and fully reveal themselves in the puppet show. The embarrassment and fear of public disappears, which will be very useful later in life.
Puppet theater is not only a fun pastime, but a whole technique with a learning effect, in which a child will learn to understand what good and evil are.
The emotions that kids receive from the audience in the person of their parents and educators make them feel successful. If after the performance there is a sweet reward, then the happiness of the kids will know no bounds. At the same time, self-confidence and self-confidence are formed , which contributes to the development of the child’s talents and existing skills.
Tabletop theater at home
So, what should you choose for home education and development for children from one to three years old? Of course, any activity at this age should be based on play .
Do you have an active child and dream of a quiet activity together? Then a tabletop theater can help you! It turns out that making it with your own hands is not so difficult. A puppet theater for kids can be made from many materials. The most difficult and labor-intensive option is to sew dolls or cut out figures from wood. The simplest and most suitable for a busy mother is to print from paper or cardboard at home.
Where to start if you want to make a paper theater for your child with your own hands? First of all, prepare your materials. You will definitely need:
- color printer;
- thickened paper or cardboard;
- scissors;
- glue;
- scotch;
- templates for crafts in electronic form or your own drawing.
Competition in kindergarten
Kindergartens often hold competitions, including on the theme “theater”.
Option 1
Most kids aged 3 years and older love to make things out of Lego pieces.
Lego is also useful for creating crafts on the theme of “theater” with your own hands.
You can build a stage and place puppet actors on it:
Another option for using Lego is to make a shadow theater.
Progress:
- You will need Lego elements, a Duplo Lego plate, a white A4 sheet, and a flashlight.
- Use Lego pieces to make a small stage, decorated with decorative elements, with side columns.
- Place a sheet of paper between the columns.
- Behind the sheet, make another scene on which the characters will be displayed.
- Place the flashlight so that the light falls on the figures.
The theater is ready for performance!
Option 2
Children aged 4-6 years will be happy to make theatrical appliqué from paper and scrap materials. The application is dedicated to the heroes of the fairy tale “The Three Little Pigs”.
Progress:
- Prepare materials - sheets of multi-colored cardboard, scissors, glue, as well as straw and sticks.
- Cut out 3 piglets from pink cardboard.
- Cut out templates of 3 houses from white cardboard. Each house should be decorated differently. Cover one with straw, the other with sticks, the third with bricks cut out of brown cardboard. Don't forget to make the windows and doors out of blue cardboard.
- Glue the parts onto a sheet of bright cardboard. The work is ready!
Option 3
A box from which you can make a stage screen will come in handy. Video to help solve this problem:
Option 4
You will need a picture frame, colored cardboard, scissors, thread, glue.
The characters of the chosen fairy tale are cut out of cardboard - they will be flat. You can decorate them by making hair out of threads and gluing ready-made eyes. The characters are fixed in a frame, it is decorated in the spirit of a fairy tale - trees, flowers, a hut are glued to the sides.
Option 5
For kindergarten you can make an applique from paper “Theater Masks”:
- Cut out the outline of the face from sheet A4.
- Bend it in the middle and cut it - you get a protruding nose.
- Make slits for the eyes.
- The child can paint the mask himself to his liking.
You can make a Venetian mask using cardboard. A cardboard mask can be decorated with beads, sequins, and shiny ribbons. The nose will be a cork from a plastic bottle.
Option 6
If you paint flat stones with acrylic paint, you get a stone theater.
The first do-it-yourself puppet theater - printable templates
Traditional fabric dolls are more difficult to care for and are not suitable for all children. But any child can handle paper products. Place a cone with a picture on the finger, suitable for each child.
It is advisable to introduce the little ones to simpler fairy tales:
- Teremok.
- Kolobok.
- Chicken Ryaba.
- Turnip.
We will need:
- scissors;
- Printer;
- PVA glue.
All templates must be printed, cut out and connected together. Fairy tale “Teremok”.
An audio tale will make the task of voicing paper characters easier. You will only need to carry out what you hear.
Goals of puppet theater
In the last article, we talked about the fact that fairy tales and games are an integral part of the process of teaching a child various skills. Using the example of toys and fairy-tale characters, they help a child learn to build a logical sequence between the desire to do something and the ability to do what he wants. And it doesn’t have to be some kind of action or skill. Using the example of fairy tale heroes (and puppet heroes), children will learn:
- overcome various fears;
- be honest, kind and responsive;
- friendship and mutual assistance;
- protect, compassionate and help the weak and old;
- interact with people of different personalities;
- resolve disputes peacefully and emerge from conflict situations with dignity;
- understand what good and evil are.
It is not for nothing that every fairy tale has its own moral, which teaches the most important thing in life - to learn to love your neighbor and coexist harmoniously with the world around you.
In addition, with dolls it is faster and easier to master the skills of counting, reading, identifying shapes, colors, developing your language and imagination.
Table theater for senior group
When a child is well versed in the plots of longer fairy tales like “The Three Little Pigs,” it is worth expanding the supply of theater sets.
The “Three Little Pigs” finger toys will surely be loved by little ones due to their bright design and ease of use. The set also comes with a script that will serve as a cheat sheet for older children.
The Masha and the Bear walker will save time on making additional decorations.
The Puss in Boots set comes with a script and the figures are reversible. This bright set will be a delight for your child or a great gift for friends.
For any paper puppet theater it is necessary to make a stage. For the finger version you will need a tall structure, which is easiest to make from an ordinary cardboard box. Make the design foldable, then it will be convenient to store.
A low stage is suitable for flat figures. It is best to store paper puppet theater kits in one place. A large plastic or cardboard box with a lid, divided into several sections, will greatly facilitate the storage and use of the figures. Such a “chest” is not convenient for everyone.
Replace it with a flat “case”. However, you won’t find a ready-made option; you’ll have to tinker with the cardboard yourself. But the result will be a convenient case that can easily fit under a bed, sofa, or in the gap between the closet and the wall. Cover it with self-adhesive paper or similar material, then it will not get too dirty.
Paper figures
Just make heroes out of cardboard. You can use colored paper. You can choose any product sizes. Kids will love creating a paper puppet theater with their own hands.
If a fairy-tale hero breaks, it’s easy to replace it with a new one. You will need special templates that need to be cut out. Two parts of one character are glued together.
Finger puppets
Also, kids really love finger puppets.
For example, knitted:
Master class on knitting a pig:
There is always a place for a fairy tale in the life of any child. It can be told, read and even shown. To quickly make well-known and beloved heroes, you don’t need any special skills. The simplest pattern and material such as felt is enough. It retains its shape well, does not deform and does not need to be stitched. For small children, mothers can make such dolls, and older children can already help their parents in making them.
Necessary materials:
• brown, beige, black, gray and red felt • template paper • pencil • felt-tip pens • sewing machine or needle and thread • small beads, ribbons • glue, brush
Sequence of work
Draw and cut out a finger-shaped figurine measuring 7.5 X 4.5 cm for the template. Then trace two blanks for each character using the template on a selected sheet of felt and small details from the appropriate material. On one of them you will need to paste the character’s facial features and then stitch the halves of the body on a typewriter or stitch them manually with white thread, leaving the lower part unsewn.
Examples of making dolls
Dog Cut out two blanks from beige felt. Then two brown ears, as well as the necessary parts for the muzzle and two legs. Place them on the front of the figure before gluing.
The ears need to be inserted between the front and back sides. For strength, you can first glue them and then sew both pieces.
Hawaiian Girl Prepare two figures from brown and black felt. The wrong side should be higher, as it is cut out with the hairstyle.
For the skirt you need to cut a piece of fabric with fringe. The hair ribbon is selected from the same fabric. You can use a thinner fabric for the eyes and mouth. After this, both parts of the doll are sewn together.
Dwarf When creating a template, extend the torso slightly upward.
Place a red cap on the front of the figure. Then you need to cut out a beige rectangle rounded on one side for the face and stick it on. After that add a white beard. Then glue on the eyes from blue circles and a red oval for the nose. Sew both parts of the doll.
Penguin On the prepared base for the doll made of black felt, glue the cut out white chest and face, and then the paws.
When the piece is dry, glue on black triangles for the eyes and red triangles for the beak. Then both parts of the body can be stitched.
Hedgehog For this doll, you need to prepare the front part from gray felt according to the size of the template, and cut the back part from black felt a little wider. Then, cutting off the corners, cut out the needles.
On the front side of the doll, glue a belly made of light gray felt, black eyes, a nose and paws, and then bangs. Connect both parts of the workpiece.
In this way you can make any fairy-tale heroes or come up with your own fairy tale and new heroes. Puppet shows instill in children a love of creativity, develop conversational speech, imagination and acting skills.
Another option is very simple toys, like this Finger Bunny, which is done in five minutes:
Another version of the knitted puppet theater “Transformer” for the play “Kolobok” was sent by Oksana Eduardovna Alexandrova:
“I work as a teacher in kindergarten No. 267 in Izhevsk. In general, the idea to make this unusual theater did not come to me right away. I first knitted a bunny in overalls, and then I decided to knit the rest of the fairy tale characters. And I chose this particular fairy tale for a reason, but because in the plot the characters do not meet each other, that is, you can easily rearrange your heads. It’s not visible in the photo, but their tails also change, they are attached to a contact tape - the hare and bear have tails in the form of a bamboshka, and the fox and wolf have their tails tied like a washcloth. I think you will appreciate my work)."
This video shows how to make a puppet theater from socks and a box:
Plastic spoons
Dolls are often made from various available materials. It’s easy to make figures from plastic spoons. To do this, draw eyes, a mouth and a nose on the convex part.
If a female character is needed, then the spoon is wrapped in cloth and a belt is selected for it. For a male character, you can use a tie or bow tie. Hair and hat are made of paper. The parts are then glued to the base.
Screen
Beautiful design will only evoke positive emotions in children. A do-it-yourself screen for a puppet theater is made from fabric, cardboard, boxes, and plywood. You can cover the hole under the table with a blanket.
The base is made of plywood, which will last a long time. Before starting work, a drawing is made and all dimensions are noted. Then you can cut out the workpiece.
All elements are covered with fabric; you can use wallpaper that was left after the renovation.
The parts are connected with door hinges to easily close the screen. The same method is used to make a cardboard product. The parts of the workpiece are sewn together.
Paper
This is the easiest way to make a do-it-yourself puppet theater.
Option 1
Draw fairy tale characters on a piece of thick paper. Cut them out and glue them on the wrong side onto cocktail tubes, ice cream sticks, and pencils. Cut out the front side of a children's lunch box to make a screen. Make a slot in the lower part where sticks with heroes will be inserted.
Attach a ribbon to the top of the box and the theater is ready. The child can hang the box around their neck or on a doorknob and perform the show.
A master class will help you create such a theater:
Option 2
Glue together a tube from paper - the torso of a theatrical character. The size depends on whether the doll will be worn on the hand or on the finger.
Glue the muzzle/face elements onto the tube.
Option 3
You can take ready-made toilet paper tubes and decorate them using colored paper.
Felt doll
Will need
- Sketch of a puppet toy.
- Two sheets of felt, A4 size.
- Small pieces of colored felt.
- Thread and needle.
- Glue gun.
- A sheet of thin cardboard.
We start work by creating a pattern. To do this, draw the sketch onto a sheet of cardboard and cut it out. You will get the main pattern of the figure and individual small details: eyes, muzzle, palms, tummy, ears. The number of details depends on the choice of sketch of the puppet hero.
Then we transfer all the details onto felt. We select the color scheme according to our taste or the content of the fairy tale. The hare can be white, gray or pink, and the fox yellow or orange. If you are doing a craft with your child, let him choose what color the characters in your play will be.
We cut out the parts and pre-assemble the toy, placing all the parts in the places where they should be. If the result is satisfactory, we begin the final assembly. First, we make one main piece out of felt. We sew on all the parts that can be sewn. We sew with a buttonhole stitch. We glue small parts with a glue gun. We put all the parts together in accordance with the sketch.
If the toy has ears, we attach them last. To do this, we fold the two main parts with the right sides facing inward. We apply the ears in such a way that the edges of the part coincide with the edges of other parts, and the tips of the ears look inward. We sew all the details along the edge with a buttonhole stitch and turn the toy inside out. The glove puppet is ready, and the ears will stick out funny on the top of the head.
Sock puppet
Original dolls are made from ordinary children's socks.
To make it you will need a sock, cardboard, a small skein of thick thread or yarn, pieces of fabric for the mouth, sewing thread and buttons, and a glue gun. You can take a sock in a plain color or with a pattern, polka dots or stripes - all this will create the image of a future toy.
We make a blank for the mouth from cardboard. To do this, fold a cardboard rectangle 7 cm wide and 20 cm long in half. We round the corners along the width. From the fabric for the inside of the mouth we cut out a blank according to this template.
Trim the toe of the sock. We cut off the edges along the edge of the workpiece. Glue the cardboard blank inside the sock using a glue gun. At the same time, we fold the edges of the fabric onto the cardboard. Glue the fabric interior on top.
Making a hairstyle for the puppet. Take thread or yarn and wrap it around your hand several times. Tie in the middle and cut the ends. If you spread your fingers wide, you will get a long hairstyle. Sew the hairstyle to the sock.
Non-traditional types of theater
In addition to the usual materials for puppet theaters, alternative types can be used.
These can include plastic and wooden spoons. Images of characters are drawn or attached to them. When painting on plastic, you should use acrylic paint. If you have to paint with gouache, it is mixed with a small amount of PVA glue.
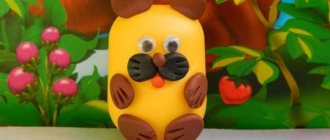
Interesting options are made from yogurt jars and plastic bottles. They are covered with colored paper, images of characters are attached and fragments of scenery are added. The results are voluminous mini-stories. Such figures do not require additional decorations and develop children's imagination.
Playing theater is a useful and interesting activity. It improves memory and develops oratory skills. The child learns to retell the text, highlight the main points, not be afraid of public speaking, and parents have the opportunity to discern the child’s talents.
Smeshariki from disks
Recently, Smeshariki from the popular Russian cartoon has become increasingly popular. They are reflected in many types of art and crafts. To make Smeshariki from disks with your own hands, you will need:
- computer disk;
- scissors;
- glue;
- colored paper.
To do this you will need a regular blank, which is no longer needed. From thick colored paper, cut out eyes, legs, arms, ears and other body parts that are needed for the selected character.
Wooden puppet theater for children
Honestly, we have different types of theaters at home, for example this is a wooden one .
My kids love it very much, because it is so funny and exciting when I show them a fairy tale and they sit and listen. Now I have an older son, he can show and tell fairy tales himself. Just think, this is very cool, because while playing, a child learns to retell his favorite fairy tale, build a dialogue, etc.
I think that all preschool children, as well as most children of primary school age, will not remain indifferent to such theaters. And if you come up with your own fairy tales with a funny plot and an intriguing ending, then it can actually turn out to be a real holiday for a child.
The simplest version of a do-it-yourself puppet theater is a paper one. It's easy to make it yourself. Well, or together with the child.
Stages of creating a shadow theater
Making a shadow theater for children with your own hands combines two stages: preparing the stage and creating characters. The approximate time that needs to be spent is about 30-40 minutes. But if you start decorating and creating puppet characters, it will take a little more time.
For the theater to “work”, you will need:
- Choose a suitable light source.
- Make a screen out of a sheet, whatman paper or white paper.
- Take care of the frame (made of cardboard or an artistic stretcher).
- Correctly position the light source, screen and characters.
Paper puppet theater “Walkers”
This kind of theater is very popular with young children; for such a theater you need your favorite characters and a couple of holes.
Believe me, children will happily play such games. And if you invite friends over, it will be even more fun to play. You will also receive samples of walkers of your favorite characters to your e-mail address.
DIY glove puppet
In reality, there are a lot of puppet theaters that can be built. Even at almost no cost. You just need to use your wits and do it! You can sew it, for example.
Or you can learn to knit and knit these cute little characters:
Honestly, I used to knit well, but now I don’t have enough time for it all. But I never liked sewing. But, as an option, you can also create a theater for those who love this business.
Although here is the simplest master for you - a class on sewing a puppet theater from fabric using gloves. Anyone can do it, even those who do not know the art of sewing.
We will need:
- household gloves, knitted - 2 pcs., buttons for the eyes - 2 pcs., thread, scissors, braid, stationery knife
Stages of work:
1. Take the first glove and steam the seam thread on the cuff, it is usually red or yellow. Tuck the little finger, thumb and index finger in so that they do not come out, sew them up. You should end up with a head with ears and a hare neck. Sew the bases of the ears to prevent your fingers from getting in there.
2. Now take the next glove and hide your ring finger in it, sew up the hole. Place your middle and index fingers together and now place the hare's head on them.
3. Sew the head to the neck. To hide the seam on your neck, tie it with a bow or tie in the shape of a butterfly. Sew button eyes and embroider a muzzle, or you can draw it with a marker. You can decorate a bunny using fluff or knitted threads by gluing a cute forelock to his head.
Dolls
Traditional puppets are placed on the puppeteer's hand, with the index finger controlling the character's head and the thumb and middle finger controlling the arms.
Such a doll can be controlled by two people at the same time: the doll’s legs have loops for fingers, the head and hands are controlled using three sticks:
We even have several master classes on hand toys.
Fairy tale "Mitten"
For example, you can sew a doll (like these little animals):
Video on how to sew a glove doll:
Felt and tie (for example, like this Horse):
From scrap materials
You can also make dolls for the kindergarten theater from scrap materials by the children themselves.
Yablochkova Natalya offers a very simple option. Once again, your child’s favorite fairy tale can be told not by you, but by two cheerful gnomes, which are easy to make with your own hands, of course, together with the child.
1. For crafts you will need pencils on which the heads of the gnomes will be put. 2. The base of the head can be made from cork, old wooden door handles or plasticine. Cut out a round piece and make a hole in it the diameter of a pencil. 3. Sew caps from different scraps of fabric and put them on the heads of the gnomes. 4. Make your hair out of multi-colored yarn, wearing it under caps. To get a strong craft, you can use glue. 5. On the face, draw eyes, mouth, nose, cheeks with gouache. If plasticine is used as a basis, then parts of the face can be made from the same material. 6. Place gnome heads on colored pencils.
And such simple dolls can be made from literally any available material:
Cool video about a puppet theater made from a box, paper and cocktail straws:
To make a doll with your own hands, prepare:
- wooden spatulas (kitchen),
- square scraps of fabric,
- hair yarn,
- wooden skewers,
- pencils,
- scissors, glue,
- beads, ribbons for decoration.
First option: make a simple doll from a handkerchief, tie a string to the arms and head. Tie the other ends of the threads to two pencils tied with a cross.
Second option: glue hair from threads onto a wooden spatula. We cut out the center of a square of fabric, put it on the shoulder blade, tie the handles diagonally, and tie a belt.
We draw the doll's face, do its hair, and dress it up.
We insert skewers into the handles. The princess for the puppet theater is ready.
You can make puppets for the theater from such everyday things as socks. Master class on making a Little Frog:
Secrets of successful theater productions
How to make a paper theater more durable? After all, paper parts often tear and become unusable. And, most likely, this will happen after the first production of your play. Here is another option for making a theater at home, which, although more time-consuming, will last longer.
The first stage of production remains unchanged - we find templates (you can even draw them yourself if there are no ready-made ones). We print them on a color printer. Then we cut out the largest decorations, glue them to cardboard and additionally seal them with tape - this will add strength to them, and they will not get dirty.
Then we start making fairy tale heroes. At this stage we will need additional materials, namely:
- Small plastic jars for yoghurts like Rastishka or Agusha.
- Wooden ice cream sticks (if you don’t have them, plastic forks or spoons will also work).
- Stationery knife.
We cut out the characters and glue them onto a cardboard base. If your paper is quite thick, then you don’t have to do this. But most often, thicker paper is not “grabbed” by the printer for printing. Keep this in mind and try using different paper weights in your printer.
Be sure to tape it with tape to prevent the parts from fraying. Then we take ice cream sticks or plastic spoons and tape them with tape to the back of the paper blank so that the stick is “behind” the hero and has a free part at the bottom (3-4 cm). Using a utility knife, we make two cuts on the bottom of the yogurt jar - you should get a cross - and then simply insert the stick with the doll into this hole. All is ready! You can start playing!
As you can see, a home theater is a great way to diversify a child’s leisure time without much expense, because printing and cutting out the templates is not at all difficult. In addition, this is a good option for spending time together, which children always like, and also strengthens family relationships.
DIY scene
To fully understand how to make a full-fledged theater-themed craft, all that remains is to create a stage. It is an important part of the production because it is where the action takes place.
- The simplest and fastest option is a plain fabric used to cover the doorway. A horizontal cut is made in the center for the dolls.
- The next simple way to build a home stage is to place two chairs with their backs facing each other and cover them with fabric.
Previously, the option of using cardboard boxes was considered. It is time consuming and requires more effort, but the results are definitely worth it.
- A frame is formed from several boxes by laying them out like bricks.
- There should be a window in the center, which will be curtained with fabric.
- For the background, all the folding parts and 2 walls of one of the boxes are cut off. A rectangle is cut out at its bottom.
- The walls are fixed in a certain way, in an angular position. This is done specifically for stability.
- Small cylinders are fixed at the folds. They will not allow the structure to develop during the presentation process.
- When the base is ready, it's time to add decorations.