Summary of the lesson on modeling “Summer carpet” in the second junior group
Alexandra Neshataeva
Summary of the lesson on modeling “Summer carpet” in the second junior group
Municipal autonomous preschool educational institution "Kindergarten No. 72"
Summary of a modeling lesson on the topic:
“
Summer Carpet ” second junior group
Compiled by teacher of group No. 9
Neshataeva Alexandra Sergeevna
Topic: Modeling “ Summer carpet ”
Goal: learn to sculpt a rug from multi-colored plasticine by combining various geometric shapes; develop fine motor skills of the fingers.
Preliminary work: Studying primary colors with children. Reviewing rugs and rugs. A conversation about fairy carpets ( the flying carpet that the Frog Princess wove)
.
Equipment: Plasticine, napkins, squares of colored cardboard - the basis of the composition, a poster on the theme: “Summer”
.
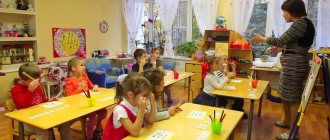
Progress of the lesson : A squirrel comes to the group of children, cries and asks for help.
children:
- Hello kids.
(Children say hello)
-I came to you for help. My mother’s birthday is coming up, I wanted to give her a gift - a summer rug , but I can’t do anything, help me kids.
Educator: Children, let's help our guest?
Main part: Examination of the “Summer”
.
Guys, what time of year? (Summer)
.
Educator: Let's guys look at this poster with you.
(Poem about summer)
Educator: Guys, what do you see on the poster? (children's answers)
That's right, guys. Tell me, please, what do you think we will make a summer carpet ? (from plasticine)
. Right! And now it’s time for us to rest a little and stretch our fingers. Squirrel, are you with us?
Finger gymnastics: “I draw Summer”
I draw summer (draw with a finger on the table)
Red paint - the sun (paint the “sun”
)
There are roses on the lawns (they clench and unclench their fingers)
There are mowings in the meadows,
Blue paint - the sky (paint a “cloud”
)
And a melodious stream (they draw a “stream”
).
Modeling a summer rug
Educator: - Guys, here is our task - How to make a rug?
Maybe Squirrel can tell us?
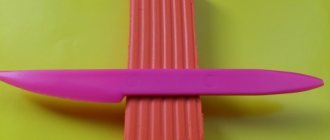
Squirrel: Guys, my friends and I once gave gifts to each other. I'll tell you and show you now. You need to take a piece of plasticine, roll it between the palms of both hands (teacher demonstration)
“What happened?”
You need to make several of these sticks and place them in a row on cardboard, but so that there is space between them. And put the rest of the sticks on top, but now you need to put them vertically (demonstration)
.
Educator: - But does this look like a summer rug ? Guys, what do you think? You can decorate it, look at our poster, there are flowers, mushrooms and apples. We can decorate our carpet . Is it true? Let us decorate our rugs with red, yellow or green apples. (The teacher reminds the sculpting - rolling between the palms, repeat with the children again how to sculpt a summer carpet ).
(during work, the teacher helps children who have difficulties in work, verbally reminds children of the sequence of work)
Final part:
Educator: Squirrel, look at what wonderful rugs the guys have prepared for you.
(next you need to ask the children what kind of rug they made, praise everyone)
.
Text of the book “Modeling with children 3-4 years old. Class notes"
Daria Nikolaevna Koldina Lepka with children 3–4 years old. Class notes
From the author
By the end of the third year of life, the child acquires basic ideas about color, size, shape; listens to fairy tales; learns to compare real objects with their images in paintings; looks at the landscapes.
It is easier for a small child to express his impressions with the help of visual activities (three-dimensional image - in modeling, silhouette - in appliqué, graphic - in drawing). He conveys images of objects using plasticine, colored paper, and paints. The child should always have these materials at hand. But this is not enough. It is necessary to develop the child’s creative abilities, show modeling techniques, teach how to cut out colored paper, and introduce various drawing techniques. To improve visual skills, one should develop the perception of form, color, rhythm, and aesthetic concepts.
A 3-4 year old child can do a lot: wash his hands, brush his teeth, feed himself, dress and undress, use the toilet. The baby develops simple verbal reasoning. He answers questions from adults with pleasure and is eager to communicate with other children; His gaming skills and voluntary behavior develop.
To develop children's creativity and mastery of visual arts, it is necessary to take into account the interests of children, use a variety of lesson topics and forms of organization (individual and collective work). It is very important to create a friendly environment in class. At first, the child is interested in the process of making the craft, but gradually he begins to be interested in its quality. The child strives to convey the image of the object as naturally as possible, and after class, play with his craft: roll a homemade ball on the table, feed the hedgehog with prepared mushrooms. The child is happy to tell you what he sculpted, what this object can do, what color he chose for his craft.
In this manual, we provide notes on exciting activities for children 3–4 years old on modeling from clay and plasticine in combination with natural and additional materials. These activities contribute to the implementation of the following tasks: introducing the child to the surrounding beauty; development of imagination, independence, perseverance, the ability to complete work, accuracy and hard work, skills in processing various materials, which in the future he will be able to independently use to make similar crafts.
The classes are organized according to the thematic principle: one topic unites all classes (on the surrounding world, on speech development, on modeling, on appliqué, on drawing) during the week. A modeling lesson for children aged 3–4 years is held once a week and lasts 15 minutes. The manual contains 36 notes of complex lessons designed for the academic year (from September to May).
Read the lesson notes carefully in advance and, if something doesn’t suit you, make changes; prepare the necessary material and equipment. Preliminary work is also important (reading a work of art, becoming familiar with surrounding phenomena, looking at drawings and paintings).
By observing each child in class or playing with other children, you can learn more about them and deal with challenging behavior.
If a child quits what he is doing,
As soon as something doesn’t work out for him, it means he doesn’t know how to overcome obstacles. This can be taught by offering the child other ways to achieve what he wants. Then he will understand that there must be a way out of any situation. For example, if your child wants to make a snowman, but he can’t do it, offer to draw one with you.
If your child quickly loses interest in an activity,
perhaps it is too simple or, on the contrary, complex for him. Understand the reason and make the task harder or easier. For example, a child needs to sculpt bagels from plasticine. If this is too simple for him, offer to make rolls and decorate them with beads, buttons and other additional materials. If the task is too difficult, start by making pies (balls) from plasticine, and then decorate them with additional material.
If your child gets tired quickly,
can’t sit for even five minutes, try to develop his endurance using massage, hardening, and sports exercises. And during classes, alternate active and calm actions more often.
In order for the child to understand the task and complete it,
it is necessary to develop his attention and ability to concentrate. Play the game “What Has Changed?” with your child. (place 3-4 toys in front of the child, and then quietly hide one of them or swap the toys). Look for as many ways as possible to involve the child in bringing the task to its logical conclusion (for example: “Let’s make some more mushrooms for the hedgehog, he has a lot of friends in the forest, and some may not have enough mushrooms” or “Let’s finish the house and put a bunny in it , otherwise the fox will come running and eat him”).
Modeling classes are based on the following approximate plan.
1. Creating a gaming situation to attract attention and develop the emotional responsiveness of children (riddles, songs, nursery rhymes; a fairy-tale character in need of help; dramatization games; exercises to develop memory, attention and thinking; outdoor games).
2. Modeling a product: familiarization with the object being depicted, the sequence of actions and modeling techniques (sometimes it is advisable to give the child the opportunity to think for himself how best to complete the craft). It is not necessary to make a sample of the product in advance; you can examine and feel an object or create an image from memory.
3. Refinement of the product using additional material (it is necessary to draw children’s attention to expressive means: correctly selected colors and interesting details).
4. Review of finished works (they are given only a positive assessment). Children should be happy with the result and learn to evaluate their crafts.
In modeling classes, children 3–4 years old sculpt from small pieces of plasticine. The following sculpting methods are used:
Constructive
- modeling an object from separate parts;
Plastic
– the details of the object are pulled out from a whole piece of plasticine.
Combined
– a combination of different modeling methods in one product.
We list the modeling techniques that children 3–4 years old can use:
• rolling with circular movements of the hands (balls, balls);
• rolling out with straight hand movements (columns, sausages);
• pressing the balls with your finger from above (peas, dots on the fly agaric cap);
• stretching pressed balls on cardboard (octopuses, stars);
• pinching the edges of the mold with your fingertips (bird's beak, edges of the bowl);
• flattening between fingers or palms (pies, pancakes);
• smoothing the surface of the sculpted figure or the junction of parts (the head and body of the snowman);
• applying plasticine inside the contour to create a flat plasticine picture on cardboard (mushroom, kitten).
• pulling out individual parts from a whole piece (the head of the nesting doll is pulled out from its body);
• pressing a depression on the surface of the mold (cup, plate) with your finger.
For clay and plasticine modeling classes, prepare in advance natural material (halves of walnut shells, pistachio shells, chestnut fruits, acorns, branches, ash seeds, maple wings, beans, peas, rice) and additional material (buttons, matches, lids from bubbles and plastic bottles, Kinder surprise capsules, threads, yogurt jars).
To work accurately with plasticine and clay, each child should have a backing board and a rag with which he will wipe his hands, as well as a small cardboard stand for the finished product.
If you don’t have clay, you can use homemade soft and plastic dough (for the dough you need to mix half a glass of salt, half a glass of flour, half a glass of water and one teaspoon of sunflower oil). The finished dough product needs to be dried on both sides on a warm radiator, and then painted with gouache.
Expected skills and abilities of a child by age 4:
• has an interest in modeling from plasticine and clay;
• knows the properties of clay and plasticine;
• uses a variety of sculpting techniques (rolling, unrolling, flattening, joining, pressing indentations with a finger, pinching the edges of the form with fingertips);
• conveys in modeling the difference in size of objects;
• rolls out lumps with straight and circular movements of the palms;
• connects the ends of the rolled sausage into a ring;
• flattens the ball, squeezing it with the palms of both hands;
• knows how to decorate a sculpted clay object using a stick with a pointed end (match) or stekka;
• knows how to bring a product to the desired image with the help of additional material;
• combines plasticine modeling and natural materials in the craft;
• knows how to sculpt various objects from 1–3 parts, connecting them by pressing and sticking to each other;
• knows how to apply plasticine in a thin layer on a surface limited by a contour;
• knows how to carefully use clay and plasticine: do not stain the table, clothes, sculpt on a board.
If your child can't do any of the above, don't worry. You will still have time to catch up.
We wish you success!
Annual thematic planning of modeling classes
Class notes
Theme of the week: “Toys”
Lesson 1. Ball (Clay modeling)
Program content.
Arouse children's interest in clay modeling. Introduce the properties of clay. Learn to roll out a ball of clay and decorate the sculpted product with additional material.
Demonstration material.
Ball.
Handout.
Clay, peas or wax crayons cut into thin rings, a backing board, a cardboard stand.
Progress of the lesson
Jump with your children “like balls”, saying the words from S. Marshak’s poem “Ball”:
My Cheerful Sounding Ball, where did you Jump off to? Yellow, Red, Blue, Can't Keep Up With You!
After the last line of the poem, the children run away and the teacher catches up with them.
Invite the children to make the same funny balls from a new material for them - clay. First, introduce them to the properties of clay: show them that it is soft and flexible. Explain that working with clay is done on a backing board. Give the children pieces of clay and ask them to roll the clay in a circular motion between their palms into a ball.
Then show the children how to decorate the ball: attach peas or thin rings of cut wax crayons to a ball rolled out of clay.
Children place the finished balls on cardboard stands to let them dry.
Theme of the week: “Vegetables”
Lesson 2. Potatoes in a bag (Plasticine molding)
Program content.
Teach children to roll small balls of plasticine between their palms and flatten them on top with their finger on cardboard. Develop tactile sensations.
Demonstration material.
Several potatoes, carrots, onions, beets, a rag bag.
Handout.
A bag template cut out of cardboard, brown plasticine, and a lining board.
Progress of the lesson
Show the children potatoes, carrots, beets, and onions and ask them to name them, determine their shape and color. Ask: “How can you call potatoes, carrots, beets, onions in one word?” (Vegetables.)
Call a few guys and ask them to take a vegetable and put it in a bag. Then ask the other guys to take only the potatoes out of the bag by touch. Count with the children how many potatoes they got.
Place a bag cut out of cardboard in front of each child and offer to “pour” potatoes into it. To do this, you need to tear off small pieces of brown plasticine, roll them between your palms into balls and attach them to a cardboard “bag”.
At the end of the activity, praise the children for collecting so many potatoes.
Theme of the week: “Fruits”
Lesson 3. Apple (Applying plasticine to the surface)
Program content.
Teach children to apply plasticine in a thin layer on a surface limited by an outline. Learn to assemble a whole from parts.
Demonstration material.
A picture of an apple cut into four parts, a natural apple.
Handout.
Cardboard with an outline image of an apple; plasticine in red (yellow or green) and brown colors.
Progress of the lesson
Examine a natural apple with your children, determine its shape and color.
Show the children a picture of an apple cut into four parts, assemble and disassemble it themselves, and then let several children assemble the picture.
Place a piece of cardboard with an outline of an apple in front of each child. Show how to “color” an apple depicted on cardboard with plasticine: pinch off small pieces of plasticine, attach them inside the outline on the cardboard and smear them in different directions with your finger. An apple stick can be rolled out of brown plasticine into a thin “sausage” and attached to the top of the apple.
At the end of the lesson, ask the kids what other fruits they know.
Theme of the week: “Berries”
Lesson 4. Bowl with cherries (Modeling from plasticine)
Program content.
Continue teaching children to roll small balls from plasticine and stick sticks into them. Learn to sculpt hollow objects using pressing and pinching techniques. Introduce berries and their names. Cultivate compassion and kindness.
Demonstration material.
A toy crow (or other bird), pictures with berries (strawberries, red rowan, grapes, cherries).
Handout.
Plasticine in red and blue colors, short branches, lining board.
Progress of the lesson
At the beginning of the lesson, show the children a toy crow (or other bird) and say: “Today a crow came to visit us. Say hello to her and listen to what she asks of you.”
Crow. Guys, I'm very hungry. Feed me please.
Ask the crow: “What do you like to eat?”
Crow. I love eating berries. Only I don’t remember the name of my favorite berries.
Help the crow remember berries: show her pictures with strawberries, red rowan, grapes, cherries and name them.
Crow. I have remembered! I love cherries! Please make me some cherries.
Once again, carefully look at the picture of cherries with your kids and determine the shape and color of the berries.
Show the children how to roll small balls of red plasticine between their palms and then stick twigs into them.
For the bowl, you need to roll a ball of blue plasticine, press the middle of the ball with your finger and slightly lift (“pinch”) the edges. Each child places cherries in a molded bowl.
At the end of the lesson, “feed” the crow some cherries.
Theme of the week: “Mushrooms”
Lesson 5. Mushroom glade (Modeling from plasticine)
Program content.
Teach children to roll out small balls of plasticine into columns and connect them with additional material. Cultivate compassion and kindness.
Demonstration material.
Soft toy – hedgehog.
Handout.
Four mushrooms of different colors and shapes, cut out of cardboard and cut in half vertically; pistachio shells, brown plasticine, a lining board and a green cardboard stand.
Progress of the lesson
Place in front of each child four mushrooms of different colors and shapes, cut out of cardboard and cut in half vertically, and ask them to find a pair for each half. Then ask the guys: “Where do mushrooms grow? (In the forest.)
Who likes to eat mushrooms?
(Hedgehogs, moose, squirrels, people.)
Show the children a toy hedgehog and say: “Guys, today a little hedgehog came to visit us. Say hello to him."
Hedgehog. I came to you from the forest. There are very few mushrooms this year. Help me and my forest friends - make a lot of mushrooms for us.
Children should roll small balls from brown plasticine and roll them out into columns on a board; Attach half a pistachio shell to the tip of each column on top and “plant” the resulting fungus on a green cardboard stand.
At the end of the lesson, collect pictures-stands with mushrooms on one table and say: “Well done, guys! So the mushroom clearing is ready for the forest dwellers!”
Theme of the week: “Autumn trees and bushes”
Lesson 6. Leaves on a tree (plasticine molding)
Program content.
Continue to teach children to roll small multi-colored balls of plasticine and flatten them with your finger on top. Develop observation skills. Learn to depict physical education words using movements.
Handout.
Cardboard with plasticine applied along the contour of the tree (without crown) (or with a tree drawn and painted over); plasticine of red, green, yellow, orange colors; lining board.
Progress of the lesson
While walking, pay attention to the trees and bushes and the color of their leaves (red, green, yellow, orange).
During the modeling lesson, invite the children to make the same beautiful autumn trees.
During the lesson, invite the children to be autumn leaves that are swirling in the wind:
We were autumn leaves sitting on branches. The wind blew and they flew. We flew, we flew and sat down on the ground. The wind came again and picked up all the leaves, turned them, twisted them and lowered them to the ground.
The guys perform movements corresponding to the text of the poem to the words of the physical education lesson.
Invite the children to make beautiful autumn leaves.
Place in front of each child a cardboard with plasticine applied along the contour of a tree (without a crown) (or cardboard with a tree drawn and painted over). Show the children how to tear off small pieces of red, green, yellow, orange plasticine, roll balls between their palms and attach the resulting leaves to tree branches.
At the end of the lesson, tell the children: “What beautiful, bright leaves on your trees! We have a real autumn forest!”
Theme of the week: “Autumn”
Lesson 7. Radiant sun (Applying plasticine to the surface)
Program content.
Continue teaching children to apply plasticine to the surface and flatten the ball with their palm. Learn to consciously switch attention. Strengthen the ability to analyze the content of a fairy tale. Create a desire to help those who need help.
Demonstration material.
Fairy tale by K. Chukovsky “The Stolen Sun”, illustrations for it.
Handout.
Blue cardboard with white clouds pasted on, yellow plasticine.
Progress of the lesson
Read K. Chukovsky’s fairy tale “The Stolen Sun” to the children in advance.
At the beginning of the lesson, play the outdoor game “Day-Night” with the children.
On the command: “Day”, children move around the room randomly. On command: “Night” - children must freeze in place with their hands under their heads.
After the game, ask the guys: “What shines in the sky at night? (Moon, month.)
What shines in the sky during the day?
(The Sun.)
Remind the children of K. Chukovsky’s fairy tale “The Stolen Sun”, look at the illustrations to it and invite the children to “light” the sun so that the heroes of the fairy tale do not feel dark and scared.
Place blue cardboard with white clouds glued on in front of each child. Show how to roll a ball out of yellow plasticine, attach it in the center of the cardboard, flatten it with your palm and, smearing the plasticine in different directions, make rays of the sun.
At the end of the lesson, ask the guys: “What kind of sun did you get?” (Round, yellow, cheerful, warm, affectionate, radiant.)
Theme of the week: “In the forest”
Lesson 8. Long snake (Modeling from plasticine)
Program content.
Teach children how to make mosaics from buttons.
Develop fine motor skills of the fingers. Clarify and consolidate the correct pronunciation of the sound sh.
Learn to roll out a long sausage from a ball of plasticine.
Demonstration material.
Subject picture with the image of a snake.
Handout.
Plasticine, buttons, cardboard stand.
Progress of the lesson
Show the children a picture of a snake and ask: “Who is in this picture? Now we’ll make a snake out of plasticine and decorate it with buttons.”
Children first roll a ball between their palms, then roll it out on a board with hand movements back and forth to form a long sausage (snake). The head is highlighted, the eyes and mouth are made. Then show the children how to take the buttons and attach them one by one to the plasticine snake.
Theme "Clothes and shoes"
Lesson 9. Mittens (Applying plasticine to the surface)
Program content.
Continue teaching children how to apply plasticine to a surface. Learn how to decorate a product yourself. Develop attention.
Demonstration material.
Several pairs of mittens, a bag, 3-4 large soft toys or dolls.
Handout.
A mitten cut out of cardboard, plasticine, peas, rice, beans and other additional material.
Progress of the lesson
Play out the situation: dolls (or soft toys) came to visit the children and brought a bag with mittens. Place the mittens in front of the children on a large table and ask them to find a pair for each mitten, otherwise the dolls cannot figure them out.
When the children complete the task, the dolls ask: “Put on mittens for us so that we don’t freeze during our walk.” The guys put mittens on the dolls, and the dolls leave.
Tell the children: “Now we will make beautiful mittens.” Remind them how to apply a thin layer of plasticine onto a cardboard blank, and decorate the resulting mitten with additional material on top: peas, beans, rice, buttons, etc.
