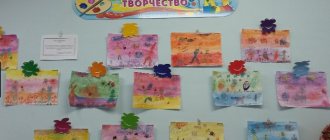
Specific options within the theme “Birds”
According to T. Komarova’s fine arts program, in the preparatory group two lessons are devoted to drawing birds: this is drawing an illustration for the work of Mamin-Sibiryak “The Gray Neck” and “The Magic Bird”. However, the topic of birds is so interesting and multifaceted that the teacher clearly should not limit himself to only this. So, options for the feathered theme could be as follows:
- Owl-owl (a very bright image that can be depicted in different techniques).
- A flock of migratory birds (theme is proposed in autumn or spring).
- Cockerel is a golden comb (can be associated with some fairy tale, for example, “The Cockerel and the Bean Seed” or “The Tale of the Golden Cockerel” by A. S. Pushkin).
- Titmouse (you can draw on November 12 or not far from this date, when people celebrate Titmouse Day).
- Bullfinches on a branch (of course, this theme is offered in winter).
- Swallow (it’s good to connect the image with the fairy tale “Thumbelina”).
- Poultry (poultry yard as an option). A child can simultaneously portray a chicken, a rooster, a duck, a goose, a turkey, or one or the other.
- White-sided magpie.
- Swan on the lake (as a variant of the swan princess of A.S. Pushkin before her transformation into a girl or an illustration for Andersen’s fairy tale “Wild Swans”).
- Kargopol birds (drawing based on folk toys).
- Fairytale bird (Firebird).
Older preschoolers always find collective compositions interesting. The “Magic Bird” work is popular, when each child paints a feather to his own taste, and then a gorgeous tail is assembled from them (the teacher prepares the base in advance - the body of the bird).
Each child paints the feather according to their wishes, and together they make up the original tail of a fairy-tale bird.
Here again, you can take an individual approach and invite some children to color two feathers.
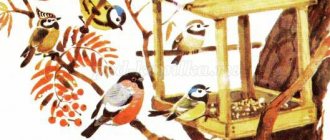
Another option for joint creativity is “Birds at the feeder.” The teacher draws a tree with branches and a feeder, and preschoolers complete the composition with birds.
The theme “Birds” encourages the creation of collective compositions
Drawing "Poultry" for older children
Anna Shkurkina
Drawing "Poultry" for older children
Topic: Drawing : “
Poultry ” (
older age ) .
Goal: Continue to introduce children to migratory birds , consolidate knowledge about poultry .
Tasks: The ability to find and name the differences and similarities between migratory wild birds and domestic ones , to determine whose house it is by appearance. Encourage children to speak up. Develop the ability to find a cause-and-effect relationship.
Cultivate goodwill and a desire to help. To develop plasticity and ease of movement in children. Teach children to draw birds using the poking method . Develop a sense of composition, the ability to beautifully arrange a pattern on a board, decorating with a bird and flowers . To develop creative abilities, artistic taste and cultivate love and interest in folk arts and crafts. Teach children to draw poultry , building an image from its component parts (using geometric shapes)
.Develop imagination in
drawing unusual birds .
Demonstration material: Picture of a magpie, letter from Dunno, mnemonic table “Structure of birds ”
.
Handout: Voskobovich square, watercolor brushes, wax crayons and colored pencils. a simple pencil for sketching , an eraser, a glass of water.
1. Organizational moment: Surprise moment:
A magpie came to visit and in its beak brought a letter with a rebus.
2 Solving the puzzle and reading the letter.
3.Question: Do you know what other birds ?
4. Riddles for children about poultry .
5. Presentation “ Poultry ”
.
6. Consideration of the structure diagram of birds .
7.Questions: Do you think one bird is good or bad ?
How do domestic birds differ from migratory birds ?
Game: D/i “Exclude the unnecessary”
(
domestic and migratory birds ) .
D/i “Whose house?”
.
D/i "
Poultry " .
D/i “What do birds ?”
.
" Bird " (from Voskobovich's Square)
.
Support for children's initiatives:
What can you tell us about poultry ?
TRIZ: “Why poultry fly to warmer climes?”
.
Video physical education
.
Problem situation: From the letter we learned that Dunno does not know who poultry and does not understand them. He brought us pictures of birds , and these turned out to be birds painted with Gorodets painting. What should I do? What do we know about Gorodets painting? How are these toys different from poultry ? Can we help him?
Productive. Drawing :
1. Turkey (Dymkovo painting)
.
2. Poultry (Chickens, geese, ducks and peacocks)
.
3. "Miracle Bird "
.
Research work “House ants.
Friends or Enemies" for senior preschool age Today I want to share my research experience on the topic "House Ants. Friends or enemies? We recently participated in this project. Summary of the musical lesson “Poultry” for young children Goal: To develop children’s musical abilities in an accessible playful way To form preschoolers’ ideas about poultry Objectives. Summary of a lesson on speech development “Poultry” for children of primary preschool age Purpose: to introduce children to domestic birds; learn to name and distinguish birds; understand and answer the teacher’s questions. Progress of the lesson: Educator:. Source
Photo gallery: examples of children's work on the topic “Birds”
The image of the Firebird is conveyed very elegantly - with a combination of yellow and orange colors. The poking method allows you to convey the fluffiness of a swan
The background is very beautifully designed - the sky
The multi-colored image of the cockerel echoes the variegated flowers with petals of the same tones
Bright colors combined with unconventional techniques give an original result. The subject composition has many characters
Pencil produces soft pastel colors
Subject compositions are often easier to depict with pencils
The black and yellow titmouse looks beautiful against the background of blue snow. The fairytale bird looks more like a small chick hiding in a pine branch
You can unusually convey the loose tail of almost any bird with your palm
Future schoolchildren learn to draw sitting birds
The image of an owl encourages the use of unconventional techniques
Using foam rubber, the shaggy plumage of an owl is well conveyed
The owl's plumage is originally rendered in the form of brown zigzags on a yellow background.
The images of sparrows pecking grains are conveyed very realistically
Beautiful subject composition, gives the impression of birds moving
Children usually love to portray living creatures, especially those that they can observe in nature. That's why the theme "Birds" is always popular with preschoolers. Many pupils of the preparatory group are able to accurately notice the characteristic features of different birds and convey them through drawing, harmoniously building a composition. The main thing for the teacher is to captivate the students, motivate them to be creative, and provide some interesting information that will additionally awaken interest in birds.
Motivating start to class
One of the tasks of learning to draw from paper is to develop motivation to work with pencils, paints, and pastels. The most effective way to attract attention to the creative process and enhance cognitive activity is to use motivational material at the preparatory stage of the lesson. As a motivating start to the lesson, the teacher can use a variety of techniques and use additional equipment:
- Visual materials: thematic posters (domestic birds, migratory birds, those remaining for the winter), photographs, illustrations in books, bird figurines, bird toys of folk craftsmen.
- Use of texts from folk tales and original literary works.
- Reading poems, nursery rhymes, proverbs and sayings, riddles about birds.
- Appeal to the experience and knowledge of students: conducting a conversation, tasks for reflection.
- Use of technical means: listening to songs about birds, audio recordings of bird voices, viewing slides on a projector.
- Conducting thematic active or logic games, creating surprise moments and problematic situations.
Examples of using motivating materials at the beginning of a lesson on the topic “Birds”.
| Lesson topic | Motivating start |
| “Illustrations for the fairy tale by D. N. Mamin-Sibiryak “The Gray Neck”” | At the beginning of the lesson, the teacher asks the children whether they remember well the fairy tale “The Gray Neck” they previously read. A conversation is held on the content of the fairy tale: for what reasons did the duck not fly away with its flock, what happened in the fairy tale before meeting the hunter, how the fox behaved, and how the duck behaved, how she met the hare, etc. The teacher reads out passages from a fairy tale: with what feeling do birds prepare for a long journey to warm lands; a description of an autumn day when Gray Neck was left alone, and flocks of migratory birds flew in the sky; scene at the wormwood; meeting with a hare, etc. Carrying out a logical game “Find the difference”: two pictures are attached to the board with the same illustration for the fairy tale of Mamin-Sibiryak, but one of them has differences. The teacher stipulates how many differences the children must find. |
| "Bullfinch on a Rowan Branch" | Creating a surprise moment : the postman brings a letter to the group. It was written by Dunno, he tells the guys that Znayka gave him a very difficult riddle, he just can’t give the correct answer. Dunno asks the child to help him solve the riddle and send him an illustration of the answer in a return letter. Riddle : Red-breasted, black-winged, Loves to peck grains. With the first snow on the mountain ash, He will appear again. Next, a conversation is held to study visual material (pictures depicting bullfinches): the children determine the structural features of the bird, plumage, and posture. Physical education lesson “Look at the branches - bullfinches in red T-shirts.” Perhaps holding a logical game “Find bullfinches in the same poses”: on the table there are pictures of bullfinches (in flight, pecking berries, sitting on a branch, jumping, etc.), the guys must find the same ones. |
| "Owl Owl" | Prepares background accompaniment for the lesson - audio recordings of forest birds singing; visual material – illustrations for fairy tales and nursery rhymes, made by the artist Vasnetsov. At the beginning of the lesson, the teacher takes the child to an exhibition of illustrations and talks about the artist Yuri Vasnetsov. Afterwards, a conversation : what birds did the children see in the paintings, what colors predominate in the works shown, etc. The teacher reads a nursery rhyme : Oh, you little owl, You are a big head, You were sitting on a tree, You were spinning your head, You fell from a tree , Rolled into the hole. He asks what bird this nursery rhyme is about and asks to find an illustration with it at the exhibition. Discussion of the image of an owl: structural features of the bird, plumage, posture, what it sits on, what colors the artist used to draw the bird. The teacher asks if they have met an owl or an eagle owl in fairy tales, poems, songs and cartoons, and perhaps they have seen this bird outside the city or in the zoo. Outdoor game “Owl”: in the middle of the game room there is an owl’s nest, where the first driver stands. The teacher announces that night has fallen in the forest, the driver closes his eyes, and the rest of the children depict various inhabitants of the forest - insects, birds, animals, they run and play. When the teacher says that the day has come, the children freeze, and the owl flies out of the nest and looks to see if everyone remains motionless; those who move, the owl takes to its nest. Afterwards, it is calculated how many the owl managed to catch, and a new driver is selected. |
How to draw a dove
Draw a small circle and a large oval for the head and torso, respectively. The top of the oval should intersect with the circle, and the oval itself should be inclined.
At the bottom of the oval you need to draw two lines forming a branch. Then draw an elongated rectangle as a tail.
Let's move on to the wings. If one wing can be drawn on top of the body, then the second will have to be placed in the background.
Next, an eye is drawn in the upper part of the head and a pupil to it, then a triangular beak, feathers in the form of dots and wavy stripes and paws (3 stripes per 1 paw). All that remains is to outline the drawing with a felt-tip pen and color the beak and branch brown, the rest gray.
How to draw a bird with a pencil
It is not so easy to draw a bird using only a pencil and an eraser in your arsenal.
Draw a line at an angle: you will later have to rely on it when depicting the silhouette of a bird. The line needs to be divided into 2 segments: the smaller one is for the head (here we draw a circle), the larger one is given to the body (here we draw an oval with a narrowed end).
From the lower part of the future abdomen, 2 lines are drawn - the “foundation” for the tail. There, in the lower abdomen, a sketch is drawn for future legs. One foot will require 2 lines connected into a triangle.
For a crest you will need a triangle, from which a segment is drawn connecting the body and head. On the left, draw a beak in the form of a triangle, draw an oval from it towards the crest. From the beak, in turn, it is necessary to draw a line. On the right, connect the stomach and head. Then draw the eye.
The next stage is the wings. They should be in the form of a semicircle. They need to be drawn from the center of the body, while the wing should be pointed downwards.
Let's move on to the paws. They are drawn in the form of oval fingers. To give it a more natural look, it is recommended to draw a branch on which the bird will sit.
Draw the contours of the beak and make a cut in its center.
A few strokes in the center of the wing are useful for obtaining plumage, and at the lower end of the body - for the tail. You will need 5 of these feathers.
Actually, the coloring of the bird. The lower part of the crest, closer to the head, should be darker in color.
When coloring the eye, leave a few white dots for highlights. Paint the muzzle with a dark color (beak area), and the breast with a lighter color.
Depending on the plumage, the wings can be given different shades of gray.
Then color the paws and tail. The latter should be painted in one shade of gray.
How to draw a bright bird
To begin with, you will need: 1 black felt-tip pen, an A4 sketchbook, an eraser and several multi-colored pencils.
We draw with a simple pencil first the body with wings, then the legs. To do this, you need to place the album vertically. Then a semicircle is drawn, from each end of which a strip is drawn, rounded towards the end to form wings. Below you need to add several small and long ovals.
Next, draw a second semicircle from one wing to the other to complete the body. You need to add paws to it. To do this, draw a pair of triangles, then another pair on the other side.
To give the bird something to sit on, you need to draw a branch by drawing 2 stripes under its paws (not necessarily even).
A bird without a tail is not a bird. It can be depicted as 2 long triangles with blunt ends.
We recommend reading:
How to draw a star: 10 best options for drawing five-pointed and other stars with your own hands. Pictures of finished works with descriptions- How to draw a dragon with a pencil - the best step-by-step instructions for beginners. TOP pictures for quick visual learning
- How to draw a pony: TOP 10 best lessons for beginners. Detailed instructions for drawing My Little Pony step by step with a pencil
The next stage is the muzzle. First, the beak is drawn, represented by a triangle. Round or oval eyes are drawn above.
The next step is to adjust the drawing and outline with a felt-tip pen.
Next comes coloring the drawing. To give expressiveness, the sides of the beak should be brighter than the center. The same goes for the paws. Color the eyes black.
If you want to make the bird bright, you need to paint it in the appropriate colors. For example, the wings and tail are painted green. The head is painted orange, the chest is painted yellow, and the lower abdomen is painted green again.
A brown or black pencil is suitable for coloring the twig.
We recommend reading:
How to draw lips with a pencil - simple instructions with descriptions and pictures. Step-by-step master class for beginnersHow to draw a family: a master class on creating a drawing “My Family” for kindergarten or school. The best lessons for children on drawing with pencil and paints
- How to draw a bear with a pencil? Review of simple and step-by-step instructions for children and beginners (120 pictures of a bear)
