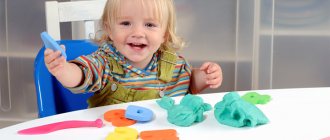
Notes on experiments with sand for younger children
Brief summary.
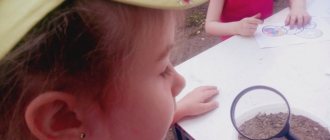
For children with impaired vision, the development of other, intact analyzers is very important. One of the ways for children with disabilities to explore the world is through experimentation.
This material may be useful for teachers of general education preschool educational institutions and for parents of younger preschoolers.
Experimenting with sand (younger age).
Goal:
to introduce children to the properties of sand, to develop the ability to concentrate; systematically and consistently examine objects, the ability to notice individual details of the overall picture; develop children's observation skills, ability to compare, establish basic cause-and-effect relationships and draw simple conclusions. Introduce safety rules when conducting experiments.
Materials for experimentation:
container with sand, water, stencils, molds, cocktail straws, plastic transparent container (jar).
Experiment 1. “Sand House”
Take a handful of sand and release it in a stream so that it falls in one place.
Gradually, a cone forms at the site of the fall, growing in height and occupying an increasingly larger area at the base. This will be our house. If you pour sand for a long time, drifts (sand rivulets), sand movements similar to a current, appear on the surface of the cone, now in one place, then in another. Children conclude: dry sand is free-flowing and can move. Experiment 2. “Footprints on wet sand”
Wet sand cannot be poured out of the palm of your hand, but it can take any desired shape until it dries. Let's find out with the children why figures can be made from wet sand (working with molds) and leaving interesting imprints - traces (working with stencils).
Experiment 3. “Where is the water?”
Invite children to find out the properties of sand by testing it by touch (loose, dry).
Children pour cups with the same amount of water (pour just enough water to completely sink into the sand). Find out what happened in the container with sand, why the water left (seeped through the sand) where there are more puddles after the rain (there are no puddles on the asphalt, in the sandbox). Experiment 4. “Wind”
Invite children to find out why it is inconvenient to play with sand in strong winds. Children examine the prepared “sandbox” (a jar filled with a thin layer of sand). Together with adults, they create a hurricane - they blow into the sand into a tube and find out what is happening and why (since the grains of sand are small, light, do not stick to each other, they cannot hold on to each other or to the ground with a strong stream of air) .
Sand experiment
Experimental activities
In the junior group "Sparrows"
Experiments with sand
The date of the:
09.11.2017
Amount of children:
8 people
Spent:
Educator - Larionova I.N.
Experimental activity in the younger group on the topic:
"Sand. Properties of sand. Making Easter cakes from sand."
Target:
To develop children's cognitive activity in the process of experimentation. Help expand children's knowledge about the properties of dry and wet sand, activate speech and enrich children's vocabulary.
Tasks
: Introduce children to the properties of sand. Learn to handle sand carefully, do not spill it. Renew your interest in working with sand. Develop the ability to put forward hypotheses, compare and draw conclusions. Learn the new game “Grains of Sand” with the children. Develop children's hand motor skills. Enrich your vocabulary. Develop skills of interaction with peers in the process of joint activities. Cultivate feelings of empathy and compassion. To develop cultural and hygienic skills in children (neatness, neatness).
Material
: touch table with sand, set of molds, scoops, watering cans, napkins.
Move
: I show the children the sand: - Look what I have in my hands? (Sand.) - Correct. This is sand. Tell me, do you like to play with sand? (Answers.) Let's play with it a little and get acquainted with its properties. But first, let's agree that during the game: - we don't put sand in our mouth; - don’t rub your eyes with dirty hands; - We don’t cover ourselves with sand. Go to the sandbox and touch the sand with your hands. — What color is the sand? (Brown). I'm pleased, I feel the coolness of the sand. What do you feel (children’s statements).
1 Experience: “Dry, loose sand”
Purpose
: to introduce children to the properties of sand.
Children examine the sand: what color, try it by touch (loose, dry). What is sand made of? What do grains of sand look like? The grains of sand are small, translucent, round, and do not stick to each other. Is it possible to sculpt from sand? Why can't we make anything out of dry sand? Invite children to pour sand from one palm to another.
2 Experience: “Wet Sand” Goal
: Introduce children to the properties of wet sand.
You have molds lying around, let's pour sand in there and make Easter cakes. Work carefully and carefully pour the sand into the molds. The Easter cakes turned out (Children's answers) Why didn't they work out? (Sand is dry). What needs to be done so that you can sculpt from sand? (children's assumptions). Who knows what will happen if you pour water into the sand (children's answers) Let's check. With the help of 1-2 children, we water the sand from a watering can. Touch it and tell me - is it dry or wet? (Wet). That's right, this sand is damp, wet. Look, does wet sand flow as well as dry sand? (Show to children). Of course, wet sand doesn't fall out. You can make Easter cakes from wet sand. Let's try. Take the molds and carefully place wet sand into them. Tap the sand like this with a scoop and compact it. Carefully invert the mold with sand onto the stand. Tap the bottom again with the scoop. Remove the mold. Well done! How beautiful your Easter cakes turned out.
I’ll sum it up with the children (sand can be dry, wet, free-flowing, soft, and can also retain its shape). Sand changes its properties depending on its condition.
Games with sand and water for the first junior group
Poluektova Tatyana Aleksandrovna
Games with sand and water for the first junior group
Game “Water - water”.
Game tasks: use playing with water to improve the health of children, emphasize the healing properties of water; consolidate initial ideas about water as a phenomenon of inanimate nature (transparent, flows, murmurs, is needed by everyone - animals, people, and plants).
The game can be accompanied by the nursery rhyme “Water - water”.
Toys: a transparent jug with boiled water; transparent cups (according to the number of children).
Illustrative series: reproduction of the nursery rhyme “Water - water” (you can use any picture that shows a child washing himself); medium size doll (40-50 cm, basin.
The teacher shows a reproduction of a girl washing her face. Children look at it for 2-3 minutes. Answer the questions:
-Who is shown in the picture?
Then the teacher reads the nursery rhyme “Water - water” and asks each child what kind of water he saw when he washed his face, washed his hands, or bathed. If the children find it difficult to answer, the teacher himself names the properties of water: transparent, flowing, pouring, babbling, gurgling.
Next, the situation with the doll is played out: it is washed over a toy basin. The teacher slowly pours water, making the stream visible, giving the children the opportunity to feel the words “the water is clear, the water is flowing.” The doll's face and hands are washed, then dried with a towel. All actions are accompanied by a conversation with the doll, jokes, and laughter.
The teacher tries to ensure that the children themselves turn to the doll with questions and advise her to wash her hands before eating and after visiting the toilet. The teacher says that they not only wash their faces with water, they also drink water, and offers the children “doll’s water” from a jug (prepared in advance). He pours water into glasses, accompanying the actions with the words: transparent, gurgles, gurgles. Invites children to try the water and evaluate it: how delicious “doll’s water is.” The guys drink themselves and give water to the doll. Then the game unfolds according to the situation.
Game "Balls - Kupariki".
Game tasks: teach children to guess which balls will float on the water and which ones will sink; consolidate knowledge about the properties of objects made of various materials.
Toys: a set of balls made of various materials (wooden, metal, rubber, cotton, paper, fabric, a small inflatable pool or a wide basin filled with water.
The teacher shows the children a full basket of balls and says: “These are not ordinary balls, these are kupariki balls: they love to swim. But some of them know how to swim, and some immediately dive to the bottom; someone first swims in the water, then gets wet and begins to sink down. The balls are all different: some are light, others are heavy, and others are light at first, and then become heavy from the water and sink.”
Children look at the balls - kupariki. At the same time, the teacher draws the children’s attention to the materials from which they are made. Then the children are invited to take one ball at a time and lower it into the water. This moment is being played out. Each kuparik ball is asked a question:
“Ball - kuparik, spin around,
Ball - kuparik, show yourself:
You will float on water
Or will you fall to the bottom?
Thus, children in play, empirically, through experimentation, consolidate their ideas about the properties of objects made of different materials: heavy objects sink in water, and light ones float. Light balls - kupariki, when wet, become heavy and slowly sink to the bottom.
Next, the children use chopsticks to move the balls - kupariki - along the bottom of the pool, and the non-sinking balls float freely, moving with a light breeze.
Game "Catch a Fish".
A long-term plan for experimental games with sand and water in the younger group
Transcript
1 Municipal government educational institution Steklyansky kindergarten Fairy tale of the Kupinsky district of the Novosibirsk region Long-term plan for games-experiments with sand and water in the younger group Teacher of the younger group: Volodina V.N.
2 October Let's pour, sculpt To form knowledge about the properties of dry and wet sand. 1. Teach how to examine material (squeeze sand in your hand and pour it out of your palm) 2. Develop visual-auditory connections, fine motor skills, coordination of movements. 3. Foster a positive attitude towards elementary experimental activities. 1. . 2. Sand molds. About a small drop Introduce children to the properties of water. 1. To develop in children the skill of practical experimentation with different objects from different materials. 2. Develop an active vocabulary. 3. Foster a positive attitude towards the character Droplet. 1. A cap toy (a blue balloon inflated in the form of a drop) 2. 2 basins of water (cold, warm) 3. A jar of dirty water. 4. Home fountain 5. Clean boiled water, cups. 6. Transparent disposable cups. 7. Colored sponges 8. Floating toys. November Our handprints To consolidate children's knowledge about the property of wet sand - to retain the shape of an object. 1. Teach children to make palm prints, fist prints, and palm edges. 2. Develop imagination and creativity. 3. Cultivate a positive attitude towards your work and the work of your comrades. 2. Multi-colored pebbles.
3 Sinks, does not sink, floats Introduce children to the properties of rubber and stones. Rubber is light and floats in water. The stone is heavy and sinks. 1. Teach children to act with rubber toys, natural materials, pebbles. 2. Develop the ability to recite a familiar nursery rhyme and demonstrate it using finger exercises. 3. Foster a positive attitude towards the character. 1. Center - water sand. 2. Small rubber balls according to the number of children. 3. Multi-colored pebbles 4. Rubber duck. Visit the mouse Consolidate children's knowledge about the properties of water and sand 1. Develop the ability to recognize and name primary colors. 2. Develop gross and fine motor skills. 3. Foster a positive attitude towards elementary research activities. 1. . 2. Path. 3. Movable mouse. 4. Little mice according to the number of children. 5. Colored boxes. 6. Bochata inserts. 7. Apricot pits, white and red beans, peas, seeds. 8. Small plates. 9. Red and blue basin. Our feet walk along the level path. To develop in children the skill of practical experimentation with different objects from different materials. 1. Teach children to act with natural materials. 2. Develop visual-auditory connections, fine motor skills, and coordination of movements. 3. Cultivate cognitive interest in the world around us. 1. Pebbles of different sizes 2. Feathers 3. Basin with water 4. Buckets
4 December River and stream Consolidate children's knowledge about the property of sand - to hold water. 1. Form the concepts of “wide”, “narrow”, “big”, “small”. 2. Develop imagination and creativity. 3. Cultivate accuracy in work and a desire to play alongside friends. 2. Narrow and wide scoop. 3. Measuring cups. 4. Bucket of water. 5. Large and small paper boats. Multi-colored water To form children's understanding of the properties of water is the possibility of coloring. 1. Learn to name primary colors. 2. Develop fine motor skills of the hands. 3. Cultivate a positive attitude towards elementary research activities. 1. Capitoshka toy. 2. Disposable cups of water. 3. Gouache paints. 4. Carrot juice. January Minks for hedgehogs To consolidate children's knowledge about the properties of dry and wet sand. 1. Form an idea of quantity (one-many, size (large-small). 2. Develop the ability to display in speech using prepositions (on, under) the location of objects. 3. Develop gross and fine motor skills, tactile sensations. 4. Cultivate a caring attitude to animals. 1. A toy hedgehog 2. Plasticine hedgehogs according to the number of children. 3. Pine needles in plates. 4.
5 Snowman visiting children Give an idea of the property of snow to turn into water. 1. To develop in children the skill of practical experimentation with different materials. 2. Develop fine motor skills and coordination of movements. 3. Foster a positive attitude towards the snowman character. 1. Toy snowman 2. Sand molds 3. Scoops 4. Trays 5. Colored pieces of ice 6. Clean snow in a basin February Slides for kids Teach children to lay out a mold from wet sand. 1. Develop knowledge about the height of an object - high, low. 2. Develop general hand motor skills and coordination of movements. 3. Cultivate goodwill and a desire to help. 2. Wooden theater set “The Wolf and the Seven Little Goats”. 3. Buckets large and small. How different water is Give an idea of the property of water to turn into ice. 1. Develop the ability to name primary colors. 2. Develop fine motor skills and coordination of movements. 3. Foster a positive attitude towards the character. 1. Molds from the bottoms of plastic bottles, 10-15 pieces. 2. Chocolate candy insert in a box. 3. Glass with clear water 4. Colored water in cups 5. Toy bunny March Foxy visiting the guys
6 Strengthen the ability to determine the properties of dry (crumbles) and wet (holds its shape) sand. 1. Teach children to scoop sand with a scoop and fill the mold. Strengthen the ability to use a sieve. 2. Develop gross and fine motor skills. 3. Cultivate a positive attitude towards the character, a desire to help. 4. Toy Fox. 5. Cord. 6. Large beads 15 pcs. 7. Sand in transparent glasses. (by number of children) 8. Sita (by number of children). 9. Molds, trays. 10. Watering can with water. Beads for a bear Give an idea about the properties and qualities of ice. 1. Form an idea of wild animals (hare, squirrel, bear). 2. Develop fine motor skills of the hands. 3. Cultivate responsiveness and goodwill. 1. Toys (hare, bear, squirrel). 2. Treats for animals (cabbage, carrots, pine cones, candy). 3. Colored beads made from ice floes. 4. Large wooden beads. 5. Cord for stringing beads. April Doll Masha's birthday Continue teaching children how to lay out shapes from wet sand. 1. To teach children to finish the words of a familiar fairy tale 2. To develop fine motor skills and coordination of movements. 3. Cultivate sympathy for the game characters, evoke a desire to help them. 2. The doll is big. 3. Table theater "Kolobok" 4. Molds. 5. Trays. 6. Scoops. 7. Great building material. Let's wash the doll's dress
7 To develop in children the ability to name the temperature of water. 1. Practice naming items of clothing and linen. 2. Develop an understanding of some labor actions and items necessary for washing (water, soap, basin). 3. Foster interest in the work activities of adults. 1. Doll 2. Basin 3. A bucket of hot and cold water. 4. Soap 5. Soap dish May We went to the garden To strengthen the children’s ability to lay out shapes from wet sand. 1. Learn to find vegetables hidden in the sand by touch and by name. 2. Develop tactile-kinesthetic sensitivity. The ability to dramatize a familiar fairy tale. 3. Foster a positive attitude towards the character. 2. Grandfather doll 3. Dummy vegetables (onions, garlic, beets, carrots, turnips). 4. Caps of the characters from the fairy tale “Turnip”. 5. Basket. 6. Molds, trays, scoops (according to the number of children) 7. Watering can with water. Bathing the Katya doll Strengthen the ability to determine and name the temperature of water “cold”, “hot”, “warm”. 1. Accustom children to use names of objects and actions with them in speech. 2. Develop the ability not to be distracted from the task at hand. 3. Develop cultural and hygienic skills and behavior. 1. Doll 2. 2 buckets of water (cold, hot) 3. Bath 4. Soap 5. Soap dish 6. Towel