Game layout “City Street”
Game layout according to traffic rules “City Street”
Tasks
: - introduce children to the rules of the road, the purpose and signals of traffic lights, road signs, expand knowledge about the rules of safe behavior for children on the street; - encourage children to engage in independent activities in the traffic rules corner,
List of materials used to create the layout
: small fiberboard sheet, PF-115 enamel paints, Lego sets, road signs.
Description of the manufacturing process when creating a layout
. For the layout, we used a small piece of fiberboard (we measured the size of the surface of the bedside table where the layout will stand). The road, sidewalk, and pedestrian crossings were painted on fiberboard using paints of different colors. We used LEGO constructors (buildings, trees). The road signs were made using applique. Children can play with small toy cars, observing traffic rules and placing signs. You can independently simulate situations on the roadway and play them out. While studying on the model, students are taught the most necessary traffic rules for pedestrians and basic norms of behavior on the street, on the roadway.
Description of the games that are played with its help
.
Game "Street"
Task. 1. Expand children’s knowledge about the rules of pedestrian behavior on the street.
2. Strengthen children’s understanding of traffic lights
3. Teach children to distinguish road signs.
Material: model of a street with houses, a crossroads, cars (toys), kinder figures - pedestrians, road signs, trees (models).
The game is played on a layout. Progress of the game. With the help of Kinder figures, children role-play various road situations. At a controlled intersection, when the traffic light is green, they cross the street, when the traffic light is yellow, they stop and wait, and when the traffic light is red, they continue to stand. Then the kinder figures walk along the sidewalk to the pedestrian crossing, marked with the information sign “Pedestrian Crossing”, and cross the roadway.
Game "City Street"
Task. Clarify and consolidate children's knowledge about the rules of behavior on the street, traffic rules, and various types of transport. Material: street layout, trees, cars, kinder figures - pedestrians, traffic lights, road signs. Hodigames. The teacher examines the street layout with the children and asks questions. Children accompany their answers by showing them on a model. Questions for children:
What houses are on our street?
What kind of traffic on our street is one-way or two-way?
Where should pedestrians walk? Where should cars go?
What is a crossroads? Where and how should it be crossed?
What does a pedestrian crossing mean?
How is traffic regulated on the street?
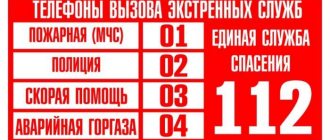
What traffic lights do you know?
What road signs are there on our street? What are they needed for?
Why is passenger transport needed? Where is he expected?
How should you behave on the bus?
Is it possible to play outside?
Next, the teacher invites the children to “drive” along the street, observing the traffic rules. Then one of the children plays the role of a pedestrian. The winner is the one who copes with the roles of driver and pedestrian.
Senior group project “Street Layout”
Project “Streets of my city”
for older children
“The homeland for a person is the most precious and sacred thing,
without which a person ceases to be a person"
V.A. Sukhomlinsky
The foundations of patriotism begin to form in preschool age.
The foundation of patriotism is rightfully considered to be the purposeful familiarization of children with their native land. Love for the Fatherland begins with love for one’s small homeland - the place where a person was born.
For the success of working with children to familiarize themselves with the city where they live, I believe that the most effective way is to use the project method. So my senior children and parents and I implemented the “Streets of My City” project, which was based on the creation of a model of the streets where our favorite kindergarten and multidisciplinary gymnasium are located.
And now we will present to your attention our work.
1 slide
1 Child
: Every person has one homeland! Homeland is the place where everything is dear to us, where we were born. Every person has his own homeland. Our homeland is the city of Gorodovikovsk. This is a small, beautiful city.
I love my city. It is beautiful at any time of the year. In summer the city is all green, there are many trees and flower beds. In winter, a huge Christmas tree with Christmas decorations is installed in the center of the square.
There is a park in our city. I like to ride on the carousel in the park in the summer.
Every year our beloved city becomes more and more beautiful.
Every person should love his homeland. I really like my city.
2 slide
. I love my Gorodovikovsk!
Everyone in the world has their own little corner. For me, believe me, this is what our quiet town has become. Before, I didn’t understand and sometimes I was sad if my mother walked us home after kindergarten. We didn't want excursions, We wanted to go on the swing! But now I’m older and my interest has awakened: About my native and glorious city Find out everything, finally. Every day I look forward to when we go for a walk, Because my mother can tell me everything: About sculptures, monuments And about the Victory monument, About athletes, masters, Famous fellow countrymen... I know everything about the city, And now I understand: We should be proud of it, our native city!
3 slide.
2nd child:
There are no cities without history. The history of each city is closely connected with the biography of its streets .
Many streets in our city bear the names of glorious sons of their fatherland, but not everyone knows who they were, how and at what price they earned the right to be immortalized in the names of streets and its monuments.
Today I would like to talk about a street that I often walk along. It is named after the Hero of the Soviet Union Bambi Khicheev.
We visited the museum of the gymnasium named after. B.B. Gorodovikov, where we were told about the hero, about his difficult battle path. Bembya Khicheev was a brave and brave man who loved his homeland very much.
Educator:
Through the Internet we found a relative of Bembya Khicheev, Marina Erentsenovna Sokalskaya. I suggested that the children send a greeting card for the Great Victory Day. The children happily agreed.
In it we wrote that the guys are proud of Bembya Khicheev and want to be like him.
Child:
His awards: The Gold Star Medal was awarded for heroism, boundless devotion and courage in the fight against the Nazi invaders;
· The order of Lenin;
· Order of the Patriotic War, 1st degree.
Educator:
When the guys found out whose name the street we walk along every day bears, we all started a very interesting job together - making a street model. This is very interesting, because every house, every tree now seems even more familiar and special.
4 slide
Educator:
Objective of the project:
Introducing children to the history and culture of their hometown through familiarization with the streets of their immediate surroundings.
Tasks:
1. Instill in children a love for their hometown.
2. Expand children’s understanding of the history of the streets of their hometown, enrich their vocabulary and coherent speech.
3. To form spatial concepts in children, the ability to navigate the streets of their hometown
4. Promote the active involvement of parents in joint activities with the child.
5. Enrich parent-child relationships with the experience of joint activities through the formation of ideas about the streets of their hometown.
6. Teach how to apply the acquired knowledge in practical activities.
5 slide
.
We began our work on the project with a tour of the streets where the kindergarten and multidisciplinary gymnasium are located. This is the street named after Maxim Gorky and Bambi Khicheev. The children and I examined the houses that are located here, learned that they are one-story and two-story, and counted how many houses there are on these streets. We also considered a kindergarten and a gymnasium. We found out that the gymnasium building is the tallest - three floors. They compared it with the houses located on these streets.
6 slide
Then the children in kindergarten began to build houses from the blocks that they saw on the excursion. The guys argued, changed places of houses, remembered and compared with what they saw on the excursion.
7 slide
The next stage of work was to select the material from which our structures will be made. The guys suggested cutting houses out of cardboard, sawing them out of wood, and making them out of clay. There were many options and proposals, but after thinking through all the materials and showing them to the children, it was decided that the houses would look simpler and more believable from foam plastic. It will give volume and the shape required for the layout will appear. So the children repeated working professions - builder, architect, painter. The children got to work.
8 slide
We also involved parents in this work. They gladly responded to our request.
Slide 9
New houses were born in the home environment. House by house, gradually the guys completed all the copies.
10 slide
Then together we began to plan our layout (exhibit houses and institutions). And again the guys had to argue a little and use their memory.
11 slide
Then we started working on the details of the layout: building the road,
12 slide
greening the street - the girls really liked it, they imagined themselves in the place of street designers and fantasized about how else they could decorate our streets.
Slide 13
So we have completed the interesting work on the layout. And this exhibit, made jointly by teachers, children and their parents, will be added to the mini-museum of the “Fairy Tale” kindergarten.
DOMOSTROYPlumbing and construction
This is the game layout that appeared in our group at the beginning of the school year. I wanted to share with you how we created it - maybe it will be useful to someone.
To make the base of the game model “City Street” we will need: 2 pieces of MDF panel (I have them 53 cm), a piano hinge, screws and nuts for fastening
Using a drill, we drill holes in the MDF panels in selected places, attach the piano hinge to the MDF panels
To ensure that the model stands at an angle of 90 degrees and does not fall back, we screw a corner stop on one side (for me it is part of the fastening from an old curtain), and paint the lower part of our model with black paint.
choosing clipart of houses for the street. for my layout I put it together like this
We print the pictures in duplicate and laminate them; if you don’t have a laminator, you can simply cover them with tape. The picture becomes brighter and it is easier to care for the layout - wipe off dust, for example. We paste one copy of our laminated pictures, joining them on the layout, this is what we should get.
Now we will give our picture volume. To do this, we cut out buildings from second copies at our discretion, and glue them onto pre-prepared ceiling tile blanks - single background and double foreground, in my work I used “Master” ceiling tile adhesive
Cutting out buildings with a utility knife
We paste it (I still use the same “Master”) on our layout, our street now has “depth”
Let's move on to the design of the roadway. We take construction tape, highlight the pedestrian crossing, the dividing strip, that is, what we will paint over with white, and cover everything else.
In my work I usually use ordinary aerosol paints in a spray can, sold at any hardware store, dry quickly, and are easy to use. We highlighted all the lines with white - remove the tape. The roadway and crossing are ready.
We laminate the printed templates (1 sheet of laminated film - 2 sheets of templates with cars), fold the sheets with the white sides inward. We laminate them so that the cars are tougher, brighter and can be wiped clean. When a sheet is laminated, we cut it along the contour and we get 2 sheets laminated on the colored side, the second side remains unlaminated (paper) - the paper sticks together better, and laminated machines shine. This is what a laminated sheet with templates, cut on 3 sides, looks like.
Cut out car templates and glue them together
Now let's move on to making road signs. Materials: I used 2 sheets of regular white office paper, ceiling tiles (better washable), a stationery knife, toothpicks, master glue, mosaic in 3 colors (red, yellow, green), laminated sheet with blank signs, I used this one. Honestly, I don’t know how to indicate the authors; everything was cut out from so many places (((
We cut it out, glue 1 copy onto the tile, cut it out, and stick 2 copies on the other side. We make a stand for our signs. Take a sheet of white paper and cut strips of 4-5 mm along the long side of the sheet. For one sign, you need 5 strips. We take one strip and wind it onto a toothpick, forming a tight “roll” - this is the upper part of the stand. Glue 4 strips into a long strip and roll them into a “roll”. Place a small one on top of a large “roll” and glue it together. We dip the edge of the toothpick with glue, pierce our “rolls”, and with the other edge of the toothpick we pierce the blank with a road sign. All our sign is ready