Card index of topics for different groups, including collective compositions
Let's present a sample list of topics for each age group that can be used when teaching preschoolers how to draw with their palms:
Junior group:
- “Colored palms” (children learn to make handprints on paper).
- "Octopuses"
- “Golden Sun” (team work).
- “Leaf Fall” (team work).
- "Fish"
- "A flower for mom."
- "My mittens."
- "Two merry geese lived with granny".
- "Grass".
- "Butterfly".
- "Spider."
Middle group:
- "Beauty Butterfly"
- “Titmouse” (as an option – “Bullfinch”, “Sparrow”, “Swans”).
- "Autumn Tree".
- "Giraffe".
- “Snake Gorynych” (as an option – “Dragon”, “Dinosaur”).
- "Magical forest".
- “Spring” (grass with flowers is depicted using palms).
Senior group:
- “Underwater world” (as an option – “Aquarium”).
- "Beautiful bouquet".
- "Butterfly in the Meadow"
- "Fairytale Bird"
- "Multi-colored cockerel."
- "Elephant".
- “Fairytale Forest” (alternatively – “Old Stump in the Forest”).
- “The forest is our wealth” (alternatively – “The Magic Forest”) (team work).
Preparatory group:
- "Crow".
- "Hedgehog".
- "Cactus".
- "Horse in the meadow."
- "Mysterious underwater world."
- "Dog".
- "Flowers in a vase".
- "Peacock".
- "Crow".
- “May there always be peace” (poster with images of birds against a background of nature) (team work)
Note that many topics are offered to children of different ages, for example, drawing a butterfly, fish, bird, flower. However, each group has its own level of difficulty.
For example, if early preschool children simply add the necessary details to a butterfly (eyes, antennae), then at an older age the image becomes more detailed: the image of an insect printed with the help of their palms is decorated with intricate patterns, interesting contrasting colors are selected. Similarly, the fish in the second younger group will simply be supplemented with eyes, and later the children will draw an entire underwater world based on such an image; sea inhabitants will differ from each other in color and scale pattern.
How to create with your fingers
Fingerprints resemble a brush stroke. Finger and palm typing can be used as a basis for creating various characters. Before starting work, the little ones are shown on a sheet of paper how to put dots and make lines. The baby tries to touch the paint with the tip of his finger.
Note! To change the color of the dye, the child will need to wash his finger in water and wipe it.
Creative work in non-traditional techniques can have any topic. Many finger painting ideas for children can be found in the world around us. You can come up with a variety of ideas for such work. For the youngest children - a yellow round chicken, red berries and so on.
When kids have practiced poking small areas with their fingers and filling them evenly, you can give them a more difficult task:
- draw large objects with your fingers;
- lay the prints along the steep curl.
A difficult task for children is to arrange their fingerprints in a circle from the center (this is how the spots on the tail of a turkey or peacock are located). This method can be used to decorate any round object, starting from the center and moving in a circle to the edges of the circle.
Note ! Older children are interested in more complex drawings.
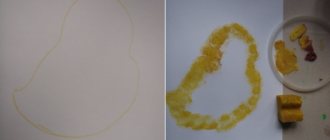
To get a larger print, they press their finger to the surface of a sheet of paper and roll it over. Next you need to figure out what you can turn this resulting oval silhouette into. Using a felt-tip pen or pencil, they will complete the color masterpiece to whatever their imagination tells them - seasons, flowers, funny animals and many other funny images.
How and what to draw on
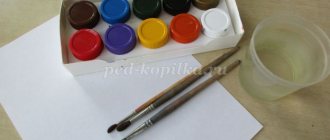
You don't need any expensive equipment to work - you only need a minimum set.
Note ! Finger dyes have a gel-like structure and do not require additional dilution with water.
They do not spread, lay beautifully on the surface, allowing you to create original images, so it is convenient for children to create with them, and the workplace remains relatively clean after work. They are easy to wash from any surface and wash off clothes.
Creativity can be practiced on a wide variety of materials: paper, cardboard, glass, fabric, and even your own body.
Winter is a season that children love to display. For the New Year, you can come up with many interesting themes and create many finger paintings. Any winter stencil is filled with fingerprints. They can be completed with different shapes, and with the help of several fingers together you can create fluffy details.
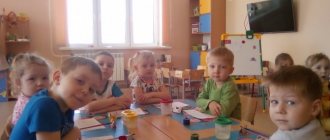
A well-structured lesson plan will help organize children and help the teacher realize their goals. Children 3–4 years old are restless and active, so when preparing a lesson, the teacher thinks through the organizational aspects of the work so that there is no monotony. Drawing blanks for kids can be different. Children are able to trace ready-made stencils of simple shapes with a pencil.
Important! The kindergarten drawing cup template is one of the popular auxiliary materials for teaching children unconventional drawing. It is convenient to draw pea circles with your fingers on the cup.
Drawing on a cup helps children learn to evenly distribute the pattern on the cup, form the concept of “tea utensils,” expand their understanding of the utensils and what they are made of and what parts they consist of.
Children have developed visual and figurative thinking. Pictures and real utensils should be before the eyes of little artists. Demonstrating visual objects, the teacher accompanies this with a story, and preschoolers maintain a conversation about what they heard.
Palms and fingers
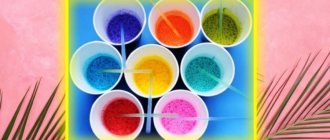
Pour paint into disposable plastic plates so that your baby's hand fits completely into the container.
Show your child how to make prints with the entire palm, side surface, and paint over the surface of the sheet with your hand.
Palms are suitable not only for creating abstractions. By completing the missing elements with pencils, demonstrate to your child how easily you can create a full-fledged drawing from individual spots:
- By adding a tail and fins to the impression of a closed fist, you can get the silhouette of a fish.
- Small fingerprints will become pebbles on the seabed, a palm with fingers protruding upward will become algae.
- The same palm, turned fingers down, with drawn eyes and a mouth, is very similar to an octopus.
- With your fingers you can draw a green lawn with lush grass, the sun, flowers, butterflies and beetles.
Sponge or piece of foam rubber
If your child is afraid to dip their hands into paint, you can use foam rubber. Offer him a piece of a regular dish sponge. Show that you can dip it in paint and move it across a sheet of paper in different ways - abruptly, with pressure, mixing colors.
The sponge allows you to paint over a large area and quickly create a green meadow or blue sky.
Using a stencil
Drawing with a stencil allows you to create a variety of pictures and scenes. You can download interesting template pictures or draw them yourself.
Print out the samples and cut out the shapes. The kid will be happy to apply bright spots of paint, getting images of cats and dogs, fish and whales, dragonflies and butterflies. You can purchase a ready-made coloring book; this excellent tool can be used many times; the paint can be easily removed from the pages. This technique is most popular with kids.
Drawing with stamps
Most paint sets are sold complete with stamps.
Additional stamps can be cut from scrap materials:
- raw potatoes,
- dense foam rubber,
- school eraser.
Use cookie cutters, large buttons with a raised pattern. Consider a device in which you can firmly attach homemade stamps so that your child can hold it comfortably in his hand.
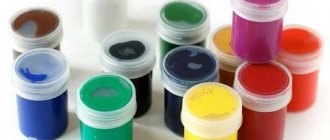
Characteristics of finger paints
Child psychologists are sure that the sooner a child starts drawing, the smarter he will grow up. Until the baby has learned to hold brushes and pencils in his hands, finger paints are the best option. In addition, felt-tip pens, colored pencils, watercolors and gouache contain unsafe substances, and it is very difficult to remove traces of them from clothes and furniture.
Class notes
| Author's full name | Title of the abstract |
| Kokunova S.N. | "Funny Zebra" (second junior group) Educational objectives: teach preschoolers to draw in an unconventional way - with their palms, combine different drawing techniques in a drawing, consolidate knowledge on the topic “Animals”. Developmental tasks: develop color perception, fine motor skills, attention. Educational tasks: cultivate perseverance, accuracy. Integration of educational areas: “Artistic creativity”, “Cognition”, “Communication”, “Socialization”, “Health”. Demo material: toy zebra. Handout: green sheets of colored paper, white and black gouache, brushes, sippy cups, brush holders, napkins. Progress of the lesson: The lesson begins with a riddle:
A toy zebra appears and came to visit the children from distant Africa. The children look at it together with the teacher - it has a beautiful coloring, just like a horse has a mane and tail. A physical education session is held:
Then the teacher tells the kids an amazing story: once upon a time a zebra was born in the African desert. And she became very lonely, there was no one to play with. And so the zebra came a long way to find friends. The teacher invites the children to help the zebra - to draw her many friends who look like her. The teacher invites the children to sit at the tables and explains to them the techniques of drawing using an unusual technique - using their palms. The pens need to be dipped in white paint and left an imprint on green paper. The missing details are painted in with a brush - black stripes, eyes, mane. Independent work of preschoolers. The zebra thanks the kids and leaves happy - now she has someone to play with. |
| Shishova L.V. | "Titmouse" (middle group) The teacher asks the children to show their palms, stroke them, pat them, rub them on their cheeks. It turns out that palms can do a lot of things, including drawing birds. The teacher finds out from the kids that the birds flew to warmer climes because they had nothing to eat. However, some birds remained to spend the winter - riddles are offered on this topic:
The teacher tells the children that today they will draw a titmouse. Finger gymnastics is performed:
The teacher shows the preschoolers his palm and asks if it reminds them of a bird. Use your finger to indicate an imaginary beak, neck, body, fluffy tail. But this bird is not bright at all, so you need to color it (applies paint to the palm of your hand, children repeat the actions after the teacher). The bird needs to be planted in the middle of the sheet - to do this, open your fingers wide and press your palm against the paper. Using a brush, the bird's legs and eyes are painted on. At the end of the lesson, all the birds are hung on the board - a fairy-tale clearing. |
| Alekseenko G. | «Elephant» (senior group) The teacher asks the children to stand in a circle, a short warm-up is carried out:
Children join hands. The teacher tells them that they have turned into one big and kind animal. The game is played:
The guys are given a riddle about an elephant:
Examination of the image of an elephant, discussing its body parts, the shape and size of the head, ears, trunk, tusks, torso, legs, tail. Particularly notable are the huge ears that partially cover the head, the long flexible trunk and small eyes. The teacher informs the children that the ears protect the animal from overheating, as well as from annoying insects. And the movable trunk easily lifts various objects, plucks leaves from trees and draws water from a reservoir. The elephant's sharp tusks serve as protection from predators and also dig up the ground in search of water during droughts. The tusks and trunk are the elephant's survival tools. In addition, the teacher reports other interesting facts from the life of these animals. For example, that all elephants are gray. They are very polite - they know how to greet and hug each other. Elephants live for about 60 years. Preschoolers are invited to depict an elephant in non-standard ways - using their palm. The teacher demonstrates the depiction process: the palm is painted with gray paint, but only up to the first phalanx, since the elephant’s legs are thick and short. In addition, when making a print, the thumb must be moved to the side - this will be the trunk. Finger gymnastics is performed:
Independent activity of preschoolers. Analysis of drawings: the teacher invites several children to tell about their elephant (what its character is, what it likes to do). |
| Patrikeeva I.N. | "Golden Time" (preparatory group) An audio recording of birds singing accompanied by the sound of autumn leaves sounds. Pictures depicting an autumn landscape hang on the board. The teacher asks a riddle about autumn:
The teacher suggests looking at reproductions of famous Russian landscape painters on an autumn theme - I. Levitan “In the Forest in Autumn”, “Oak Grove. Autumn”, “Golden Autumn”, I. Shishkina “Golden Autumn”, “Forest Backwater. Autumn", Kuindzhi "Autumn". Discussion of what was seen: how nature is depicted, what color the sky, trees, clouds, grass, the mood that the artists wanted to express. Then photographs are offered for viewing: children highlight the signs of a golden autumn. Preschoolers are offered the didactic game “Guess the tree from its leaves.” Reading the poem “Autumn Grandmother” by L. Fadeeva:
The teacher informs the children that today they will turn into landscape artists and depict autumn in all its beauty, and then organize an exhibition of their paintings. Children are invited to draw a landscape using their palms. The teacher shows the sequence of doing the work: you need to smear your palms with red, yellow and orange paint and use a print to depict the crown of a tree at the top of a vertical sheet of paper. The rest of the work is done with a brush - the brown trunk and multi-colored leaves are painted on. The image of a tree is complemented by grass, flowers, sun, clouds. A physical education session on an autumn theme is being held:
Independent activity of children. Design of the “Golden Exhibition” stand. |
The benefits of finger painting at a young age
Drawing with paints is a fascinating form of educational activity. Parents, engaging in such developmental activities with their baby, establish psychological contact and trusting friendships with him.
While working on the drawing, the child:
- Develops hand motor skills - which in turn has a beneficial effect on abstract thinking and speech development;
- Learns about the existence of new objects, studies ways to interact with them.
- Gets an idea of the shape and color of the objective world around him;
- Working with small objects, develops coordination of movements;
- Receives a large amount of positive emotions;
- Develops taste.
Based on the drawings of a child over 3-4 years old, one can judge the experiences of the young artist. Through the color and specific arrangement of the characters in his drawings, the baby expresses his fears and anxiety.