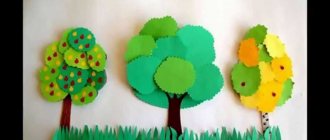
How to make appliques from paper Wild animals. Print our free templates, color them however you like, cut them out and glue them together!
The proposed applications - a symbiosis of coloring books and cut-outs - will be useful for the development of the child. They will help improve coloring, cutting, designing , develop fine motor skills, precision of movements, spatial thinking, attentiveness, and perseverance.
See also:
- colored paper applications,
- learning to cut with scissors - the simplest templates.
Print applique templates Animals
Applique Grizzly Bear
Grizzly Bear Facts
- Although grizzly bears are not endangered, an existential threat exists. 1,000 grizzly bears left in the wild .
- Grizzly bears are a North American subspecies of brown bear.
- Grizzly bears are often seen at some of Alaska's best fishing spots, where they feast to accumulate enough body fat to survive the winter.
- During the winter, grizzly bears hibernate. They dig holes on the hillside. Females give birth at this time.
- Grizzly bears are powerful predators, although they eat a wide variety of foods. Nuts, seeds, berries, fish, rodents and moose!
A comprehensive lesson on application in the second junior group on the topic “Wild Animals”
Maria Medvedeva
Complex lesson on application in the second junior group on the topic “Wild Animals”
Topic: “ Wild animals . Beautiful napkin"
Integration of educational areas: “Cognitive development”
,
“Speech development”
,
“Artistic and aesthetic development” (
application ) .
The goals of the teacher’s activities: to develop the ability to recognize, name and distinguish the features of the appearance and lifestyle of wild animals ; cultivate activity, independence, love for the animal world ; learn to make a pattern on square paper, placing large circles of the same color in the corners and in the middle, and small circles of a different color in the middle of each side.
Materials and equipment: pictures depicting wild and domestic animals , panel “Winter Forest”
applique sample , napkins, large and small circles cut from colored paper, square sheets of white paper, glue, brushes, napkins.
Paper applique Raccoon
Raccoon Facts:
- Raccoons will eat anything. Insects, mice, fish, eggs and even garbage!
- Because they eat almost anything, you can find raccoons in any environment - from the farm to the city!
- Raccoons love to live in hollows, logs, and even attics! Young raccoons often spend the first two months of their lives high in tree holes until their mother drops them to the ground.
- Raccoons typically live 2-3 years in the wild.
- Northern raccoons hibernate - they binge on food to store fat and then sleep in their den all winter.
Applications with wild animals
Pets are well known even to children, because they live “side by side” with humans. But wild animals “hide” from the curious glances of children in the thicket of the forest or in the enclosures of the Zoo. We are unlikely to be able to “spy” on the life of wild animals in the forest, but we can visit the Zoo right now!
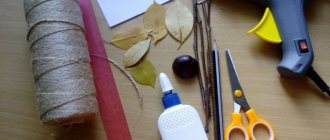
In today's lesson, we invite you to use your imagination a little and go with us on an excursion to the Zoo to admire the wild animals. In order to go on an exciting journey, you need to prepare some materials, as well as special tools:
- Scissors
- Paper sheets
- Glue
- A little millet
- Markers
- Paintings depicting a bear, a hare
- cotton wool
- Napkins
Bear applique
There are many different wild animals in the Zoo, but the first one we will pay attention to is the bear. After all, it is the bear in our area that is considered the real owner of the forest!
Step-by-step instruction:
First, give the children pictures of a bear. Then explain to the children that they must carefully coat the figure with glue without going beyond the outline. After this, you will need to sprinkle millet on top of the glue, and then put the work aside until it dries completely.
Chanterelle – applique
The second inhabitant of the Zoo is the fox, considered the most cunning wild animal. Her bright fur coat is unlikely to leave kids indifferent; they will definitely want to make a craft with the beautiful fox!
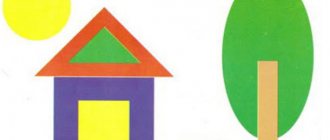
The fox is formed from geometric shapes. Triangles are used for the head and ears, and ovals are used for the tail, paws, and body. You can simply draw eyes and a nose with a black felt-tip pen.
Bunny made from napkins
Wild animals living in our forests are not only formidable predators, but also quite peaceful herbivores. Therefore, while walking around the Zoo, we will admire not only the bear and fox, but also look into the bunny’s enclosure. Scheme of work:
- Take white napkins, tear them into small pieces, and then roll them into balls.
- Using templates, draw bunnies:
- Gradually attach the finished lumps to the ears and body:
- Decorate the middle of the ears, tail, and muzzle of the hare with cotton wool.
- Form a mustache from the dark stripes:
Lion clipping
Facts about lions:
- Lions live in groups called "prides".
- Male lions boast a mane, a large fringe that encircles their heads.
- Males defend the pride territory, which they clearly mark with the smell of their urine.
- Lionesses are hunters in a pride. They often work together to hunt antelope, zebra, wildebeest, zebra, etc.
- Most lions on earth live in Africa, although a very small population can be found in India's Gir Forest.
Features of appliqué classes in the preparatory group of kindergarten
By the age of 6–7 years, the child handles scissors well and easily cuts out simple shapes along the contour. He can connect dotted lines or dots with a continuous line, and draw simple elements for use in appliqué. In accordance with the skills of pupils of this age, the program requirements become more complex. The teacher needs to direct the children’s imagination to create plot applications. The child should accompany the process of gluing the prepared parts with verbal comments. The game moment turns on: we not only learn how to create a craft, but at the same time we compose a story.
Kinds
Pupils of the preparatory group must master the following appliqué techniques:
- Creation according to the model. The child can trace the templates suggested by the teacher, cut them out and create a picture similar to what they saw. Students are offered several samples on a given topic and are given the opportunity to combine creation techniques and compositional elements.
- Silhouette applique. It involves the same actions as in the previous paragraph, but the template is more complicated, the work turns out to be more labor-intensive and painstaking. For ages 6–7 years, this type of application is interesting when there is a plot-role factor in the creative process.
- Creating a symmetrical figure or a series of symmetrical figures. These are the actions of folding a sheet of paper and cutting out half of the image. For older preschoolers, tasks in this technique should be as complex as possible: the outline for cutting should have nuances, punctures or slits must be made inside the image.
- Broken applique. Used when working in mixed media. For example, in the form of a broken appliqué, an imitation of bird feathers or the fur of fur-bearing animals is created.
- Overlay applique. Also used in mixed media: to depict fish scales, snake skin, bird plumage.
- Modular application. This is work with elements of the same shape, but of various sizes and colors. The parts can be bent and one of the halves can be glued to the base (then the second half will go beyond the plane, creating a three-dimensional image). Module parts can be placed on top of each other during the gluing process.
- Collage. Not just an image of an object is created; in the process of creativity, the child comes close to the world of art. Collage involves working with various materials, shapes and has a carefully thought-out composition, color scheme and often a plot component.
Photo gallery: examples of applications of different types on the theme “Domestic and wild animals”
Creating a direct applique based on a sample using various materials Modular applique: elements in the shape of a circle were used to create an image Silhouette applique, combining elements of simple design and plot design The basis of the applique is the symmetrical cutting of image objects. The task in the preparatory group involves cutting out complex pictures, with small details and slits. Collage applique involves the use of a variety of materials (buttons, lace, natural material, beads, pieces of fabric)
Multi-layer applique: parts are glued on top of each other in such a way that a three-dimensional image is obtained
Materials used
There are no restrictions on the materials used to create applications. Fine motor skills at this age are so developed that pupils skillfully handle even bulk materials made from small particles (semolina, sawdust, colored sand).
Sawdust was used to imitate dog skin
Unusual materials should be used more and more often so that children do not lose interest in this type of creativity. The process becomes especially interesting when household materials act as applique details - so familiar in everyday life, but unexpected as a component of an object of art. This is what is most often considered garbage: wrappers, candy wrappers, foil, metal or plastic lids, etc. As well as food materials: cereals, pasta of various shapes, coffee beans, dried barberries, cloves, cinnamon sticks, even popcorn, crackers, dryers.
Photo gallery: examples of using waste and food materials to create crafts
Application from grains and cereals Seeds were used to imitate hedgehog needles
Using pasta as a material for appliqué
Using candy wrappers as a material to create imitation fish scales
Using popcorn to create an applique Applique from plastic bottle caps
Paper creation
What about paperwork? Of course, in the preparatory group it is also possible to create paper applications. But the teacher should definitely remember that the children spent several years honing their skills in working with scissors and glue, creating pictures and their first stories with this material. However, paper material is not only cardboard and a set of colored paper! Pupils aged 6–7 years willingly continue working with well-known material. When preparing a lesson on creating a paper application, the teacher should follow several recommendations:
- Paper materials are varied. To create, we can use newspaper and magazine paper, wallpaper paper, wrapping and packaging paper, plain and themed napkins, tracing paper, graph paper, parchment, postcards, various cards, used tickets, etc.
- The use of other papermaking techniques when creating parts for appliqué. Let's talk about them in more detail.
Weaving is one of the oldest forms of creativity. Pupils can weave a simple braid from paper strips and connect strips of different colors together. They are also woven from paper tubes, in which case the process requires more time (the tubes must be prepared in advance). There should be several separate lessons on weaving. Having mastered the technique of simple (satin weaving), students will be able to create elements for use in appliqué.
Photo gallery: using wicker parts when creating an applique
Slots are made in the base through which strips of paper are pulled
An example of using weaving to create an animal image
An example of using weaving to create an image of an animal Examples of using weaving to create an image of an animal Examples of using weaving to create an image of an animal
The nest is made using simple weaving technique
Origami is a Japanese art form, a technique of folding paper figures. Understanding the basics of origami in childhood perfectly develops fine motor skills and prepares the hand for writing. The child gets acquainted with the principles of geometry, uses the terms “point”, “line”, “angle”, “right angle”, etc. However, mastering the work in the origami technique requires thorough immersion, this must be taken into account when drawing up calendar and thematic planning for the year: To create origami figures, you need to highlight several activities. After the students have worked out how to make animal figures in origami classes, they can conduct a lesson on creating collective works using appliqué.
Photo gallery: diagrams and templates of simple animal figures using the origami technique and examples of their use
Origami diagram
Origami diagram Origami diagram Origami diagram Origami diagrams
Origami diagram
Application with origami elements
Application with origami elements
Application with origami elements Application with origami elements Application with origami elements Application with origami elements Application with origami elements
Quilling is the process of twisting paper strips using a special tool or a simple pencil. Round or oval elements are created from spirals, from which an image is created by gluing the parts onto the base. You can cut paper strips for quilling yourself, or you can purchase ready-made sets of various colors and widths. It is recommended to conduct 1-2 separate lessons on quilling, the result of which can be small appliqué postcards. The lesson on creating a collective applique assumes that each student will be assigned an agreed number of parts from paper spirals to create, then together the children will glue the twisted elements onto the base.
Photo gallery: quilling details available for creating crafts, examples of working with them
Basic quilling element Instructions Quilling element Instructions Applique with quilling elements
Applique with quilling elements Applique with quilling elements
Paper art is a technique for creating elements from paper napkins by soaking and then rolling. Roll between palms. From napkin strips you can make flagella, from which you can roll up various shapes (leaves, circles, spirals, etc.), and from squares you can make balls. This technique involves gluing elements from napkins onto a surface for further decoration (boxes, wooden frames, vases, etc.). Applications with such flagella and balls should be made on a base made of thick cardboard. Parts must be painted; the paper base may become deformed.
Photo gallery: creating elements and pictures from paper balls
The process of creating elements Prepared material for creating an image Applique from flagella twisted from strips of napkin Applique from balls rolled from pieces of napkin
Applique of balls rolled from pieces of napkin
Wombat paper applique
Wombat Facts:
- Wombats are marsupials, meaning they have pouches on their bellies in which they raise their babies.
- A baby wombat lives in its mother's pouch for about five months before it emerges.
- Wombats use their claws to dig burrows in eucalyptus forests and grasslands.
- Wombats are nocturnal and they are vegetarians (herbivores). They come out at night to eat grass, bark and roots.
- A wombat that burrows in fields can be a destroyer of ranches and crop-dependent farms.
Leaf applique: animals
Leaves are a fertile material for crafts. In the summer and autumn, you collect various natural materials (seeds, leaves, ears of corn, acorns, sunflower seeds, flowers), dry them (like a herbarium or in sand), and soak them in glycerin. The leaves turn out to be very brittle using the first method, and glycerin gives softness and flexibility, but changes color.
Any (animals, landscape, people, fish, birds) develops imagination, thinking, logic. The child learns more about the plant world, the properties of natural materials, and ways to interact with them.
Here are some options for making rodents. For the mouse you will need birch, clover, elm leaves, dill or flax seeds, and blades of grass. Glue the birch leaf with the tail down (this will be the body). Place a small elm leaf without a tail on the body. Glue on the clover ears, and then the elm head. You use the seeds to form the eyes and nose, and the grass is useful for the mustache. It turns out to be a full-face view of the mouse.
If the head sheet is positioned perpendicular to the body, then the mouse will be in profile. Glue on the paws, tail, ears, eyes, and nose accordingly. If necessary, adjust the shape of the sheet with scissors.
Craft Panda
Panda facts:
- Pandas are an endangered species.
- They eat about 28 pounds of bamboo a day!
- Adult pandas weigh about 300 pounds (136 kg).
- Wild pandas live only in remote mountainous areas of China.
- Pandas are solitary animals.
Lesson on appliqué in the second junior group “Zoo”
Natalia Tsygichko
Lesson on appliqué in the second junior group “Zoo”
Lesson on appliqué in the second junior group “ Zoo ”
Integration of educational areas: “Artistic creativity”
,
“Cognition”
,
“Communication”
,
“Socialization”
Purpose: to introduce children to the technique of cut appliqué .
Objectives: teach children to work using the cut appliqué ; expand children's knowledge about wild animals, the zoo ; cultivate activity, independence, love for the animal world.
Equipment: sheets of paper with an outline of a giraffe for each child, brown colored paper, brushes, glue; pictures of animals from hot countries; animal figurines, bag.
Anteater applique
Anteater Facts:
- They are edentulous animals, meaning they have no teeth at all.
- Anteaters use their long tongues to swallow 35,000 ants and termites every day!
- They find food by smell.
- Anteaters live in tropical forests and grasslands of Central and South America.
- They live for about 14 years and are classified as endangered.
Craft Warthog
Facts about warthogs:
- The "spikes" and bumps on a warthog's face... those are warts!
- They are from the same family as the cute domestic pigs, although they look different.
- They have 4 tusks (although our template only shows two).
- They eat grass and plants and dig up roots and bulbs.
- They live for about 15 years.
- Warthogs can go for long periods without drinking water.
Scheme for preparing lesson notes
The lesson plan must include time for physical education and finger exercises.
To successfully conduct a lesson, the teacher needs to take into account a number of methodological recommendations that relate not only to the actual implementation of the application, but also to drawing up a plan for working on it. And you need to start by formulating the goals and objectives of the lesson. So, the goals of working on the application in the senior group can be identified
- the formation of general ideas about wild and domestic animals, their cubs;
- continued work on developing the ability to transfer an object image to a plane;
- consolidation of ideas about the color, size, shape of an object;
- cultivating patience, as well as the ability to bring the work started to its logical conclusion.
Objectives of the lesson on the application dedicated to wild and domestic animals:
- continue teaching children to work with scissors, cutting out individual elements of the workpiece;
- strengthen the skill of careful gluing;
- to cultivate an emotionally positive attitude towards the results of one’s own creative process, as well as towards the works of other children;
- develop a respectful attitude towards the environment;
- develop motor skills, including fine, perception, attention, memory, speech and thinking.
In order for the lesson to go well, the teacher must strictly follow the timing of each stage of work on the application.
- Introductory part (6 minutes). This is the time to motivate children.
- Main part of the lesson (18 minutes). This time includes not only work on crafts, but also a break for finger exercises and physical education.
- Summarizing. In the last 6 minutes, the teacher sums up the results (praises and thanks the little ones for their work), and the children conduct a short self-analysis of their own work results.
Example of lesson notes
Compensatory kindergarten No. 260 (Moscow) “Pets: cat and dog” (fragment)
| <… Didactic game “Who eats what?” Pictures on the board: bone, fish, milk, hay, grass, food waste (bucket). On the board, children put pictures of the corresponding animal, accompanying their actions with speech: “The dog is chewing a bone. The cat laps milk and loves fish. Cow, horse, goat, sheep eat grass (hay). Pig waste." Game "Guess the cub." The teacher names an adult pet, and the children name their cub: Cat - kitten Dog - puppy Pig - pig Cow - calf Horse - foal Sheep - lamb Goat - kid Physical education Educator: “And now you and I will turn into cats. Turn around and turn into a cat!” Children: (perform movements in accordance with the text). The cat sat down under a bush, ate a piece of cheese, the cat stood up, stretched, and its fur unfurled. Each child has a blank on the table (two sheets of paper: one with a drawn house, and the other with a drawn cat and dog), pencils, scissors, glue. Teacher: “Guys! Look at our piece of paper, what’s written on it?” Children: “On one sheet of paper there is a house, and on the other there is a cat and a dog.” Teacher: “Remember where our cat lives?” Children: “In a man’s house.” Teacher: “Where does the dog live?” Children: “In the kennel.” Educator: “Do we have a kennel on our sheet?” Children: "No." Teacher: “So, what needs to be done for the dog, what needs to be drawn?” Children: "Kennel." Children take pencils and draw a dog kennel on sheets of paper with a house. Educator: “Well done guys! You and I remembered where our pets live, but now we need to return them to their houses. What will we do for this? Children: “Let’s cut out a cat and a dog, and then glue it on.” Educator: “We work carefully with scissors and glue.” Children carve a cat and a dog. They each stick to their own house (the cat is next to the person’s house, and the dog is next to the kennel). The teacher helps the children as needed, and does the rest independently. Educator: “Well done guys! Look, but the artist forgot to color our pets, let’s help him.” Children take pencils and color pets. Analysis of finished works. Children show each other their work. They evaluate them. Summary of the lesson. The teacher, together with the children, remembers the name of the lesson, topic, content. Then the finished works are exhibited on the stand> |
Baboon cutout
Facts about baboons:
- There are 5 different species of baboons and they all live in Africa or Arabia.
- Baboons are one of the largest monkeys in the world. Males weigh on average from 15-37 kg.
- Baboons prefer savanna and other semi-arid habitats.
- They don't have prehensile tails like other monkeys, but they can climb trees to sleep, eat, or wait out trouble.
- Baboons eat fruits, herbs, seeds, bark, roots, meat and love to eat farm crops.
- They are known to form large orders of baboons, ranging from tens to hundreds with a complex hierarchical system.
- They can live about 30 years.
Schemes and descriptions of work on the application of domestic and wild animals
Photo gallery: finished works of children
To complete this craft, children will have to work hard, rolling cotton balls
In this application, children glue parts onto the base, and the teacher “attaches” the figure with a stapler to create stripes on the skin.
The original use of the outlined arms and legs can be found in the applique
From the leaves of different tree species you can create whole pictures
Such an applique can be glued to the base and exist in the form of a three-dimensional picture.
Photo gallery: animal templates
This dog is quite easy to cut, since it does not have too small elements
This template is convenient for mosaic application
Children are happy to repeat geometric shapes, working with them as part of an applique. Such a turtle needs to be printed out in color, and children can draw spots on the shell themselves and fill them, for example, with buckwheat
To complete the elephant you will need to cut out quite small parts
Spots on a cow can be made from velvet paper
Pets
Let's look at examples of the application of the most “popular” pets.
"Dog"
In the older group, kids can work with 2-3 types of materials for mosaic application
This is an example of a mosaic application in which children cover the outline of the picture with cereals: millet, buckwheat, rice, and also use peas.
Instructions:
- Children receive a template with a picture of a dog, PVA glue and separate bowls of cereal and peas.
- Kids first apply glue to small areas to fill.
- Start by placing peas on the back paw.
- After this, they start with rice, which fills the eye and the spot on the chest.
- We fill the nose, ear and spot on the side with buckwheat.
- Finally, fill the remaining space with millet.
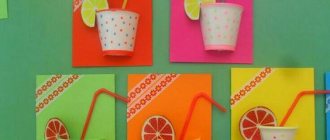
"Cat"
The cotton wool applique looks very unusual and voluminous.
The figure of a pet is made using mixed media: we add voluminous details made of cotton wool to elements made of colored paper.
Instructions:
- The guys receive templates (a figurine of a cat and white clouds).
- Then a fringe is made - grass - on a strip of green paper.
- Kids glue the grass onto the base.
- Then the cat and cloud templates are placed on the sheet.
- Spread the figures with glue and fill them with pieces of cotton wool.
- Finish drawing flowers (additional task).
- Antennae, mouth and eyes for the cat are cut out from pieces of colored paper.
Using the same technology you can make the “Sheep” craft.
Wild animals
To make appliques of wild animals, it is better to take large representatives of the fauna or well-known ones, so that it is easier for children to remember and take into account all the details of their appearance.
"Hedgehog"
Leaf applications are a traditional autumn activity in kindergarten.
This classic applique is created from natural material - leaves. To make it more difficult, children are asked to complete the drawing of the hedgehog's face.
Instructions:
- The kids receive a blank - a figurine of a hedgehog.
- Children glue it to the base.
- Use a black felt-tip pen to complete the nose, eye and mouth.
- Apply glue to the “back”.
- Lay out the leaves in several layers, pointing them upward.
"Squirrel"
The broken applique in the older group is complicated by the fact that small elements of the design also need to be filled in
The broken applique is familiar to children from the younger group. But in the older ones it becomes more complicated because the kids have to complete some elements of the image.
Instructions:
- The guys prepare the material - they tear orange paper cut into strips into small pieces.
- Then a base sheet with the contours of a squirrel is obtained.
- Draw a mustache, nose and eye (these details may already be drawn on the template).
- Apply glue to the figurine and carefully place the scraps within the outline.
- If necessary, add trees (Christmas trees), the background, and also complement the picture with acorns (drawn or made in the form of an applied applique).
"Bunny"
Cotton pads are a very convenient material for application.
To complete this application you will need cotton pads, colored paper, cotton wool and grains of polystyrene foam.
Instructions:
- Children glue a cotton pad onto the base sheet.
- An oval is cut out of another disk - the muzzle of a hare.
- The slightly smaller ovals are the legs.
- From pieces of cotton wool we make snow under the paws and a small tail.
- The disks folded in half are ears.
- Disks cut in half are snowdrifts under the fir trees.
- Christmas trees can be voluminous figures folded using the origami technique or cut out pictures.
- We make a circle of smaller diameter from the disk, paint it yellow - this is the sun.
- Apply a few drops of glue to the background and “scatter” the foam plastic snow.
"Fox"
The difficulty of this craft is that children need to carefully cut out several symmetrical parts of different sizes, including very small ones for the ears.
An example of an applied applique illustrating the fairy tale “Kolobok”. Made from geometric pieces.
Instructions:
- Children cut out two isosceles triangles from an orange sheet. To do this, you can ask them to fold the sheet in half and cut the shape diagonally, starting from the bottom edge.
- We unbend the figure, repeat the operation again, but this time the cutting line should be slightly smaller.
- The next detail is the tail. The triangle should be narrow but long.
- And to complete the preparation of the parts - the ears - two small symmetrical triangles.
- Glue the parts to the base.
- Cut out a circle and glue it to the fox’s nose.
- We finish drawing the point of the nose, eyes and muzzle of Kolobok.
"Bear"
To turn a polar bear into a brown bear, you need to paint the bunting with watercolors
Thus, oatmeal, which is unloved by many toddlers, can become a very convenient material for the “Polar Bear” applique.
Instructions:
- Children receive sheets of paper with a picture of a bear and cut them out along the outline.
- Paste the picture onto the base.
- Spread the figure with glue and cover it with oatmeal.
- The nose and eye are made from black plasticine.
By the way, this resident of the north can be turned into a brown bear. To do this, after gluing the oatmeal, you need to coat it with brown paint (watercolor).
Application options
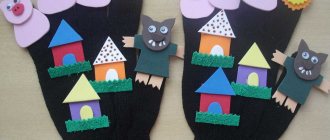
You can make a home for each of the animals.
"Doghouse"
When making the “Dog House” applique, children repeat the simplest geometric shapes
This applique is a combination of geometric shapes.
Instructions:
- Children cut out a square, a triangle and a small circle along the contours.
- Glue a square onto the base.
- Above is a triangle.
- To a square - a circle.
- In addition, you can cut out a dog bone from white paper. The teacher draws the outline of the bone, and the children practice cutting out small symmetrical parts.
"Farm Animals"
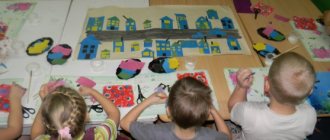
To complete the “Farm Animals” applique, it is better to use a collage, which also very well develops the skill of neatly cutting and gluing parts, but at the same time saves lesson time
This can be a collective application using the collage technique with drawing elements.
Instructions:
- Each child is given the task of cutting out an animal figurine.
- The teacher explains which animal to stick where.
- Then the kids finish painting the grass, clouds and sun with paints.
If the application is a group one, then an adult or a child can complete the drawing of the base, if the class time allows.
"Zoo Animals: Hippopotamus"
An applique of a combination of round and oval elements allows children to develop coordination when cutting and sticking
You can make up a whole zoo from different animals. This application can be a group one. In this case, the basis will be common, for example, a white sheet with the contours of fences, and the animals will become the product of individual creativity.
Instructions:
- Cut out 4 circles from blue paper.
- From gray paper - 2 circles.
- Glue 2 blue ones in a line.
- We place the other 2 slightly lower and slightly overlap each other.
- We put gray on them.
- A little higher we place another gray one.
- Cut out an oval from blue paper.
- Glue it at the intersection of the gray ones.
- Cut out small ears from gray paper, and eyes from white paper.
- Glue these elements.
- We finish drawing the muzzle and pupils.
"Zoo Animals: Camel"
When using yarn, children must use the glue extremely carefully, so it is better to apply it with a thin brush
To make this applique you will need several strands of gray yarn.
Instructions:
- Children cut out the figure of a camel along the contour.
- Glue it to the base.
- Glue pieces of yarn onto the camel's head, neck, hind legs and tail.
- To recreate the animal’s habitat, you can cut out several cacti ovals from green paper.
- We make needles from paper of a more saturated shade, cutting them in the form of short strips.
"Zoo Animals: Giraffe"
To make this craft, children must be able to select suitable pieces of paper to fill different parts of the outline
For this applique we will need to use the overlay and cutting techniques for making the craft. Moreover, the latter, despite its apparent simplicity - after all, it is mastered already in the younger group - is complicated by the fact that the pieces of paper need to be placed on a narrow contour (on the giraffe’s neck).
Instructions:
- Children receive sheets of yellow paper with the outline of a giraffe.
- The animal is cut out.
- Glue onto the base.
- Pieces are cut from brown paper to imitate the color of a giraffe.
- The tail, eyes, and “horns” are also cut out.
- Use a brown felt-tip pen to complete the nose and mouth.
- Palm leaves are cut out of green paper, and triangular elements of the trunk are cut out of brown paper.
- They “collect” the palm tree.
- Complement the picture with the sun or clouds.
Craft Leopard
Leopard Facts:
- Leopards are an endangered species.
- They are strong hunters and love to be in trees. In fact, they often drag their prey up trees to eat it!
- They are nocturnal.
- Leopards are very secretive and hunt antelope and deer under the cover of tall grass.
- They are also good swimmers and love to be in the water.
- Leopards are light colored with black spots called rosettes. There are also black leopards, commonly known as black panthers .
Fennec cutout
Fennec Fox Facts:
- The fennec fox is the smallest fox species in the world.
- They have huge bat-like ears that help radiate body heat and keep them cool in the desert.
- They mainly live in North Africa and the Sahara Desert.
- They have long hair, which keeps them warm on cold nights and protects them from the hot sun.
- They live in underground dens in small communities of about ten foxes.
- Fennec foxes are omnivores and eat both plants and small rodents, eggs, reptiles and insects.
- They can go without water for a long time.
Most commonly used materials and equipment
In order to convey the image of the animal as clearly and completely as possible, the teacher offers children both traditional and little-used materials for appliqué. Traditional ones include ordinary colored paper and thin cardboard, plain and printed, clippings from worn-out children's magazines and books. However, a variety of materials that were not originally intended for application in kindergartens are becoming increasingly widespread:
- Fabric, cotton wool, cotton pads, threads, braid, ribbons, sequins, sparkles, beads.
- Buckwheat, rice, semolina, millet.
- Gifts of the plant world (leaves, twigs, dried flowers, pine needles, moss, straw). They can be used to lay out animal figures, or fill and decorate the background.
- Waste material, for example, candy wrappers, scraps of beautiful wrapping paper, shavings that form when sharpening pencils.
A hedgehog made from pencil filings looks almost real
When using small materials, the teacher must draw children's attention to the fact that these objects can be dangerous and must also be handled with care.
For the background use white and colored paper, large pieces of wallpaper with a discreet pattern, and fabric. Interesting and beautiful applications are made on burlap and unbleached fabric. You can decorate the background by washing watercolors, stamps, spraying, or applying a design with a roller.
In addition to scissors with rounded ends, glue, napkins, and a pencil, the following equipment may be useful for tracing an outline:
- small plates where children will put scraps and pour out excess cereal;
- used fountain pen refills (for creating curls using the quilling technique);
- templates and stencils depicting animal body parts or their silhouettes;
- felt-tip pens, wax crayons for finishing details.
Application with quilling elements looks very gentle and airy
From the beginning of the year, students should be taught to keep their workspace in order and not to scatter materials, because there will be quite a lot of them on the table. This is best done by personal example: the teacher performs the appliqué next to the children and first tells them where to put the tools and materials, and then during the lesson reminds them how best to organize the workplace.
Proper organization of the workplace is the key to children’s safety
Howler monkey paper applique
Howler Monkey Facts:
- Howler monkeys live in tropical areas of Central and South America.
- They howl so loudly that they can be heard up to 5 km away.
- They have what is called a "prehensile" tail, which means they can use it as an extra hand to grasp branches.
- Howler monkeys can live 15-20 years in the wild.
Outline for the application “Wild Animals”
Semenova Tatyana Raisovna
Outline for the application “Wild Animals”
Topic: Wild animals .
– expand children’s knowledge about wild animals
– strengthen children’s ability to work with templates and trace along the contour.
– improve the ability to work with scissors.
– Continue to develop figurative, auditory, visual perception, thinking, attention and speech.
– develop gross and fine motor skills of the hands.
– cultivate the ability to plan one’s activities , accuracy in performing work, and perseverance.
– instill a friendly attitude towards the natural environment.
– develop the ability to work in a team, communication skills.
– review of the album “ Wild Animals ”
, conversation about
wild animals , reading fiction.
– showing children a shadow theater to familiarize themselves with the silhouettes of animals .
– creation of the composition “autumn forest”
.
Materials: Composition “Autumn Forest”
, colored woolen threads, scissors, glue, glue brushes, simple pencils, animal templates, napkins.
The group is decorated in an autumn forest.
1. Organizational moment
Guys, I suggest you go to the kingdom of wild animals . If we want to go to the kingdom, then we need transport, not simple, but magical. Let's go on a fabulous transport, let these be our chairs. We will say the magic words and our chairs will fly to the kingdom of wild animals .
1.2.3 - my chair fly! (children close their eyes and imitate moving their arms to the sides and land in the forest)
Here we are in the kingdom of wild animals . Admire the beauty of autumn trees, colorful leaves. We really entered the kingdom of wild animals .
1). We saw the tracks. Q: Guys, let's follow the tracks. Whose traces do you think these could be?
Bear. (bear growl)
What is that sound? Who makes this sound?
The teacher displays a picture of a bear and the children talk about the bear.
– What do you know about the bear? (One child tells and hangs it on a magnetic board)
.
2) We saw footprints again. Q: Whose footprints are these?
These are fox tracks. (fox cry)
Who makes this sound?
This is the sound made by a fox.
The teacher displays a picture of a fox and the children talk about the fox and hang it on a magnetic board).
3) We saw the tracks of a hare. Q: Whose tracks are these?
These are hare tracks because...
The teacher displays a picture of a hare and the children talk about the hare and hang it on a magnetic board.
4) whose traces are these?
These are the tracks of a wolf. (children guess whose howl)
The teacher displays a picture of a wolf and the children talk about it and hang it on the board)
5). Let's go, whose tracks are these?
These are squirrel tracks. (The sound of a squirrel, who makes this sound?
this sound is made by a squirrel. (children talk about the squirrel and post it on the board)
Guys, what animals did we meet ?
bear, wolf, fox, hare, squirrel - wild animals .
Q: Guys, what time of year is coming soon?
Winter. yes, winter. I suggest you dress wild animals in warm fur coats so that they do not freeze in winter.
Now let's get to work. Here on my table are colored threads and patterns of wild animals , choose which animal you wanted to dress . Have you thought about what color of thread you chose and why?
I chose the orange color of the threads because the fox has an orange coat...
In the middle of the lesson there is a warm-up game “To the Watering Place”
One day, along a forest path, animals walked to a watering hole (children calmly walk in a circle)
A little fox was sneaking behind the mother fox (sneaking on tiptoes)
A bear cub walked behind the mother bear (they waddle)
The baby squirrels jumped after the mother squirrel (they jump in a squat position)
Behind the mother hare are the slanting hares (jumping on straightened legs)
The she-wolf led the wolf cubs (walking on all fours)
All mothers and children want to get drunk (face in a circle, make a tongue movement and lap)
.
Who dressed the animal in a fur coat , we move it into the forest. (autumn forest leaf prepared in advance)
Where would you like to place your animal ?
Look what a beautiful picture of the forest it turned out to be!
Guys, we need to go back to kindergarten. We sat down on the chairs and said the magic words: 1.2.3 - my chair fly (close your eyes)
So we flew back to our kindergarten.
Children's master class on volumetric applique from natural material “Wild Animals” Master class on volumetric applique “Wild Animals” from natural material – fallen autumn leaves – was carried out by preparatory children.
Lesson summary “Wild animals of our area” Purpose: to familiarize children with the changes that have occurred in the life of forest animals with the arrival of winter. Objectives: To clarify children’s knowledge of where they spend the winter.
Summary of the lesson “Wild Animals” in the middle group Goal: to systematize and clarify children’s knowledge about wild animals. Objectives: Educational: learn to pronounce certain sounds, guess.
Gorilla cutout
Gorilla Facts:
- Gorillas are classified as endangered.
- There are only 700 mountain gorillas left on Earth.
- Although their numbers are slowly increasing due to conservation efforts, habitat loss and poaching still pose a major threat to these animals.
- Baby gorillas love to ride on their mother's back.
- Gorillas are herbivores and primarily eat bamboo and other leafy plants.
- Gorillas can live 40-50 years.
- They are very smart!
Schemes and order of execution of applications
"Cat"
Trace a template with a picture of a cat on a cardboard base;
Draw on the base the eyes, mouth, mustache, ears and paws of the animal;
Apply glue to the base with a brush, glue the cereal in accordance with the plan (the desired color and shape).
"Poodle"
Trace the template with the image of a poodle, cut along the contour (white paper);
Glue the cut out element onto the base, in accordance with the plan, glue cotton balls onto the image of the dog;
Draw in the necessary details (muzzle, claws) with felt-tip pens.
"Calf"
Trace and cut out elements from felt of different colors according to the template;
Glue the parts onto the base by overlapping.
"Puppy"
Draw and cut out circles of different diameters from paper of various colors in accordance with the plan;
Glue the modules onto the base, bending them according to plan.
"In the forest"
Paint the base for the workpiece;
Glue parts made from natural materials.
"Bears at the Pole"
Glue elements for creating a photo (crumpled paper, cotton wool) onto a colored base;
Draw and cut out an image of bears along the contour;
Glue new details to the background image;
Complete your plans with felt-tip pens.
Glue the leaves onto the base in accordance with the plan (overlay and design technique).
"Lamb"
Create elements using the quilling technique (performed by a group);
Glue the elements onto the base.
"Fish in the Aquarium"
Each student makes a fish using the origami technique;
Video: how to make a cat from yarn
In the preparatory group of kindergarten it is still important to create applications. This type of paperwork plays a big role in the all-round development of a child. Older preschoolers work with all kinds of materials and use various techniques. It is necessary to conduct application classes more often in group form: this is how the guys learn to interact with each other, distribute responsibilities, and communicate on the same level. Without interrupting the creative process, students develop speech skills and fantasize. The plot application has a game form, but serves to fulfill several pedagogical tasks - educational, developmental, aesthetic.