Mom - how much this word means to everyone. Mom is the closest and dearest person, so adults and children always figure out how to congratulate their beloved woman on her day. Kids can happily make a postcard or any other craft with their own hands to make it nice and please mommy.
Mother's Day is coming soon, so information about gifts will be relevant. All crafts are varied and easy to prepare, so every child will be able to do them. There will be options made from paper, napkins, plasticine and even puff pastry, as well as many other options.
Creativity develops imagination, fine motor skills, and perseverance in children, so choose any of the options and create with us.
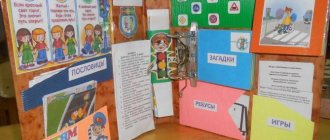
Applications
Eights with flowers
A symbolic figure eight decorated with flowers will be both a postcard and a gift picture.
Cut out the figure eights in advance. Also cut out flowers and butterflies of different sizes and colors from colored paper.
Felt crafts
Baskets with felt flowers
Felt is a soft synthetic material that can be used for appliques. Flowers made from felt or colored paper are suitable as decorations. Rhinestones made of colored plastic can now be found on sale; they already come with an adhesive backing, so attaching them to the center of the flowers and to the basket itself will not be difficult.
Working with finger paints
Finger paints are non-toxic and completely safe for children. Even if the baby decides to taste and lick his finger there will be no harm to health.
Postcard painted with finger paints
Children really like to draw simply with their own hands without using brushes. This develops their tactile senses and skills.
Volumetric flowers made of corrugated paper
Tulips made of corrugated paper and disposable spoons
You can make a whole bouquet of such tulips and strengthen them along with the leaves in a small flower pot. Or you can make one tulip in a pot for each mother.
For this craft we need:
- Plastic spoons - at the rate of 4 spoons per flower.
- Red and green corrugated paper - 0.5-1 meter for each flower, 1 meter is enough for green.
- Transparent tape.
Wrap each spoon in red paper.
Wrap the leg of the spoon in green paper and secure with tape.
A beautiful paper card for mom: easy and quick
This will be a beautiful and voluminous card for mom. Let's make a bouquet of flowers in a pot. The application develops imagination, motor skills, perseverance and attention. This card is easy to make, so the child should not have any problems.
We will need:
- Watercolor paper or any other with a beautiful background.
- Colored paper in 4 different colors.
- Pencil.
- Glue.
- Scissors.
- Beads.
Manufacturing stages:
1. Divide sheets of paper in half. We will need 7 halves.
2. Now bend the sheet diagonally and cut off the excess. You should get a triangle.
3. You need to place the fig so that the fold remains at the bottom and the top of the triangle at the top.
4. Bend the triangle in half.
5. Bend the resulting figure in the same way.
6. Draw a droplet with a pencil and cut it out with scissors.
7. We perform the same movements with the remaining sheets of paper.
8. Unfold the drops and get the base for the flower. We cut one petal and glue the two outer petals together.
9. Repeat the procedure for each flower.
10. Mark one petal on the flowers and paint over them with a pencil. Now we glue the flowers together along the painted area.
11. Glue the other two on the sides to one flower.
12. Glue another flower on top.
13. We add the remaining flowers to the bouquet so that it looks symmetrical.
14. Now we’ll design the frame of the postcard. You need to bend a sheet of paper in half. If you use watercolor paper, you need to glue the background to the spread of the card.
15. Apply glue on both sides of the flowers; for reliability, you can apply a few drops of glue along the base of the bouquet. Glue the flowers to the paper. We decorate the centers with beads.
If you have colored cupcake tins on your household, you can make this charming bouquet:
If you glue a photo of the child into a mold, the mother will be doubly pleased:
Or this beauty:
A more complex option is a DIY 3D postcard:
Gifts made from ordinary table napkins
In addition to their main purpose, paper napkins are an excellent material for creativity. Soft and flexible, they wrinkle well. And the variety of flowers allows you to make bouquets of roses, mimosas, and daisies.
Bouquet of mimosa from table napkins
Ordinary table napkins are very flexible; they can be used to make voluminous small flowers or small lumps.
Take yellow and green napkins.
Floral arrangements made from double-sided colored paper and other materials
Magic double-layer flowers flowers made of colored paper
These seemingly complex flowers are made very simply. Moreover, when making crafts, you don’t have to glue a lot. It is enough to fasten the necessary parts with a piece of tape.
For work we need:
- Colored double-sided paper, for example white and purple - 2 leaves per flower.
- Green colored double-sided paper - 1 sheet will yield three stems.
- Scotch.
Fold the sheet in half.
Set aside 2 cm from the free edge and draw a light line.
From the fold side, cut a sheet of colored paper into strips to a drawn line no more than 2 mm wide.
First do this from purple paper, then from white.
Move the edges of the workpiece to the right by 3 cm and secure the left edge with tape.
Let's prepare the stem. To do this, divide the paper horizontally into three equal parts. You need to start twisting the stem from the diagonal.
Now let's start twisting the flower.
The lighter part should remain at the top of the flower. The darker part is below.
Secure the white and purple paper to the stem with tape. Spread the petals.
Flowers made from cotton swabs
Cotton swabs are perfect for our children's creativity. The more you show your imagination and involve kids in making gifts for mothers and grandmothers, the more interesting it will be for them.
https://www.youtube.com/watch?v=imuDCCq9jww
This is the kind of beautiful unusual flower you should end up with.
For work we need:
- Cotton swabs on plastic stems - 2-3 large packages.
- Foam balls for the base - 1 ball for each flower.
- A container in which to dilute paints.
- Paints - you can take regular gouache in different compatible colors. For example, pink and light blue. Or yellow and orange.
- Wooden skewers for canapés are the stem.
Each stick must be cut diagonally to create a sharp edge.
We insert each half of a cotton swab into a foam ball.
You should end up with a hedgehog made from cotton swabs like this.
Dilute a small amount of paint with water into a plate or other container. The solution should be bright but not thick.
Dip our hedgehog into the paint and leave the cotton end in the paint for a second.
We paint the wooden stem green with gouache.
Craft for Mother's Day from napkins, which is not difficult to make
This gift option will be in the form of a picture, with a small palm and a heart, symbolizing a child’s pure love. It is made from napkins and looks original and beautiful. It’s quick and easy to do, and most importantly, every mother will like it.
We will need:
- red or pink cardboard - 1 sheet.
- PVA glue or pencil.
- napkins of white and pink colors - 1 pack each.
- scissors.
- satin ribbon – 50 cm.
- pencil.
- A4 sheet of paper.
- child's hand template.
- double sided tape.
- colored yellow paper - 1 sheet.
Stages:
1. Draw a big heart on the back of the cardboard and cut it out with scissors.
2. Place a template of a child’s hand on the white side of the cardboard and carefully trace it with a pencil.
3. Now you need to cut the napkins into squares. To do this, you need to take one napkin and divide it into 4 even strips. If necessary, draw stripes with a pencil. Now each strip needs to be cut into equal squares. Each strip should yield approximately 4 squares.
4. The most labor-intensive stage has arrived. The most labor-intensive stage has arrived. From each resulting square you need to roll balls in a random motion. There is no need to press or twist them too much; they should look light and careless. There is no need to wet them with water.
5. Lubricate the drawn palm with glue and place white balls on it. They should fit snugly against each other and stick well. After completion, you need to leave the craft for a few minutes so that the balls stick well.
6. Cut the required length from the satin ribbon and use double-sided tape to glue it at the top of the heart. This will be the pendant.
7. Cover the remaining empty area with glue and lay out balls of pink napkins. To begin with, you can lay out the outline of the figure, and then fill it closer to the center. You should carefully place the balls near your palm so as not to crush it and ruin the shape.
8. Draw a flower on a sheet of white paper and cut it out. Cut a circle on yellow paper; this will be the center of the flower.
9. Glue the center onto the flower, and glue the flower onto the resulting heart.
10. Glue a piece of paper with a printed verse on the back side.
Next, I want to offer another craft made from napkins, also in the form of a flower. It’s easy to do, but of course it will take time:
And if you make three flowers and attach stems to them, you will get a cute and beautiful bouquet:
Plasticine products
Plasticine can now be found in different qualities and colors. I really like plasticine, which dries in the air. It does not stick to hands and clothes, and the finished product will become very dense over time. Another advantage of this plasticine is the choice of colors.
Bouquet of plasticine on paper
On a sheet of paper we make a bouquet of thin tubes. We divide the plasticine into equal pieces and roll them into small flagella. We roll these flagella into a spiral - these will be our flowers. Place a ball of green plasticine in the center.
As an option, you can make a beautiful mimosa from plasticine balls.
Craft for Mother's Day from cotton pads in kindergarten
We will collect white and delicate flowers from cotton pads. Let's make a small bouquet.
We will need:
- Sheet of colored paper
- Cotton pads -3-5 pcs.
- Cotton swabs – 3-5 pcs.
- Yellow gouache – 1 jar.
- Sheet of green paper
- Glue.
- Satin ribbon.
Subsequence:
1. Make a square from a sheet of paper. Then we bend the two halves crosswise to form an envelope. We bend the edges.
2. Cut out stems from green paper. The number of stems corresponds to the number of flowers. Glue the strips onto the resulting unfolded envelope.
3. Cut the cotton swabs in half. We paint the areas with cotton wool yellow and let them dry.
4. Place a cotton swab in the center of the cotton pad. Lubricate one edge of the disk with glue. Glue the edges together.
5. Glue the buds to the stems.
6. Make a bow from a satin ribbon and attach it to the bouquet using a stapler or liquid glue.
7. Cut out leaves from green paper and insert them into the bouquet with the flowers. For reliability, you can glue it.
The bouquet is ready!
I also share beautiful and easy options for children:
Roses made from disks look very beautiful, but below see the diagram on how to easily and simply make them:
These roses can easily be turned into a beautiful bouquet:
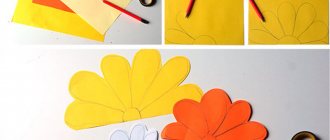
DIY flowers made from colored paper ribbons
These ribbons are sold as a set. But making the blanks yourself is not difficult. You can instruct your parents at home to cut double-sided colored paper into 1 cm thick ribbons. Children lay out flowers twisted into spirals on the paper. The ribbons are attached to the paper using regular glue.
Rolled paper appliques
Craft for mommy from puff pastry
An excellent gift made from salt dough would be a cast of a child's hand as a souvenir.
We need:
- Flour – 0.5 cups.
- Salt - 0.25 tablespoons.
- Water
- Beaker.
- Deep cup.
- Paints and brush.
- Cup.
- Rolling pin.
- Ribbon.
Cooking steps
1. Dissolve salt in warm water and add flour to it. Mix well until smooth. If necessary, you can add flour. You can also add sunflower oil for plasticity.
2. Let the dough rise a little. Preparing the work surface. It must be clean and dry. Take the dough and roll it out using a rolling pin. Use a glass or mug to squeeze out a circle.
3. We invite the child to leave his fingerprint on the test.
4. Make a hole for the ribbon using a marker or pen.
5. Let the form dry and after drying, decorate it as desired. We thread the fly through the hole and tie it.
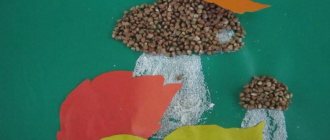
Baskets with flowers
Paper baskets with flowers
As baskets, you can use either colored paper itself or ready-made small flower pots for seedlings. To make the baskets look more aesthetically pleasing, they should be wrapped in corrugated soft paper or colored paper.
Instead of flowers, you can make small trees with flowers using this technology.
Master class “Flowers for your beloved mother for Mother’s Day” for children of senior preschool age
Plisova Svetlana
Master class “Flowers for your beloved mother for Mother’s Day” for children of senior preschool age
"Flowers for my beloved mother"
One of the warmest and most tender holidays of the year is approaching - Mother's Day. The day when all children and adults can once again confess their love to their mothers and thank them for their care. You definitely need to prepare for this holiday in advance! A Mother's Day gift turns out to be a wonderful way to thank her. Paper flowers are a universal decoration for any Mother's Day craft.
The kids will be happy to make flowers with their own hands to make it nice and please their mother.
Goal: make flowers out of paper and create a flower bouquet.
Objectives: teach how to make flowers from paper, talk about the sequence and techniques of making flowers, teach how to make a flower bouquet, cultivate perseverance, accuracy, and respect for work.
Necessary materials: paper of different colors, scissors, glue, a simple pencil, a ruler.
Progress:
For the flower we take 2 colors of paper: one of any color, and the second green. Any color for wrapper. A green stripe for the stem and a bright piece for the signature.
Let's start making the stem. We twist the green strip from the corner diagonally to the end. Glue the end with glue. The stem is ready.
Now fold the peach sheet of paper in half lengthwise, and in half again.
We take scissors and make thin cuts. The width of the strips is 0.5 cm.
Unfold and cut the strip in the center.
We unfold the entire sheet and bend it in the opposite direction.
Apply glue along the edge and glue the two sides together.
Take a green leaf and make exactly the same stripe. We begin to collect the flower. Apply glue to the edge of the peach strip, glue the stem and begin twisting the strip around the stem.
We twist the entire strip.
Apply glue to the edge of the green strip, apply it to the peach one a little lower and wind the strip in the same way evenly in a circle.
Let's make a little bag. Measure 12cm from the edge and cut.
The strip that is smaller is removed. On the sheet, turn the lower left corner. The corner is divided in half at the top. Smooth and turn the right corner. Then we smooth it again and fold the edge back. Glue, straighten and insert the flower.
Glue the inscription “To my beloved mother”. The gift is ready. Flowers can be made from paper of different colors.
The guys all tried very hard - after all, this is a gift for mom! Look what we did!
Original crafts from bushings
Save the rolls from disposable towels or toilet paper. From them you can make a huge number of useful things for the home and just for beauty.
Mugs, hats and bracelets made from cardboard tubes
These are the mugs for mom. You can't pour tea in them, but you can store various little things.
And what mother would refuse an exclusive bracelet made by her baby?
And in such boxes, mothers can store pens, pencils and even knitting needles with other needlework supplies.
Our children’s crafts will not be as beautiful and neat as in the pictures, but for us, mothers, it will be the most valuable gift. And when children grow up, homemade gifts will keep memories and love.
Do-it-yourself topiary for March 8: examples with photos
Gifts for March 8th can be varied, and if you know that your mother or grandmother loves all sorts of home crafts and decor, then a beautiful topiary could be an ideal option.
If you take a ready-made option as a basis, but bring a little of your imagination into it, taking into account the tastes of the person who will receive this gift, you can get a real masterpiece.
Lovers of coffee and flowers will not remain indifferent when they see this version of topiary.
We found ready-made roses from foamiran, then they can be used to create a heavenly topiary. You can supplement them with sisal balls, twigs, pearls, cones
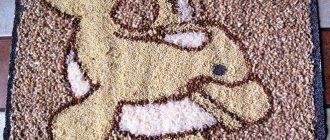
Topiary can be made in the form of a number that is directly related to the holiday.
Make a bright topiary using flower blanks made of paper or thin cardboard.
Corrugated paper will help you create a beautiful and lush decorative tree.