Benefits of the lesson
Sand as an art material has several advantages. And most importantly – a relaxing, therapeutic effect. The child gets rid of the effects of stress, and emotional stability returns to him. Sand painting is used to treat sleep disorders, neurotic disorders, and anxiety in children. Sand art is also useful for healthy children; it allows them to calm down after failures, get rid of low self-esteem and the phobia of becoming a loser. The child sees that a bad drawing can be corrected at any time.
The second benefit of sand painting for children is a developmental activity. The technique improves finger motor skills, sensory perception and creative thinking. Drawing usually involves both hands, which has a positive effect on the development of both the right and left hemispheres of the brain. For schoolchildren, fiddling with sand improves writing skills. It is useful to use the technique with children for whom studying is a burden. In this case, sand painting becomes a good addition to homework and allows you to consolidate school knowledge through art.
The third benefit of drawing on sand is the revelation of artistic potential and the manifestation of imagination. The technique has no restrictions and strict rules. You can draw with your hands and various devices. The loose texture of the material allows you to create images of any complexity and degree of detail. Drawing with sand is available for toddlers, middle school preschoolers, and schoolchildren.
Drawing with sand is useful for any child, and here's why
Sand painting is not only an unusual form of fine art, but also an effective and very popular method of art therapy. We have already talked about playing with sand, and today we will talk about how to turn drawing with this material into exciting activities that help the child’s development. Child psychologist and sand therapist Natalia Kalinichenko shares her favorite sand painting techniques.
Natalia Kalinichenko, child psychologist (children's leisure center "Umniki club", Yaroslavl), fairytale therapist, member of the European Confederation of Psychoanalytic Psychotherapy
Why is this method so popular
Sand therapy as a way of working with the emotional sphere of a child with social and family problems is widely used by psychologists, psychoanalysts, as well as teachers and speech therapists. Today, educational and creative games are available to any mother who has sand and a container in which to create a sandbox.
Sand as a material for educational games has several advantages. Firstly, it is pleasant to the touch, interaction with it relaxes and relieves emotional stress. Children love to play with loose materials, so it is ideal for activities with little ones who don't like to study at all. Through working with sand, you can explore a lot of topics that, for example, need to be mastered in preparation for school.
Secondly, this material can be used to solve a variety of problems. Drawing with sand helps develop motor skills, sensory skills, and creative thinking; When a baby draws with both hands at once, this contributes to the development of interhemispheric asymmetry.
Thirdly, sand eliminates the child’s fear of failure: when working with it, a situation where the child fails at nothing is impossible. This is very important for children with increased anxiety. And if something doesn’t work out, you can always shake up the sand and start again.
What you need for sand painting at home
Sand-art, or the sand painting method, initially involves practicing on special tables with light illumination or light tablets. But for the games I’ll talk about, such equipment is not at all necessary. You can use a translucent tray and illuminate it from below with a table lamp. Or simply fill any deep tray with sand, preferably specialized sand from the store. If you can’t find it, you can take regular street sand - sift it and bake it in the oven or microwave. Or you can take regular semolina, it is also free-flowing and looks like sand.
How to start working with sand
The first thing to do is to introduce the child to the possibilities of sand and his own hands. Let the baby plunge both hands into the sand, feel it, sprinkle it, and relax. After this, you can show various drawing techniques. To begin, ask your child to place all ten fingers on the sand and “trample” them (chaotically move both hands simultaneously on the sand): this is how you will get the first drawing. Praise the child for this: “How beautiful! I think it's fireworks! What do you see here?”
Next, we introduce the child to other drawing techniques. You can take toys for visualization, especially if you are playing with children 3-4 years old. For example, you can make koloboks from dough: small, medium, large, and tell a story. “The little bun wants to take a walk, but there are sands and desert all around. Let's make a path for him?" Start with what your child is used to: drawing with one finger. Show him how to draw a path: you need to draw a wavy line, all children can do this. Then - the road: a straight line. Take the second bun: “He also wants to go for a walk, but the first path is too narrow for him. Let's make it wider." Firmly connect the child's index and middle fingers and draw the same winding curved line, then a straight road. Here, children with insufficiently developed motor skills and low hand tone may encounter difficulties: it will be difficult for them to hold two fingers together and work with them. But all this can be trained just by playing with sand.
When you take the largest kolobok, you need to draw a path for it with three fingers. Or you can take an even larger toy and invite the child to use his fist to draw a path. If you press the fist and move it along the tablet or tray, a wide line is formed.
We continue the game: “Our heroes went for a walk in the desert, looked up and saw beautiful lush clouds.” We use the same part of the cam, press it to the sand and make a rotational movement, and so on in three places - so we get a cumulus cloud. You can also show your child that you can draw with the edge of your palm. The main thing is that he tries all the named methods of drawing: with one finger, with several, and so on.
Development of interhemispheric asymmetry
Drawing with both hands at once develops interhemispheric asymmetry, that is, the interaction of the right and left hemispheres of the brain. When our hemispheres are “friends,” we become faster and smarter. It is important to do this from an early age, when the brain is in an active stage of development.
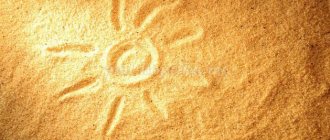
Start by drawing symmetrical objects, first you, and then the child, following your example. Divide the tray in half with a line so that the child can immediately see right and left. Over time, the child will already understand which side is which, and there is no need to draw a line. Place a dot on this dividing line. Let the child place a finger of his right and left hand on it and begin to make simultaneous and mirror movements with both hands. The simplest thing you can draw is a sun: place your index fingers at one point, your right hand makes a semicircle to the right, your left to the left. We make sure that the fingers move simultaneously and come to the same point. It turns out to be a circle. And then you can use all your other fingers to draw rays to the circle - you get the sun. Make it more complicated: draw a house, an apple, a pear, a butterfly with patterned wings.
To make the exercise effective, make sure that both arms move at the same time. If the baby does not succeed in this synchronicity, then gently guide him. But if it still doesn’t work out for a long time, perhaps this is a signal that you should see a neuropsychologist. The specialist will tell you how else you can develop areas of your baby’s brain.
Invite your child to complete the half-finished drawing: complete the left part if the child is right-handed, and the left part if vice versa.
Development of spatial orientation
Ask your child: “Draw a bright sun in the middle of our tray.” The child finds the middle, if it is difficult, you need to prompt him, and draws the sun. Next, depending on the child’s knowledge, we draw a picture in space: we ask you to draw a cloud above the sun, a house below to the right of the house. You can add figures: “Put a butterfly under the sun, a bird above the house,” and so on. If we are preparing a child for school, we can complicate this task: give letters and ask the child: “Sign your picture. Place on the sun the letter whose sound it begins with.”
Understanding the world around us
Playing with sand will help introduce your baby to various natural phenomena. You will need different colored sheets of paper. When studying the seasons, take leaves of green, yellow, red, blue. Place them on a tray in the order in which the seasons change, and cover them with sand. A child can clean the sand with his palm and see the color blue. We ask, “What time of year is it?” and invite the child to remember what happens in winter and draw, for example, a tree without leaves. We clear the bottom further and see the green color: it’s spring. Let the child draw the trunk again, but with leaves that will grow on the tree if you “stomp” it with your fingers.
Before playing with multi-colored paper, you can show your child various leaves: birch, oak, maple. The child draws symmetrically, with two fingers, these leaves, under which a green leaf appears. We ask: “When is a leaf green?” This exercise develops the child's understanding of symmetry and knowledge about the world.
Memorizing numbers and letters
For young children who do not yet have literacy skills, letters and numbers are just meaningless symbols. What is the easiest way to understand and remember them? By activating associative, visual and sensory memory.
First we show the correct spelling of a letter or number. Then we take the child’s finger, and it exactly repeats everything we have done. You can blindfold him, and then he will draw a symbol, imagining its image.
The next level is to “erase” your drawing by shaking the sandbox and ask your child to draw the letter or number themselves. Have your child gradually reduce the size of the symbols. Practice until you get it right. Then shake the tablet and say that letters, like people, love to live in families. The letter O has a big tall dad, a slightly shorter mom, children, aunties and other relatives. We draw from left to right, thus accustoming us to the automatic direction of reading. On the left we draw a large letter O, then gradually make it smaller. This way the child will not only develop motor skills, but also repeat the correlation of sizes. If the child is small, let him build families of shapes, such as squares and circles.
Then we move to the level of association. Draw the letter c. We use imagination and try to create an environment in which the child will reveal his creative abilities and peculiarities of perception: how far can the letter O be drawn? To the sun, to the face, to part of the glasses, to the wheel. You can pay attention to what the child uses as an association - this word-symbol can then be used to remember the letter. As a rule, children first remember what a letter looks like, then the letter itself.
And for better memorization of numbers, you can come up with a travel fairy tale in which the numbers will turn into various objects of the surrounding world in order to help someone. For example, a one can become a pole for power lines if the wires break in the city, and an eight will delight children in hot countries by turning into a snowman. Entertain your child with a fairy tale on the sand, play yourself - this way you will not only relax together, but also spend time usefully.
Sand painting materials
To learn to draw on sand, you need to purchase a list of materials and equipment. All of them are affordable, you won’t have to fork out a lot of money. Here's what the young artist will need:
- table with sides and a lighting device at the bottom;
- sand;
- antistatic agent in a can;
- additional equipment - art brushes, sticks, sieve, templates;
- a wide and flat brush for sweeping grains of sand from the corners of the table.
An antistatic agent is necessary to prevent sand grains from sticking together, which is inevitable when quartz material is used repeatedly. The spray should be sprayed before each lesson. A regular antistatic agent is suitable, preventing synthetic clothing from sticking to the body.
You can buy a table or make it yourself. Homemade design - sides connected in a rectangular shape with a bottom made of frosted glass or plastic up to 5 mm thick. It is necessary to fix the lamp from below so that diffused light is obtained. The lighting can be anything: in the warm and cold range, even colored. The legs of the table should not wobble, otherwise when drawing you will not be able to draw neat lines.
The finished table is a structure with sides and a bottom in the form of an illuminated tablet. The optimal format is 130x70 cm, but for a child 70x50 cm is enough. The height of the sides should be at least 6-7 cm, but from the side of the drawer it is only 3 cm, otherwise it will be inconvenient to draw the lower elements. It is necessary to leave indentations for sand 10-15 cm wide on the right and left sides. It is advisable that these areas be in the same plane as the space for drawing, this makes it more convenient to use many techniques. But some ready-made tables have tray recesses on both sides.
Any sand will do. You can buy an aquarium one at a pet store, and a special one for creativity at a supermarket in the children's section. You can contact a children's and adult creativity studio where sand animation is practiced, if there is such an institution in the locality. They probably won't refuse to sell a small amount of sand. The fraction of the material can also be any. It is advisable to get different ones, since fine sand is convenient for creating tones and halftones, and coarse sand is convenient for creating large image details.
If there is a river near your house, you can dig up sand on the shore. You just have to filter it through a fine-mesh sieve, then rinse. The washing procedure looks like this:
- Pour 4-5 kg of sand into a bucket. This is the standard amount for drawing.
- Fill with water to the edge of the bucket.
- Stir gently with your hand or a large spoon.
- When dust and dirt particles rise to the surface and heavier grains of sand settle to the bottom, carefully drain the water.
- Repeat the procedure until the drained water becomes crystal clear.
- Dry the cleaned material on the balcony if the weather is sunny, or on a radiator, or in the oven.
You can replace sand with semolina, finely ground salt, and to create darker and more contrasting elements of the image - ground coffee.
Bulk material should be renewed once every 3 months, and if the child draws every day, then once every 1.5 months. If this is not done, the sand will become less pliable, since with constant friction the grains of sand are destroyed and the structure of the material softens.
What you need for sand painting at home
Sand painting can be easily done at home. You will need sand and something similar to a transparent table with lighting. You're just thinking about how complicated it is, a table with lighting... Well, let's think a little more, we don't need a sand animation studio, but just let the child draw with sand, without littering, right?
What can you come up with at home? You can look for a translucent container: a tray, a basin or something like that. They can be illuminated from below with a regular table lamp. Yes, by and large, you don’t have to do this either; the child will be happy without the backlight, because playing with sand is so exciting.
For example, a container is quite suitable for containers for sand.
Sand can be bought at a specialized store. You can bring it from the street. Street sand will need to be processed: sifted and calcined in the oven or microwave. If you really have a hard time with sand, then semolina will come to the rescue, yes, ordinary semolina. Its structure is very similar to sand: fine and free-flowing.
At sea with a child. What do we take in the first aid kit?
Sand painting technique
The technique of creating sand drawings is not difficult, but when teaching a child you will have to be patient. The main tool is the artist’s hands, but it is possible to use auxiliary devices.
Before your child starts drawing, introduce him to the art material. Offer to immerse your hands in the sand, pour it from one palm to the other, and talk about your feelings. After becoming familiar with the material, you can begin to learn drawing methods.
Fist rash
This is the first DIY sand painting method that a preschooler should master. Ask to take the material into your palm, clench it into a fist, and turn it along a vertical axis so that the grains of sand fall down. Explain to your child that the amount of sand spilled out is regulated by squeezing and relaxing the fist muscles. If more grains of sand spill out, the “mound” becomes denser and darker. This creates images with a smooth transition from light to shadow.
Lines of different sizes
Next, preschoolers master drawing lines of different thicknesses, lengths, and tortuosities. Teach your child to draw dotted lines, curls, and waves. This is the best method of getting used to the original drawing technique for a preschooler of the younger group.
To create a thin straight or curved line, you need to pour a strip of sand from your fist, then put two fingers together - your thumb and forefinger, and run them along the strip. You will get a line of the same thickness throughout. Explain to your child that you should not strain your fingers too much, otherwise the image may turn out uneven. If a thicker line is required, the fingers need to be connected diagonally.
Drawing with different parts of the hand
When drawing on sand, different parts of the hand are used. They move one or more fingers over the material, move them and spread them apart. Large elements and thick lines are depicted with a fist and the edge of the palm extending from the little finger. To create many small details, they poke the sand with their fingertips, and draw fine lines with their nails.
Drawing on dark and light
When the above-described drawing methods have been mastered, you can begin to select a compositional basis. You can draw “in the dark”: fill the background with sand to make light lines on it. Or “in light”, that is, create a dark sandy image on an empty background. Typically, professional artists combine these methods. At the initial stage, it is enough for a child to master them separately.
Drawing with aids
To make sand drawing more fun in kindergarten, let children use not only their fingers and palms, but also additional devices. What you can draw:
- Artistic brushes of different hardness. They are convenient to depict hair and wool.
- Toothpicks, hashi sushi sticks, cooking skewers. Optimal for creating thin and graceful lines, fancy patterns, and detailed drawing. It is advisable to use wooden products; they will not scratch the plastic bottom of the drawing table.
- Comb, small rake. With their help, you get neat waves.
- Colored paper. It is placed on the table and sand is poured on top. Uncovered areas of the design are multi-colored. The method is applicable for creating floral motifs and abstract patterns.
- Funnel. Pour sand through it, create slides, paths, patterns - a fascinating activity.
- Fine mesh sieve. With its help, the table is covered with a thin layer of sand, which can become the background basis for the drawing.
- Stencils. You can use ready-made ones. Or cut them out of plastic lids or cardboard for practice. Or use different flat objects for this purpose. You need to place them on a clean table surface, sprinkle them with sand, and then carefully remove them.
- Pendulum. Attach a round-shaped weight to the thread and give it to the child. Let the pendulum swing over the sandy surface, creating patterns of different depths. This is a wonderful method of strengthening the skill of correct pressure and speed of movement when creating a drawing.
- Cylinder with patterns. You can use a toilet sleeve. Apply patterns on it with a thick layer of glue. Wait until it dries, then give it to your child. Let the cylinder roll on the sand, creating patterned paths.
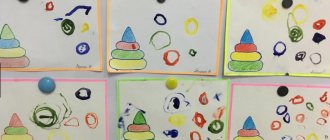
Summary of GCD in the middle group of preschool educational institutions for experimenting with sand
Abstract of educational activities in the middle group of preschool educational institutions in the educational field “Cognitive development” on the topic “Sand Country - Wonderland”
Goal : Development of cognitive activity in the process of experimental activities with sand. Program objectives: Educational:
- to form a child’s cognitive interest and cognitive actions in various types of activities through experimentation in conditions of health preservation and life safety;
— introduce children to the properties of sand: flowability, ability to move, ability of wet sand to take any shape; — expand children’s knowledge about the purpose of sand in our lives; — learn to work in a team and independently during experiments; Developmental:
- to develop the cognitive activity of children in the process of becoming familiar with the properties of sand;
- develop all cognitive functions (perception, attention, memory, thinking, speech); — activate and enrich children’s vocabulary, develop coherent speech; — develop fine motor skills through the development of tactile sensitivity as the basis of “manual intelligence”; Educational:
- cultivate curiosity;
— cultivate accuracy when working with sand, compliance with safety regulations; — to cultivate the moral and spiritual qualities of the child during his communication with nature. Preliminary work. Games and experiments with sand. Comparison of sand and clay. Conversations about the purpose and use of sand, a reminder “Precautions when playing with sand,” reading poems and asking riddles about sand and the inhabitants of the desert. Subject-spatial environment - layout “Inhabitants of the Desert” - exhibition of illustrations “Sand and its properties”; - algorithm; - mini laboratory for experimenting with sand; — laptop, projector — equipment and materials for children’s productive activities. Materials and equipment: • For the teacher: game character - the wise Turtle, musical accompaniment, presentation “Man and Sand”, cartoon “Lion Cub and Turtle” • For children: pool with dry sand, box with dry sand and toys - inhabitants of the desert, sand table, sand, cocktail tubes, wet wipes, trays, glue, glue brushes, brush stands, spoons, magnifying glasses (according to the number of children), Easter cake molds, Easter cake trays, sand bags. Types of children's activities: play, communication, cognitive-research, motor, self-service, socialization, productive. Modern educational technologies used: - gaming; - problematic; — ICT; — research; — personality-oriented; - health-saving. Expected results - shows curiosity and interest in cognitive and research activities;
— actively interacts with peers and adults in the process of research and experimentation; - can use new words and expressions in speech: magnifying glass, experiments, grains of sand, loose. Progress of the GCD:
1. Motivational (introductory part). Educator. Guys, we have guests today. Let's welcome them. Educator: Guys! Do you like watching cartoons? Let's now watch an excerpt from a cartoon we know. (Showing an excerpt from the film “The Lion Cub and the Turtle” 2. Setting up a problem-game situation. Educator: Did you like the cartoon? What do you think the mood of the cartoon characters was? Why were they cheerful and joyful? What kind of sand is this? Let’s find out , as much as possible about him. 3. Surprise moment Educator: And the Wise Turtle from this cartoon came to us. She invites us to her native, amazing, full of wonders Sand Country. The Turtle will help us figure out what sand is and why it is needed , what are its properties. Do you want to go on a trip? 4. Rules for handling sand. Educator : Guys, any country has its own rules, and the Sand Country also has its own rules. All guests of the Sand Country should know them and be sure to follow them. Let's think , what rules might there be in Sand Country? (children’s answers are accompanied by mnemonic tables “Rules for handling sand”) - The sand doesn’t like being put in the mouth. - The sand doesn’t like being thrown at other children. - The sand doesn’t like when destroying what other children have built. — Sand doesn’t like it when sand is thrown out of the sandbox. “But sand loves it when children have clean hands, noses and heads. Therefore, guys, after playing with sand, we should wash our hands or wipe them with a damp cloth. — Can we comply with the rules of the Sand Country? Educator: Now we are ready to go to the Sand Country. So! We will go to a sandy land - a wonderland! And the Wise Turtle will show us the way. Let's follow her along a magical path with obstacles (walking between bags of sand) - We will follow the path and come to a sandy land. 5. Playing with sand “Welcome to the sand” We approached the pool with sand. Educator: Here we are. Let's say hello to the sand with our palms. I will introduce you to some ways of greeting. Educator: 1) Touch the sand with your palms, first with the inside, then with the outside, let’s give the sand a piece of our warmth. What does sand feel like? (dry, warm) 2) Take sand into your hands and rub it between your palms. What do you feel? Are you pleased? I feel the warmth of the sand, the small grains. Hands rejoice in the sand! 3) In a sandy country there may be an unusual sand rain. It is very nice. You can make this rain yourself. Watch it happen. (The teacher pours sand from his fist into his palm, then the children repeat.) 4) Now let’s leave traces with the help of our fingers, as “the inhabitants of this country come, camels, lizards” - the fingers walk waddling. 5) “Snakes crawl” - fingers make the surface of the sand wavy. Educator: Well, so we played with the sand. Did you enjoy playing with sand? Educator: Guys, did we follow all the rules in Sand Country? What did we forget to do? (wipe your hands with a damp napkin) Educator: Look at your hands, they are dusty with sand, let's wipe them with a damp napkin. 6. Viewing the presentation “Man and Sand” Educator: Guys, today, “our hero” is sand. To learn more about it, the Wise Turtle invites us to the TV room to look at a magic screen that will show why sand is needed and where it is used. (Presentation “Man and Sand”) 7. Game with sand “Find the animal in the sand” Educator: Guys, do you think animals need sand? D: Yes. Educator: Correct. Animals hide in the sand from the heat. And now we will find the inhabitants of the Sandy Country who hid in the sand and create a model of the Sandy Country. 8. Dynamic pause Educator: Let's imagine that you and I are grains of sand. “Turn around yourself and turn into grains of sand. Squatted down. How much sand we have! But then the wind blew, picked up the grains of sand and they flew in different directions (a waltz sounds and the children imitate flight) The wind died down and the grains of sand flew in and fell to the ground. The wind suddenly blew again and blew away the grains of sand. The breeze stopped blowing, the rain started dripping and all the grains of sand from the water stuck together (the children stand in a circle and hug each other by the shoulders.) Turn around yourself and turn into children" 9. Conducting experiments with sand Educator: The wise turtle said that in the sand country there is an interesting club for children “I want to know everything”. Let's go to the club! Here we will explore the properties of sand and conduct experiments. Experiment 1. “What is sand made of?” Educator: Now we will look at sand. Will an unusual object help us with this? Who knows what it's called (magnifying glass). That's right or a magnifying glass. To do this, take a magnifying glass and look through the magnifying glass to see what the sand is made of. What do you see? Children: Grains of sand. Educator: Sand consists of small grains of sand. Experiment 2. “Flowability of sand.” Educator: Take sand from a plate with a spoon and pour it onto a tray. What does sand do? Children: It's falling out. Educator: Does sand flow easily (easy) - Why does it flow easily (dry, free-flowing). -And if it were wet, it would crumble (mould). Experiment 3. “Movement of sand” (breathing exercise) Educator: Guys, do you think sand can move? How can I check this? Take the straws and gently blow into the sand. What's happening? Children: The sand is moving. (The experiments are accompanied by a picture depicting the properties of sand) 10. Finger play Our good little hands can do everything, even though we are tiny. They can draw, sculpt and make patterns, glue, cut, play, clap, even dance! Let's squeeze them tightly now, let's start doing good deeds! 11. Drawing on the sand “Let’s revive the Sand Country” Educator: Guys, you can also draw on the sand. Let's go to the magic table and bring the sandy land to life. We will draw the sun, rainbow, trees and flowers. 12. Productive activities of children by subgroups. Educator: We learned a lot about sand, and now the Wise Turtle invites us to the Creative Workshop. We will prepare gifts for the residents of Sand Country as a souvenir: we will bake Easter cakes and create sand drawings. Take your seats at the tables. What is in store for you here? (Wet sand, Easter cake molds, trays, napkins) - for 1 subgroup (Brushes, glue, colored cardboard, dry sand, stands for brushes, napkins) - for 2 subgroups. 13. Reflection. Educator: Guys, look at what wonderful gifts we made with our own hands for the residents of Sand Country! Did you like our trip to Sand Country? Thanks to the Wise Turtle for inviting us to such an amazing country. Guys, it's time for us to go back to kindergarten. And, of course, we have to say goodbye to sand! Repeat after me: “Thank you, our dear sand, you helped us become smarter. Goodbye sand! Goodbye, residents of the Sand Country!
We recommend watching:
Summary of GCD in the middle group “Visiting the Traffic Light” Summary of GCD in the middle group on the theme “New Year” Direct educational activities on experimentation in the middle group Summary of GCD in the middle group on the topic “Air” (with elements of entertainment)
Similar articles:
Summary of continuous direct educational activities in the middle group
Summary of GCD in the senior group on the topic “So that your teeth don’t hurt”
Summary of GCD in the middle group on the topic “Journey to the autumn forest”
Summary of GCD in the middle group on the topic: “So summer is over”
Exercises
Here are some popular sand painting exercises on light tables for children:
- Letters. The lesson is useful for older preschoolers and younger schoolchildren who are learning to write. Spread sand on the table in a dense layer. Let your child learn to write letters beautifully and develop finger motor skills.
- Water landscape. To create it, walk with your outstretched fingers along the sandy surface, imitating waves. At the top of the composition, make thin strokes with your nail - these will be distant ripples. Draw the horizon with the edge of your palm, remove the excess in the upper part - this is the sky above the reservoir.
- Clouds. Take sand into your fist. Pour it out in a thin stream, making circular, non-sweeping movements.
- Maple Leaf. Draw lines that form the outline and veins of the leaf. Sharpen the outline by running your finger along the outer edge of the line, moving the sand inward. Use your fingernail to follow the veins. Outline the border of the petiole.
- Sun. Take sand into your fist and lift it 20-30 cm above the table surface. Pour out evenly, trying not to move your hand. Grains of sand, falling from a height, bounce off the plastic surface, form a ring, and the middle remains empty. And its diameter is wider, the higher the hand is raised.
- Mountain landscape. Spread the sand in a horizontal direction using quick zigzag movements. Use the edge of your little finger to walk along the upper part, removing the excess to create a relief.
Games and art therapy exercises
Sandy beach
Invite your child to imagine that he is on the seashore on a sunny day, grains of sand tickle his palms, he can hear the splash of waves, and there is silence all around. Let the baby touch the sand, take a handful while taking a deep breath and squeeze his fingers as hard as possible. As you exhale, the child gradually pours out the sand and relaxes.
Target:
development of tactile sensitivity, regulation of muscle tension, development of self-control.
Paths
Start with simple straight stripes. Then move on to broken, broken and wavy lines. Invite your child to draw a path home for their favorite fairy-tale character.
Target:
improvement of coordination of movements and orientation in space.
Additional exercises: “Rain” - for practicing drawing vertical lines. “Ladders” - this exercise teaches you to combine vertical and horizontal lines.
Sand doodles
Two people are playing. One person closes his eyes while the other person draws a simple doodle in the sand. Then the first participant opens his eyes and can complete the scribble, turning it into some kind of understandable image. Then the players change roles.
Target:
development of imagination.
My favorite toy
A child draws his favorite toy with sand and then describes it in words without naming it. The adult or other children present must guess what thing is being talked about.
Target:
development of coherent speech and communication skills, formation of the ability to understand each other.
Animal portraits
Invite your child to draw with sand animals expressing joy, delight, anger, fear, sadness, surprise. Ask the little artist to tell us who he depicted, what mood this character is in, what feelings he is experiencing, what happened to him and why, how you can help him.
Target:
acquaintance with basic emotions, learning to determine the emotional state, help in understanding one’s own feelings, development of coherent speech.
Puzzles
Make a wish for any object: an animal, a bird, a plant, a piece of furniture, a toy. Invite your child to guess what you have in mind based on the clues. If a pear is wished for, it can be described as follows: it is a fruit; grows on a tree; looks like a light bulb. The child must draw his answer on the light table.
You can make guesses and describe events. For example, celebrating the New Year, going to visit. Change roles so that the child has the opportunity to come up with riddles himself.
Target:
development of logical and associative thinking, imagination.
Gardener
“Turn” the light table into an orchard and invite your child to plant it with different plants. The kid makes drawings and tells what grows where. Ask him to describe fruits, vegetables and berries by color, shape and taste. Try to draw together the trees and shrubs on which fruits are ripening.
Target:
acquaintance with the world around us and broadening our horizons, developing thinking and coherent speech.
Complete the picture
Using sand on a light table, draw circles, squares, triangles and ask your child to complete the picture so that you get a sun, a ball, a house, a flag, a piece of cheese.
Target:
development of figurative memory and imagination.
Dressy socks
Children play in pairs or with an adult. The participants’ task is to draw two socks so that they make a set. To do this, you need to agree on what pattern will be on the socks, and try to depict it the same way.
Target:
developing the ability to work in a team, negotiate and come to a common decision, developing the skill of mutual assistance.
Footprints
Invite your child to imagine what the footprints of certain creatures, such as a hippopotamus or a spider, look like and draw them in the sand. Discuss the resulting prints: who left them, what his name was, where he was going, where he was from, what emotional state he was in. You can also depict traces of large raindrops or car tires, or use sand rollers.
Target:
acquaintance with the outside world, development of speech and imagination.
Writing on the sand
Prepare letters or numbers cut out of cardboard for the game. You can use large symbols from magnetic sets. Hand your child a letter or number and ask them to sculpt it out of sand. Rake the sand with the edges of your palms and form a letter. Check the sand letter with the original and start making the next one. So a whole City of Letters will appear on the light table!
Letters and numbers can not only be sculpted, but also written. Let the child draw the desired image with his finger first. Then you can use the stick, holding it like a pen.
Target:
consolidation of the graphic image of letters and numbers, formation of graphomotor skills.
Photographer
You need to play in pairs. Both participants look at each other carefully, trying to remember the features and hairstyle. After this, the children begin to draw a portrait of a friend with sand - take a photograph. When the “snapshots” are ready, discuss how accurate they turned out.
Target:
development of communication skills, mindfulness and social activity.
Journey through a fairyland
Let your child use his imagination and draw a fairy-tale kingdom on the light table. Give the young entertainer time to create, and then ask him to tell him the name of the country, who lives in it, what the character of these characters is, what events take place in the fairy tale.
Target:
development of imagination, logic and coherent speech.
In search of treasure
To play you will need small objects or stickers. Together with your child, draw a diagram map on a piece of paper with conventional images of a tree, river, mountain, forest, house. Using this map, create a sand painting.
Sand animation for preschool children
The highest skill is shooting sand animation, in which the artist continuously creates images that smoothly flow into each other. And he does this by making the minimum possible number of movements. This is a complex art that requires the master to act quickly and have impeccable artistic skills.
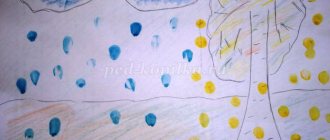
Real animation is unlikely to be within the capabilities of a preschooler, but something simple, for example, a tree that is bare in winter and blooms in summer, he can easily depict after practicing for 3-4 lessons.
Introducing a sand painting master class for children:
- Spread the material evenly.
- Place the pad of your finger on the sandy surface and move upward. Thin the line by gradually raising the pad. You will get a tree trunk.
- Draw branches with your little finger. Make them curved rather than straight so they look natural. It will turn out to be a tree in winter.
- Now make it summer. Sprinkle sand in a wide layer on the ends of the branches - this is the crown. Also sprinkle horizontally under the tree - this is grass.
- Randomly poke your fingers along the crown, pressing to different depths, to make leaves. Draw blades of grass by running your fingernail vertically under the tree.
- Adjust the contour of the tree crown and remove excess sand.
- The animation can be continued by making it autumn. To do this, place a few spots under the tree with your fingers - these will be fallen leaves.